
Home>Create & Decorate>DIY & Crafts>DIY Hoop Greenhouse: A Step-by-Step Guide To Building Your Own
DIY & Crafts
DIY Hoop Greenhouse: A Step-by-Step Guide To Building Your Own
Published: May 7, 2024

Senior Editor in Create & Decorate, Kathryn combines traditional craftsmanship with contemporary trends. Her background in textile design and commitment to sustainable crafts inspire both content and community.
Discover how to build your own DIY hoop greenhouse with our step-by-step guide. Perfect for DIY & Crafts enthusiasts looking to create their own sustainable garden space. Start your project today!
(Many of the links in this article redirect to a specific reviewed product. Your purchase of these products through affiliate links helps to generate commission for Twigandthistle.com, at no extra cost. Learn more)
Introduction
Are you looking to extend your growing season and protect your plants from harsh weather conditions? Building your own DIY hoop greenhouse can be a cost-effective and rewarding project. Whether you're a seasoned gardener or just starting out, a hoop greenhouse can provide a controlled environment for your plants to thrive. In this guide, we'll walk you through the step-by-step process of building your own hoop greenhouse, from selecting the right materials to maintaining your structure for long-term success. Let's get started on creating a cozy and productive space for your plants to flourish!
Materials Needed
To get started on your DIY hoop greenhouse project, you'll need to gather the following materials:
- PVC Pipes: These will form the hoops of your greenhouse. The number of pipes will depend on the size of your greenhouse.
- Rebar or Steel Stakes: These will be used to secure the PVC pipes into the ground.
- Plastic Sheeting: This will serve as the covering for your greenhouse, providing insulation and protection for your plants.
- Clamps or Fasteners: These will be used to secure the plastic sheeting to the PVC pipes.
- Hinges and Door Latch: If you plan to include a door for easy access to your greenhouse.
- Ventilation Options: Consider including vents or windows for airflow and temperature control.
- Tools: Including a saw for cutting the PVC pipes to size, a drill for creating holes, and a hammer for securing the rebar or steel stakes.
Gathering these materials will set you on the right path to constructing your very own DIY hoop greenhouse.
Choosing the Right Location
Selecting the ideal location for your DIY hoop greenhouse is crucial for the success of your plants. Here's what to consider:
-
Sunlight Exposure: Look for a spot that receives ample sunlight throughout the day. South-facing locations are often optimal as they receive the most sunlight.
-
Wind Protection: While sunlight is essential, it's also important to consider wind exposure. Choose a location that is shielded from strong winds to prevent damage to your greenhouse and plants.
-
Accessibility to Water: Ensure that the location is easily accessible to a water source for irrigation. This will make it convenient for you to maintain the moisture levels within the greenhouse.
-
Level Ground: Select a flat and level area for your greenhouse. This will make the construction process easier and provide stability for your structure.
-
Soil Quality: Consider the soil quality in the chosen location. You want to ensure that the soil is suitable for plant growth and can be easily cultivated for your greenhouse.
By carefully evaluating these factors, you can choose a location that promotes the healthy growth of your plants within your DIY hoop greenhouse.
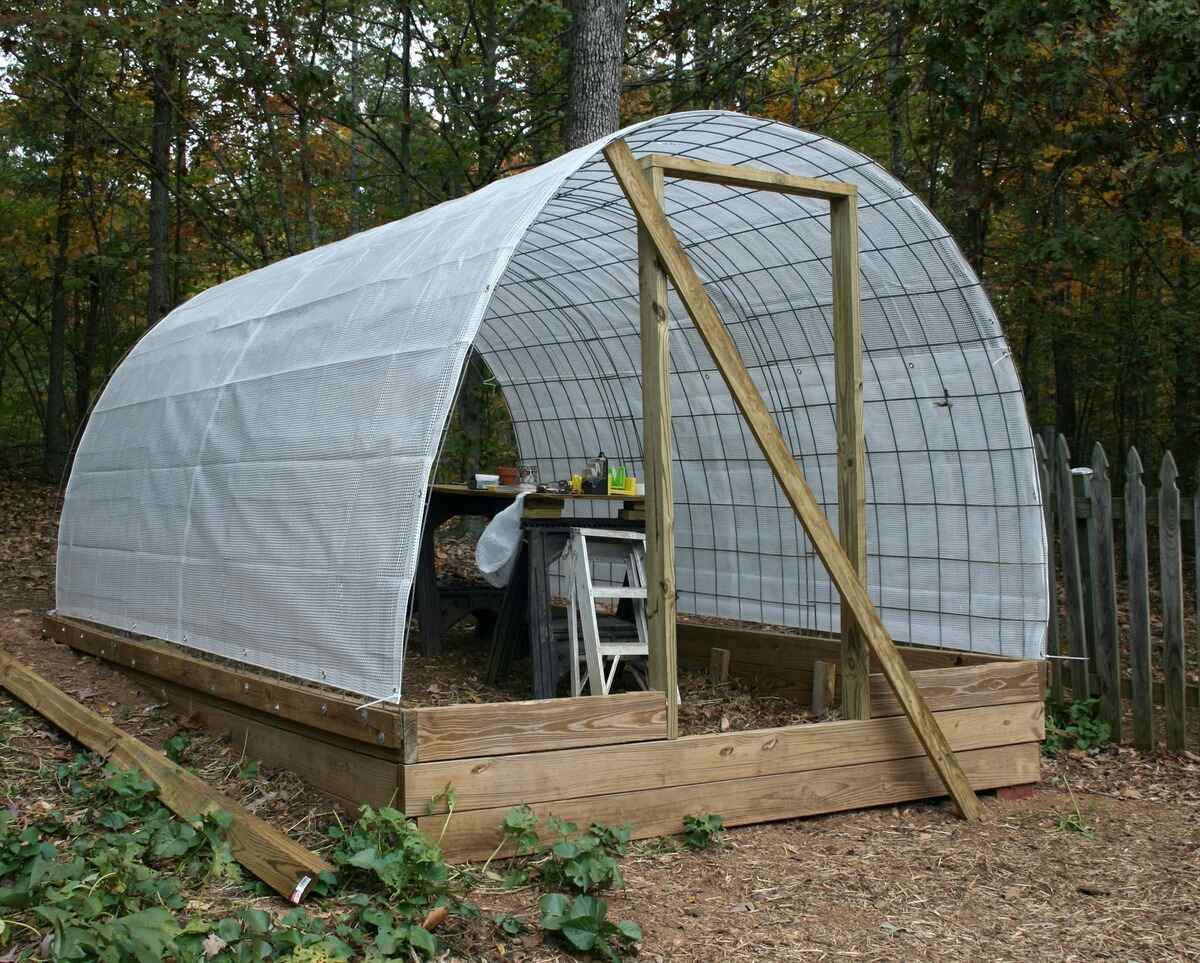
Building the Hoop Structure
Building the hoop structure is a critical step in creating your DIY hoop greenhouse. Follow these steps to construct the framework for your greenhouse:
-
Measure and Cut PVC Pipes: Begin by measuring and cutting the PVC pipes to the desired length for the width of your greenhouse. You will need two long pipes for the base and shorter pipes for the hoops. Ensure that the pipes are cut accurately to achieve a uniform hoop structure.
-
Create Hoop Formation: Once the pipes are cut, form them into hoops by gently bending them into a semi-circular shape. The number of hoops will depend on the length of your greenhouse. Spacing the hoops evenly along the base pipes will provide structural stability.
-
Secure the Hoops: Position the hoops over the base pipes and secure them in place using clamps or fasteners. This will hold the hoops in position and create the framework for your greenhouse.
-
Anchor the Structure: Drive rebar or steel stakes into the ground on either side of the base pipes to anchor the structure securely. This will prevent the greenhouse from shifting or becoming unstable, especially during windy conditions.
-
Optional Door Frame: If you plan to include a door in your greenhouse, create a door frame using additional PVC pipes. Attach hinges to one side of the frame and a latch on the opposite side for easy access.
By following these steps, you can successfully build the hoop structure for your DIY greenhouse, providing a sturdy foundation for the next stages of construction.
Installing the Plastic Covering
Once the hoop structure is in place, the next crucial step is to install the plastic covering to create a protective environment for your plants. Here's a detailed guide on how to effectively install the plastic sheeting for your DIY hoop greenhouse:
-
Measure and Cut the Plastic Sheeting: Begin by measuring the dimensions of your greenhouse to determine the amount of plastic sheeting needed. Allow for some overhang to ensure complete coverage. Carefully cut the plastic sheeting to the required size using sharp scissors or a utility knife.
-
Secure the Plastic Sheeting to the Hoops: Drape the cut plastic sheeting over the hoop structure, ensuring that it evenly covers the entire framework. Use clamps or fasteners to secure the edges of the plastic sheeting to the hoops. Start from one end and work your way to the other, pulling the plastic taut as you secure it in place.
-
Create End Panels: To enclose the ends of the greenhouse, cut additional pieces of plastic sheeting to size. Secure these panels to the end hoops using clamps or fasteners. This will create a sealed environment within the greenhouse, protecting your plants from external elements.
-
Ensure Proper Ventilation: If your greenhouse design includes windows or vents, cut out the appropriate sections of the plastic sheeting to accommodate these openings. Install the windows or vents according to the manufacturer's instructions, ensuring that they provide adequate ventilation for your plants.
-
Trim Excess Plastic: Once the plastic sheeting is securely in place, trim any excess material to create a neat and tidy finish. This will prevent the plastic from being a tripping hazard and give your greenhouse a polished appearance.
By following these steps, you can effectively install the plastic covering for your DIY hoop greenhouse, creating a protective and nurturing environment for your plants to thrive.
Adding Ventilation and Access Points
Proper ventilation is essential for maintaining a healthy environment within your DIY hoop greenhouse. Additionally, having convenient access points will make it easier for you to tend to your plants and manage the internal conditions of the greenhouse. Here's how to add ventilation and access points to your greenhouse:
-
Install Windows or Vents: Cut out sections of the plastic sheeting to accommodate the installation of windows or vents. Position these openings strategically to promote airflow and regulate the temperature within the greenhouse. Windows can be hinged to allow for adjustable ventilation, while vents can be equipped with adjustable covers to control the airflow.
-
Consider a Louvered Vent: Louvered vents are an effective option for providing continuous ventilation. These vents are designed to open and close automatically based on temperature and humidity levels, ensuring that your plants receive optimal airflow without requiring manual adjustments.
-
Incorporate a Door with a Latch: If your greenhouse design includes a door, ensure that it is equipped with a secure latch. This will not only provide easy access for you but also help maintain the internal temperature and humidity levels by keeping the door closed when necessary.
-
Position Accessible Water Sources: If you plan to incorporate irrigation systems or water containers within the greenhouse, ensure that they are positioned in easily accessible locations. This will make it convenient for you to water your plants and maintain the moisture levels within the greenhouse.
By incorporating these ventilation and access points into your DIY hoop greenhouse, you can create a well-balanced and easily manageable environment for your plants to thrive.
Maintaining Your DIY Hoop Greenhouse
Maintaining your DIY hoop greenhouse is essential for ensuring the longevity of your structure and the health of your plants. Here are some key maintenance tasks to keep your greenhouse in optimal condition:
-
Regular Cleaning: Periodically clean the plastic covering of your greenhouse to remove dirt, dust, and debris. Use a mild soap solution and a soft brush to gently scrub the plastic, followed by rinsing with water. This will help maintain light transmission and prevent the buildup of contaminants that can hinder plant growth.
-
Inspect for Damage: Routinely inspect the PVC pipes, plastic sheeting, and fasteners for any signs of wear, tear, or damage. Repair or replace any components that show deterioration to prevent structural issues and maintain the integrity of your greenhouse.
-
Monitor Ventilation: Check the functionality of windows, vents, and louvers to ensure proper ventilation. Clear any obstructions that may impede airflow and make adjustments as needed to regulate the internal climate of the greenhouse.
-
Manage Temperature: During extreme weather conditions, monitor the temperature inside the greenhouse. Consider using shade cloth to reduce excessive heat buildup or adding additional insulation during colder periods to maintain a favorable environment for your plants.
-
Pest and Disease Control: Keep an eye out for pests and signs of plant diseases within the greenhouse. Implement integrated pest management strategies and promptly address any disease outbreaks to prevent the spread and protect your plants.
-
Watering and Fertilization: Maintain a consistent watering schedule for your plants and ensure that they receive adequate nutrients. Monitor soil moisture levels and fertilize as needed to support healthy growth.
-
Seasonal Adjustments: Make seasonal adjustments to accommodate changes in light exposure, temperature, and plant requirements. Consider installing shade cloth during the summer months and providing additional heating during the winter to support your plants' needs.
By staying proactive with these maintenance tasks, you can create an environment where your plants can thrive and maximize the benefits of your DIY hoop greenhouse for years to come.
Conclusion
In conclusion, building your own DIY hoop greenhouse can be a fulfilling and practical endeavor for any gardening enthusiast. By carefully selecting the right materials, choosing an optimal location, constructing a sturdy hoop structure, installing the plastic covering, and incorporating ventilation and access points, you can create a nurturing environment for your plants to flourish. Additionally, maintaining your greenhouse through regular cleaning, inspections, and proactive care will ensure its longevity and the well-being of your plants. With the right approach and attention to detail, your DIY hoop greenhouse can provide a versatile space for extending the growing season, protecting delicate plants, and enjoying the rewards of homegrown produce. Get ready to embark on this rewarding journey of creating your very own DIY hoop greenhouse and watch your plants thrive in this controlled and nurturing environment.