Home>Create & Decorate>DIY & Crafts>DIY Window Greenhouse: How To Create Your Own Mini Garden

DIY & Crafts
DIY Window Greenhouse: How To Create Your Own Mini Garden
Published: May 4, 2024

Senior Editor in Create & Decorate, Kathryn combines traditional craftsmanship with contemporary trends. Her background in textile design and commitment to sustainable crafts inspire both content and community.
Learn how to build your own DIY window greenhouse and create a charming mini garden with our easy step-by-step guide. Perfect for DIY & Crafts enthusiasts!
(Many of the links in this article redirect to a specific reviewed product. Your purchase of these products through affiliate links helps to generate commission for Twigandthistle.com, at no extra cost. Learn more)
Introduction
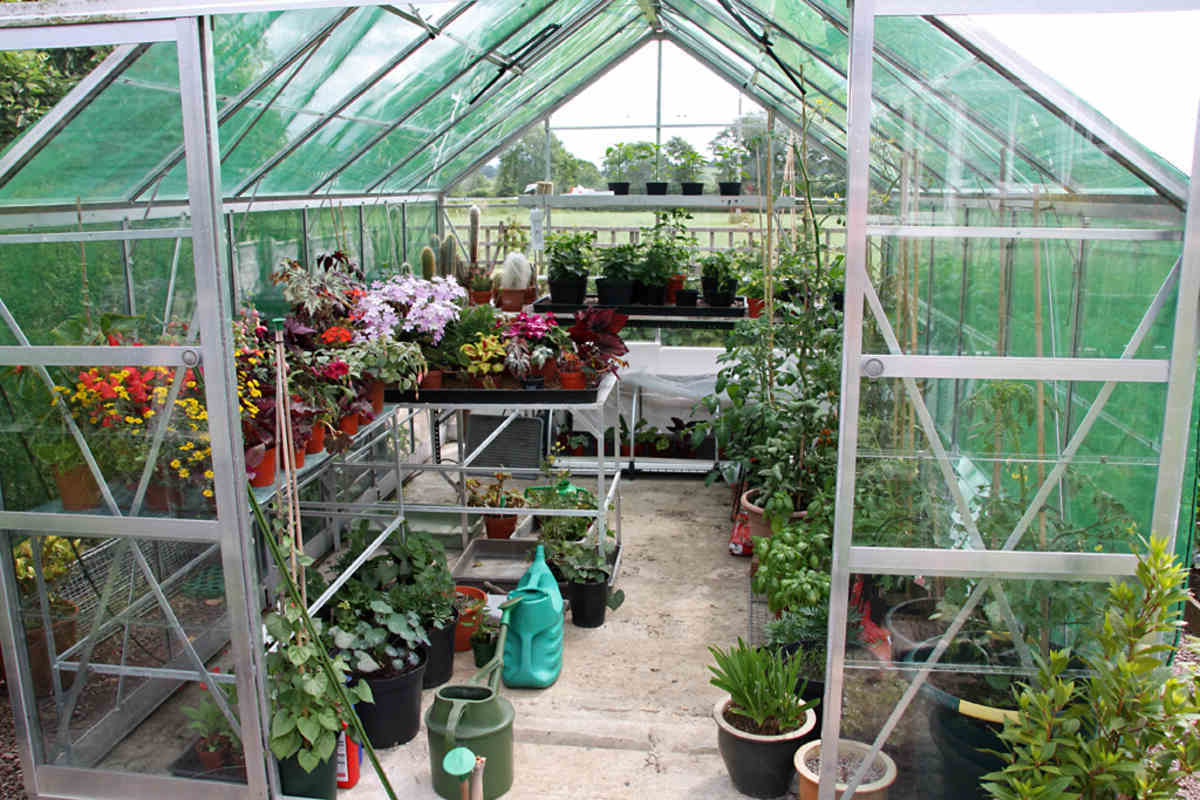
Are you looking for a fun and creative way to bring some greenery into your home? Creating a DIY window greenhouse is a fantastic way to add a touch of nature to your living space. Not only does it allow you to grow your own plants, but it also serves as a beautiful and decorative addition to any room. In this article, we will explore the benefits of a DIY window greenhouse and provide you with a step-by-step guide on how to create your very own mini garden. Whether you're a seasoned gardener or a complete beginner, this project is sure to bring joy and a sense of accomplishment as you watch your plants thrive in their new home.
Read more: How to Build a Window Well Garden
Benefits of a DIY Window Greenhouse
Creating a DIY window greenhouse offers a multitude of benefits that go beyond just adding a touch of green to your home. Here are some of the advantages of having your own mini garden:
-
Brings Nature Indoors: A window greenhouse allows you to bring the beauty of the outdoors inside your home. It provides a refreshing and calming environment, especially during the colder months when outdoor gardening may not be feasible.
-
Improves Air Quality: Plants are natural air purifiers, and having them in your home can help improve the air quality. They absorb carbon dioxide and release oxygen, creating a healthier living space for you and your family.
-
Enhances Aesthetics: A DIY window greenhouse adds a charming and decorative element to your home. It serves as a focal point, bringing life and color to any room.
-
Year-Round Gardening: With a window greenhouse, you can enjoy gardening all year long. Regardless of the season, you can nurture and grow your favorite plants, herbs, or flowers right in the comfort of your home.
-
Therapeutic Benefits: Gardening has been proven to have therapeutic effects on mental well-being. It can reduce stress, anxiety, and depression, providing a peaceful and rewarding hobby for individuals of all ages.
-
Saves Space: If you have limited outdoor space, a window greenhouse is an excellent alternative for growing plants. It maximizes the use of vertical space and can be adapted to fit in even the smallest of homes.
-
Educational Opportunity: For families, a DIY window greenhouse provides an educational opportunity for children to learn about plant growth, the environment, and the responsibility of caring for living things.
Incorporating a DIY window greenhouse into your home offers a myriad of benefits, making it a worthwhile and fulfilling project for any homeowner or gardening enthusiast.
Choosing the Right Plants for Your Mini Garden
When it comes to creating your DIY window greenhouse, selecting the right plants is crucial for the success of your mini garden. Consider the following factors when choosing the plants that will thrive in your indoor space:
1. Light Requirements
Different plants have varying light needs. Assess the amount of natural light your window receives throughout the day. For sun-loving plants, such as herbs like basil and rosemary, or flowering plants like geraniums, a south-facing window that receives ample sunlight is ideal. On the other hand, low-light plants like pothos, ferns, or peace lilies are better suited for east or north-facing windows with indirect sunlight.
2. Space and Size
Take into account the available space in your window greenhouse. Compact plants like succulents, small herbs, or dwarf varieties of vegetables are excellent choices for limited space. Hanging planters or vertical gardens can also maximize the use of vertical space, allowing you to grow a variety of plants without overcrowding the area.
3. Maintenance and Care
Consider your lifestyle and the amount of time you can dedicate to plant care. If you have a busy schedule, opt for low-maintenance plants that require minimal attention, such as snake plants, spider plants, or ZZ plants. For those with a green thumb and more time to spare, you can explore a wider range of plants that may need more frequent watering or specific care routines.
4. Purpose and Preference
Think about the purpose of your mini garden. Are you looking to grow herbs for culinary use, or perhaps you want to create a lush display of foliage for aesthetic appeal? Tailor your plant selection to align with your goals and personal preferences. Consider mixing different types of plants to create a diverse and visually appealing window garden.
5. Climate Considerations
Take into account the climate in your region and the indoor temperature of your home. Some plants may be more sensitive to temperature fluctuations, so it's essential to choose varieties that can thrive in the indoor environment, especially during extreme weather conditions.
By carefully considering these factors, you can select the right plants that will flourish in your DIY window greenhouse, creating a vibrant and thriving mini garden that brings joy and beauty to your home.
Step-by-Step Guide to Creating Your DIY Window Greenhouse
Creating your own DIY window greenhouse is an exciting and rewarding project that allows you to bring the beauty of nature into your home. Follow these step-by-step instructions to set up your mini garden with ease:
Read more: How to Build a DIY Greenhouse Roof
1. Choose the Right Location
Select a suitable window in your home that receives ample sunlight. South-facing windows typically receive the most sunlight throughout the day, making them ideal for sun-loving plants. Ensure that the chosen window is easily accessible for watering and maintenance.
2. Gather Materials
Gather the necessary materials for your window greenhouse. You will need items such as a sturdy shelving unit or hanging planters, clear plastic or glass panels to create the greenhouse effect, potting soil, plant containers, a watering can, and the plants of your choice.
3. Prepare the Space
Clear and clean the chosen window area to create a clean and welcoming environment for your mini garden. Install the shelving unit or hanging planters, ensuring that they are securely positioned to support the weight of the plants and greenhouse materials.
4. Assemble the Greenhouse
Construct the greenhouse structure using clear plastic or glass panels. These panels will help create a warm and humid environment, mimicking the conditions of a traditional greenhouse. Ensure that the greenhouse materials are securely in place and provide ample space for the plants to grow.
Read more: How to Build a Basement Greenhouse
5. Plant Your Garden
Carefully plant your selected greenery in the designated containers, ensuring that each plant has enough space to thrive. Consider the light and space requirements of each plant as you arrange them within the greenhouse. This is an opportunity to get creative and design a visually appealing arrangement.
6. Water and Maintain
Once your plants are in place, water them thoroughly and ensure that the soil is adequately moist. Establish a regular watering schedule based on the specific needs of your plants. Monitor the moisture levels and adjust as necessary to maintain a healthy growing environment.
7. Monitor Growth
Keep a close eye on the growth and development of your plants. As they flourish in their new environment, you may need to adjust the positioning of the greenhouse materials to accommodate their growth. Prune and care for your plants as needed to promote healthy and robust growth.
By following these simple steps, you can create a stunning DIY window greenhouse that brings the joy of gardening into your home. With a little care and attention, your mini garden will thrive, providing a beautiful and refreshing addition to your living space.
Maintaining and Caring for Your Mini Garden
Once your DIY window greenhouse is set up and your plants are thriving, it's essential to maintain and care for your mini garden to ensure its continued growth and beauty. Here are some key steps to keep your indoor garden flourishing:
Read more: How To Build A Mini Golf Course
1. Watering
Establish a regular watering schedule based on the specific needs of your plants. Different plants have varying water requirements, so it's crucial to understand the moisture needs of each species. Avoid overwatering, as this can lead to root rot, and ensure that the soil is adequately moist without becoming waterlogged. Consider using a watering can with a narrow spout to target the soil directly and prevent water from spilling onto the greenhouse materials.
2. Light and Temperature
Monitor the amount of sunlight your window receives and adjust the positioning of your plants as needed to ensure they receive adequate light. Rotate the plant containers periodically to promote even growth and prevent the plants from leaning towards the light source. Additionally, be mindful of temperature fluctuations near the window, especially during extreme weather conditions. Protect your plants from drafts or excessive heat to maintain a stable and comfortable environment for growth.
3. Pruning and Maintenance
Regularly inspect your plants for any signs of overgrowth, wilting, or pest infestations. Prune dead or yellowing leaves to encourage new growth and maintain the overall health of the plants. Remove any debris or fallen leaves from the greenhouse to prevent the accumulation of moisture, which can attract pests and lead to fungal issues. Keep an eye out for common indoor plant pests such as aphids, spider mites, or mealybugs, and take prompt action to address any infestations.
4. Fertilizing
Depending on the type of plants you have, consider incorporating a regular fertilizing routine to provide essential nutrients for healthy growth. Choose a balanced, water-soluble fertilizer and apply it according to the instructions on the packaging. Be mindful not to over-fertilize, as this can lead to nutrient imbalances and potentially harm the plants. Fertilize your plants during their active growing season to support robust and vibrant foliage.
Read more: DIY Greenhouse Door Ideas
5. Air Circulation
Ensure adequate air circulation within the greenhouse to prevent the buildup of excess humidity and stagnant air. Consider opening the window periodically to allow fresh air to enter the space and promote ventilation. This can help prevent mold growth and create a more favorable environment for your plants. If the weather permits, you can also move the plants outdoors for a brief period to benefit from natural airflow and sunlight.
By following these maintenance and care practices, you can nurture a thriving and beautiful mini garden in your DIY window greenhouse. With attention to detail and a nurturing touch, your indoor oasis will continue to bring joy and natural beauty into your home.
Conclusion
In conclusion, creating a DIY window greenhouse is a fulfilling and rewarding endeavor that brings the beauty of nature into your home. The benefits of having a mini garden indoors extend beyond aesthetics, offering improved air quality, therapeutic benefits, and year-round gardening opportunities. By carefully selecting the right plants, following a step-by-step guide to set up your greenhouse, and maintaining your mini garden with proper care, you can enjoy the lush greenery and vibrant blooms that enrich your living space. Whether you're a seasoned gardener or a novice enthusiast, the DIY window greenhouse provides an avenue for creativity, relaxation, and a deeper connection to the natural world. Embrace the joy of nurturing your own indoor oasis and revel in the tranquility and beauty it brings to your home.

