
Home>Create & Decorate>DIY & Crafts>DIY Outdoor Fireplace: Step-by-Step Guide To Building Your Own
DIY & Crafts
DIY Outdoor Fireplace: Step-by-Step Guide To Building Your Own
Published: February 23, 2024

Senior Editor in Create & Decorate, Kathryn combines traditional craftsmanship with contemporary trends. Her background in textile design and commitment to sustainable crafts inspire both content and community.
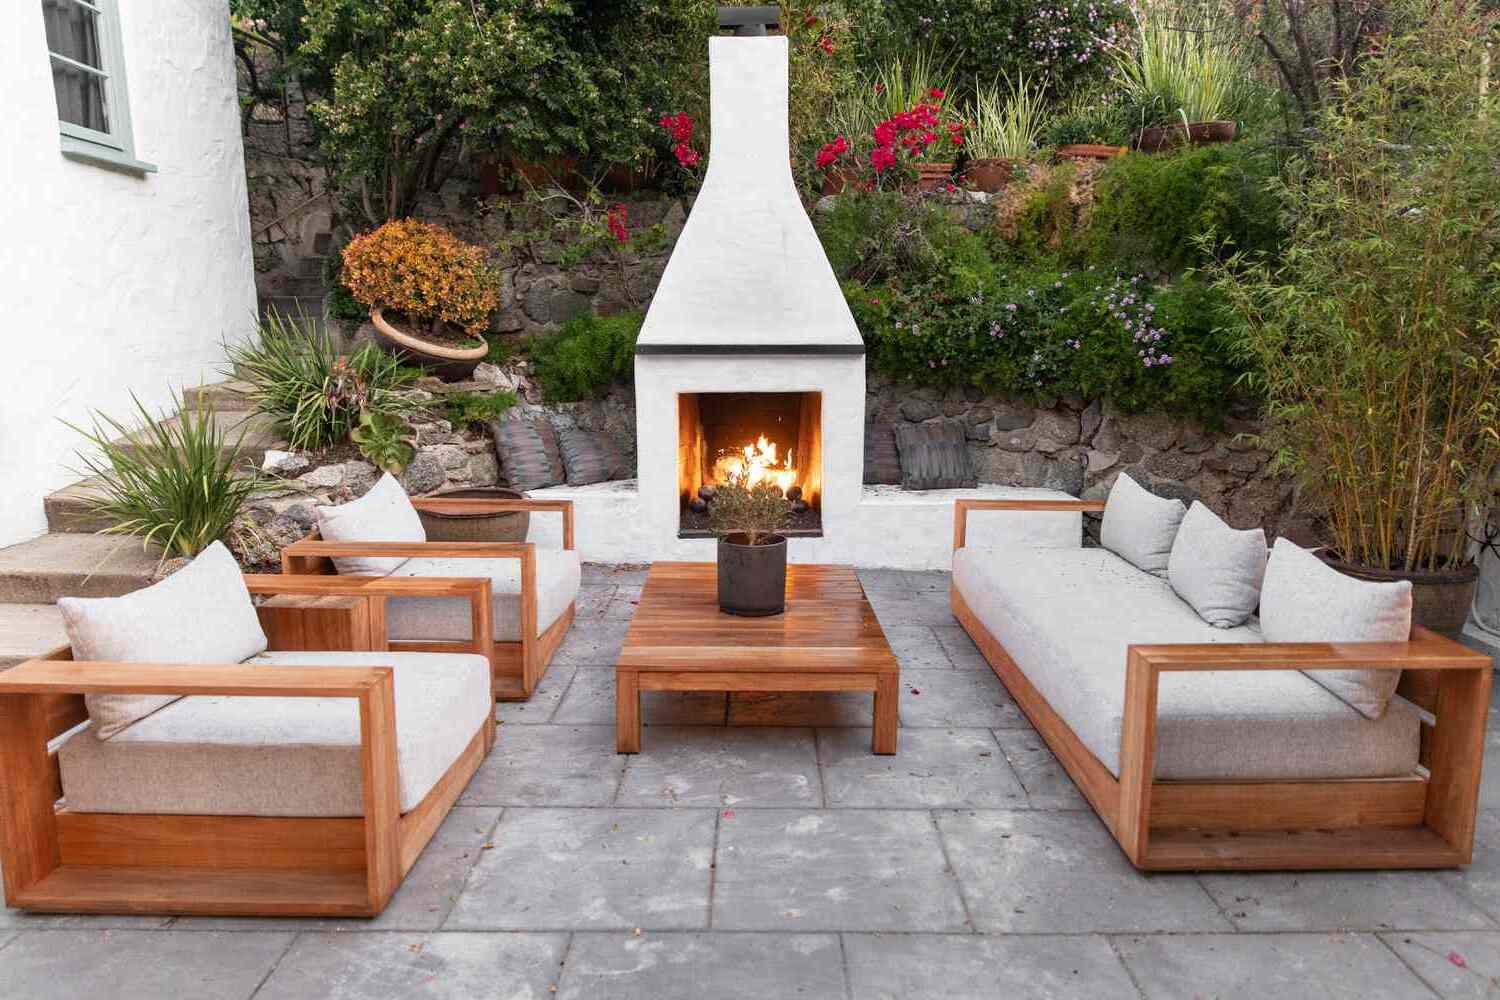
Learn how to build your own DIY outdoor fireplace with our step-by-step guide. Perfect for DIY & Crafts enthusiasts looking to enhance their outdoor space.
(Many of the links in this article redirect to a specific reviewed product. Your purchase of these products through affiliate links helps to generate commission for Twigandthistle.com, at no extra cost. Learn more)
Introduction
Welcome to the world of DIY outdoor fireplaces! There's something truly magical about gathering around a crackling fire on a cool evening, and with a homemade outdoor fireplace, you can bring that enchanting experience right to your backyard. Whether you're a seasoned DIY enthusiast or just starting out, building your own outdoor fireplace can be a rewarding and fulfilling project that adds both warmth and charm to your outdoor living space.
In this comprehensive guide, we'll walk you through the step-by-step process of creating your very own outdoor fireplace. From selecting the perfect location to adding the finishing touches, we've got you covered. By the end of this journey, you'll have a stunning outdoor feature that not only provides a cozy ambiance but also serves as a focal point for gatherings with family and friends.
So, roll up your sleeves, gather your tools, and get ready to embark on an exciting DIY adventure. Whether you're aiming for a rustic, traditional look or a sleek, modern design, building an outdoor fireplace allows you to unleash your creativity and personalize your outdoor space to reflect your unique style and preferences. Let's dive in and discover the joy of crafting a warm and inviting outdoor oasis with your own hands.
Step 1: Choosing the Right Location
Selecting the perfect location for your DIY outdoor fireplace is crucial for both aesthetic and practical reasons. Before you start building, take some time to carefully consider the following factors to ensure that your fireplace becomes a seamless and harmonious addition to your outdoor space.
Aesthetic Appeal
The location of your outdoor fireplace can significantly impact the overall visual appeal of your outdoor area. Consider placing it as a focal point, such as in the center of a seating area, to create a cozy and inviting atmosphere. Additionally, think about how the fireplace will complement the existing design elements of your outdoor space, such as landscaping, furniture, and architectural features.
Safety and Regulations
When choosing a location, it's essential to adhere to local building codes and regulations regarding outdoor fire features. Ensure that the chosen spot complies with any setback requirements and is a safe distance from structures, trees, and other flammable materials. By doing so, you can enjoy your fireplace with peace of mind, knowing that it has been positioned in a safe and responsible manner.
Wind Patterns and Ventilation
Consider the prevailing wind patterns in your area when selecting the location for your outdoor fireplace. Placing it in a spot that minimizes the impact of strong winds will help maintain a steady and controlled burn. Additionally, adequate ventilation is crucial for the efficient operation of the fireplace, so choose a location that allows for proper airflow and minimizes smoke accumulation in gathering areas.
Accessibility and Functionality
Think about how you plan to use the outdoor fireplace and ensure that the chosen location aligns with your intended functionality. For example, if you envision using the fireplace for cooking, consider proximity to outdoor dining areas. Similarly, if the primary purpose is to provide warmth and ambiance, position the fireplace where it can radiate heat effectively and create a comfortable gathering space.
By carefully considering these factors, you can select a location that not only enhances the visual appeal of your outdoor space but also ensures the safety, functionality, and overall enjoyment of your DIY outdoor fireplace. Once you've identified the perfect spot, you'll be ready to move on to the next exciting step in the journey of building your own outdoor oasis.
Step 2: Gathering Materials and Tools
Gathering the right materials and tools is a crucial step in the process of building your DIY outdoor fireplace. By ensuring that you have everything you need before you begin construction, you can streamline the building process and avoid unnecessary delays. Here's a comprehensive list of the essential materials and tools you'll need to bring your outdoor fireplace vision to life.
Materials
-
Firebrick: As the primary building material for the firebox, firebrick is designed to withstand high temperatures and is essential for creating a durable and heat-resistant interior.
-
Concrete Blocks or Pavers: These will form the foundation and structure of your outdoor fireplace. Choose high-quality, weather-resistant blocks or pavers to ensure the longevity of your creation.
-
Mortar Mix: Select a high-temperature mortar mix specifically designed for outdoor fireplaces. This will provide the necessary adhesion and strength for the construction of the firebox and chimney.
-
Reinforcement Bar (Rebar): Used to reinforce the structural integrity of the foundation and firebox, rebar adds strength and stability to the overall construction.
-
Gravel and Sand: These materials are essential for creating a stable and level foundation for your outdoor fireplace. Properly prepared ground with gravel and sand will ensure the stability and longevity of your structure.
-
Chimney Pipe and Cap: If your design includes a chimney, be sure to acquire the appropriate chimney pipe and cap to safely direct smoke and embers away from the gathering area.
-
Fireplace Door or Screen: If desired, a fireplace door or screen can add a decorative and functional element to your outdoor fireplace, providing added safety and protection from sparks.
-
Outdoor Fireplace Kit (Optional): Consider using a pre-designed outdoor fireplace kit, which may include pre-cut and pre-shaped components, simplifying the construction process.
Tools
-
Masonry Trowel: An essential tool for applying mortar and positioning bricks or blocks with precision.
-
Level: Ensures that the foundation and structure of the fireplace are perfectly aligned and balanced.
-
Rubber Mallet: Used for tapping bricks or blocks into place without causing damage.
-
Concrete Saw (Optional): If adjustments to concrete blocks or pavers are necessary, a concrete saw can be a valuable tool for precision cutting.
-
Work Gloves and Safety Glasses: Protect your hands and eyes during construction with durable work gloves and safety glasses.
-
Wheelbarrow and Shovel: For mixing mortar, transporting materials, and preparing the foundation.
-
Measuring Tape and Carpenter's Square: Essential for accurate measurements and ensuring precise angles during construction.
By gathering these materials and tools, you'll be well-equipped to begin the construction of your DIY outdoor fireplace. With everything in place, you can proceed to the next step with confidence, knowing that you have the necessary resources to bring your outdoor oasis to fruition.
Step 3: Building the Foundation
The foundation serves as the backbone of your outdoor fireplace, providing stability and support for the entire structure. Properly constructing the foundation is essential for ensuring the longevity and safety of your DIY outdoor fireplace. Here's a detailed overview of the steps involved in building a solid foundation for your outdoor oasis.
1. Site Preparation
Before laying the foundation, it's crucial to prepare the site properly. Start by clearing the area of any debris, vegetation, or obstacles that may impede the construction process. Use a shovel and a rake to level the ground, ensuring that the foundation will be built on a stable and even surface. Additionally, consider using a layer of gravel to improve drainage and prevent moisture accumulation beneath the foundation.
2. Marking the Layout
Using a measuring tape and marking spray paint, outline the dimensions of the foundation according to your fireplace design. Ensure that the layout is square and level by using a carpenter's square and a level. Precise measurements and a well-defined layout will set the stage for a structurally sound foundation.
3. Excavation
Once the layout is marked, begin excavating the marked area to the required depth for the foundation. The depth will depend on the specific design and local building codes. Typically, a depth of at least 12 inches is recommended to provide adequate support for the fireplace structure. Use a shovel and a digging tool to carefully remove the soil, creating a uniform and level excavation.
4. Adding Gravel and Sand
After the excavation is complete, add a layer of gravel to the bottom of the pit. The gravel will enhance drainage and prevent the accumulation of water beneath the foundation. Once the gravel is in place, add a layer of sand and use a tamper to compact it, creating a stable base for the foundation.
5. Installing Rebar
To reinforce the foundation and enhance its structural integrity, place lengths of rebar within the excavation. The rebar should be positioned in a grid pattern, providing reinforcement throughout the foundation. Use wire ties to secure the intersecting points of the rebar, ensuring that it remains in place during the pouring of the concrete.
6. Pouring Concrete
With the site prepared and the reinforcement in place, it's time to pour the concrete for the foundation. Prepare a high-quality concrete mix according to the manufacturer's instructions, ensuring that it is of the appropriate consistency for pouring. Carefully pour the concrete into the excavation, ensuring that it fills the entire space evenly.
7. Leveling and Finishing
Once the concrete is poured, use a screed board and a level to smooth and level the surface of the foundation. Pay close attention to achieving a uniform and level finish, as this will serve as the base for the subsequent construction of the firebox and chimney. Allow the concrete to cure according to the recommended timeframe, providing ample time for it to achieve the necessary strength and stability.
By following these steps, you can lay a solid foundation for your DIY outdoor fireplace, setting the stage for the construction of the firebox and chimney. With the foundation in place, you're one step closer to enjoying the warmth and ambiance of your own handcrafted outdoor oasis.
Step 4: Constructing the Firebox
The construction of the firebox is a pivotal phase in the creation of your DIY outdoor fireplace. This component not only houses the fire but also serves as the focal point of the structure, dictating its functionality and visual appeal. Here's a detailed guide to constructing the firebox, ensuring that it meets both aesthetic and practical requirements.
1. Layout and Planning
Before commencing the construction, carefully plan the dimensions and layout of the firebox. Consider the size of the firebrick and the desired opening for the fire. Mark the layout on the foundation, ensuring precise measurements and a level base for the firebox.
2. Assembling the Firebox Walls
Using firebrick and high-temperature mortar, begin assembling the walls of the firebox. Lay the bricks in a running bond pattern, applying mortar between each layer to ensure a secure and stable structure. Pay close attention to maintaining uniformity and alignment as you build the walls, ensuring that the firebox is symmetrical and well-constructed.
3. Creating the Firebox Opening
Carefully plan and construct the opening for the firebox, ensuring that it provides adequate space for the fire while maintaining a balanced and visually appealing design. Use a combination of firebrick and refractory mortar to create the opening, ensuring that it is both functional and aesthetically pleasing.
4. Reinforcement and Insulation
To enhance the durability and heat-resistance of the firebox, consider adding a layer of insulation behind the firebrick. Insulating materials such as vermiculite or perlite can be used to create a barrier between the firebrick and the exterior structure, improving the efficiency and safety of the firebox.
5. Finishing Touches
Once the firebox walls and opening are constructed, take the time to inspect the structure for any gaps or imperfections. Use a wire brush to clean off any excess mortar and ensure that the firebox presents a clean and polished appearance. Additionally, consider adding decorative elements or features to personalize the firebox and align it with your overall outdoor design aesthetic.
By following these steps, you can construct a sturdy and visually appealing firebox for your DIY outdoor fireplace. With the firebox in place, you're one step closer to realizing your vision of a warm and inviting outdoor oasis, where the flickering flames will create lasting memories for years to come.
Step 5: Adding the Chimney
The addition of a chimney to your DIY outdoor fireplace not only enhances its functionality but also contributes to the overall aesthetic appeal of the structure. A well-designed chimney ensures proper smoke ventilation and adds a striking vertical element to the fireplace, creating a captivating focal point in your outdoor space. Here's a detailed guide to adding the chimney, ensuring that it complements the firebox and contributes to the safe and efficient operation of your outdoor oasis.
1. Chimney Design and Sizing
Before commencing the construction of the chimney, carefully plan its design and dimensions to align with the overall aesthetic and functional requirements of your outdoor fireplace. Consider factors such as the height of the chimney, the diameter of the flue, and the materials to be used. The design should not only facilitate efficient smoke dispersion but also harmonize with the surrounding landscape and architectural elements.
2. Constructing the Chimney Structure
Using high-quality chimney pipe and appropriate fittings, begin assembling the structure of the chimney. Ensure that the pipe is securely connected to the firebox, providing a seamless transition for smoke and heat to exit the fireplace. Pay close attention to the vertical alignment and stability of the chimney, ensuring that it stands tall and straight, ready to channel smoke and embers safely away from the gathering area.
3. Sealing and Insulation
As you construct the chimney, it's essential to pay attention to sealing and insulating the joints and connections. Use high-temperature silicone sealant to create a tight and secure seal between the chimney components, preventing smoke leakage and ensuring efficient ventilation. Additionally, consider adding insulation around the chimney pipe to enhance its heat resistance and improve the draft, contributing to the overall performance of the fireplace.
4. Chimney Cap Installation
The installation of a chimney cap is a crucial step in completing the chimney structure. A chimney cap serves multiple purposes, including preventing rainwater and debris from entering the flue, minimizing downdrafts, and deterring animals from nesting in the chimney. Select a durable and weather-resistant chimney cap that complements the design of your outdoor fireplace, ensuring that it provides both functional and aesthetic value to the structure.
5. Finishing Touches
Once the chimney is in place, take the time to inspect the entire structure for any imperfections or areas that require attention. Clean off any debris or construction residue, and ensure that the chimney presents a polished and cohesive appearance. Consider adding decorative elements or finishes to the chimney, such as a decorative cap or facade, to further enhance its visual appeal and integrate it seamlessly into your outdoor living space.
By following these steps, you can add a well-constructed and visually striking chimney to your DIY outdoor fireplace, elevating its functionality and charm. With the chimney in place, your outdoor oasis is poised to provide warmth, ambiance, and lasting memories for gatherings with family and friends, creating a captivating focal point in your outdoor living space.
Step 6: Finishing Touches and Safety Considerations
As you near the completion of your DIY outdoor fireplace project, it's time to focus on the finishing touches that will elevate both the aesthetic appeal and safety of your outdoor oasis. Additionally, integrating essential safety considerations ensures that your fireplace not only enhances your outdoor space but also provides a secure and worry-free environment for gatherings and relaxation.
1. Exterior Finishes
Consider adding exterior finishes to your outdoor fireplace to harmonize it with the overall design of your outdoor space. Options such as natural stone veneer, stucco, or decorative tiles can be used to create a cohesive and visually appealing facade. These finishes not only enhance the aesthetic appeal of the fireplace but also provide additional protection against the elements, ensuring its longevity and durability.
2. Fire Safety Measures
Prioritize fire safety by incorporating essential measures into the design of your outdoor fireplace. Clear the surrounding area of any flammable materials, such as overhanging branches or dry vegetation, to minimize fire hazards. Additionally, consider installing a spark arrestor or mesh screen to prevent embers from escaping the firebox and posing a risk to the surrounding environment.
3. Seating and Comfort
Create a comfortable and inviting seating area around the fireplace to encourage gatherings and socializing. Whether it's arranging outdoor furniture, adding cozy cushions, or incorporating built-in seating, providing a welcoming space around the fireplace enhances its functionality and encourages its use as a focal point for relaxation and entertainment.
4. Lighting and Ambiance
Enhance the ambiance of your outdoor fireplace by incorporating strategic lighting. Consider installing soft, ambient lighting around the fireplace to create a warm and inviting atmosphere during evening gatherings. Whether it's through string lights, lanterns, or integrated LED fixtures, thoughtful lighting adds a magical touch to the outdoor space.
5. Regular Maintenance
Plan for regular maintenance and upkeep of your outdoor fireplace to ensure its continued safety and performance. Regularly inspect the firebox, chimney, and surrounding area for any signs of wear, damage, or debris buildup. Clean the firebox and chimney as needed, and address any maintenance issues promptly to uphold the safety and functionality of the fireplace.
By attending to these finishing touches and safety considerations, you can ensure that your DIY outdoor fireplace not only enhances the beauty of your outdoor space but also provides a secure and inviting environment for memorable gatherings and moments of relaxation. With these elements in place, your outdoor oasis is ready to become a cherished focal point for enjoyment and connection in your outdoor living space.
Conclusion
Congratulations on completing the construction of your DIY outdoor fireplace! As you stand back and admire the warm glow emanating from your handcrafted masterpiece, you've not only added a captivating focal point to your outdoor space but also created a gathering spot that will foster cherished memories for years to come.
Building your own outdoor fireplace is a testament to your creativity, craftsmanship, and dedication to enhancing your outdoor living experience. From the careful selection of the location to the meticulous construction of the firebox and chimney, every step has been a labor of love, resulting in a stunning addition to your home.
As you bask in the warmth of your outdoor oasis, it's important to reflect on the transformative power of DIY projects. Beyond the physical structure of the fireplace, this endeavor has brought a sense of fulfillment and pride, knowing that you've brought your vision to life with your own hands. The process of building an outdoor fireplace has not only enriched your outdoor space but has also enriched your own skills and confidence as a DIY enthusiast.
Your DIY outdoor fireplace is more than just a functional feature; it's a reflection of your personal style and a testament to the joy of creating something meaningful. Whether it's the crackling of the fire, the inviting ambiance, or the joy of gathering around with loved ones, your outdoor oasis will continue to be a source of warmth, comfort, and connection.
As you enjoy the fruits of your labor, remember to prioritize safety and regular maintenance to ensure that your outdoor fireplace remains a secure and enduring addition to your home. With proper care and attention, your DIY outdoor fireplace will continue to be a beacon of warmth and hospitality, inviting laughter, storytelling, and shared moments under the open sky.
So, as the flames dance and the stars twinkle above, take pride in the craftsmanship and creativity that have brought your outdoor oasis to life. Your DIY outdoor fireplace stands as a testament to the power of imagination, determination, and the joy of transforming a vision into a tangible, heartwarming reality. Cheers to the memories yet to be made and the warmth that will continue to radiate from your very own outdoor masterpiece.