
Home>Outdoors & Camping>Hardscaping>How To Build A Wood Retaining Wall
Hardscaping
How To Build A Wood Retaining Wall
Published: February 20, 2024

Content Creator for Outdoors & Camping, Sophie turns any yard into a sustainable paradise. Her dedication to DIY outdoor projects and volunteer work in community gardens shares joy and knowledge.
Learn how to create a durable wood retaining wall for your hardscaping project with our step-by-step guide. Enhance your outdoor space today!
(Many of the links in this article redirect to a specific reviewed product. Your purchase of these products through affiliate links helps to generate commission for Twigandthistle.com, at no extra cost. Learn more)
Introduction
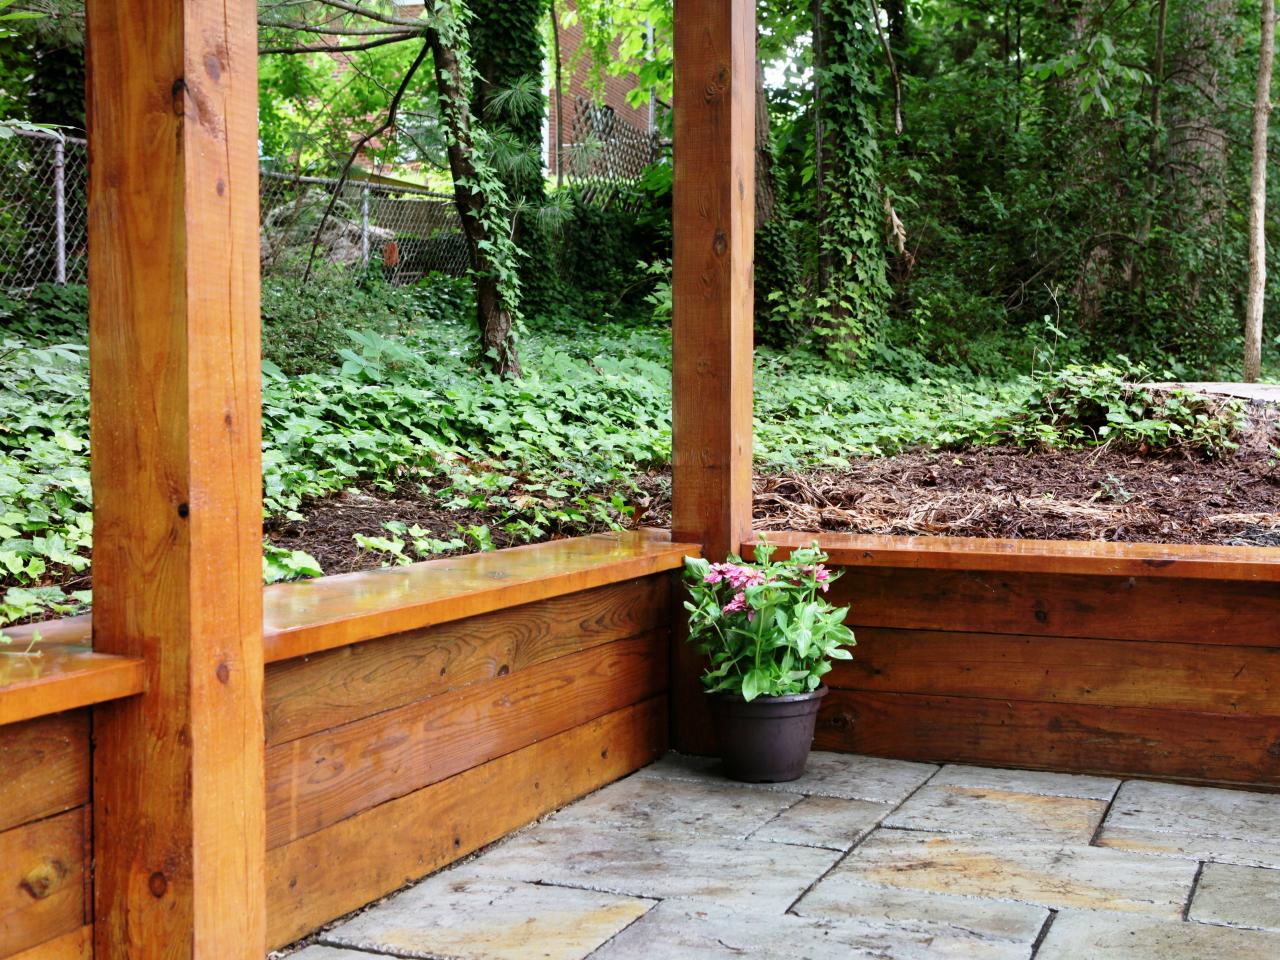
Building a wood retaining wall can transform the aesthetics and functionality of your outdoor space. Whether you're looking to level a sloped yard, create a garden terrace, or add visual interest to your landscape, a well-constructed wood retaining wall can achieve these goals with natural charm and durability.
Retaining walls serve a crucial purpose in landscaping by preventing soil erosion, managing water runoff, and creating usable spaces in areas with varying elevations. Wood, a versatile and visually appealing material, offers a warm and inviting look that complements a range of architectural styles and natural surroundings.
In this comprehensive guide, we will walk you through the step-by-step process of building a wood retaining wall. From initial planning and material selection to the final touches, you will gain the knowledge and confidence to undertake this rewarding hardscaping project. Whether you're a seasoned DIY enthusiast or a novice looking to expand your skills, this guide will equip you with the essential know-how to create a stunning wood retaining wall that enhances the beauty and functionality of your outdoor environment.
So, roll up your sleeves, gather your tools, and let's embark on this exciting journey of crafting a wood retaining wall that not only stands the test of time but also adds a touch of natural elegance to your outdoor living space.
Step 1: Planning and Preparation
Before diving into the physical aspects of building a wood retaining wall, meticulous planning and thorough preparation are essential for a successful outcome. This initial phase sets the foundation for the entire project, ensuring that the wall not only meets your aesthetic preferences but also functions effectively in its intended environment.
Assess the Site
Begin by assessing the site where the retaining wall will be constructed. Take note of the slope, soil composition, drainage patterns, and any existing structures or utilities. Understanding these factors will help you determine the appropriate height, length, and design of the wall. Additionally, consider the overall landscape design and how the retaining wall will integrate harmoniously with the surroundings.
Check Local Regulations
Before proceeding, check with local authorities or building codes to ensure compliance with any regulations or permits required for constructing a retaining wall. Some areas may have specific guidelines regarding the height and location of such structures, so it's crucial to be informed about these considerations from the outset.
Determine Materials and Design
Next, decide on the type of wood and design style for your retaining wall. Pressure-treated lumber, cedar, or redwood are popular choices for their durability and resistance to decay. Consider the visual appeal of different wood species and how they complement the existing landscape. Additionally, choose between a timber wall, which utilizes horizontal layers of wood, or a post-and-plank design, which incorporates vertical posts for added stability.
Calculate Dimensions and Materials
With the site assessment and design preferences in mind, calculate the dimensions of the retaining wall, including the length, height, and width. This will help determine the quantity of materials needed, such as timber, gravel, drainage pipe, and backfill. Accurate measurements and material estimates are crucial for budgeting and procurement.
Create a Detailed Plan
Finally, create a detailed plan that encompasses all the aforementioned aspects, including site assessment findings, design sketches, material specifications, and a step-by-step construction timeline. This plan will serve as your roadmap throughout the project, ensuring that each phase is executed with precision and efficiency.
By investing time and attention into the planning and preparation stage, you set the stage for a smooth and successful wood retaining wall construction process. With a clear vision and comprehensive plan in place, you're ready to move on to the next steps of gathering materials and tools for the project.
Step 2: Gathering Materials and Tools
Once the planning phase is complete, the next crucial step in building a wood retaining wall is gathering the necessary materials and tools. This phase is pivotal in ensuring that you have everything required to execute the construction process efficiently and effectively. By assembling the right materials and tools, you set the stage for a seamless and productive building experience.
Materials
The materials needed for constructing a wood retaining wall typically include:
- Pressure-treated lumber or suitable wood species based on your design preferences and site conditions.
- Gravel for drainage purposes.
- Landscape fabric to prevent soil erosion and maintain structural integrity.
- Drainage pipe to manage water runoff behind the wall.
- Backfill material, such as gravel or crushed stone, to provide stability and support.
- Rebar or deadman anchors for added reinforcement, especially for taller walls.
- Fasteners, such as screws or nails, designed for outdoor use to secure the wood components.
It's essential to procure high-quality materials that are specifically intended for outdoor and hardscaping applications. This ensures the longevity and structural integrity of the retaining wall, especially in the face of environmental elements and soil pressure.
Tools
Equipping yourself with the right tools is equally important for a successful wood retaining wall construction project. Some of the essential tools include:
- Shovel and digging tools for excavating the area and preparing the foundation.
- Level, tape measure, and string for precise layout and alignment.
- Circular saw or handsaw for cutting the wood to the required dimensions.
- Drill and appropriate drill bits for creating pilot holes and securing fasteners.
- Wheelbarrow for transporting materials, such as gravel and backfill, to the construction site.
- Tamper for compacting the backfill material and ensuring structural stability.
- Safety gear, including gloves, safety glasses, and hearing protection, to prioritize personal safety during the construction process.
By gathering these materials and tools in advance, you streamline the construction process and minimize potential delays or interruptions. With everything at your disposal, you're well-prepared to move on to the next phase of excavating the area and laying the groundwork for the wood retaining wall.
This comprehensive guide will equip you with the essential know-how to create a stunning wood retaining wall that enhances the beauty and functionality of your outdoor environment. So, roll up your sleeves, gather your tools, and let's embark on this exciting journey of crafting a wood retaining wall that not only stands the test of time but also adds a touch of natural elegance to your outdoor living space.
Step 3: Excavating the Area
Excavating the area marks a pivotal phase in the construction of a wood retaining wall. This step involves preparing the ground where the wall will be situated, creating a stable foundation, and ensuring proper drainage to support the structural integrity of the wall. By meticulously executing the excavation process, you set the stage for a durable and resilient retaining wall that effectively serves its purpose in the landscape.
Clearing the Site
Begin by clearing the designated area where the retaining wall will be constructed. Remove any vegetation, rocks, debris, or obstructions that may impede the excavation process. This step is essential for creating a clean and accessible work environment, allowing for precise measurements and foundational preparations.
Marking the Layout
Using stakes and string, mark the layout of the retaining wall to delineate its boundaries and alignment. This visual guide will help ensure that the excavation is carried out according to the intended dimensions and contours of the wall. Pay close attention to the slope and elevation of the terrain, as these factors will influence the depth and configuration of the excavation.
Digging the Trench
With the layout in place, commence digging the trench where the first row of timbers will be positioned. The depth of the trench will depend on the planned height of the retaining wall and the recommended depth for stable support. Typically, the trench should extend below the frost line and accommodate a suitable base material for optimal drainage and stability.
Creating a Level Base
Once the trench is excavated, focus on creating a level base to accommodate the first row of timbers. Use a compactable base material, such as gravel or crushed stone, to establish a stable foundation within the trench. Compact the base material thoroughly to ensure uniform support and minimize the risk of settling or shifting over time.
Incorporating Drainage
Integrate a perforated drainage pipe behind the first row of timbers to manage water runoff and alleviate hydrostatic pressure. This step is crucial for preventing water accumulation behind the retaining wall, which can compromise its structural integrity and lead to soil saturation. Additionally, consider incorporating landscape fabric to prevent soil erosion and maintain the integrity of the backfill material.
Ensuring Precision and Alignment
Throughout the excavation process, prioritize precision and alignment to ensure that the trench and base are consistent with the intended design and dimensions of the retaining wall. Utilize a level, tape measure, and string to verify the accuracy of the excavation, guaranteeing that the subsequent construction phases proceed smoothly and seamlessly.
By meticulously executing the excavation process, you establish a solid foundation for the wood retaining wall, laying the groundwork for the subsequent phases of installing the first row of timbers and bringing the vision of a stunning and functional retaining wall to fruition.
Step 4: Installing the First Row of Timbers
With the groundwork laid through meticulous planning, preparation, and excavation, the construction of a wood retaining wall progresses to the pivotal phase of installing the first row of timbers. This foundational row serves as the anchor for the entire structure, providing essential support and alignment for the subsequent layers. The precision and care applied during this phase are instrumental in ensuring the stability and integrity of the retaining wall.
Positioning the Timbers
Begin by carefully positioning the pressure-treated timbers or chosen wood material into the prepared trench. The timbers should be laid horizontally, with their ends abutting one another to create a seamless and robust base. Pay close attention to the alignment and levelness of the timbers, using a level and string to verify that they are uniformly positioned along the length of the wall.
Securing the Timbers
Once the timbers are in place, secure them to the compacted base and to each other using appropriate fasteners, such as exterior-grade screws or nails. Pre-drilling pilot holes may be necessary to prevent splitting and ensure precise placement of the fasteners. This step is crucial for reinforcing the stability of the first row and establishing a solid foundation for the subsequent layers.
Checking for Level and Alignment
Verify the levelness and alignment of the first row of timbers, making any necessary adjustments to ensure that they conform to the intended design and specifications. A precisely leveled base is essential for the structural integrity and visual appeal of the retaining wall, setting the standard for the layers that will follow.
Incorporating Drainage and Backfill
As the first row of timbers is secured in place, it's essential to integrate additional components that contribute to the functionality and longevity of the retaining wall. Consider incorporating gravel behind the first row to facilitate drainage and minimize hydrostatic pressure. Additionally, compact the backfill material behind the timbers to provide stability and support, ensuring that the wall remains resilient against soil pressure and environmental factors.
Ensuring Structural Integrity
Throughout the installation process, prioritize the structural integrity of the first row of timbers, ensuring that they are securely anchored and aligned to withstand the pressures exerted by the retained soil. Attention to detail and precision at this stage lays the groundwork for a durable and visually appealing wood retaining wall that enhances the landscape and provides long-lasting functionality.
By methodically executing the installation of the first row of timbers, you set the stage for the subsequent phases of adding subsequent rows and completing the finishing touches of the wood retaining wall. This critical phase marks a significant milestone in the construction process, bringing the vision of a sturdy and aesthetically pleasing retaining wall one step closer to reality.
Step 5: Adding Subsequent Rows
As the foundational first row of timbers is securely in place, the construction of the wood retaining wall progresses to the phase of adding subsequent rows. This pivotal step builds upon the stability and alignment established in the initial row, further reinforcing the structural integrity of the wall and creating a visually impactful tiered design. The meticulous execution of this phase is essential for ensuring that each subsequent row seamlessly integrates with the preceding layer, culminating in a cohesive and resilient retaining wall.
Layering the Timbers
Commence the addition of subsequent rows by carefully layering the timbers atop the first row, ensuring that they are positioned with precision and alignment. The ends of the timbers should be staggered from the joints of the preceding row, creating a sturdy interlocking pattern that enhances the stability and visual appeal of the wall. Pay close attention to the levelness and straightness of each timber, using a level and string to verify uniformity across the length of the wall.
Securing the Subsequent Rows
Once the timbers are in place, secure them to the underlying row and to each other using appropriate fasteners, such as exterior-grade screws or nails. Ensuring a secure and robust connection between the layers is crucial for maintaining the structural integrity of the retaining wall, especially as the height and soil pressure increase with each added row.
Verifying Alignment and Levelness
Throughout the process of adding subsequent rows, meticulously verify the alignment and levelness of each layer, making any necessary adjustments to maintain uniformity and precision. Consistent attention to these details ensures that the retaining wall maintains a visually appealing and structurally sound profile, enhancing its overall effectiveness and aesthetic impact within the landscape.
Incorporating Drainage and Backfill
As each subsequent row is installed, continue to integrate gravel for drainage and compact the backfill material behind the timbers to provide essential support and stability. These components play a crucial role in managing water runoff, alleviating hydrostatic pressure, and reinforcing the resilience of the retaining wall against soil pressure and environmental factors.
Ensuring Cohesive Integration
The addition of subsequent rows represents a critical phase in the construction process, where the individual layers cohesively integrate to form a unified and durable wood retaining wall. By meticulously executing this phase, you further solidify the structural integrity and visual impact of the wall, bringing it one step closer to completion.
By methodically adding subsequent rows, you advance the construction process, setting the stage for the final phase of backfilling and completing the finishing touches of the wood retaining wall. This pivotal step represents a significant milestone in the journey of crafting a sturdy and visually captivating retaining wall that enhances the landscape and provides long-lasting functionality.
Step 6: Backfilling and Finishing Touches
With the structural framework of the wood retaining wall in place, the focus shifts to the crucial phase of backfilling and adding the finishing touches. This stage not only enhances the visual appeal of the wall but also contributes to its stability, functionality, and long-term resilience within the landscape.
Backfilling Behind the Wall
Commence the backfilling process by carefully layering gravel or crushed stone behind the retaining wall. This backfill material serves multiple purposes, including facilitating drainage, minimizing soil compaction, and providing crucial support to the structure. As the backfill is added, use a tamper to compact it evenly, ensuring uniform distribution and optimal stability.
Incorporating Drainage Considerations
Integrate a perforated drainage pipe within the backfill material to manage water runoff effectively. The drainage pipe serves to alleviate hydrostatic pressure, preventing water accumulation behind the wall and safeguarding its structural integrity. Additionally, consider incorporating landscape fabric to prevent soil erosion and maintain the integrity of the backfill material over time.
Adding the Final Row of Timbers
If the design calls for multiple rows of timbers, proceed to install the final row, ensuring that it aligns seamlessly with the preceding layers. Secure the timbers in place, verifying their levelness and alignment to maintain the cohesive and visually appealing profile of the retaining wall. Attention to detail during this phase contributes to the overall stability and aesthetic impact of the structure.
Finishing Touches and Aesthetic Enhancements
As the construction nears completion, consider adding aesthetic enhancements to the wood retaining wall. This may include applying a protective sealant or wood preservative to enhance durability and weather resistance. Additionally, explore options for integrating landscaping elements, such as cascading plants or decorative stones, to complement the natural charm of the wall and further enhance its visual appeal.
Final Inspection and Adjustments
Conduct a thorough inspection of the completed retaining wall, verifying its alignment, stability, and overall integrity. Make any necessary adjustments to ensure that the wall meets the intended design specifications and functions effectively within the landscape. Attention to detail during this final phase contributes to the longevity and performance of the wood retaining wall.
By meticulously executing the backfilling process and adding the finishing touches, you bring the vision of a sturdy, visually captivating wood retaining wall to fruition. This pivotal phase marks the culmination of the construction journey, resulting in a resilient and aesthetically pleasing structure that enhances the landscape and provides enduring functionality.
Conclusion
In conclusion, the construction of a wood retaining wall represents a rewarding endeavor that combines functionality, aesthetics, and craftsmanship to enhance outdoor spaces. From the initial stages of meticulous planning and preparation to the final touches that elevate the visual appeal of the structure, each phase of the construction process contributes to the creation of a durable and visually captivating retaining wall.
Throughout this comprehensive guide, we have delved into the essential steps involved in building a wood retaining wall, emphasizing the importance of precision, attention to detail, and adherence to best practices. The planning and preparation phase sets the stage for a well-executed project, guiding the selection of materials, design considerations, and compliance with local regulations. The subsequent phases of excavation, timber installation, and backfilling are pivotal in establishing a solid foundation and structural integrity for the retaining wall.
As the construction progresses, the addition of subsequent rows and the incorporation of drainage considerations further reinforce the stability and functionality of the retaining wall. The final phase of backfilling and finishing touches not only enhances the visual appeal of the structure but also contributes to its long-term resilience within the landscape.
The completion of a wood retaining wall signifies the transformation of outdoor spaces, creating terraced gardens, leveling sloped yards, and adding visual interest while addressing soil erosion and water management. The natural charm of wood, coupled with the structural integrity of a well-constructed retaining wall, lends a timeless elegance to outdoor environments, complementing a range of architectural styles and natural surroundings.
As you embark on your journey of building a wood retaining wall, remember that attention to detail, precision, and a commitment to quality are paramount. Whether you are a seasoned DIY enthusiast or a novice looking to expand your skills, this guide equips you with the essential knowledge to undertake this hardscaping project with confidence and creativity.
In the end, the construction of a wood retaining wall is not merely a physical endeavor but a testament to the artistry and ingenuity that can be woven into the landscape. It is a reflection of the seamless integration of natural elements and human craftsmanship, resulting in a structure that stands the test of time while enhancing the beauty and functionality of outdoor living spaces.