
Home>Create & Decorate>DIY & Crafts>How To Build A Yurt
DIY & Crafts
How To Build A Yurt
Published: February 27, 2024

Content Creator specializing in woodworking and interior transformations. Caegan's guides motivate readers to undertake their own projects, while his custom furniture adds a personal touch.
Learn how to build a yurt with our DIY & Crafts guide. Discover step-by-step instructions and tips for creating your own yurt. Start your yurt-building journey today!
(Many of the links in this article redirect to a specific reviewed product. Your purchase of these products through affiliate links helps to generate commission for Twigandthistle.com, at no extra cost. Learn more)
Introduction
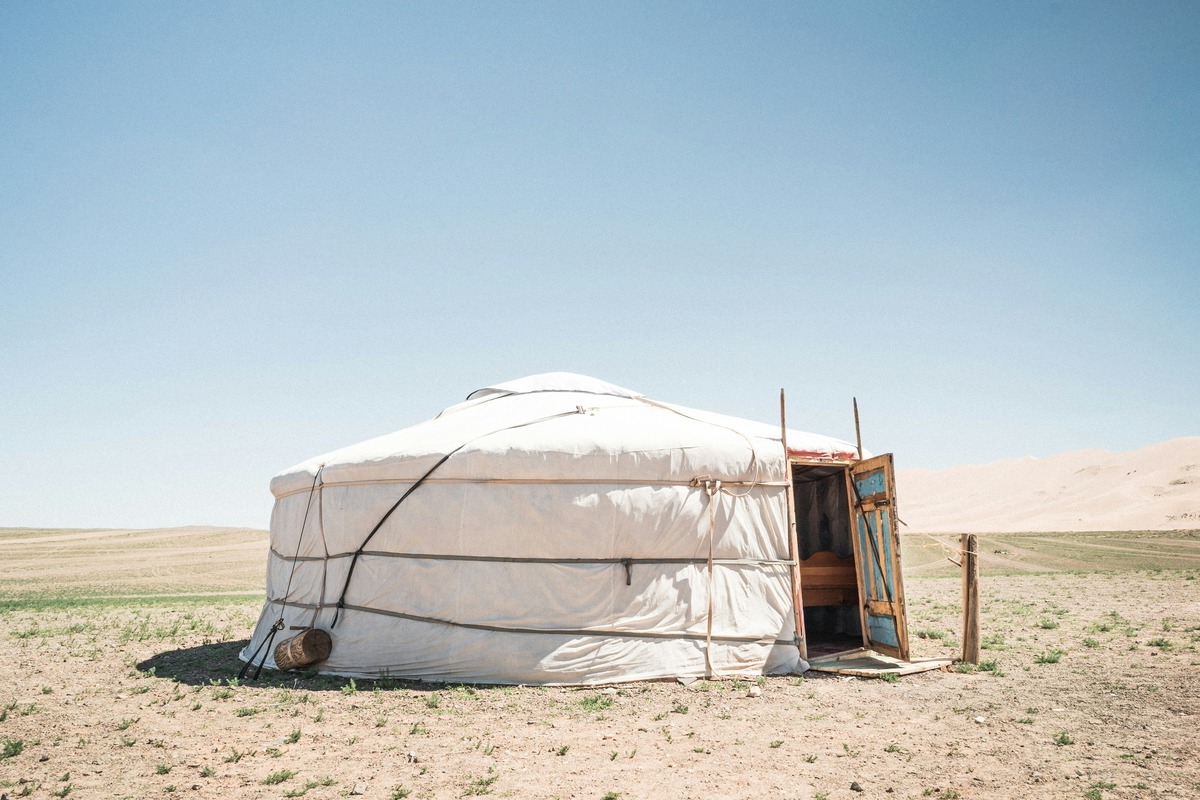
Building a yurt is an exciting and rewarding DIY project that allows you to create a unique and versatile living space. Originating from the nomadic cultures of Central Asia, yurts have gained popularity worldwide as eco-friendly and sustainable housing options. These portable, circular dwellings are not only aesthetically pleasing but also practical, making them a perfect choice for those seeking an alternative and affordable housing solution.
Constructing a yurt provides an opportunity to connect with traditional building methods while incorporating modern materials and techniques. Whether you're looking to create a cozy guest house, a meditation retreat, or a backyard studio, a yurt offers a versatile and customizable living space that can adapt to various needs and environments.
In this comprehensive guide, we will walk you through the step-by-step process of building a yurt, from constructing the frame to adding the finishing touches. You'll discover the essential materials and tools required for the project, as well as valuable tips and techniques to ensure a successful build. By following this guide, you'll gain the knowledge and confidence to embark on your yurt-building journey and create a unique and sustainable living space that reflects your creativity and individuality.
Embark on this adventure with an open mind and a spirit of exploration, as building a yurt is not just about constructing a shelter; it's about embracing a lifestyle that values simplicity, sustainability, and harmony with nature. So, gather your tools, unleash your creativity, and let's begin the fulfilling journey of bringing a yurt to life.
Materials and Tools Needed
Building a yurt requires a combination of traditional and modern materials, as well as a set of essential tools to facilitate the construction process. Before embarking on this DIY project, it's crucial to gather all the necessary items to ensure a smooth and efficient building experience. Here's a comprehensive list of the materials and tools you'll need:
Materials:
-
Wood: Select high-quality, untreated lumber for the yurt frame, including sturdy posts for the central ring, rafters, and lattice wall sections. Opt for durable wood species such as cedar, Douglas fir, or pine to ensure structural integrity and longevity.
-
Canvas or Fabric: Choose a durable, weather-resistant fabric for the yurt cover, such as canvas or heavy-duty polyester. The fabric will serve as the outer shell of the yurt, providing protection from the elements while allowing natural light to filter through.
-
Insulation: Depending on your climate and intended use of the yurt, consider incorporating insulation materials to regulate temperature and enhance comfort. Options include rigid foam insulation, wool insulation, or reflective insulation barriers.
-
Fasteners: Stock up on screws, nails, and bolts of various sizes to secure the wooden components together. Additionally, consider using metal brackets and connectors for added structural support.
-
Door and Windows: If desired, acquire a pre-made yurt door and windows or gather materials to construct them yourself. Ensure the door and windows are appropriately sized to fit the yurt's dimensions.
-
Roofing Material: Select a suitable roofing material, such as corrugated metal sheets, shingles, or thatch, to provide weatherproofing and aesthetic appeal to the yurt's roof.
-
Decorative Elements: Personalize your yurt by incorporating decorative elements such as trim, paint, or natural finishes to enhance its visual appeal and reflect your unique style.
Tools:
-
Circular Saw: A reliable circular saw will be essential for cutting the wooden components to the required dimensions with precision and accuracy.
-
Drill and Bits: Invest in a quality drill and a set of drill bits to create pilot holes, drive screws, and perform various assembly tasks throughout the construction process.
-
Measuring Tools: Equip yourself with a tape measure, carpenter's square, and level to ensure the precise alignment and dimensions of the yurt's components.
-
Ladder or Scaffolding: Depending on the yurt's size, a sturdy ladder or scaffolding will facilitate safe access to elevated areas during construction.
-
Sewing Machine: If opting for a fabric cover, a sewing machine will be necessary to create and assemble the yurt's outer shell.
-
Safety Gear: Prioritize safety by wearing protective gear, including goggles, gloves, and a dust mask, when working with wood, insulation, and power tools.
By gathering these materials and tools, you'll be well-equipped to embark on the yurt-building journey with confidence and preparedness. With everything in place, you're ready to move on to the next crucial step: constructing the yurt frame.
Step 1: Building the Frame
The construction of a sturdy and well-designed frame forms the foundation of a durable and resilient yurt. The frame provides structural support for the entire yurt, ensuring stability and integrity in various environmental conditions. Building the frame involves assembling the central ring, rafters, and lattice wall sections, culminating in a robust framework that serves as the backbone of the yurt's structure.
Central Ring Assembly
The central ring, also known as the compression ring, serves as the focal point of the yurt's frame, supporting the roof and connecting the rafters. Constructed from solid wood, the central ring is typically a circular assembly with a central opening to accommodate the roof's skylight or ventilation system. To build the central ring, carefully cut and join the wooden components, ensuring precise measurements and a secure fit. The central ring's strength and stability are paramount, as it bears the weight of the entire roof structure.
Rafter Installation
Once the central ring is in place, the next step involves installing the rafters, which radiate outward from the central ring to the yurt's perimeter. Rafters are essential for distributing the roof's weight and providing structural support to the entire framework. Each rafter is meticulously positioned and secured to the central ring, creating a symmetrical and balanced arrangement that forms the basis of the yurt's conical shape. Attention to detail during rafter installation is crucial, as it directly impacts the yurt's overall stability and load-bearing capacity.
Lattice Wall Construction
The lattice wall sections, consisting of interconnected wooden lattices, encircle the yurt's perimeter, forming the walls of the structure. These lattice walls not only contribute to the yurt's distinctive appearance but also offer flexibility and resilience, allowing the structure to adapt to external forces such as wind and seismic activity. Assembling the lattice walls involves interlocking the wooden lattice components with precision and securing them to the foundation, creating a durable and cohesive enclosure for the yurt's interior space.
By meticulously executing each step of the frame-building process, you lay the groundwork for a resilient and well-structured yurt. The careful assembly of the central ring, rafters, and lattice walls ensures that the yurt's frame embodies strength, durability, and architectural integrity, setting the stage for the next phase of construction: attaching the walls.
Step 2: Attaching the Walls
Attaching the walls is a pivotal stage in the construction of a yurt, as it transforms the frame into a fully enclosed living space. The lattice wall sections, meticulously crafted during the frame-building phase, serve as the foundation for the attachment of the yurt's walls. This process involves securing the fabric or canvas cover to the lattice walls, creating a weatherproof and visually appealing exterior while maintaining the yurt's distinctive circular shape.
Before attaching the walls, it's essential to ensure that the lattice wall sections are structurally sound and securely anchored to the foundation. The integrity of the lattice walls directly influences the stability and longevity of the yurt, making thorough inspection and reinforcement a crucial preparatory step. Once the lattice walls are deemed structurally sound, the process of affixing the fabric cover can commence.
The fabric or canvas cover, chosen for its durability and weather-resistant properties, is carefully draped over the lattice walls, enveloping the yurt's frame in a protective layer. Precision and attention to detail are paramount during this phase, as the proper alignment and tension of the fabric cover contribute to the yurt's overall structural integrity and aesthetic appeal. The cover is meticulously secured to the lattice walls, ensuring a snug and weatherproof fit that withstands the elements.
As the fabric cover is affixed to the lattice walls, the transformation of the yurt into a functional living space becomes evident. The enclosed interior space, characterized by the circular layout and natural light filtering through the fabric, embodies the essence of traditional yurt living while accommodating modern comfort and functionality. The attachment of the walls marks a significant milestone in the yurt-building journey, bringing the vision of a sustainable and versatile dwelling closer to realization.
By completing the process of attaching the walls with precision and care, you set the stage for the subsequent phases of yurt construction, including adding the roof, installing the door and windows, and applying finishing touches. The successful attachment of the walls not only enhances the yurt's structural integrity and weather resistance but also paves the way for the realization of a unique and inviting living space that harmonizes with its natural surroundings.
Step 3: Adding the Roof
Adding the roof to a yurt is a pivotal step that not only enhances its structural integrity but also contributes to its aesthetic appeal and weatherproofing. The roof serves as a protective shield, safeguarding the interior space from the elements while completing the iconic conical shape of the yurt. This phase of construction involves carefully selecting and installing roofing materials, ensuring proper insulation, and incorporating a skylight or ventilation system to optimize the yurt's functionality and comfort.
Roofing Material Selection
Choosing the right roofing material is essential to ensure durability, weather resistance, and visual harmony with the yurt's overall design. Options such as corrugated metal sheets, shingles, thatch, or modern synthetic roofing materials offer varying degrees of protection and aesthetic versatility. Factors such as climate, local building codes, and personal preferences play a crucial role in determining the most suitable roofing material for the yurt. Additionally, the selected material should complement the yurt's natural surroundings and contribute to its eco-friendly and sustainable ethos.
Insulation Integration
Incorporating insulation into the roof structure is vital for regulating temperature and enhancing energy efficiency within the yurt. Depending on the climate and intended use of the yurt, insulation materials such as rigid foam insulation, wool insulation, or reflective insulation barriers can be installed between the rafters to minimize heat loss and maintain a comfortable interior environment. Proper insulation not only contributes to thermal comfort but also reduces energy consumption, aligning with the yurt's eco-conscious design principles.
Skylight or Ventilation System
Integrating a skylight or ventilation system into the roof design enhances natural light penetration and air circulation within the yurt. A strategically positioned skylight not only illuminates the interior space during the day but also provides an opportunity for stargazing at night, connecting occupants with the surrounding natural environment. Alternatively, a well-designed ventilation system ensures adequate airflow, preventing moisture buildup and promoting a healthy indoor atmosphere. Careful consideration of the skylight or ventilation system placement and design optimizes the yurt's livability and connection to the outdoors.
By meticulously addressing the roofing phase, from material selection to insulation integration and skylight or ventilation system installation, the yurt's construction reaches a significant milestone. The addition of the roof not only fortifies the yurt's structural resilience but also contributes to its functionality, comfort, and visual allure. This transformative phase sets the stage for the final steps of yurt construction, including installing the door and windows and adding finishing touches, bringing the vision of a sustainable and harmonious living space closer to fruition.
Step 4: Installing the Door and Windows
The installation of the door and windows marks a pivotal phase in the construction of a yurt, as it not only enhances the functionality and livability of the structure but also contributes to its aesthetic appeal and connection to the surrounding environment. The careful selection, placement, and installation of the door and windows play a crucial role in creating a welcoming and versatile living space within the yurt.
Door Installation
The door serves as the primary entry point to the yurt, facilitating access while contributing to security, privacy, and insulation. When selecting a door for the yurt, considerations such as size, material, and design should align with the overall aesthetic and functional requirements of the structure. Whether opting for a pre-made yurt door or constructing a custom door, attention to detail in the installation process is paramount. The door should be securely mounted within the frame, ensuring a snug fit and smooth operation. Additionally, weather-stripping and insulation around the door perimeter contribute to energy efficiency and weather resistance, enhancing the comfort and sustainability of the yurt.
Window Integration
Windows play a dual role in the yurt, allowing natural light to permeate the interior space while offering views of the surrounding landscape. When integrating windows into the yurt design, factors such as size, placement, and operability should be carefully considered to optimize natural light penetration and ventilation. Additionally, the selection of window materials and glazing impacts insulation, soundproofing, and visual harmony with the yurt's aesthetic. Proper sealing and weatherproofing around the window frames ensure protection from the elements, contributing to the yurt's overall comfort and resilience.
The installation of the door and windows not only enhances the functionality and visual appeal of the yurt but also fosters a sense of connection with the natural environment. By carefully selecting and installing these elements, the yurt becomes a welcoming and adaptable living space that harmonizes with its surroundings while providing comfort and functionality for its occupants.
With the door and windows seamlessly integrated into the yurt's structure, the final phase of adding finishing touches brings the construction journey to completion, culminating in a unique and sustainable dwelling that embodies the spirit of traditional yurt living while embracing modern comfort and versatility.
Step 5: Finishing Touches
As the yurt construction nears completion, attention turns to the crucial phase of adding finishing touches, where meticulous details and personalization elevate the structure from a functional dwelling to a harmonious and inviting living space. This phase encompasses a range of tasks that contribute to the yurt's visual appeal, comfort, and functionality, creating a seamless integration of traditional craftsmanship and modern sensibilities.
Interior Design and Furnishings
The interior design of the yurt presents an opportunity to infuse the space with warmth, character, and functionality. Considerations such as wall coverings, flooring, and furnishings play a pivotal role in creating a comfortable and aesthetically pleasing environment. Natural materials such as woven rugs, wooden furniture, and textiles can enhance the yurt's organic ambiance, while strategic placement of seating, storage, and decorative elements optimizes the use of space.
Lighting and Ambiance
Thoughtful lighting design contributes to the ambiance and functionality of the yurt. Incorporating natural light through strategically positioned windows and a skylight fosters a connection to the outdoors, while supplementary lighting sources such as lanterns, string lights, and task lighting enhance versatility and visual appeal. The interplay of light and shadow within the yurt creates a dynamic and inviting atmosphere, catering to various activities and moods.
Climate Control and Comfort
Ensuring climate control and comfort within the yurt is essential for year-round livability. Proper insulation, ventilation, and heating solutions tailored to the yurt's specific climate and intended use contribute to a comfortable interior environment. Additionally, the integration of eco-friendly and energy-efficient technologies aligns with the yurt's sustainable ethos, promoting a harmonious relationship with the natural surroundings.
Personalization and Artistic Expression
Personal touches and artistic expression add a layer of individuality and charm to the yurt. Incorporating artwork, textiles, and decorative accents that reflect personal tastes and cultural influences infuses the space with character and warmth. Handcrafted elements, such as pottery, woven textiles, and artisanal decor, celebrate craftsmanship and tradition, enriching the yurt's ambiance with a sense of authenticity and creativity.
Landscaping and Outdoor Living
Complementing the yurt's interior, thoughtful landscaping and outdoor living spaces extend the harmonious living experience to the surrounding environment. Creating outdoor seating areas, gardens, and functional spaces that integrate with the natural landscape enhances the yurt's connection to its surroundings, fostering a holistic and sustainable living experience.
By attending to these finishing touches with care and creativity, the yurt evolves into a unique and inviting sanctuary that embodies the spirit of traditional craftsmanship, sustainable living, and modern comfort. Each detail contributes to the cohesive and harmonious integration of the yurt with its natural surroundings, creating a space that inspires connection, creativity, and a profound appreciation for the art of yurt living.
Conclusion
In conclusion, the journey of building a yurt is not merely a construction project; it is a transformative experience that embodies the principles of sustainability, craftsmanship, and harmonious living. From the initial stages of gathering materials and crafting the frame to the final touches that infuse the yurt with warmth and character, every step reflects a deep connection to tradition, creativity, and the natural environment.
The construction of a yurt represents a harmonious blend of ancient building techniques and modern ingenuity, resulting in a versatile and eco-friendly living space that resonates with a sense of timelessness. The circular design, natural materials, and seamless integration with the surroundings exemplify the yurt's ability to coexist with nature while providing comfort and functionality for its occupants.
As the yurt takes shape, it becomes more than a shelter; it becomes a sanctuary that fosters a profound connection to the earth and a mindful way of living. The circular layout, abundant natural light, and efficient use of space create an environment that encourages simplicity, creativity, and a deep appreciation for the beauty of sustainable living.
Furthermore, the process of building a yurt is a testament to the power of craftsmanship and human ingenuity. Each carefully selected material, meticulously crafted component, and thoughtfully integrated detail contributes to the yurt's structural integrity and aesthetic allure. The dedication and skill invested in every aspect of the construction reflect a deep respect for tradition and a commitment to creating a space that embodies both functionality and artistry.
Ultimately, the completion of a yurt represents the realization of a vision—a vision of sustainable living, harmonious design, and a sanctuary that embraces the essence of traditional craftsmanship. It stands as a testament to the enduring appeal of ancient building practices and the timeless allure of living in harmony with nature.
In essence, the journey of building a yurt transcends the act of construction; it embodies a philosophy—a philosophy that celebrates simplicity, sustainability, and the profound connection between human creativity and the natural world. As the yurt stands proudly, it serves as a reminder of the beauty of mindful living and the enduring legacy of traditional craftsmanship in a modern world.