
Home>Create & Decorate>DIY & Crafts>How To Build An Outhouse
DIY & Crafts
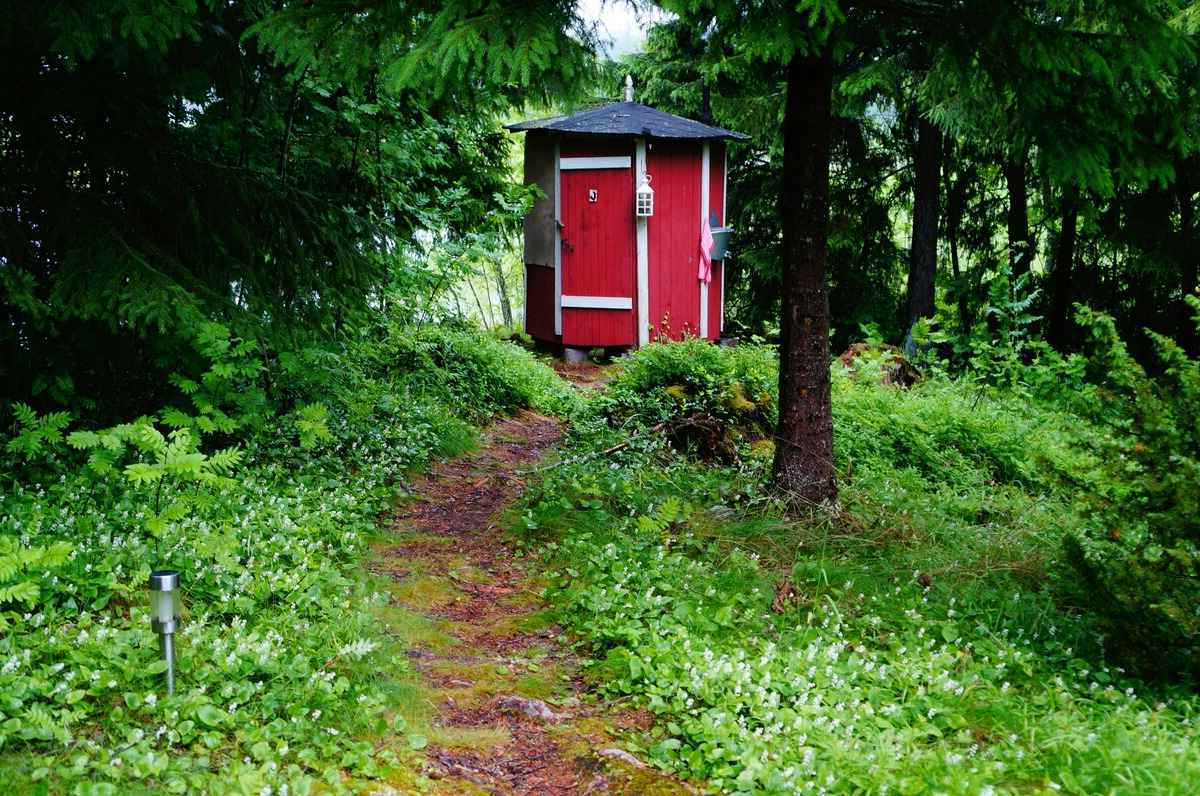
How To Build An Outhouse
Published: February 27, 2024

Content Creator specializing in woodworking and interior transformations. Caegan's guides motivate readers to undertake their own projects, while his custom furniture adds a personal touch.
Learn how to build an outhouse with our step-by-step DIY guide. Get creative with your DIY & Crafts projects today!
(Many of the links in this article redirect to a specific reviewed product. Your purchase of these products through affiliate links helps to generate commission for Twigandthistle.com, at no extra cost. Learn more)
Introduction
Building an outhouse can be a rewarding and practical project for anyone seeking a sustainable and eco-friendly sanitation solution. Whether you're a homesteader, a nature enthusiast, or simply looking to add a rustic charm to your property, constructing an outhouse allows you to embrace a simpler way of life while minimizing your environmental impact.
In this comprehensive guide, we will walk you through the step-by-step process of building an outhouse from scratch. From selecting the ideal location to adding the finishing touches, you will gain valuable insights and practical tips to create a functional and aesthetically pleasing outhouse that complements your outdoor space.
By following this guide, you will not only acquire the satisfaction of completing a DIY project but also contribute to sustainable living practices. So, roll up your sleeves, gather your tools, and let's embark on this fulfilling journey of constructing your very own outhouse.
Step 1: Choosing the Location
Selecting the right location for your outhouse is crucial for its functionality and overall appeal. Here are some key considerations to keep in mind as you choose the perfect spot for your outdoor sanitation facility:
-
Distance from Living Areas: When choosing a location for your outhouse, it's essential to consider its proximity to your living spaces. Ideally, the outhouse should be situated a reasonable distance away from your home, cabin, or any outdoor gathering areas. This helps maintain a comfortable level of privacy and minimizes any potential odors from reaching inhabited spaces.
-
Ground Elevation and Drainage: Assess the ground elevation and drainage patterns in the chosen area. It's important to place the outhouse on slightly elevated ground to prevent water accumulation during rainy seasons. Additionally, ensure that the location allows for proper drainage to avoid any potential flooding or waterlogging around the structure.
-
Accessibility and Privacy: Strike a balance between accessibility and privacy when selecting the location. While you want the outhouse to be easily reachable, especially during inclement weather, it's equally important to ensure that it's shielded from direct view. Consider natural barriers such as trees, shrubbery, or terrain features to provide a sense of seclusion.
-
Sunlight and Ventilation: Opt for a location that receives ample sunlight and allows for natural ventilation. Adequate sunlight helps minimize moisture buildup and discourages the growth of odor-causing bacteria. Additionally, good ventilation contributes to a more pleasant experience for users and aids in controlling odors.
-
Legal and Environmental Compliance: Before finalizing the location, familiarize yourself with local regulations and environmental guidelines pertaining to outhouse construction. Ensure that the chosen spot complies with any zoning restrictions, setback requirements, and environmental conservation measures in your area.
By carefully considering these factors, you can identify an optimal location for your outhouse that aligns with practicality, aesthetics, and environmental responsibility. Once you've chosen the perfect spot, you can proceed to the next steps of gathering materials and laying the foundation for your DIY outhouse project.
Step 2: Gathering Materials
Before diving into the construction process, it's essential to gather all the necessary materials and tools for building your outhouse. By ensuring that you have everything on hand, you can streamline the construction process and avoid unnecessary delays. Here's a comprehensive list of materials and tools you'll need to gather:
Materials:
- Lumber: Purchase high-quality, treated lumber for framing the structure. Opt for pressure-treated wood to enhance durability and resistance to decay.
- Plywood: Acquire sturdy plywood sheets for sheathing the walls and roof. Consider using exterior-grade plywood to withstand outdoor elements.
- Roofing Materials: Depending on your preference, choose asphalt shingles, metal roofing panels, or other suitable roofing materials to protect the outhouse from the elements.
- Concrete Blocks or Gravel: For the foundation, gather concrete blocks or gravel to provide stable support for the structure.
- Fasteners: Stock up on galvanized nails, screws, and other fasteners to secure the various components of the outhouse.
- Ventilation Pipe: Obtain a ventilation pipe and associated fittings to facilitate proper airflow within the outhouse.
- Door and Hardware: Select a durable, weather-resistant door along with hinges, a latch, and any additional hardware required for installation.
- Sealant and Paint: Invest in a high-quality sealant to protect the wood from moisture and apply exterior paint to enhance the outhouse's visual appeal while providing an extra layer of protection.
Tools:
- Circular Saw: A reliable circular saw will be indispensable for cutting lumber and plywood to the required dimensions.
- Hammer and Nails: Ensure you have a sturdy hammer and an ample supply of nails for framing and sheathing.
- Level and Tape Measure: These essential tools will help maintain accuracy and precision throughout the construction process.
- Drill and Screws: A power drill and a selection of screws will expedite the assembly of various components.
- Shovel: If opting for a gravel foundation, a sturdy shovel will be necessary for excavation and leveling.
- Paintbrushes and Rollers: Prepare the appropriate painting tools for applying sealant and exterior paint to the outhouse.
By gathering these materials and tools, you'll be well-equipped to commence the construction of your outhouse with confidence and efficiency. With everything in place, you can proceed to the next step of building the foundation, laying the groundwork for the successful completion of your DIY project.
Step 3: Building the Foundation
The foundation serves as the fundamental support system for your outhouse, ensuring stability and longevity. When constructing the foundation, it's crucial to adhere to proper building techniques to create a solid base for the structure. Here's a detailed overview of the steps involved in building the foundation for your outhouse:
Excavation and Site Preparation
Begin by marking the perimeter of the foundation area using stakes and string. Use a shovel to excavate the marked area to the desired depth, ensuring that the ground is level and free from any debris or obstructions. If opting for a concrete block foundation, dig the trenches to accommodate the blocks, ensuring uniform depth and alignment.
Installing the Footings
For a concrete block foundation, pour a shallow layer of gravel into the trenches to provide a stable base for the blocks. Place the concrete blocks evenly along the excavated area, ensuring that they are level and properly aligned. Use a spirit level to verify the evenness of the blocks, making adjustments as necessary to achieve uniformity.
Gravel Foundation Option
Alternatively, if opting for a gravel foundation, spread a layer of compacted gravel evenly across the excavated area. Use a hand tamper or mechanical compactor to firmly pack the gravel, creating a stable and level surface to support the outhouse structure.
Leveling and Alignment
Once the footings or gravel base is in place, verify the levelness and alignment of the foundation using a long, straight board and a spirit level. Make any necessary adjustments to ensure that the foundation is uniformly level and square, as this will directly impact the stability and structural integrity of the outhouse.
Final Checks and Compaction
Before proceeding to the next construction phase, perform a final check to confirm the stability and uniformity of the foundation. If using a gravel base, thoroughly compact the gravel to enhance its load-bearing capacity and minimize settling over time. For concrete block foundations, ensure that the blocks are securely positioned and free from any shifting or movement.
By meticulously executing these steps, you will establish a robust and reliable foundation for your outhouse, setting the stage for the subsequent phases of construction. With the foundation in place, you can confidently progress to the next steps of framing the walls and bringing your outhouse vision to fruition.
Step 4: Constructing the Walls
Constructing the walls of your outhouse is a pivotal phase that shapes the structural integrity and visual appeal of the entire facility. By meticulously following the steps outlined below, you can ensure that the walls are robust, weather-resistant, and aesthetically pleasing.
Framing the Walls
Begin by measuring and cutting the lumber to the required dimensions for framing the walls. Utilize a circular saw to make precise cuts, ensuring that the framing members are uniform in size. Assemble the lumber to form the wall frames, securing the joints with galvanized nails or screws for added strength. Pay close attention to maintaining squareness and alignment during the framing process to facilitate seamless assembly.
Sheathing the Walls
Once the wall frames are in place, proceed to sheath the exterior surfaces with plywood. Cut the plywood sheets to fit the dimensions of the wall frames, ensuring a snug and secure fit. Use galvanized nails or screws to affix the plywood to the frames, creating a sturdy and durable enclosure for the outhouse. Consider applying a weather-resistant barrier, such as building wrap, beneath the plywood to enhance protection against moisture and the elements.
Window and Ventilation Openings
If incorporating windows or ventilation openings in the walls, carefully measure and cut openings in the plywood sheathing as per your design specifications. Install window frames or ventilation grilles as needed, ensuring a proper seal to prevent water infiltration. These openings not only facilitate natural light and airflow but also contribute to the overall comfort and functionality of the outhouse.
Reinforcement and Bracing
To reinforce the structural integrity of the walls, consider adding diagonal bracing or corner braces at strategic locations. These reinforcements help mitigate potential sway and ensure that the walls remain stable and resilient, especially in areas prone to strong winds or seismic activity. Additionally, inspect the walls for any signs of warping or misalignment, making adjustments as necessary to maintain a uniform and plumb surface.
Inspection and Quality Assurance
Upon completing the wall construction, conduct a thorough inspection to verify the integrity and craftsmanship of the walls. Check for any gaps, protruding fasteners, or irregularities that may compromise the structural soundness or visual appeal. Address any identified issues promptly, ensuring that the walls meet the desired standards of quality and functionality.
By meticulously executing these steps, you will successfully construct the walls of your outhouse, laying the groundwork for the subsequent phases of adding the roof, door, and finishing touches. With the walls in place, your DIY outhouse project will steadily take shape, bringing you closer to the realization of a functional and charming outdoor sanitation facility.
Step 5: Installing the Roof
The installation of the roof marks a significant milestone in the construction of your outhouse, as it not only provides essential protection from the elements but also contributes to the overall aesthetic appeal of the structure. By meticulously following the steps outlined below, you can ensure a durable and visually appealing roof that complements the functionality and charm of your outdoor sanitation facility.
Roofing Material Selection
Begin by selecting the roofing material best suited for your outhouse. Common options include asphalt shingles, metal roofing panels, or cedar shakes, each offering distinct advantages in terms of durability, weather resistance, and visual appeal. Consider factors such as local climate, architectural compatibility, and personal preferences when making this crucial decision.
Roof Framing Preparation
Prepare the roof framing by installing rafters or trusses at the predetermined intervals, ensuring proper spacing and alignment. Utilize a level to confirm the evenness and straightness of the framing members, making any necessary adjustments to achieve structural integrity and uniformity. Additionally, incorporate a ridge board or beam to provide central support for the roof structure.
Sheathing and Underlayment
Once the roof framing is in place, proceed to sheath the roof with plywood or oriented strand board (OSB) to create a solid base for the roofing material. Secure the sheathing to the rafters using appropriate fasteners, ensuring a secure and uniform attachment. Subsequently, apply a weather-resistant underlayment, such as roofing felt or synthetic underlayment, to provide an additional barrier against moisture infiltration and enhance the longevity of the roof.
Roofing Material Installation
Carefully install the selected roofing material according to the manufacturer's guidelines, paying meticulous attention to proper alignment, fastening, and overlap. Whether laying asphalt shingles, securing metal panels, or arranging cedar shakes, ensure that each roofing component is securely affixed and contributes to a watertight and durable roof assembly. Adhere to recommended installation techniques to optimize the performance and longevity of the roofing material.
Flashing and Edging
Incorporate flashing at critical junctions, such as roof valleys, penetrations, and intersections, to prevent water seepage and reinforce the weatherproofing of the roof. Additionally, install appropriate edging materials, such as drip edge or rake edge, to enhance the aesthetics and functionality of the roof while safeguarding vulnerable edges from water intrusion and wind uplift.
Quality Assurance and Final Checks
Upon completing the roof installation, conduct a comprehensive inspection to verify the integrity, weatherproofing, and visual appeal of the roof. Check for any loose fasteners, misaligned components, or deficiencies that may compromise the roof's performance. Address any identified issues promptly, ensuring that the roof meets the highest standards of craftsmanship and functionality.
By meticulously executing these steps, you will successfully install a robust and visually appealing roof for your outhouse, culminating in a significant advancement toward the completion of your DIY project. With the roof in place, your outhouse will not only offer essential shelter and protection but also exude a charming and inviting presence within your outdoor space.
Step 6: Adding the Door and Ventilation
The addition of the door and ventilation system is a critical phase in the construction of your outhouse, as it contributes to both functionality and user comfort. By meticulously following the steps outlined below, you can ensure that your outhouse is equipped with a secure and accessible entry point, as well as adequate airflow to maintain a pleasant environment.
Installing the Door
Begin by selecting a sturdy and weather-resistant door that aligns with the dimensions and design of your outhouse. Whether opting for a pre-hung door unit or assembling the door components on-site, ensure that it provides a secure seal and smooth operation. Position the door within the designated opening, verifying proper alignment and clearance. Install durable hinges and a robust latch mechanism to secure the door, promoting privacy and ease of use. Consider incorporating a latch or lock for added security, especially if the outhouse will be situated in a public or shared space.
Ventilation System Implementation
Introduce a ventilation system to promote airflow and mitigate odors within the outhouse. A simple yet effective approach involves installing a vent pipe that extends from the interior of the outhouse to above the roofline. This vent pipe facilitates the release of odors and moisture, contributing to a more pleasant user experience. Ensure that the vent pipe is securely affixed and properly sealed to prevent water infiltration while allowing for unobstructed airflow. Additionally, consider incorporating a vent cap or screen to deter pests and debris from entering the ventilation system.
Sealing and Weatherproofing
Prioritize the effective sealing and weatherproofing of the door and ventilation components to safeguard the interior of the outhouse from the elements. Apply weather-stripping around the door frame to create a tight seal, minimizing drafts and enhancing thermal comfort. Similarly, seal any gaps or joints around the vent pipe to prevent water penetration and maintain the integrity of the structure. By addressing these crucial details, you can fortify the outhouse against inclement weather and ensure a durable and resilient construction.
Accessibility and User Experience
Consider the accessibility and user experience when finalizing the door and ventilation installation. Optimize the door's swing direction and handle placement for ergonomic operation, accommodating users of varying ages and abilities. Similarly, position the ventilation outlet to maximize airflow efficiency while minimizing potential obstructions. By prioritizing user comfort and convenience, you can elevate the functionality and appeal of your outhouse, enhancing its overall utility and desirability.
By meticulously executing these steps, you will successfully integrate a secure and functional door, along with an effective ventilation system, into your outhouse. These essential components not only contribute to the practicality and comfort of the facility but also reflect your commitment to quality craftsmanship and thoughtful design. With the door and ventilation in place, your outhouse will stand as a testament to your dedication to creating a sustainable and inviting outdoor sanitation solution.
Step 7: Finishing Touches
As you approach the final phase of constructing your outhouse, it's time to add the finishing touches that will elevate its functionality, aesthetics, and overall appeal. These subtle yet essential details will contribute to the completion of your DIY project, culminating in a well-crafted and inviting outdoor sanitation facility.
Exterior Treatment
Apply a protective sealant to the exterior surfaces of the outhouse, safeguarding the wood against moisture, UV exposure, and environmental wear. Choose a high-quality sealant specifically formulated for outdoor applications, ensuring comprehensive coverage to prolong the lifespan of the structure. Additionally, consider applying exterior paint in a color scheme that harmonizes with the natural surroundings, enhancing the visual integration of the outhouse within its outdoor environment.
Interior Comfort
Enhance the interior comfort of the outhouse by incorporating practical amenities such as a toilet seat, toilet paper holder, and a simple hand sanitizer dispenser. These thoughtful additions elevate the user experience and demonstrate your attention to detail in creating a functional and welcoming space. Ensure that these elements are securely installed and easily accessible, promoting convenience and hygiene for users.
Landscaping Integration
Integrate the outhouse into the surrounding landscape by strategically planting native shrubs, ornamental grasses, or flowering perennials around the structure. This landscaping approach softens the visual impact of the outhouse, blending it harmoniously with the natural environment. Additionally, consider defining a clear pathway leading to the outhouse, using gravel, stepping stones, or natural pavers to establish a designated approach that complements the rustic charm of the facility.
Signage and Information
Install a discreet yet informative sign near the outhouse, providing essential guidance and instructions for users. Include simple directives on proper usage, waste disposal guidelines, and any relevant safety information. This proactive approach promotes responsible use of the facility and fosters a sense of community engagement in maintaining a clean and organized outdoor space.
Final Inspection
Conduct a comprehensive final inspection of the outhouse, addressing any remaining touch-ups, adjustments, or minor enhancements. Verify the structural integrity, weatherproofing, and overall presentation of the facility, ensuring that it aligns with your vision of a well-crafted and functional outdoor sanitation solution.
By attending to these finishing touches, you will bring your outhouse project to its completion, infusing it with character, practicality, and a sense of thoughtful design. With the finishing touches in place, your outhouse stands as a testament to your dedication to sustainable living and craftsmanship, offering a valuable addition to your outdoor space.
Conclusion
In conclusion, the journey of building your own outhouse is not just a practical endeavor but a testament to embracing sustainable living practices and the art of craftsmanship. From the initial selection of the perfect location to the final finishing touches, every step in the construction process contributes to the creation of a functional and aesthetically pleasing outdoor sanitation facility.
By carefully considering factors such as distance from living areas, ground elevation, accessibility, and environmental compliance during the location selection, you set the stage for a harmonious integration of the outhouse within your outdoor space. This thoughtful approach ensures that the outhouse not only serves its practical purpose but also enhances the overall ambiance of the environment.
Gathering the necessary materials and tools is a crucial preparatory phase that streamlines the construction process, allowing for efficient progress and minimizing potential delays. The careful selection of high-quality lumber, roofing materials, fasteners, and ventilation components sets the foundation for a durable and well-equipped outhouse.
Building the foundation and constructing the walls are pivotal stages that establish the structural integrity and stability of the outhouse. Attention to detail during these phases ensures that the foundation provides a solid base for the structure, while the walls offer robust protection and visual appeal.
The installation of the roof, door, and ventilation system further enhances the functionality and comfort of the outhouse, providing essential shelter, accessibility, and airflow. These elements not only contribute to the practicality of the facility but also reflect a commitment to creating a welcoming and user-friendly space.
Adding the finishing touches, such as exterior treatment, interior amenities, landscaping integration, and informative signage, elevates the outhouse from a mere structure to a thoughtfully designed and integrated part of the outdoor environment. These details demonstrate a holistic approach to creating a sustainable and inviting outdoor sanitation solution.
As you complete the construction of your outhouse, you not only gain the satisfaction of a DIY accomplishment but also contribute to sustainable living practices. Your outhouse stands as a symbol of responsible stewardship of the environment and a testament to the timeless art of craftsmanship. It offers a valuable addition to your outdoor space, embodying practicality, charm, and a commitment to sustainable living.