
Home>Create & Decorate>DIY & Crafts>DIY Patio Cover: Transform Your Outdoor Space With This Step-by-Step Guide
DIY & Crafts
DIY Patio Cover: Transform Your Outdoor Space With This Step-by-Step Guide
Modified: May 30, 2024

Content Creator specializing in woodworking and interior transformations. Caegan's guides motivate readers to undertake their own projects, while his custom furniture adds a personal touch.
Transform your outdoor space with our step-by-step DIY patio cover guide. Create a stylish and functional addition to your home with our DIY & Crafts project.
(Many of the links in this article redirect to a specific reviewed product. Your purchase of these products through affiliate links helps to generate commission for Twigandthistle.com, at no extra cost. Learn more)
Introduction
Transforming your outdoor space into a cozy and inviting retreat can be a rewarding DIY project. One of the most effective ways to achieve this is by adding a patio cover. Not only does a patio cover provide shade and protection from the elements, but it also enhances the aesthetic appeal of your outdoor area. Whether you're looking to create a comfortable spot for al fresco dining, a relaxing lounge area, or a place to entertain guests, a well-designed patio cover can elevate the functionality and charm of your outdoor space.
In this comprehensive guide, we will walk you through the step-by-step process of building a DIY patio cover. From planning and designing to gathering materials, constructing the frame, installing the roofing, and adding finishing touches, we've got you covered. With the right tools, materials, and a bit of creativity, you can create a stylish and functional patio cover that complements your home's architecture and meets your specific needs.
By following this guide, you'll not only save on the costs of hiring a professional contractor but also have the satisfaction of creating a custom outdoor feature that reflects your personal style. Whether you're a seasoned DIY enthusiast or a novice looking to take on a new project, this guide will provide you with the knowledge and confidence to tackle the construction of a patio cover. So, roll up your sleeves, gather your tools, and let's embark on this exciting journey to transform your outdoor space into a haven of comfort and style.
Step 1: Planning and Designing Your Patio Cover
Before diving into the construction phase, it's crucial to lay a solid foundation through meticulous planning and thoughtful design. This initial step sets the stage for a successful and well-executed patio cover project. Here's a detailed breakdown of the planning and designing process:
-
Assess Your Needs and Preferences: Begin by envisioning how you intend to use the covered patio. Are you aiming for a space to host outdoor gatherings, a tranquil reading nook, or a dining area? Understanding your specific requirements will guide the design and layout of the patio cover.
-
Consider the Aesthetic and Architectural Harmony: Take into account the architectural style of your home and the overall aesthetic you wish to achieve. Whether you prefer a modern, minimalist design or a more traditional look, aligning the patio cover with your home's architecture will create a cohesive and visually appealing outdoor space.
-
Determine the Size and Placement: Measure the available outdoor area to determine the ideal size and placement of the patio cover. Consider factors such as the orientation of the sun, prevailing winds, and the proximity to indoor living spaces to optimize comfort and functionality.
-
Select Suitable Materials: Choose materials that not only complement your home but also withstand the local climate. Whether you opt for wood, metal, or a combination of materials, ensure they are durable, low-maintenance, and visually appealing.
-
Create a Detailed Design Plan: Sketch out a detailed design plan that includes the dimensions, structural elements, and any additional features such as lighting or ceiling fans. This plan will serve as a roadmap during the construction phase and help you visualize the end result.
-
Check Local Building Codes and Permits: Before finalizing your design, research local building codes and permit requirements. Compliance with regulations ensures the safety and legality of your patio cover project.
By dedicating time to the planning and design phase, you'll lay a solid groundwork for a well-crafted patio cover that seamlessly integrates with your outdoor space and enhances your lifestyle. Once the planning is complete, you'll be ready to move on to the next exciting phase of gathering materials and tools.
Step 2: Gathering Materials and Tools
Gathering the necessary materials and tools is a pivotal step in the journey of constructing a DIY patio cover. By ensuring that you have all the essential components at your disposal, you can streamline the construction process and minimize interruptions. Here's a comprehensive list of materials and tools you'll need to bring your patio cover vision to life:
Materials:
-
Lumber: Select high-quality pressure-treated or weather-resistant lumber for the frame and support beams. The specific dimensions and quantity will depend on the size and design of your patio cover.
-
Roofing Materials: Choose from a variety of roofing options such as corrugated metal panels, polycarbonate sheets, or traditional shingles. Consider factors like durability, aesthetics, and weather resistance when making your selection.
-
Fasteners: Stock up on galvanized screws, nails, and bolts suitable for outdoor use. Ensure that the fasteners are corrosion-resistant to prolong the lifespan of your patio cover.
-
Concrete and Anchors: If your patio cover will have posts or footings, you'll need concrete mix for securing the posts and anchors for stability.
-
Hardware and Connectors: Invest in sturdy hardware such as joist hangers, post bases, and brackets to reinforce the structural integrity of the patio cover.
-
Paint or Stain: If you plan to finish the wood elements of your patio cover, acquire exterior-grade paint or stain in your preferred color and finish.
-
Sealant and Caulk: Weatherproofing is essential for ensuring the longevity of your patio cover. Purchase a high-quality sealant and caulk to protect vulnerable areas from moisture and the elements.
-
Decorative Elements: Depending on your design preferences, consider adding decorative elements such as trim pieces, lattice panels, or ornamental accents to enhance the visual appeal of your patio cover.
Tools:
-
Measuring Tools: A tape measure, carpenter's square, and level are indispensable for precise measurements and ensuring the squareness and alignment of the structure.
-
Cutting Tools: A circular saw or miter saw will be essential for cutting lumber and roofing materials to the required dimensions.
-
Drilling and Fastening Tools: A power drill with a variety of drill bits, impact driver, and a hammer will facilitate the assembly of the frame and attachment of roofing materials.
-
Safety Gear: Prioritize safety by equipping yourself with protective gear including gloves, safety glasses, and a dust mask.
-
Ladder or Scaffolding: Depending on the height of your patio cover, a stable ladder or scaffolding will be necessary for working at elevated positions safely.
-
Assorted Hand Tools: Screwdrivers, adjustable wrenches, and a rubber mallet are among the hand tools that will come in handy during the construction process.
By procuring the right materials and tools, you'll be well-prepared to embark on the construction phase with confidence and efficiency. With everything in place, you're ready to move on to the next step: preparing the area for the installation of your DIY patio cover.
Step 3: Preparing the Area
Preparing the area for your DIY patio cover is a critical phase that sets the groundwork for the structural integrity and longevity of the project. This step involves several key tasks aimed at ensuring a stable and level foundation for the patio cover. Here's a detailed breakdown of the essential steps involved in preparing the area:
-
Clearing the Site: Begin by clearing the designated area of any obstructions, debris, or vegetation. This includes removing rocks, roots, and any existing structures that may interfere with the installation of the patio cover. A clean and level site is essential for the proper assembly and stability of the structure.
-
Marking the Layout: Use marking paint or stakes and string to outline the dimensions and layout of the patio cover. This visual guide will help you visualize the placement of the support posts, frame, and roofing, ensuring that the structure aligns with your initial design plan.
-
Excavation and Footings: If your patio cover design includes support posts or footings, excavation will be necessary to create stable foundations. Dig the required holes for the footings, ensuring that they are below the frost line and comply with local building codes. Once the holes are dug, pour concrete into the excavated areas and insert post anchors or embed the support posts, ensuring they are plumb and securely positioned.
-
Grading and Leveling: Ensure that the ground where the patio cover will be installed is properly graded to facilitate drainage and prevent water accumulation. Use a level to confirm that the site is uniformly level, making adjustments as needed to achieve a stable and even base for the patio cover.
-
Utilities and Considerations: Take into account any underground utilities or cables that may be present in the area. It's crucial to avoid digging or disturbing these utilities during the preparation process. Additionally, consider factors such as access to electrical outlets if you plan to incorporate lighting or fans into your patio cover design.
-
Surface Preparation: Depending on the surface where the patio cover will be installed, such as a concrete patio or a ground-level deck, ensure that the surface is clean and free of any obstacles. If necessary, make any repairs or modifications to the existing surface to ensure it provides a stable and secure foundation for the patio cover.
By meticulously preparing the area for the installation of your patio cover, you'll establish a solid base for the subsequent construction phases. With the site cleared, graded, and ready for the next steps, you'll be well-positioned to move forward with building the frame and bringing your vision of a stylish and functional patio cover to fruition.
Step 4: Building the Frame
With the area prepared, it's time to embark on the pivotal phase of constructing the frame for your DIY patio cover. The frame serves as the structural backbone, providing support for the roofing materials and ensuring the stability and durability of the entire structure. Here's a detailed guide on the essential steps involved in building the frame for your patio cover:
-
Cutting and Assembling the Lumber: Begin by cutting the lumber to the specified dimensions based on your design plan. Use a tape measure and a carpenter's square to ensure precision in the cutting process. Once the lumber pieces are cut to size, assemble the frame components according to your design, taking care to maintain squareness and alignment.
-
Installing Support Posts or Beams: If your patio cover design includes support posts or beams, position them at the designated locations based on your layout. Use a level to ensure that the posts are plumb and securely anchored in place. Additionally, install post bases or brackets to provide a stable connection between the posts and the ground or footings.
-
Attaching Joists and Rafters: With the support posts in place, attach the horizontal joists or rafters to create the framework for the roof structure. Secure the joists to the support posts using appropriate hardware such as joist hangers or brackets. Ensure that the spacing between the joists is uniform to provide adequate support for the roofing materials.
-
Reinforcing the Frame: To enhance the structural integrity of the frame, reinforce critical connections with additional hardware such as angle brackets and structural screws. This step is crucial for ensuring that the frame can withstand external forces such as wind and snow loads, providing a secure and long-lasting patio cover.
-
Checking for Level and Alignment: Throughout the assembly process, regularly check the level and alignment of the frame components. This meticulous attention to detail ensures that the frame is structurally sound and ready to support the roofing materials. Make any necessary adjustments to maintain the squareness and stability of the frame.
-
Applying Weatherproofing Treatment: Before proceeding to the next phase, consider applying a weatherproofing treatment to the lumber components of the frame. This treatment helps protect the wood from moisture, UV exposure, and other environmental factors, extending the lifespan of your patio cover.
By meticulously following these steps, you'll successfully build a sturdy and well-constructed frame for your patio cover. With the frame in place, you're ready to progress to the next phase of the construction process: installing the roofing materials to provide shelter and protection for your outdoor space.
Step 5: Installing the Roofing
The installation of roofing materials is a pivotal phase in the construction of your DIY patio cover, as it provides shelter and protection from the elements while enhancing the visual appeal of the outdoor space. Here's a detailed guide on the essential steps involved in installing the roofing for your patio cover:
-
Selecting the Roofing Material: Begin by selecting the roofing material that best suits your design, climate, and aesthetic preferences. Options such as corrugated metal panels, polycarbonate sheets, or traditional shingles offer varying degrees of durability, light transmission, and visual appeal. Consider factors such as weather resistance, maintenance requirements, and compatibility with the overall design of your patio cover.
-
Measuring and Cutting: Accurate measurements are crucial for ensuring a precise fit and professional finish when installing roofing materials. Use a tape measure and marking tools to measure and mark the roofing panels or shingles according to the dimensions of the frame. Employ a circular saw or specialized cutting tools designed for the specific roofing material to achieve clean and precise cuts.
-
Securing the Roofing: Depending on the selected material, secure the roofing panels or shingles to the frame using appropriate fasteners. For corrugated metal panels, use specialized screws with rubber washers to prevent water infiltration. When installing shingles, follow the manufacturer's guidelines for the correct placement and fastening techniques. Ensure that the roofing materials are securely attached to the frame to withstand wind, rain, and other environmental factors.
-
Sealing and Weatherproofing: To enhance the longevity and weather resistance of the patio cover, apply sealant or caulk to the seams, edges, and fastener locations of the roofing materials. This step helps prevent water penetration and ensures a watertight seal, safeguarding the underlying structure from moisture and potential damage. Additionally, consider adding flashing or edge trims to further enhance the weatherproofing and aesthetic appeal of the roofing installation.
-
Integration with the Frame: Ensure that the roofing materials integrate seamlessly with the frame and support structure of the patio cover. Pay attention to the alignment, overhang, and drainage features to optimize the functionality and visual cohesiveness of the roofing installation. Proper integration with the frame is essential for creating a durable and visually appealing shelter for your outdoor space.
By meticulously following these steps, you'll successfully install the roofing for your DIY patio cover, creating a functional and stylish outdoor retreat that enhances the comfort and aesthetic appeal of your home. With the roofing in place, you're one step closer to completing your custom patio cover and enjoying the benefits of your outdoor oasis.
Step 6: Adding Finishing Touches
As you approach the final phase of your DIY patio cover project, adding finishing touches will elevate the visual appeal, functionality, and overall ambiance of your outdoor space. These thoughtful details not only contribute to the aesthetic charm of the patio cover but also enhance its usability and comfort. Here's a detailed guide on the essential steps involved in adding finishing touches to your patio cover:
1. Lighting and Ambiance
Integrating lighting elements such as string lights, lanterns, or recessed fixtures can extend the functionality of your patio cover into the evening hours. Consider energy-efficient LED lighting options that provide a warm and inviting glow, creating a captivating ambiance for outdoor gatherings or quiet relaxation.
2. Ceiling Fans and Ventilation
Incorporating ceiling fans not only enhances air circulation and comfort during warm weather but also adds a touch of sophistication to the patio cover. Choose fans with weather-resistant finishes and consider options with integrated lighting for added functionality.
3. Decorative Accents
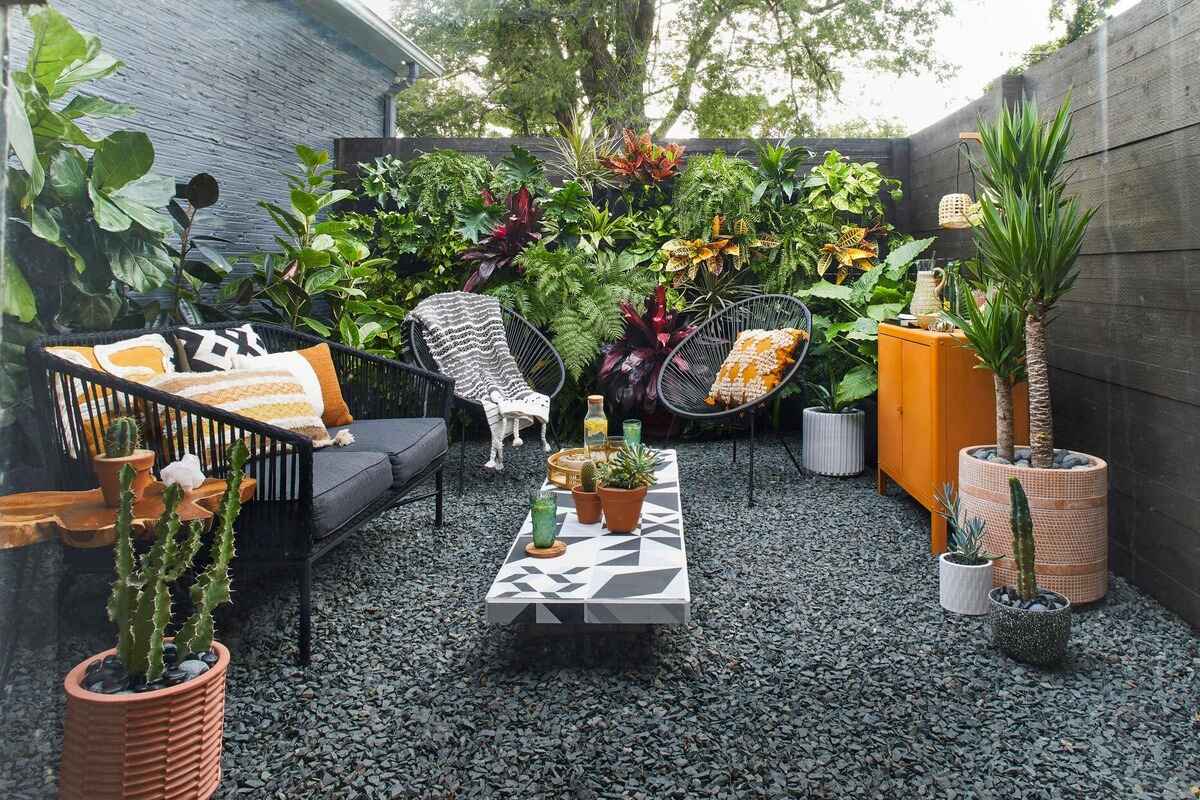
Personalize your patio cover with decorative accents such as potted plants, hanging baskets, or outdoor artwork. These elements infuse character and charm into the space, reflecting your unique style and creating a welcoming outdoor retreat.
4. Furniture and Furnishings
Selecting comfortable and durable outdoor furniture transforms the patio cover into a functional and inviting living area. Whether it's a cozy seating arrangement, a dining set, or a relaxing chaise lounge, the right furniture enhances the usability and comfort of the space.
5. Privacy and Screening
Incorporate privacy features such as latticework, outdoor curtains, or strategically positioned plants to create a sense of seclusion and intimacy within the patio cover. These elements provide a retreat-like atmosphere and shield the space from neighboring views.
6. Maintenance and Care
Implement a maintenance plan to preserve the beauty and functionality of your patio cover. This may include regular cleaning, wood treatment, and inspection of roofing materials to ensure longevity and structural integrity.
By attending to these finishing touches, you'll transform your DIY patio cover into a captivating and functional outdoor sanctuary. Each detail contributes to the overall appeal and usability of the space, creating a seamless integration with your home and lifestyle. With the completion of these final touches, your custom patio cover will stand as a testament to your craftsmanship and creativity, providing a cherished space for relaxation, entertainment, and enjoyment of the outdoors.
Conclusion
Congratulations on successfully completing the construction of your DIY patio cover! By following this comprehensive guide, you've embarked on a fulfilling journey that has transformed your outdoor space into a haven of comfort, style, and functionality. As you reflect on the meticulous planning, precise construction, and thoughtful details that have gone into creating your custom patio cover, it's evident that your efforts have yielded a remarkable addition to your home.
Your patio cover stands as a testament to your creativity, craftsmanship, and dedication to enhancing your living environment. Beyond the tangible structure, it represents the countless hours of envisioning, planning, and hands-on work that have culminated in a space that seamlessly integrates with your lifestyle and reflects your personal taste.
As you step back and admire the finished patio cover, take pride in the fact that you've not only added value to your home but also created a welcoming retreat for relaxation, entertainment, and connection with the outdoors. The thoughtful design, sturdy construction, and attention to detail have resulted in a space that beckons you to unwind, host gatherings, and savor the simple joys of outdoor living.
Moving forward, your newly constructed patio cover invites you to make lasting memories, whether it's enjoying leisurely meals with loved ones, basking in the gentle breeze under the shade, or simply finding solace in the tranquility of your outdoor sanctuary. The versatility of the space allows for a myriad of activities, from lively social gatherings to quiet moments of contemplation, making it a cherished extension of your home.
As you settle into the comfort of your patio cover, surrounded by the finishing touches that reflect your personality and preferences, take a moment to appreciate the transformation that has taken place. Your outdoor space has evolved into a multifaceted retreat that adapts to your needs and offers a seamless transition between indoor and outdoor living.
In conclusion, the completion of your DIY patio cover marks not only the end of a construction project but the beginning of a new chapter in your home's story. It's a testament to your ingenuity, resourcefulness, and commitment to creating a space that enriches your daily life. Embrace the opportunities that your patio cover presents, and relish in the joy of having crafted a space that embodies your vision and enhances the beauty of your home.