
Home>Create & Decorate>DIY & Crafts>DIY Outdoor Table: How To Build Your Own Stylish Patio Furniture
DIY & Crafts
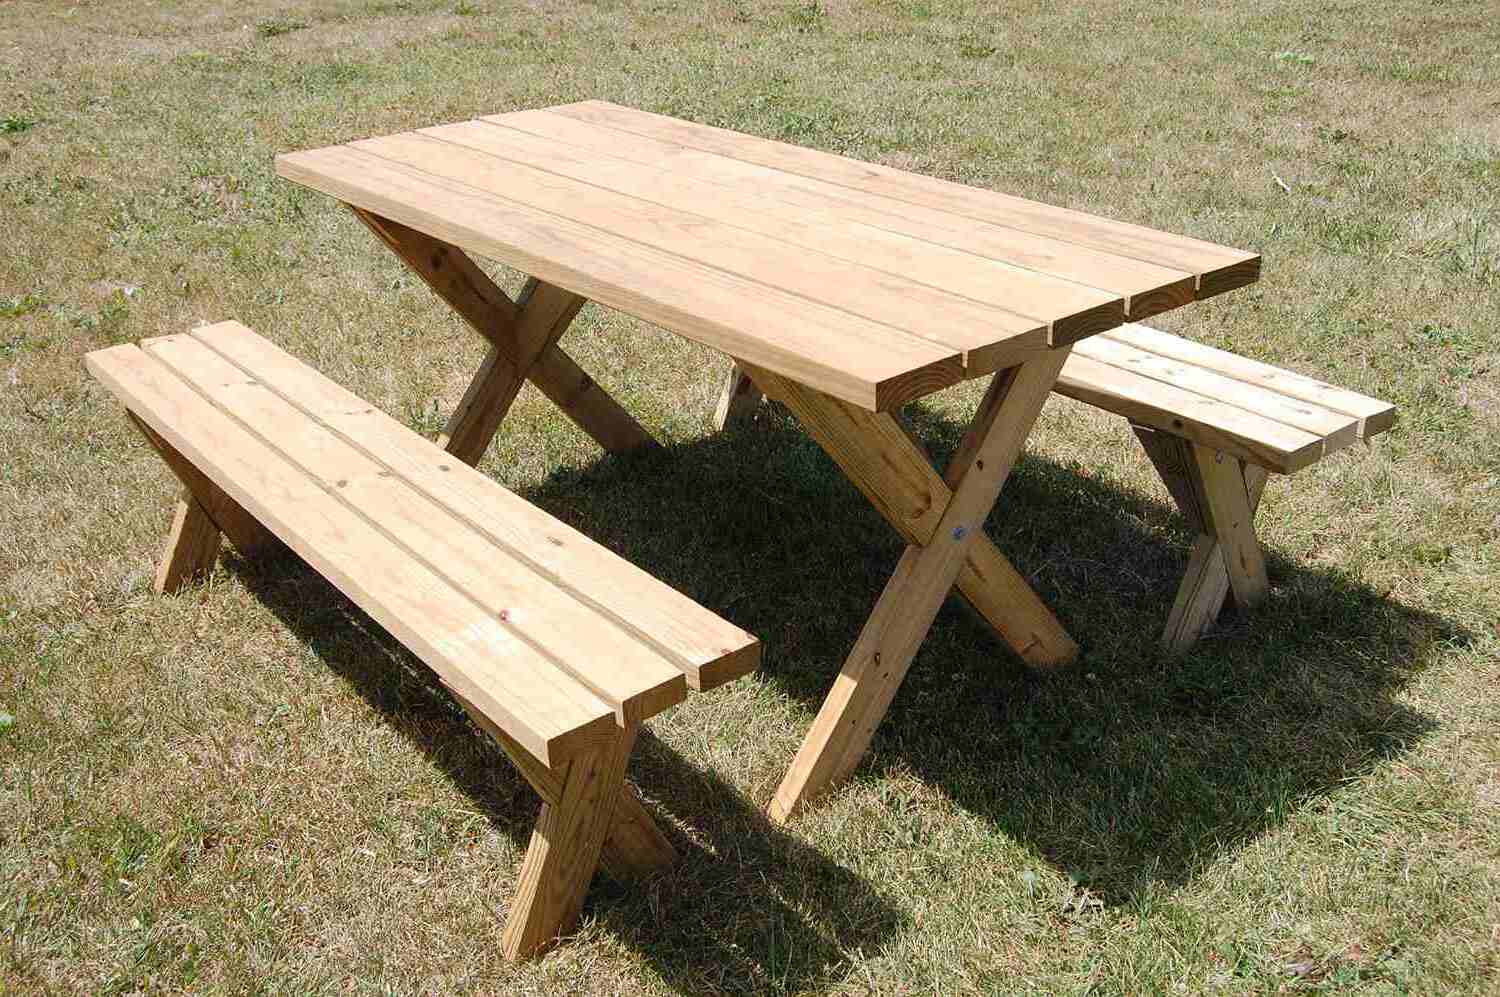
DIY Outdoor Table: How To Build Your Own Stylish Patio Furniture
Published: May 13, 2024

Content Creator specializing in woodworking and interior transformations. Caegan's guides motivate readers to undertake their own projects, while his custom furniture adds a personal touch.
Learn how to create your own stylish patio furniture with our DIY outdoor table guide. Get inspired with our DIY & Crafts tips and start building today!
(Many of the links in this article redirect to a specific reviewed product. Your purchase of these products through affiliate links helps to generate commission for Twigandthistle.com, at no extra cost. Learn more)
Introduction
Are you looking to spruce up your outdoor space with a stylish and functional piece of furniture? Building your own DIY outdoor table is a great way to add a personal touch to your patio while also saving some money. In this article, we will guide you through the step-by-step process of creating your own outdoor table that will be perfect for entertaining guests or simply enjoying a meal al fresco. With the right materials and a little bit of elbow grease, you can have a beautiful and sturdy outdoor table that will be the envy of your neighborhood. So, roll up your sleeves and let's get started on this fun and rewarding project!
Materials Needed
To build your own DIY outdoor table, you will need the following materials:
- Wood: Choose a durable and weather-resistant wood such as cedar, redwood, or pressure-treated lumber for the tabletop and legs.
- Screws: Opt for corrosion-resistant screws that are suitable for outdoor use.
- Wood Glue: Use weatherproof wood glue to ensure the sturdiness of the table.
- Wood Stain or Paint: Select a finish that is designed for outdoor applications to protect the wood from the elements.
- Sandpaper: Have a variety of grits on hand for sanding the wood to a smooth finish.
- Polyurethane Sealant: This will provide an extra layer of protection for the tabletop against moisture and UV rays.
- Measuring Tape and Pencil: Essential for marking and measuring the wood accurately.
- Safety Gear: Don't forget to wear safety goggles and gloves to protect yourself during the construction process.
Gathering these materials before you begin will ensure that you have everything you need to complete the project smoothly and efficiently.
Tools Required
When it comes to building your own DIY outdoor table, having the right tools at your disposal is crucial for a successful project. Here are the essential tools you will need:
- Circular Saw: Perfect for making straight and precise cuts on the wood for the tabletop and legs.
- Drill and Bits: An electric drill with a variety of drill bits will be necessary for creating holes and driving screws into the wood.
- Screwdriver: Both a manual and electric screwdriver will come in handy for assembling the table.
- Clamps: These will help hold the wood pieces together securely during assembly.
- Level: Ensures that the tabletop and legs are perfectly aligned and balanced.
- Paintbrushes or Stain Applicators: For applying the wood stain or paint evenly onto the tabletop and legs.
- Sanding Block or Orbital Sander: Makes the sanding process quicker and more efficient.
- Workbench or Sawhorses: Provides a stable surface for cutting and assembling the wood.
- Dust Mask: Protects you from inhaling sawdust and wood particles during the cutting and sanding process.
Having these tools on hand will make the construction process smoother and more enjoyable, allowing you to create a beautiful outdoor table with ease.
Step 1: Cutting the Wood
The first step in building your DIY outdoor table is to cut the wood to the appropriate dimensions. Using a measuring tape and pencil, mark the tabletop and leg pieces according to your desired table size. Then, using a circular saw, carefully cut the wood along the marked lines. It's crucial to ensure that the cuts are straight and accurate to guarantee a well-constructed table. Take your time and double-check your measurements before making any cuts to avoid any errors that could affect the table's stability and appearance.
Once the tabletop and leg pieces are cut to size, use a sanding block or orbital sander to smooth out any rough edges and surfaces. This will not only give the table a polished look but also prevent any splinters when the table is in use. Be thorough in your sanding to achieve a professional finish, and remember to wear a dust mask to protect yourself from inhaling wood particles during the sanding process.
After the wood is cut and sanded, you are ready to move on to the next step of assembling the tabletop, bringing you one step closer to completing your stylish DIY outdoor table.
Step 2: Assembling the Tabletop
With the wood pieces cut and sanded, it's time to assemble the tabletop. Lay the tabletop pieces on a flat surface, ensuring that they fit together seamlessly. Apply a thin, even layer of weatherproof wood glue along the edges of the tabletop pieces to create a strong bond. Then, using clamps, secure the pieces together and wipe off any excess glue with a damp cloth.
Next, pre-drill pilot holes along the edges of the tabletop to prevent the wood from splitting when you drive in the screws. Once the pilot holes are in place, use corrosion-resistant screws to attach the tabletop pieces together firmly. Be sure to countersink the screws slightly below the surface of the wood to achieve a smooth and even tabletop.
After the tabletop pieces are securely fastened, use a level to check for any unevenness. Making adjustments at this stage will ensure that your tabletop is flat and stable. Once you're satisfied with the alignment, allow the wood glue to dry completely before moving on to the next step of building your DIY outdoor table.
The tabletop is a crucial component of your outdoor table, so taking the time to assemble it accurately will result in a sturdy and visually appealing centerpiece for your patio. With the tabletop assembled, you're ready to proceed to the next stage of constructing the table legs.
Step 3: Building the Table Legs
Now that the tabletop is assembled, it's time to focus on building the table legs. Start by measuring and cutting the wood for the legs to your desired height, ensuring that all four legs are the same length. Once the pieces are cut, use a sanding block or orbital sander to smooth out any rough edges and surfaces, just as you did with the tabletop and other wood pieces.
Next, it's time to create the leg assemblies. Lay two leg pieces parallel to each other and measure and mark where the cross supports will be attached. Use a drill and screws to secure the cross supports to the legs, creating a sturdy and stable base for the table. Ensure that the legs are evenly spaced and perpendicular to the tabletop to guarantee a balanced and level surface.
After the leg assemblies are constructed, it's essential to attach them to the tabletop securely. Position the tabletop upside down on a flat surface and place the leg assemblies at each corner. Pre-drill pilot holes through the tabletop and into the legs, then use corrosion-resistant screws to fasten the legs to the tabletop firmly. Double-check the alignment and stability of the legs to ensure that they can support the weight of the tabletop and withstand outdoor conditions.
With the table legs securely attached, your DIY outdoor table is taking shape and becoming closer to completion. The next step will focus on sanding and finishing the table to enhance its appearance and protect it from the elements.
Step 4: Attaching the Legs to the Tabletop
With the table legs constructed, it's time to attach them securely to the tabletop. Position the tabletop upside down on a flat surface, ensuring that it is stable and well-supported. Place the leg assemblies at each corner of the tabletop, making sure they are evenly spaced and aligned.
Using a drill, create pilot holes through the tabletop and into the legs. These pilot holes will guide the screws and prevent the wood from splitting during the attachment process. It's important to use the appropriate length of screws to ensure a strong and secure connection between the tabletop and the legs.
Once the pilot holes are in place, use corrosion-resistant screws to fasten the legs to the tabletop firmly. Make sure to drive the screws in snugly, but be cautious not to overtighten them, as this could cause the wood to crack or split.
After attaching all the legs to the tabletop, carefully flip the table over to its upright position. Double-check the alignment and stability of the legs to ensure that they can support the weight of the tabletop and withstand outdoor conditions.
By securely attaching the legs to the tabletop, you are one step closer to completing your DIY outdoor table. The next and final step will focus on sanding and finishing the table to enhance its appearance and protect it from the elements.
Step 5: Sanding and Finishing
After the construction of the table, the next crucial step is sanding and finishing to ensure a polished and protected final product. Start by using fine-grit sandpaper to smooth out any rough spots, edges, or surfaces on the tabletop and legs. This step not only enhances the visual appeal of the table but also prevents any splinters or rough patches that could detract from the overall experience of using the table.
Once the sanding is complete, it's time to apply a protective finish to the table. Whether you choose to use wood stain or paint, make sure to select a product that is specifically designed for outdoor use. Apply the stain or paint evenly to the tabletop and legs, following the manufacturer's instructions for the best results. This protective finish not only adds a pop of color to your outdoor table but also shields the wood from the damaging effects of moisture, UV rays, and other outdoor elements.
After the stain or paint has dried, consider applying a coat of polyurethane sealant to provide an extra layer of protection. The sealant will help safeguard the table from water damage, sun exposure, and general wear and tear, ensuring that your DIY outdoor table remains in top-notch condition for years to come.
Once the finishing touches are complete, step back and admire your handiwork. Your DIY outdoor table is now ready to take its place as a stylish and functional addition to your patio or outdoor space. Whether you're hosting a gathering with friends or simply enjoying a peaceful moment outdoors, your custom-built table will be a source of pride and satisfaction, showcasing your craftsmanship and creativity.
Conclusion
In conclusion, building your own DIY outdoor table is a rewarding and fulfilling project that allows you to create a stylish and functional piece of furniture for your outdoor space. By following the step-by-step process outlined in this guide, you can craft a durable and visually appealing table that will be perfect for entertaining guests, enjoying meals, or simply relaxing outdoors. From cutting and assembling the wood to sanding and finishing the table, each stage of the construction process contributes to the overall quality and longevity of the final product. With the right materials, tools, and a bit of patience, you can achieve a custom-built outdoor table that reflects your personal style and enhances the ambiance of your outdoor living area. So, roll up your sleeves, gather your supplies, and embark on this DIY adventure to create a stunning outdoor table that you can be proud of for years to come.