
Home>Home & Furniture>Bathroom>How To Build A Shower Pan
Bathroom
How To Build A Shower Pan
Published: February 22, 2024
Editor-in-Chief with a decade in home renovation and a passion for vintage furniture. Diane is known for her weekend treasure hunts at flea markets, enriching our content with unique style insights.
Learn how to build a custom shower pan for your bathroom with our step-by-step guide. Create a durable and waterproof base for your shower installation.
(Many of the links in this article redirect to a specific reviewed product. Your purchase of these products through affiliate links helps to generate commission for Twigandthistle.com, at no extra cost. Learn more)
Introduction
Building a shower pan is a crucial step in creating a durable and watertight shower enclosure. Whether you're renovating a bathroom or constructing a new one, understanding the process of building a shower pan is essential for ensuring a long-lasting and functional shower space. A well-constructed shower pan not only provides a solid foundation for the shower floor but also prevents water from seeping into the subfloor, thus averting potential water damage and mold growth.
The process of building a shower pan involves several key steps, including preparing the subfloor, installing the drain, creating the necessary slope for proper drainage, waterproofing the shower pan, and pouring the mortar base. Each of these steps plays a critical role in ensuring that the shower pan is structurally sound and effectively channels water toward the drain.
By following a systematic approach and using the right materials and tools, you can successfully build a shower pan that meets industry standards and withstands the test of time. This comprehensive guide will walk you through each stage of the process, providing detailed instructions and valuable insights to help you achieve a professional-quality shower pan installation.
Whether you're a seasoned DIY enthusiast or a homeowner looking to gain a deeper understanding of the construction process, this guide will equip you with the knowledge and confidence to tackle the task of building a shower pan with precision and skill. With a clear understanding of the fundamentals and a methodical approach, you can embark on this rewarding project and take pride in creating a well-crafted shower pan that enhances the functionality and aesthetic appeal of your bathroom.
Materials and Tools Needed
Before embarking on the process of building a shower pan, it's essential to gather the necessary materials and tools to ensure a smooth and efficient installation. Here's a comprehensive list of items you'll need to complete this project:
Materials:
- Shower Pan Liner: A waterproof barrier that prevents water from seeping into the subfloor. It's typically made of PVC or CPE (Chlorinated Polyethylene) and is available in various sizes to accommodate different shower dimensions.
- Mortar Mix: A blend of cement, sand, and additives used to create a sturdy base for the shower floor. Opt for a high-quality mortar mix designed for shower installations.
- Shower Drain Assembly: Consisting of a drain body, strainer, and waterproofing components, the shower drain assembly facilitates proper water drainage and ensures a watertight seal.
- Caulk: Waterproof caulk is essential for sealing joints and seams to prevent water infiltration. Choose a caulk that is specifically formulated for wet environments.
- Gravel or Aggregate: Used to create a stable base for the shower pan and facilitate proper drainage.
- Wood Shims: These are utilized to level the shower pan and ensure a uniform slope towards the drain.
- Framing Lumber: Necessary for constructing the framework that supports the shower pan and provides structural stability.
- Waterproofing Membrane: An additional layer of waterproofing material applied to the shower walls and curb to reinforce protection against moisture.
Tools:
- Trowel: A notched trowel is essential for spreading mortar and achieving a uniform application on the shower pan base.
- Level: To ensure that the shower pan slope is accurately established for efficient water drainage.
- Utility Knife: Used for cutting the shower pan liner and other materials to the required dimensions.
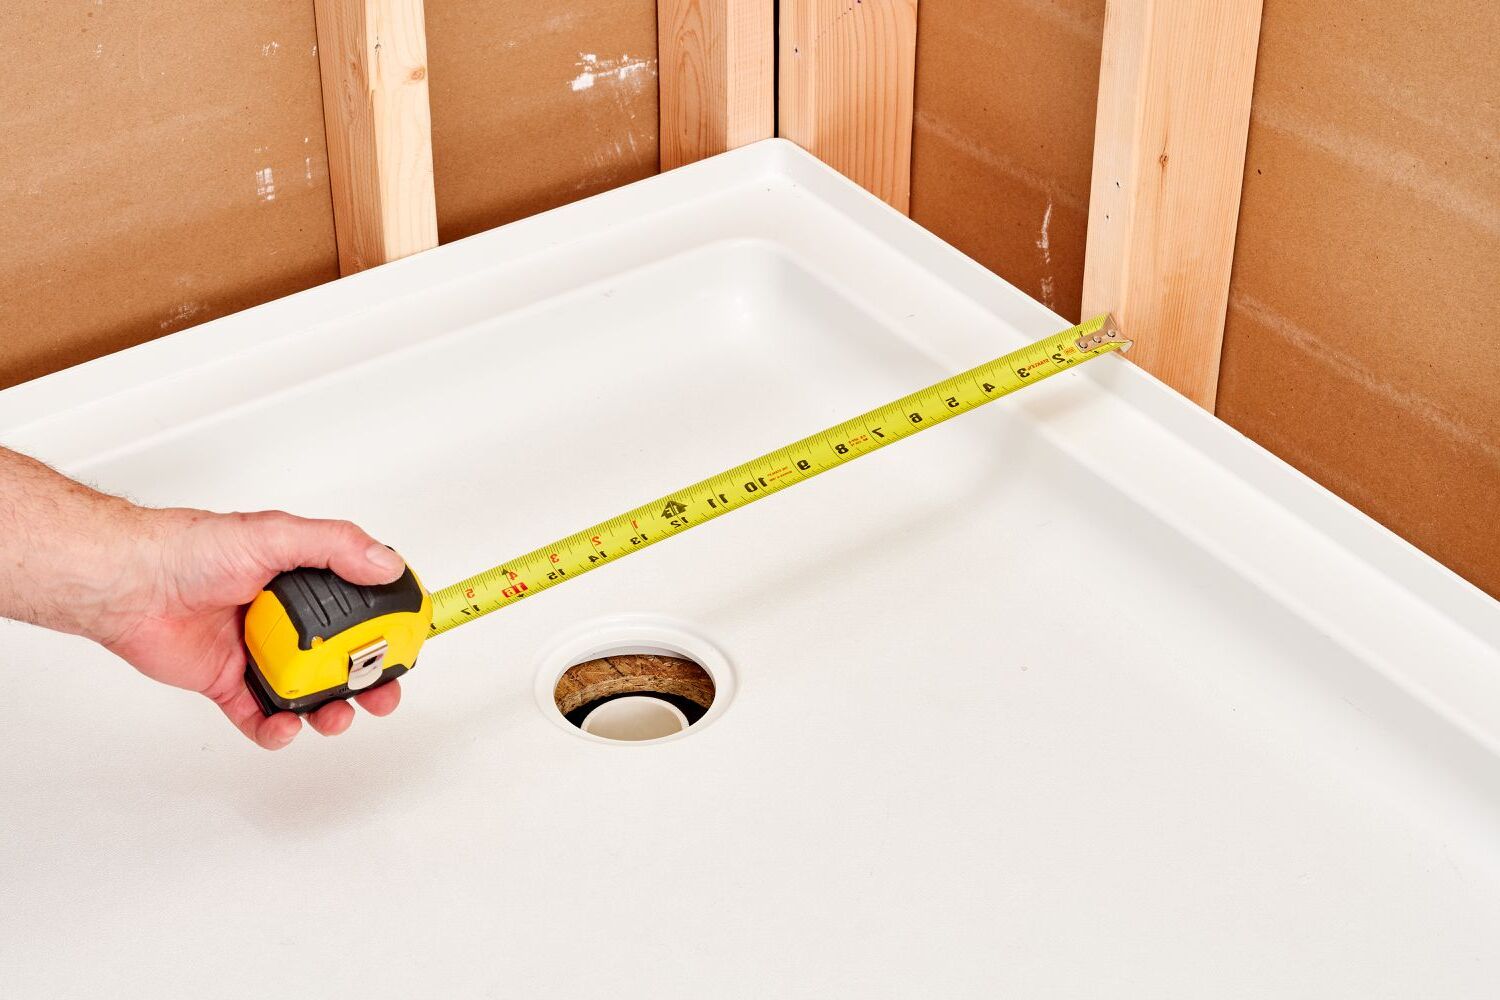
- Measuring Tape: Essential for taking precise measurements and ensuring that the shower pan components fit accurately within the designated space.
- Rubber Mallet: Utilized for tapping and leveling the shower pan components during the installation process.
- Screwdriver and Screws: Necessary for securing the shower drain assembly and other fixtures in place.
- Safety Gear: Including gloves, goggles, and a dust mask to protect yourself during the construction process.
By ensuring that you have all the essential materials and tools at your disposal, you can proceed with confidence, knowing that you're well-equipped to execute each phase of the shower pan installation with precision and efficiency. This comprehensive preparation sets the stage for a successful and professional-quality shower pan construction, laying the groundwork for a functional and visually appealing shower enclosure.
Preparing the Subfloor
Preparing the subfloor is a critical initial step in building a shower pan that ensures structural integrity and long-term durability. The subfloor must be properly prepped to provide a stable foundation for the shower pan components and facilitate effective water drainage. Here's a detailed breakdown of the essential tasks involved in preparing the subfloor for the shower pan installation:
Assessing the Subfloor Condition
Before commencing any modifications, it's crucial to assess the condition of the subfloor. Ensure that the subfloor is structurally sound, free from any signs of water damage, rot, or deterioration. Address any existing issues, such as water damage or rot, before proceeding with the installation to prevent future complications.
Removing Existing Flooring
If there is existing flooring in the shower area, it must be completely removed to expose the subfloor. This includes removing tiles, vinyl, or any other flooring material. Carefully inspect the subfloor for any damage or uneven areas that may need to be addressed before proceeding.
Establishing a Level Surface
Once the existing flooring is removed, it's essential to ensure that the subfloor is level and free from any dips or uneven spots. Use a level to identify any areas that require leveling. Address any discrepancies by adding shims or using a self-leveling compound to create a uniformly level surface.
Reinforcing the Subfloor
In some cases, reinforcing the subfloor may be necessary to provide additional support for the shower pan. This can be achieved by adding extra framing lumber or plywood to strengthen the subfloor and minimize flexing or movement, which could compromise the integrity of the shower pan over time.
Installing the Subfloor Drain
If the shower pan design includes a subfloor drain, it's essential to cut an opening in the subfloor to accommodate the drain assembly. Ensure precise measurements and a secure fit to prevent any potential leaks or instability.
By meticulously preparing the subfloor, you establish a solid foundation for the subsequent stages of the shower pan installation. This meticulous approach sets the stage for a successful and long-lasting shower pan, ensuring that the subfloor provides the necessary support and stability for the shower enclosure.
Installing the Drain
The installation of the drain is a pivotal step in building a shower pan, as it forms the core component responsible for efficient water drainage. Proper installation of the drain ensures that water is effectively directed towards the drainage system, preventing pooling and potential water damage. Here's a detailed breakdown of the essential tasks involved in installing the drain for the shower pan:
Positioning the Drain Assembly
The first step in installing the drain is to position the drain assembly at the designated location on the subfloor. This involves carefully aligning the drain body with the opening in the subfloor, ensuring a precise fit that facilitates seamless water flow towards the drain.
Securing the Drain Body
Once the drain assembly is positioned, the next crucial task is to secure the drain body to the subfloor. This is typically achieved by fastening the drain body to the subfloor using screws or bolts, ensuring a stable and immovable connection that can withstand the weight and pressure exerted on the shower pan.
Connecting the Drain Pipe
After securing the drain body, the next step involves connecting the drain pipe to the drain assembly. This connection should be watertight and secure, preventing any potential leaks or seepage. It's essential to verify that the drain pipe is properly aligned and securely attached to the drain assembly to facilitate efficient water drainage.
Testing the Drain Assembly
Once the drain assembly is installed and connected, it's imperative to conduct a thorough test to ensure its functionality. This involves pouring water into the shower pan and observing the flow towards the drain. Any irregularities or issues with water drainage should be promptly addressed to guarantee the optimal performance of the drain assembly.
By meticulously executing the installation of the drain, you establish a fundamental element of the shower pan that is essential for effective water management. This meticulous approach sets the stage for a successful and long-lasting shower pan, ensuring that the drain assembly functions seamlessly to channel water away from the shower area, thereby maintaining a dry and structurally sound shower enclosure.
Creating the Slope
Creating the slope for the shower pan is a critical step that directly impacts the efficiency of water drainage and the overall functionality of the shower enclosure. The slope, also known as the shower pan pitch, is designed to direct water towards the drain, preventing stagnant water and potential leaks. Here's a detailed breakdown of the essential tasks involved in creating the slope for the shower pan:
Establishing the Slope Design
The first step in creating the slope is to establish the design and dimensions of the shower pan pitch. The slope should be strategically planned to ensure that water flows consistently towards the drain without pooling in any particular area. Typically, a minimum slope of 1/4 inch per foot is recommended to facilitate efficient water drainage.
Marking the Slope Lines
Once the slope design is determined, the next task is to mark the slope lines on the subfloor. This involves using a level and a pencil to outline the slope pattern, ensuring that the lines are accurately positioned to guide the application of the mortar mix. Careful attention to detail is crucial at this stage to achieve a uniform and effective slope.
Applying the Mortar Mix
With the slope lines marked, the next step is to apply the mortar mix to create the slope. Begin by mixing the mortar to the appropriate consistency, ensuring that it is workable and adheres well to the subfloor. Using a trowel, spread the mortar evenly along the slope lines, gradually building up the incline to achieve the desired pitch towards the drain.
Smoothing and Leveling
As the mortar mix is applied, it's essential to smooth and level the surface to ensure a consistent slope. A straight edge or trowel can be used to refine the slope, removing any excess mortar and refining the pitch to guarantee optimal water flow. Attention to detail during this stage is crucial to achieve a seamless and uniform slope.
Verifying the Slope Accuracy
Once the mortar mix is applied and shaped, it's imperative to verify the accuracy of the slope. This involves using a level to confirm that the slope lines adhere to the designated pitch, ensuring that water will effectively drain towards the shower pan's drain assembly. Any adjustments can be made at this stage to fine-tune the slope as needed.
By meticulously creating the slope for the shower pan, you establish a fundamental element that is essential for efficient water management. This meticulous approach sets the stage for a successful and long-lasting shower pan, ensuring that the slope effectively directs water towards the drain, thereby maintaining a dry and structurally sound shower enclosure.
Waterproofing the Shower Pan
Waterproofing the shower pan is a crucial step in the construction process, as it serves as a primary defense against water infiltration and moisture-related issues. By creating a watertight barrier, the shower pan waterproofing ensures the longevity and structural integrity of the entire shower enclosure. Here's a detailed overview of the essential tasks involved in waterproofing the shower pan:
Applying the Waterproofing Membrane
The first step in waterproofing the shower pan involves applying a specialized waterproofing membrane to the surface of the mortar base. This membrane, typically made of PVC or CPE (Chlorinated Polyethylene), forms a resilient barrier that prevents water from penetrating the shower pan and reaching the subfloor. Carefully follow the manufacturer's instructions for the application of the waterproofing membrane, ensuring thorough coverage and proper adhesion to the mortar base.
Sealing the Corners and Joints
Once the waterproofing membrane is in place, it's essential to focus on sealing the corners and joints to reinforce the waterproofing barrier. Utilize waterproofing tape or fabric to seal the seams where the walls meet the shower pan, as well as any corners or transitions within the shower enclosure. This meticulous attention to detail ensures that potential weak points are fortified, minimizing the risk of water seepage.
Testing the Waterproofing Integrity
After the waterproofing membrane is applied and the seams are sealed, it's crucial to conduct a comprehensive test to verify the integrity of the waterproofing. This involves performing a flood test, wherein the shower pan is filled with water to assess the effectiveness of the waterproofing barrier. Any signs of water leakage or seepage indicate areas that require additional attention and reinforcement.
Ensuring Compatibility with Tile Installation
In addition to providing waterproofing for the shower pan, it's essential to ensure that the waterproofing membrane is compatible with the subsequent tile installation. The membrane should create a suitable surface for tile adhesion, allowing for a seamless transition to the tiling phase of the shower construction. Verify that the waterproofing membrane meets the necessary specifications for tile installation, ensuring a cohesive and durable finish.
By meticulously waterproofing the shower pan, you establish a robust defense against water damage and mold growth, safeguarding the structural integrity of the shower enclosure. This meticulous approach sets the stage for a successful and long-lasting shower pan, ensuring that the waterproofing barrier effectively protects the subfloor and surrounding areas from the detrimental effects of moisture infiltration.
Installing the Shower Pan Liner
Installing the shower pan liner is a critical phase in the construction of a watertight and durable shower pan. The shower pan liner, typically made of PVC or CPE (Chlorinated Polyethylene), serves as a pivotal waterproof barrier that prevents water from seeping into the subfloor and surrounding areas. This essential component ensures that any moisture that penetrates the tile and mortar layers is effectively channeled towards the drain, safeguarding the structural integrity of the shower enclosure.
Preparing the Subfloor for the Liner
Before installing the shower pan liner, it's imperative to prepare the subfloor to accommodate this waterproofing layer. The subfloor should be clean, level, and free from any debris that could compromise the adhesion and integrity of the liner. Additionally, any protrusions or sharp objects on the subfloor should be removed to prevent potential damage to the liner during installation.
Cutting and Fitting the Liner
The shower pan liner should be cut to the appropriate dimensions to fit the shower pan area accurately. Careful measurements should be taken to ensure that the liner adequately covers the shower pan base and extends up the walls to the specified height, typically several inches above the finished curb height. The liner should drape over the shower curb, allowing for proper water containment and drainage.
Securing the Liner in Place
Once the liner is positioned within the shower pan area, it should be securely fastened to the walls and subfloor to create a seamless and watertight enclosure. This is typically achieved by using fasteners or adhesive specifically designed for securing shower pan liners. It's essential to ensure that the liner is taut and free from any wrinkles or folds that could impede its effectiveness as a waterproof barrier.
Sealing the Liner Joints
To reinforce the waterproofing integrity of the shower pan liner, the joints and seams should be meticulously sealed to prevent any potential water seepage. Waterproofing tape or adhesive is applied to the seams where the liner meets the walls and curb, creating a robust and impermeable seal. This meticulous attention to detail minimizes the risk of water infiltration and enhances the overall effectiveness of the shower pan liner.
Testing the Liner Integrity
After the installation of the shower pan liner, a comprehensive test should be conducted to verify its waterproofing integrity. This involves filling the shower pan with water and allowing it to remain for a specified duration to assess the liner's ability to contain the water without any signs of leakage. Any areas of concern should be promptly addressed to ensure that the liner provides reliable protection against moisture.
By meticulously installing the shower pan liner, you establish a vital waterproof barrier that safeguards the subfloor and surrounding areas from water damage. This meticulous approach sets the stage for a successful and long-lasting shower pan, ensuring that the liner effectively contains moisture and reinforces the structural resilience of the shower enclosure.
Pouring the Mortar Base
Pouring the mortar base is a pivotal phase in the construction of a robust and structurally sound shower pan. The mortar base, also known as the shower pan bed, serves as the foundation for the shower floor, providing a stable and sloped surface that facilitates efficient water drainage. This essential component not only supports the shower pan liner and tile installation but also ensures that water is effectively directed towards the drain, preventing any accumulation that could compromise the integrity of the shower enclosure.
Preparing the Mortar Mix
Before pouring the mortar base, it's crucial to prepare the mortar mix to the appropriate consistency. The mortar mix, typically a blend of cement, sand, and additives, should be thoroughly mixed with water to achieve a workable yet firm texture. Careful attention should be given to the mixing process to ensure that the mortar attains the ideal composition for optimal adhesion and structural support.
Applying the Mortar to Create the Slope
Once the mortar mix is prepared, it is carefully applied to the shower pan area to establish the necessary slope. Using a trowel, the mortar is spread evenly, gradually building up the incline to conform to the predetermined slope design. This meticulous process involves shaping the mortar to achieve a uniform pitch that guides water towards the drain, preventing any pooling or stagnation within the shower pan.
Smoothing and Leveling the Surface
As the mortar is applied, it's essential to smooth and level the surface to ensure a consistent slope and a uniform base for the subsequent tile installation. A straight edge or trowel is used to refine the slope, removing any excess mortar and refining the pitch to guarantee optimal water flow. This meticulous attention to detail is crucial to create a seamless and structurally resilient mortar base.
Verifying the Slope Accuracy
After the mortar base is poured and shaped, it's imperative to verify the accuracy of the slope. This involves using a level to confirm that the slope adheres to the designated pitch, ensuring that water will effectively drain towards the shower pan's drain assembly. Any adjustments can be made at this stage to fine-tune the slope as needed, ensuring that the mortar base aligns with the precise specifications for efficient water management.
By meticulously pouring the mortar base, you establish a solid foundation for the shower pan that is essential for supporting the subsequent layers of the shower floor. This meticulous approach sets the stage for a successful and long-lasting shower pan, ensuring that the mortar base effectively channels water towards the drain, thereby maintaining a dry and structurally resilient shower enclosure.
Testing and Finishing the Shower Pan
Once the essential components of the shower pan, including the drain, slope, waterproofing, and mortar base, are meticulously installed, the final phase involves testing the functionality and ensuring a polished finish for the shower pan. This critical stage serves as the ultimate validation of the construction process, confirming that the shower pan is structurally sound, watertight, and ready for the subsequent tile installation.
Conducting a Water Test
The first step in testing the shower pan involves conducting a comprehensive water test to evaluate its waterproofing integrity and drainage efficiency. This test entails filling the shower pan with a significant volume of water, allowing it to remain for a specified duration to simulate the conditions experienced during regular use. By closely monitoring the behavior of the water, any signs of leakage, seepage, or inadequate drainage can be promptly identified and addressed. This meticulous assessment ensures that the shower pan effectively contains water and directs it towards the drain without compromising the surrounding areas.
Verifying the Drainage Efficiency
During the water test, careful observation of the water flow towards the drain is essential to verify the effectiveness of the slope and the drain assembly. The water should consistently and swiftly move towards the drain without any pooling or stagnation in specific areas of the shower pan. This verification process confirms that the slope design and drain installation function harmoniously to facilitate efficient water drainage, minimizing the risk of water accumulation and potential damage to the shower enclosure.
Applying the Finishing Touches
Upon successful completion of the water test and verification of drainage efficiency, the finishing touches are applied to the shower pan to ensure a polished and professional appearance. This involves inspecting the edges, corners, and seams for any imperfections or irregularities and addressing them as needed. Additionally, any excess mortar, adhesive, or waterproofing materials are meticulously removed to create a clean and uniform surface, preparing the shower pan for the subsequent tile installation. This meticulous attention to detail enhances the overall aesthetic appeal of the shower pan and sets the stage for a seamless transition to the final phase of the shower construction.
By meticulously testing and finishing the shower pan, you validate the structural integrity and functionality of the installation, ensuring that it meets the highest standards of quality and performance. This meticulous approach sets the stage for a successful and long-lasting shower pan, laying the groundwork for a visually appealing and resilient shower enclosure that enhances the functionality and aesthetic appeal of the bathroom.