
Home>Home & Furniture>Bathroom>How To Build A Shower Niche
Bathroom
How To Build A Shower Niche
Published: February 22, 2024
Editor-in-Chief with a decade in home renovation and a passion for vintage furniture. Diane is known for her weekend treasure hunts at flea markets, enriching our content with unique style insights.
Learn how to build a shower niche in your bathroom with our step-by-step guide. Create a functional and stylish storage solution for your shower space.
(Many of the links in this article redirect to a specific reviewed product. Your purchase of these products through affiliate links helps to generate commission for Twigandthistle.com, at no extra cost. Learn more)
Introduction
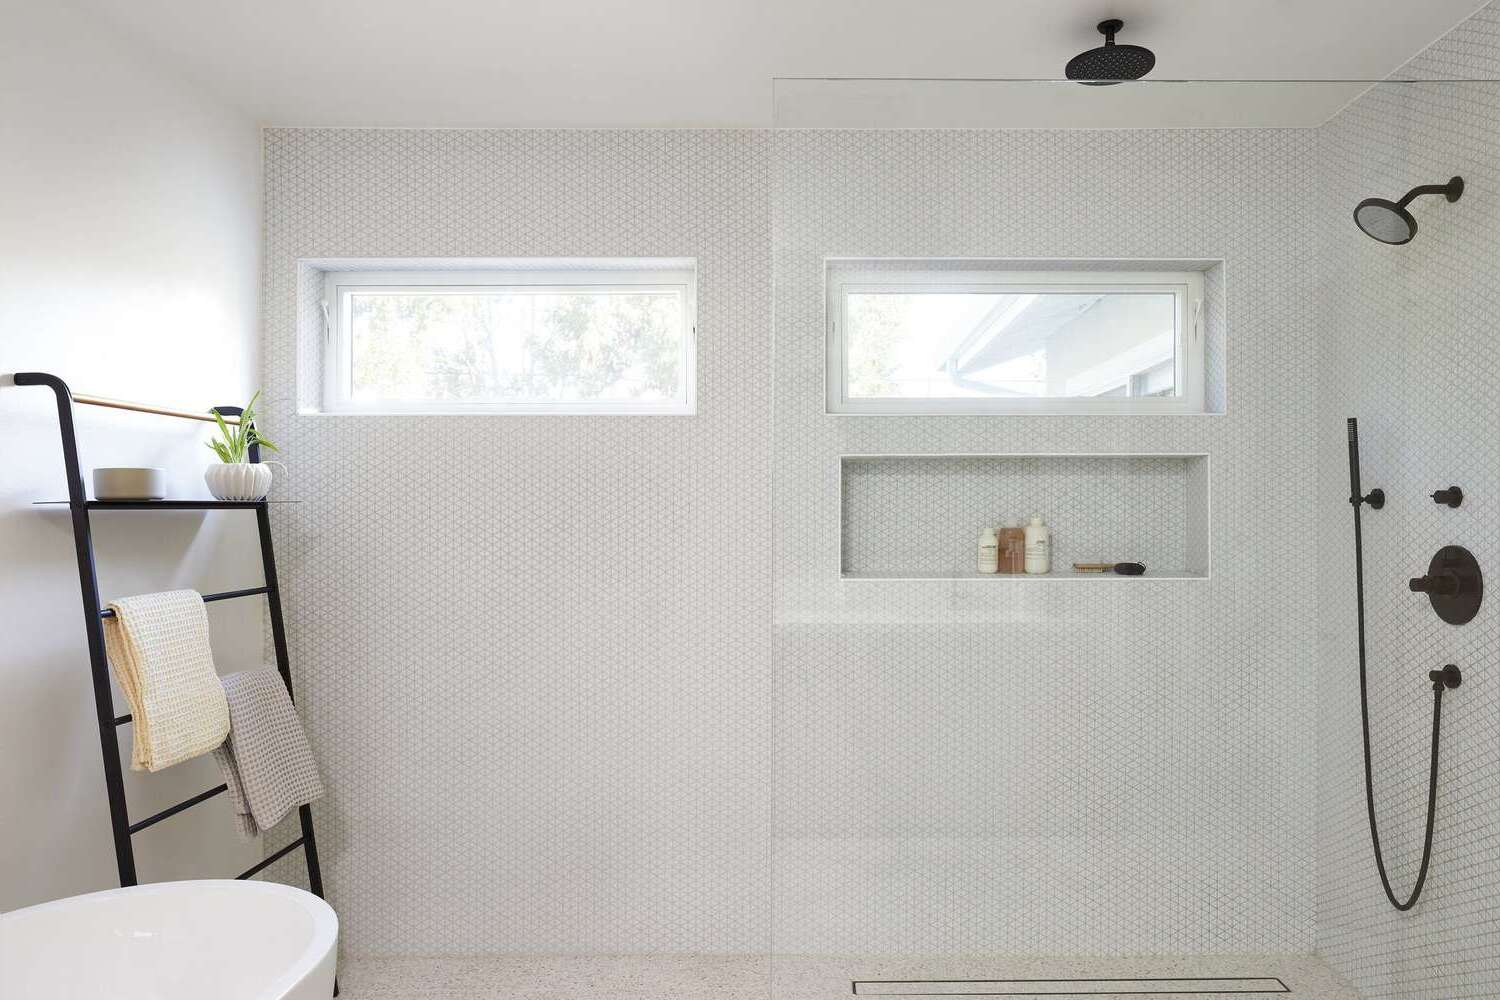
Building a shower niche is a fantastic way to add both functionality and style to your bathroom. A shower niche, also known as a shower shelf or shower alcove, provides a convenient storage space for shower essentials while seamlessly blending into the overall design of the shower area. Whether you're embarking on a bathroom renovation project or constructing a new shower, creating a shower niche can elevate the aesthetic appeal and practicality of the space.
When done correctly, a shower niche not only offers a designated spot for shampoo bottles, soaps, and other bathing necessities but also contributes to a clutter-free shower environment. By integrating a well-crafted niche into the shower, you can streamline your daily bathing routine and enhance the visual allure of the space. Moreover, a thoughtfully designed shower niche can serve as a focal point, adding a touch of sophistication and elegance to the bathroom.
In this comprehensive guide, we will walk you through the step-by-step process of building a shower niche. From gathering the necessary tools and materials to waterproofing the niche and adding the finishing touches, each stage is crucial in ensuring a durable, visually appealing, and fully functional shower niche. Whether you're a seasoned DIY enthusiast or a novice looking to embark on your first home improvement project, this guide will equip you with the knowledge and confidence to create a stunning shower niche that complements your bathroom's aesthetic and meets your practical needs.
So, roll up your sleeves, gather your tools, and let's dive into the exciting journey of crafting a custom shower niche that will elevate the ambiance and utility of your bathroom space.
Step 1: Gather the necessary tools and materials
Before embarking on the construction of a shower niche, it's essential to gather all the required tools and materials to ensure a smooth and efficient building process. Here's a comprehensive list of the items you'll need:
Tools:
- Measuring Tape: Accurate measurements are crucial for creating a perfectly sized shower niche.
- Pencil and Marking Tool: These are essential for marking the location and dimensions of the niche on the shower wall.
- Level: Ensures that the niche is installed perfectly straight and aligned with the surrounding tiles.
- Stud Finder: Used to locate the wall studs, which are essential for securing the niche framing.
- Utility Knife: For cutting and shaping the waterproofing membrane and other materials.
- Saw: Depending on the wall material, you may need a circular saw, jigsaw, or oscillating multi-tool for cutting the opening for the niche.
- Screwdriver or Drill: Required for fastening the niche framing and shelf.
- Notched Trowel: Used for applying thin-set mortar or adhesive when installing the niche shelf and tiles.
- Grout Float: Essential for applying grout to the tile joints.
- Bucket and Sponge: For cleaning and smoothing grout during the finishing stage.
Materials:
- Waterproofing Membrane: Ensures that the shower niche is protected from water damage.
- Shower Niche Kit or Framing Lumber: Depending on your preference, you can either purchase a pre-made shower niche kit or use framing lumber to construct a custom niche.
- Shelf Material: This can be a piece of marble, ceramic, porcelain, or any other waterproof material of your choice.
- Thin-Set Mortar or Adhesive: Used for securing the shelf and tiles in place.
- Tiles: Choose tiles that complement the overall design of your shower and bathroom.
- Grout: Select a grout color that enhances the aesthetic appeal of the niche and complements the chosen tiles.
- Caulk: Waterproof caulk is essential for sealing the edges and corners of the niche.
By ensuring that you have all the necessary tools and materials at the outset, you can streamline the construction process and minimize interruptions. With these items in hand, you'll be well-prepared to move on to the next step of measuring and marking the location of the shower niche.
Step 2: Measure and mark the location of the shower niche
Accurate measurements and precise marking are fundamental to the successful installation of a shower niche. Before making any cuts or modifications to the shower wall, it's crucial to meticulously measure and mark the location of the niche. Here's a detailed walkthrough of this essential step:
Assess the Shower Layout
Begin by assessing the layout of your shower area. Consider the most convenient and accessible spot for the shower niche. Typically, niches are installed at a height that allows easy access to shower essentials without interfering with the overall shower experience. It's common to position the niche at a height that aligns with the eye level of the primary user.
Locate Wall Studs
Using a stud finder, locate the wall studs in the chosen area for the niche. Securing the niche framing to the wall studs is vital for ensuring its stability and load-bearing capacity. Once the studs are identified, mark their positions with a pencil.
Determine Niche Dimensions
Carefully determine the dimensions of the niche, taking into account the size of the items you intend to store within it. Consider the height, width, and depth of the niche, ensuring that it harmonizes with the surrounding tiles and the overall design of the shower. Use a measuring tape to record these dimensions accurately.
Mark the Niche Outline
With the dimensions in mind, use a pencil and a level to mark the outline of the niche on the shower wall. Ensure that the lines are straight, level, and precisely aligned with the surrounding tiles. This step is critical in visualizing the final placement of the niche and ensuring that it integrates seamlessly with the shower's aesthetic.
Double-Check the Measurements
Before proceeding to the next phase, double-check all measurements and markings to confirm their accuracy. It's essential to be meticulous at this stage to avoid errors that could compromise the integrity and appearance of the finished niche.
By meticulously measuring and marking the location of the shower niche, you set the stage for a precise and well-executed installation process. With the niche outline clearly defined, you're ready to move on to the next step of cutting the opening for the niche, bringing you one step closer to the completion of your custom shower niche.
Step 3: Cut the opening for the niche
With the location of the shower niche clearly marked on the wall, the next crucial step is to cut the opening for the niche. This process requires precision and care to ensure that the resulting opening accommodates the niche while seamlessly integrating with the surrounding tiles. Here's a detailed walkthrough of how to cut the opening for the niche:
Gather the Necessary Safety Gear
Before commencing any cutting work, it's essential to prioritize safety. Equip yourself with safety goggles, a dust mask, and work gloves to protect your eyes, respiratory system, and hands from potential hazards associated with cutting materials.
Select the Appropriate Cutting Tool
The choice of cutting tool depends on the type of wall material in your shower. For ceramic or porcelain tiles, a diamond-bladed wet saw is recommended for precise and clean cuts. If you're dealing with other materials such as natural stone or glass tiles, a wet saw with a specialized blade designed for those materials is necessary. Additionally, for cutting through cement board or other wall substrates, a circular saw with a carbide-tipped blade or an oscillating multi-tool can be used.
Make the Initial Cuts
Carefully position the cutting tool at the edge of the marked niche outline. If using a wet saw, ensure that the water reservoir is filled to keep the blade cool and minimize dust. Slowly and steadily guide the saw along the marked lines, allowing the blade to cut through the tiles or substrate. Exercise caution to maintain a straight and precise cutting path, ensuring that the edges of the opening are smooth and free from jagged edges.
Verify the Fit
Once the initial cuts are made, assess the fit of the niche within the opening. The niche should slide into the opening snugly, with minimal gaps or uneven edges. If adjustments are needed, carefully trim the edges of the opening to achieve the perfect fit for the niche.
Clean the Opening
After the niche fits seamlessly within the opening, remove any debris or dust from the surrounding area. A vacuum cleaner or a damp cloth can be used to ensure that the opening is clean and ready for the next phase of installing the framing for the niche.
By following these steps, you can effectively cut the opening for the shower niche, setting the stage for the subsequent stages of framing, waterproofing, and finishing the niche. With the opening accurately cut, you're one step closer to realizing a beautifully crafted and functional shower niche that enhances the allure and utility of your bathroom space.
Step 4: Install the framing for the niche
With the opening for the shower niche precisely cut, the next pivotal step is to install the framing that will provide structural support and serve as the foundation for the niche. Proper framing is essential for ensuring the stability, durability, and load-bearing capacity of the niche, laying the groundwork for the subsequent waterproofing and finishing stages. Here's a detailed guide on how to install the framing for the shower niche:
Select the Framing Material
The choice of framing material depends on your preference and the specific requirements of your shower niche. Common options include moisture-resistant lumber, such as redwood or cedar, or pre-fabricated shower niche kits made from waterproof materials. If using lumber, ensure that it is appropriately treated to withstand the humid and wet conditions of the shower environment.
Cut the Framing Pieces
Using the measurements of the niche opening as a guide, carefully cut the framing pieces to the required dimensions. Typically, the framing consists of vertical studs on the sides and a horizontal support at the top and bottom of the niche. Ensure that the pieces are cut accurately to fit snugly within the opening and align with the surrounding wall studs.
Secure the Framing in Place
Position the framing pieces within the niche opening, ensuring that they are level, plumb, and securely aligned with the wall studs. Use a combination of wood screws and construction adhesive to fasten the framing to the surrounding wall structure, providing a solid and stable foundation for the niche. It's crucial to verify the stability and alignment of the framing before proceeding to the next phase.
Reinforce the Corners and Joints
To enhance the structural integrity of the framing, reinforce the corners and joints with additional screws and adhesive as needed. This step is vital for preventing any potential shifting or movement of the framing over time, ensuring that it remains robust and steadfast in supporting the niche and its contents.
Verify the Stability
Once the framing is securely in place, verify its stability by applying gentle pressure and ensuring that it withstands the load without shifting or flexing. A well-installed framing structure forms the backbone of the shower niche, providing the necessary support for the subsequent waterproofing and tiling processes.
By meticulously following these steps, you can effectively install the framing for the shower niche, setting the stage for the critical stages of waterproofing and finishing the niche. With the framing securely in place, you're poised to advance to the next phases of creating a stunning and functional shower niche that enhances the aesthetic and practicality of your bathroom space.
Step 5: Waterproof the niche
Waterproofing the shower niche is a pivotal step that ensures the longevity and integrity of the entire installation. Proper waterproofing is essential for safeguarding the surrounding walls and structural components from water damage, thereby preventing potential issues such as mold growth, deterioration of building materials, and compromised structural stability. Here's a comprehensive guide on how to effectively waterproof the shower niche:
Apply the Waterproofing Membrane
Begin by applying a high-quality waterproofing membrane to the interior surfaces of the niche framing. This membrane acts as a protective barrier, preventing water from seeping into the wall substrate and surrounding areas. Ensure that the membrane is applied evenly and thoroughly, covering all exposed surfaces within the niche.
Seal the Joints and Corners
Pay special attention to sealing the joints, corners, and edges of the niche with waterproofing membrane or waterproof seam tape. These areas are particularly vulnerable to water infiltration and must be meticulously sealed to create a watertight enclosure. Properly sealing the joints and corners is crucial for preventing moisture from penetrating the underlying wall structure.
Extend the Waterproofing to the Shelf Area
If the niche includes a shelf, it's imperative to extend the waterproofing membrane to cover the shelf area. This ensures that the entire interior of the niche, including the shelf surface, is effectively protected against water intrusion. Thoroughly coat the shelf and its supporting structure with the waterproofing membrane, leaving no exposed areas vulnerable to moisture.
Verify the Integrity of the Waterproofing
After applying the waterproofing membrane, carefully inspect the entire niche to ensure that all surfaces are adequately coated and sealed. Look for any gaps, uneven application, or areas that may require additional attention. It's essential to verify the integrity of the waterproofing before proceeding to the next phase of installing the niche shelf and finishing the interior surfaces.
Allow Sufficient Drying Time
Once the waterproofing membrane is applied and verified, allow sufficient time for it to dry and cure as per the manufacturer's recommendations. Proper drying is critical for the membrane to form a durable and impermeable barrier against water, ensuring the long-term protection of the shower niche and the surrounding shower enclosure.
By meticulously following these steps, you can effectively waterproof the shower niche, fortifying it against water damage and ensuring its resilience in the demanding shower environment. With the niche thoroughly waterproofed, you're ready to progress to the subsequent stages of installing the niche shelf and finishing the interior surfaces with tiles or other materials.
Step 6: Install the niche shelf
With the shower niche waterproofed and prepared, the next crucial step is to install the niche shelf, providing a functional and aesthetically pleasing surface for storing shower essentials. The installation of the shelf requires precision and attention to detail to ensure a seamless integration with the niche and the surrounding shower environment. Here's a comprehensive guide on how to effectively install the niche shelf:
Select the Shelf Material
Begin by selecting the material for the niche shelf. Common options include marble, ceramic, porcelain, or any other waterproof material that complements the overall design of the shower. Consider the size and depth of the niche to determine the appropriate dimensions for the shelf, ensuring that it provides ample space for storing shower items while harmonizing with the niche's interior.
Prepare the Shelf Surface
Before installing the shelf, ensure that the surface within the niche is clean and free from any debris or residue. Use a damp cloth to wipe down the interior surfaces, removing any dust or particles that may affect the adhesion of the shelf material.
Apply Thin-Set Mortar or Adhesive
Using a notched trowel, apply a layer of thin-set mortar or adhesive to the bottom surface of the niche where the shelf will be placed. Ensure that the mortar is spread evenly to create a solid and uniform bonding surface for the shelf material.
Position and Place the Shelf
Carefully position the shelf within the niche, pressing it firmly onto the layer of thin-set mortar or adhesive. Verify that the shelf is level and aligned with the surrounding walls, making any necessary adjustments to ensure a perfect fit. Apply gentle pressure to the shelf to secure its adhesion to the niche surface.
Allow for Setting Time
After placing the shelf, allow sufficient time for the thin-set mortar or adhesive to set and cure as per the manufacturer's instructions. This setting time is crucial for ensuring a strong and durable bond between the shelf and the niche surface, providing long-term stability and support for shower items.
Verify the Stability
Once the thin-set mortar or adhesive has set, verify the stability and sturdiness of the installed shelf. Apply gentle pressure to the shelf to ensure that it is securely bonded to the niche surface, with no signs of movement or instability.
By following these steps, you can effectively install the niche shelf, creating a functional and visually appealing storage space within the shower niche. With the shelf securely in place, you're ready to advance to the final step of finishing the niche with tiles or other materials, bringing your custom shower niche to completion.
Step 7: Finish the niche with tile or other materials
The final step in creating a stunning shower niche involves finishing the interior surfaces with tiles or other materials, enhancing the aesthetic appeal and cohesiveness of the niche with the overall shower design. This phase allows for creative expression and customization, enabling you to infuse the niche with your desired style and visual impact. Here's a detailed guide on how to effectively finish the niche with tile or other materials:
Select the Finishing Material
Begin by selecting the finishing material for the interior surfaces of the niche. Common options include ceramic, porcelain, glass, or natural stone tiles, each offering unique textures, colors, and patterns. Alternatively, you may opt for solid surface materials or waterproof panels that complement the surrounding shower walls and create a cohesive look within the niche.
Plan the Layout
Carefully plan the layout of the chosen finishing material within the niche. Consider the orientation, pattern, and alignment of the tiles or panels to achieve a visually appealing and harmonious arrangement. It's essential to visualize the final look of the niche and ensure that the chosen layout complements the overall design of the shower space.
Cut and Trim the Material
If using tiles or panels, accurately measure and cut the material to fit the dimensions of the niche. Use a tile cutter, wet saw, or appropriate cutting tools to achieve precise cuts and ensure that the material fits seamlessly within the niche. Pay attention to the edges and corners, ensuring that the cuts are clean and precise for a professional finish.
Apply Adhesive and Install the Material
Using a notched trowel, apply a layer of thin-set mortar or adhesive to the interior surfaces of the niche. Ensure that the adhesive is spread evenly to create a solid bonding surface for the finishing material. Carefully position and install the tiles or panels within the niche, pressing them firmly onto the adhesive. Verify that the material is level, aligned, and securely bonded to the niche surfaces.
Grout the Joints
Once the finishing material is installed, apply grout to the joints between the tiles or panels. Select a grout color that complements the material and enhances the overall aesthetic of the niche. Use a grout float to fill the joints with grout, ensuring a uniform and neatly finished appearance. Wipe off any excess grout from the surface of the material using a damp sponge.
Seal the Edges and Corners
To ensure the longevity and water resistance of the finished niche, seal the edges and corners with waterproof caulk. This step is crucial for preventing water infiltration and maintaining the integrity of the installation. Carefully apply the caulk along the perimeter of the niche, creating a watertight seal that enhances the durability of the finished surfaces.
By meticulously following these steps, you can effectively finish the shower niche with tile or other materials, elevating its visual appeal and integrating it seamlessly with the overall shower design. With the niche beautifully finished, you've successfully created a custom shower niche that combines functionality and style, enhancing the ambiance and practicality of your bathroom space.
Conclusion
In conclusion, the process of building a shower niche is a rewarding endeavor that not only adds practical functionality to the bathroom but also contributes to the overall aesthetic appeal of the shower space. From the initial stages of measuring and marking the niche location to the final steps of finishing the niche with tiles or other materials, each phase plays a crucial role in creating a well-crafted and visually appealing shower niche.
By meticulously following the step-by-step guide outlined in this comprehensive tutorial, DIY enthusiasts and homeowners can embark on the journey of constructing a custom shower niche with confidence and precision. The careful selection of tools and materials, coupled with attention to detail in each phase, ensures the successful realization of a durable, waterproof, and visually striking shower niche.
The integration of a shower niche into the bathroom environment offers numerous benefits, including the efficient organization of shower essentials, the reduction of clutter within the shower area, and the creation of a focal point that enhances the overall design of the space. Additionally, a well-built shower niche contributes to a seamless and enjoyable shower experience, allowing for easy access to bathing necessities while maintaining a clean and uncluttered shower environment.
Furthermore, the customization options available during the finishing phase enable individuals to infuse their personal style and creativity into the niche, aligning it with their unique design preferences and the overall aesthetic of the bathroom. Whether opting for classic ceramic tiles, luxurious natural stone, or modern solid surface materials, the finishing phase allows for creative expression and customization, resulting in a shower niche that harmonizes with the surrounding shower walls and contributes to the cohesive design of the space.
In essence, the construction of a shower niche represents a significant enhancement to the bathroom, combining practical utility with visual appeal. By following the outlined steps and infusing the process with creativity and attention to detail, individuals can achieve the satisfaction of creating a custom shower niche that elevates the ambiance and functionality of their bathroom space.