
Home>Home & Furniture>Bathroom>How To Build A Shower Seat
Bathroom
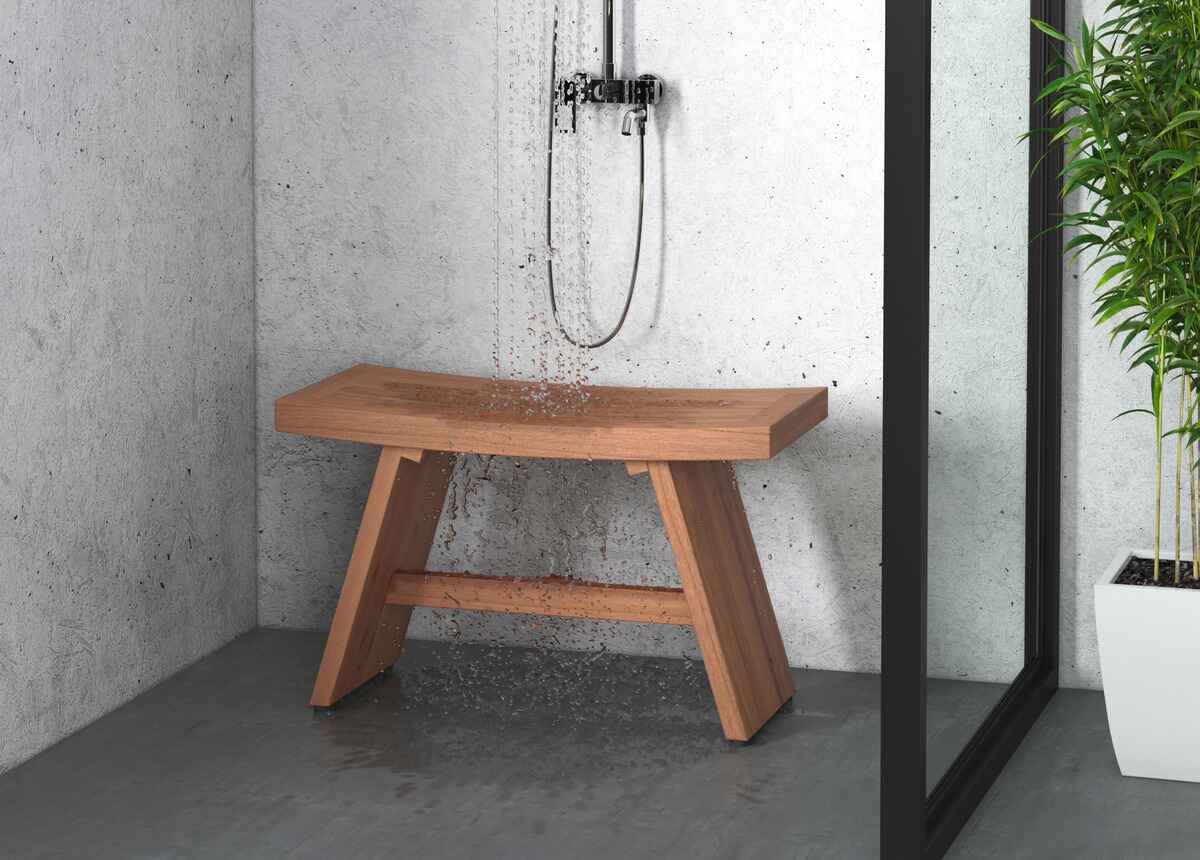
How To Build A Shower Seat
Published: March 7, 2024
Editor-in-Chief with a decade in home renovation and a passion for vintage furniture. Diane is known for her weekend treasure hunts at flea markets, enriching our content with unique style insights.
Learn how to create a comfortable and stylish shower seat for your bathroom. Get step-by-step instructions and expert tips. Elevate your bathroom design today!
(Many of the links in this article redirect to a specific reviewed product. Your purchase of these products through affiliate links helps to generate commission for Twigandthistle.com, at no extra cost. Learn more)
Introduction
Are you looking to add some comfort and convenience to your shower? Building a shower seat can be a great DIY project that not only adds functionality but also enhances the overall look of your bathroom. Whether you want a place to sit and relax or need a practical solution for those with mobility issues, a shower seat can be a valuable addition to any bathroom. In this guide, we'll take you through the steps to build your own shower seat, providing you with the knowledge and confidence to tackle this project with ease. Let's dive in and get started on creating a more comfortable and accessible shower space!
Choosing the Right Materials
When it comes to building a shower seat, selecting the right materials is crucial for ensuring durability and safety. Here are the materials you'll need to get started:
1. Wood
Opt for a moisture-resistant wood such as teak, cedar, or redwood. These types of wood are known for their ability to withstand the humid environment of a shower without rotting or warping.
2. Stainless Steel Screws
Choose stainless steel screws to prevent rust and corrosion in the moist conditions of the shower.
3. Waterproof Sealant
Invest in a high-quality waterproof sealant to protect the wood from water damage and mold growth. Look for a sealant specifically designed for use in wet areas.
4. Measuring Tape and Pencil
Accurate measurements are essential for a well-fitted shower seat. A measuring tape and pencil will help you plan and mark the dimensions for your seat.
5. Safety Equipment
Don't forget to prioritize safety. Ensure you have protective gear such as goggles, gloves, and a dust mask for when you're cutting and sanding the wood.
By choosing the right materials, you can ensure that your DIY shower seat not only looks great but also stands the test of time in the moist environment of your bathroom.
Measuring and Planning
Before diving into the construction of your shower seat, it's crucial to take accurate measurements and plan out the design. Here's how to get started:
-
Measure the Space: Begin by measuring the area in your shower where you intend to install the seat. Take into account the dimensions of the space, as well as any obstructions such as shower fixtures or plumbing.
-
Consider the Height: Determine the ideal height for your shower seat. This will depend on the intended use and the needs of the individuals who will be using the seat. A typical height for a shower seat is around 17 to 19 inches, but you may need to adjust this based on personal preference and comfort.
-
Sketch the Design: Create a rough sketch or diagram of the shower seat, including the dimensions and any additional features such as armrests or a slatted surface for drainage. This will serve as a visual guide as you move through the construction process.
-
Plan for Support: Decide how the seat will be supported. Will it be attached to the wall, or will it have legs that extend to the floor? Consider the weight capacity and ensure that the support structure is sturdy and secure.
-
Account for Slope: If your shower floor has a slope for drainage, you'll need to factor this into your design. The seat should be level and stable, so take the slope into consideration when planning the installation.
By taking the time to measure and plan out your shower seat design, you'll set yourself up for a smoother construction process and a final product that fits seamlessly into your shower space.
Building the Frame
Building the frame is a critical step in constructing a sturdy and reliable shower seat. Follow these steps to create a strong foundation for your seat:
-
Cut the Wood: Using the measurements and design plan from the previous step, carefully cut the wood pieces to the appropriate lengths. If you're using multiple pieces of wood to construct the frame, ensure that they are cut precisely to fit together seamlessly.
-
Assemble the Frame: Begin by assembling the basic frame structure. This may involve creating a rectangular or L-shaped frame, depending on the design of your shower seat. Use wood screws to securely join the pieces together, ensuring that the frame is stable and able to support the weight of those using the seat.
-
Reinforce the Joints: To add extra strength to the frame, consider reinforcing the joints with additional support pieces. This can be achieved by adding diagonal braces or support blocks at the corners and along the length of the frame.
-
Consider Drainage: If your shower seat will be located in an area where water will come into contact with it, such as directly under the showerhead, it's important to consider drainage. To allow water to flow through and prevent pooling, you can create a slatted surface by leaving small gaps between the wood pieces or drilling drainage holes.
-
Sand the Edges: Once the frame is assembled, take the time to sand down any rough edges or corners. This not only creates a smoother and more comfortable surface for sitting but also reduces the risk of splinters.
By following these steps, you can build a sturdy and well-constructed frame for your shower seat, setting the stage for the next phase of the construction process.
Attaching the Seat
-
Positioning the Seat: Place the frame in the desired location within the shower, ensuring that it is level and properly aligned. Use a level to confirm that the frame is not tilted or uneven, as this will impact the stability and comfort of the seat.
-
Securing the Frame: Once the frame is in position, use a pencil to mark the locations where the frame will be attached to the wall or floor. If the seat will be attached to the wall, locate the wall studs and use screws to secure the frame firmly in place. For a freestanding seat, ensure that the legs are securely anchored to the floor to prevent any wobbling or movement.
-
Attaching the Seat Surface: With the frame securely in place, it's time to attach the seat surface. Whether you're using a single solid piece of wood or multiple slats, ensure that the surface is level and well-supported by the frame. Use screws to fasten the seat to the frame, taking care to space them evenly and avoid splitting the wood.
-
Applying Sealant: To protect the wood from moisture and enhance its longevity, apply a waterproof sealant to the entire surface of the seat. Pay special attention to the areas where the wood is joined or where screws are inserted, as these are vulnerable points for water penetration.
-
Final Checks: Once the seat is attached and the sealant has dried, perform a final inspection to ensure that everything is secure and stable. Test the seat by applying pressure and sitting on it to confirm that it can support the intended weight without any signs of weakness or movement.
-
Finishing Touches: If desired, you can add finishing touches such as rounded edges, a coat of paint or stain, or even a cushion for added comfort. These details can enhance the appearance and functionality of the shower seat, making it a seamless addition to your bathroom space.
By following these steps, you can effectively attach the seat to the frame, creating a secure and reliable shower seat that is ready for use.
Finishing Touches
After the main construction of the shower seat is complete, it's time to add those final touches that will enhance both its appearance and functionality. Here are some steps to consider for putting the finishing touches on your DIY shower seat:
-
Rounded Edges: To make the seat more comfortable and visually appealing, consider rounding off the edges of the wood. This not only softens the appearance of the seat but also eliminates sharp corners that could pose a risk of injury.
-
Paint or Stain: Depending on the aesthetic of your bathroom, you may choose to paint or stain the shower seat to match the existing decor. If you opt for paint, be sure to use a waterproof, mold-resistant paint that can withstand the humid environment of the shower. Staining the wood can enhance its natural beauty while providing protection against moisture.
-
Sealant: Apply a final coat of waterproof sealant to the entire surface of the seat, including any newly added features such as rounded edges. This will provide an extra layer of protection against water damage and mold growth, ensuring the longevity of your shower seat.
-
Cushion: For added comfort, consider adding a cushion to the seat. There are various waterproof and mold-resistant cushion options available that can provide a soft and comfortable sitting surface while being suitable for the shower environment.
-
Storage: If space allows, you might want to incorporate a storage element into the design of the shower seat. This could be in the form of a hinged lid that opens to reveal a storage compartment, providing a convenient place to store shower essentials such as toiletries or towels.
-
Accessibility Features: If the shower seat is intended to accommodate individuals with mobility challenges, consider adding features such as grab bars or a handheld showerhead within reach of the seat. These additions can enhance the accessibility and safety of the shower space.
By paying attention to these finishing touches, you can elevate the functionality and visual appeal of your DIY shower seat, creating a customized and practical addition to your bathroom.
Conclusion
In conclusion, building a shower seat can be a rewarding DIY project that adds both comfort and functionality to your bathroom space. By carefully selecting the right materials, taking accurate measurements, constructing a sturdy frame, attaching the seat securely, and adding the finishing touches, you can create a shower seat that meets your specific needs and enhances the overall appeal of your shower area. Whether it's for relaxation, accessibility, or simply to upgrade your bathroom, a well-built shower seat can make a significant difference. With the knowledge and guidance provided in this guide, you're now equipped to embark on this DIY endeavor with confidence. So, roll up your sleeves, gather your materials, and get ready to enjoy the benefits of a custom-built shower seat in your home.