
Home>Create & Decorate>DIY & Crafts>DIY TV Wall: Transform Your Living Room With A Stunning Feature
DIY & Crafts
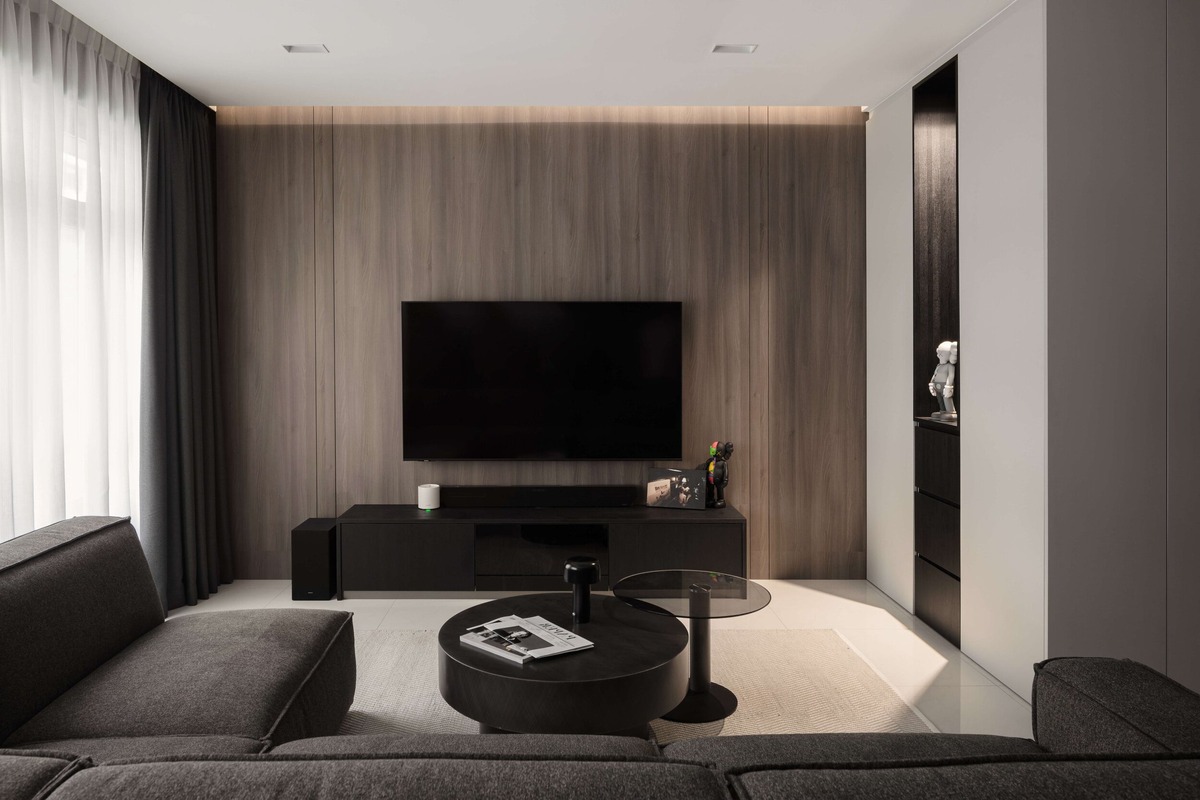
DIY TV Wall: Transform Your Living Room With A Stunning Feature
Published: June 9, 2024

Senior Editor in Create & Decorate, Kathryn combines traditional craftsmanship with contemporary trends. Her background in textile design and commitment to sustainable crafts inspire both content and community.
Transform your living room with a stunning DIY TV wall feature. Get inspired with our DIY & Crafts ideas for a stylish and personalized space.
(Many of the links in this article redirect to a specific reviewed product. Your purchase of these products through affiliate links helps to generate commission for Twigandthistle.com, at no extra cost. Learn more)
Introduction
Are you looking to elevate the style and functionality of your living room? A DIY TV wall can be the perfect way to transform your space into a stunning feature that not only showcases your television but also adds a touch of personality to the room. In this article, we'll explore the step-by-step process of creating a DIY TV wall that will become the focal point of your living area. From choosing the right wall to adding customized features, we've got you covered with all the tips and tricks you need to create a show-stopping TV wall in your home.
Choosing the Right Wall for Your DIY TV Feature
When it comes to creating a DIY TV wall, the first step is to carefully consider the location. The right wall can make all the difference in transforming your living room into a stylish and functional space. Here are some key factors to keep in mind when choosing the perfect wall for your DIY TV feature:
-
Visibility and Viewing Angle: Select a wall that offers optimal visibility from various seating areas in the room. Consider the viewing angles from different spots to ensure that everyone can enjoy the television without any obstructions.
-
Proximity to Power Outlets: It's essential to choose a wall that is close to power outlets to ensure easy access for plugging in your TV and any additional components. This will help to avoid unsightly cords running across the room.
-
Aesthetics and Balance: The chosen wall should complement the overall aesthetics of the room. Consider the balance of the space and how the TV wall will integrate with the existing decor and furniture.
-
Structural Considerations: Ensure that the wall you choose is structurally sound and capable of supporting the weight of the TV and any additional features you plan to incorporate.
By carefully considering these factors, you can select the perfect wall for your DIY TV feature, setting the stage for a stunning transformation of your living room.
Planning and Measuring for Your TV Wall
Before diving into the physical aspects of creating your DIY TV wall, it's crucial to start with thorough planning and precise measurements. This stage sets the foundation for a seamless and professional-looking result. Here's a detailed guide on how to plan and measure for your TV wall:
-
Assess the Wall Space: Begin by assessing the dimensions of the wall where you intend to install the TV. Measure the width, height, and depth of the space to determine the maximum size of the TV and any additional features you plan to incorporate.
-
Consider Surrounding Elements: Take into account any existing elements on the wall, such as windows, doors, or architectural features. These elements will influence the placement and design of your TV wall.
-
Create a Floor Plan: Sketch out a floor plan of the room, including the location of furniture and the TV wall. This will help you visualize how the TV wall will fit into the overall layout and ensure that it doesn't overcrowd the space.
-
Account for Wiring and Outlets: Plan for the placement of power outlets, cable connections, and any additional wiring required for the TV and other electronic devices. Consider concealing wires within the wall for a clean and polished look.
-
Measure for Mounting: If you're using a TV mount, carefully measure and mark the precise location for mounting hardware on the wall. Ensure that the mount is positioned at the appropriate height for comfortable viewing from various seating areas.
-
Account for Ventilation: If incorporating additional features such as a media console or shelving, ensure that there is sufficient space for ventilation around electronic components to prevent overheating.
By meticulously planning and measuring for your TV wall, you'll lay the groundwork for a successful DIY project and avoid potential issues during the installation process. This preparation will ultimately contribute to a polished and professional end result that enhances the overall aesthetic of your living room.
Selecting the Perfect TV Mount
When it comes to creating a DIY TV wall, selecting the right TV mount is a crucial step in ensuring the safety, functionality, and aesthetic appeal of your setup. Here's a comprehensive guide to help you choose the perfect TV mount for your DIY TV wall:
-
Consider the TV Size and Weight: Before selecting a TV mount, it's essential to consider the size and weight of your television. Different mounts are designed to support specific TV sizes and weights, so be sure to check the compatibility of the mount with your TV's specifications.
-
Mounting Type: There are various types of TV mounts available, including fixed mounts, tilt mounts, full-motion mounts, and ceiling mounts. Each type offers different features and flexibility. Consider your viewing preferences and the layout of your room to determine the most suitable mounting type for your DIY TV wall.
-
Wall Compatibility: Assess the type of wall where the TV will be mounted. Different mounts are designed for different wall materials, such as drywall, concrete, or wood studs. Ensure that the TV mount is compatible with the specific wall material in your living room.
-
Cable Management: Look for a TV mount that offers integrated cable management features. This will allow you to neatly conceal and organize cables, creating a clean and streamlined look for your DIY TV wall.
-
Accessibility and Adjustability: If you value flexibility in positioning your TV, consider a full-motion mount that allows for swiveling, tilting, and extending the TV. This feature enables optimal viewing angles from various seating areas in the room.
-
Installation and Safety: Prioritize mounts that come with easy-to-follow installation instructions and include all necessary hardware. Additionally, ensure that the chosen TV mount is designed with safety features to securely hold your TV in place.
By carefully considering these factors, you can select a TV mount that perfectly complements your DIY TV wall, providing both functionality and aesthetic appeal. The right TV mount will contribute to the overall success of your project, ensuring a secure and visually striking display for your television.
Creating a Customized Backdrop for Your TV
When it comes to creating a DIY TV wall, the backdrop behind the television serves as a canvas for adding personality and style to the space. Here's a detailed guide on how to create a customized backdrop that enhances the visual impact of your TV wall:
1. Wall Treatments and Finishes
Consider incorporating wall treatments and finishes to add texture and visual interest to the backdrop. Options such as textured wallpaper, reclaimed wood paneling, or decorative wall tiles can create a stunning backdrop that complements the overall aesthetic of the room.
2. Accent Lighting
Integrating accent lighting behind the TV can elevate the ambiance of the space and draw attention to the focal point. LED strip lights, recessed lighting, or wall sconces can be strategically placed to illuminate the backdrop and create a captivating visual effect.
3. Artwork and Decor
Incorporate artwork, framed photographs, or decorative elements on the backdrop to infuse personality and creativity into the design. Gallery walls, statement art pieces, or curated decor arrangements can transform the backdrop into a captivating feature that complements the TV display.
4. Floating Shelves and Display Units
Consider installing floating shelves or display units on the backdrop to showcase decorative items, plants, or collectibles. These elements not only add visual interest but also offer practical storage and display solutions for enhancing the overall appeal of the TV wall.
5. Integrated Media Console
If space allows, consider integrating a custom media console into the backdrop design. This feature can house media components, provide additional storage, and serve as a stylish anchor for the TV wall, creating a cohesive and functional focal point in the room.
By incorporating these customized elements into the backdrop, you can elevate the visual impact of your DIY TV wall, creating a personalized and visually striking feature that transforms your living room into a stylish and functional space.
Incorporating Additional Features and Shelving
When creating a DIY TV wall, incorporating additional features and shelving can significantly enhance the functionality and aesthetic appeal of the space. Here's a detailed exploration of how to integrate these elements into your TV wall design:
1. Customized Shelving Units
Integrating customized shelving units around the TV not only provides practical storage solutions but also adds visual interest to the wall. Consider incorporating floating shelves, open shelving units, or modular shelving systems that complement the overall style of the room. These shelves can be used to display decorative items, books, or media components, adding a personalized touch to the TV wall.
2. Media Storage and Organization
Incorporating dedicated media storage and organization solutions into the TV wall design can help declutter the space and create a streamlined look. Consider installing built-in cabinets, media consoles, or wall-mounted storage units to neatly house electronic devices, gaming consoles, DVDs, and other media accessories. This not only enhances the functionality of the TV wall but also contributes to a tidy and organized living room environment.
3. Integrated Sound Systems
For an immersive entertainment experience, consider integrating sound systems or speakers into the TV wall design. Whether it's a sleek soundbar mounted below the TV or concealed in-wall speakers, incorporating audio elements into the TV wall can elevate the viewing and listening experience while maintaining a clean and cohesive aesthetic.
4. Display Nooks and Niches
Creating display nooks or niches within the TV wall allows for the showcase of decorative items, artwork, or personal mementos. These recessed areas can be illuminated with accent lighting to draw attention to the displayed items, adding depth and visual intrigue to the overall design. Consider incorporating adjustable shelves or built-in display cases to accommodate various items and adapt to evolving decor preferences.
5. Functional Integration
In addition to aesthetics, prioritize the functional integration of additional features. Ensure that the shelving and additional elements are strategically positioned to complement the TV viewing experience and maintain a balanced visual composition. Consider the accessibility of media components, the placement of gaming consoles, and the organization of cables to create a seamless and user-friendly setup.
By incorporating these additional features and shelving into your DIY TV wall, you can create a multifaceted and personalized space that seamlessly combines style, functionality, and organization. These elements contribute to the overall success of your TV wall project, transforming your living room into a versatile and visually captivating environment.
Finishing Touches and Styling Your DIY TV Wall
As you near the completion of your DIY TV wall project, the finishing touches and styling play a pivotal role in elevating the overall aesthetic and cohesiveness of the space. Here's a comprehensive guide on how to add those final details that will truly make your TV wall a stunning feature in your living room:
1. Cable Management Solutions
Implementing effective cable management solutions is essential for achieving a polished and clutter-free look. Utilize cable raceways, cord covers, or in-wall cable concealment to neatly organize and conceal wires, ensuring a clean and streamlined appearance for your TV wall. By tucking away unsightly cables, you can create a visually pleasing and professional finish.
2. Decorative Accents and Greenery
Incorporate decorative accents and greenery to infuse life and personality into the TV wall design. Consider adding decorative objects, such as vases, sculptures, or framed art, to create visual interest and complement the overall style of the space. Additionally, incorporating indoor plants or succulents can introduce a refreshing touch of nature, adding vibrancy and texture to the TV wall.
3. Stylish Wall Art and Mirrors
Integrating stylish wall art or mirrors can enhance the visual impact of the TV wall while contributing to the room's ambiance. Select artwork or mirrors that complement the color scheme and style of the room, and strategically position them to create a balanced and harmonious composition. This addition can elevate the overall aesthetic and create a captivating focal point within the living room.
4. Layered Lighting Solutions
Layered lighting solutions, such as ambient, task, and accent lighting, can transform the atmosphere of the space and highlight the features of the TV wall. Incorporate a combination of ceiling lights, floor lamps, and wall sconces to create a versatile lighting scheme that enhances the functionality and visual appeal of the room. Adjustable lighting fixtures can also provide flexibility in setting the mood for different occasions.
5. Personalized Display Arrangements
Curate personalized display arrangements on the TV wall to reflect your individual style and interests. Whether it's a gallery of family photographs, a collection of memorabilia, or curated art pieces, these displays add a personal touch to the space and create a sense of warmth and authenticity. Arrange the items thoughtfully to create a visually engaging and meaningful display.
6. Harmonizing with Surrounding Decor
Ensure that the finishing touches harmonize with the surrounding decor and furniture in the living room. Consider the color palette, textures, and design elements of the existing furnishings, and select finishing touches that complement and enhance the overall aesthetic. This cohesive approach creates a unified and harmonious look throughout the space.
By incorporating these finishing touches and styling elements into your DIY TV wall, you can elevate the visual impact and create a personalized and inviting focal point in your living room. These details contribute to the overall cohesiveness and charm of the space, ensuring that your DIY TV wall becomes a stunning and functional feature that enhances the ambiance of your home.