Home>Create & Decorate>DIY & Crafts>DIY Sawmill: How To Build Your Own Lumber Mill At Home

DIY & Crafts
DIY Sawmill: How To Build Your Own Lumber Mill At Home
Published: April 18, 2024

Senior Editor in Create & Decorate, Kathryn combines traditional craftsmanship with contemporary trends. Her background in textile design and commitment to sustainable crafts inspire both content and community.
Learn how to build your own DIY sawmill and create custom lumber at home with our step-by-step guide. Perfect for DIY & Crafts enthusiasts!
(Many of the links in this article redirect to a specific reviewed product. Your purchase of these products through affiliate links helps to generate commission for Twigandthistle.com, at no extra cost. Learn more)
Introduction
Are you a DIY enthusiast looking to take your woodworking skills to the next level? Have you ever considered building your own lumber mill at home? In this article, we will explore the exciting world of DIY sawmills and guide you through the process of creating your very own lumber mill. Whether you're a seasoned woodworker or a novice looking for a new challenge, constructing a DIY sawmill can be a rewarding and cost-effective endeavor. So, grab your tools and let's dive into the fascinating realm of homemade lumber mills!
Understanding the Basics of Sawmills
Sawmills are essential for converting logs into lumber, and understanding their basic operation is crucial before embarking on building your own DIY sawmill. Here are the key components and functions of a typical sawmill:
-
Log Entry and Handling: Logs are loaded onto the sawmill, where they undergo a series of processes to transform them into usable lumber. This initial step involves the efficient handling and positioning of logs for optimal cutting.
-
Cutting Mechanism: The cutting mechanism, typically a saw blade, is responsible for slicing the logs into boards or planks of desired dimensions. Understanding the types of saw blades and their applications is vital for achieving precise cuts.
-
Log Support and Movement: Sawmills feature mechanisms to support and move the logs during the cutting process. This ensures stability and accuracy in the resulting lumber.
-
Waste Management: Sawmills produce wood waste in the form of sawdust and offcuts. Efficient waste management systems are integrated into sawmills to collect and dispose of these byproducts.
By grasping these fundamental aspects of sawmill operation, you'll be better equipped to design and construct your own DIY sawmill tailored to your specific woodworking needs.
Choosing the Right Materials and Tools
When embarking on the journey of building your DIY sawmill, selecting the appropriate materials and tools is paramount to the success of your project. Here's a comprehensive guide to help you make informed choices:
Materials
-
Steel Beams: Opt for sturdy steel beams to form the foundation and framework of your sawmill. The durability and load-bearing capacity of steel make it an ideal choice for supporting the weight of logs and the cutting mechanism.
-
Lumber: Utilize high-quality lumber for constructing the various components of your sawmill, such as the log support structure, platform, and safety guards. Select treated lumber to enhance resistance to environmental elements and prolong the lifespan of your DIY sawmill.
-
Saw Blade: Invest in a high-performance saw blade designed for cutting hardwood or softwood, depending on your intended lumber processing. Consider the blade's tooth count, kerf width, and material composition to ensure optimal cutting efficiency.
-
Motor and Power Transmission Components: Choose a reliable motor with sufficient horsepower to drive the saw blade through the logs. Additionally, select appropriate power transmission components, such as pulleys, belts, and bearings, to facilitate smooth and consistent operation.
Tools
-
Welding Equipment: Acquire a welding machine and related accessories for joining steel beams and fabricating the frame of your DIY sawmill. Proficient welding is essential for ensuring structural integrity and stability.
-
Cutting and Drilling Tools: Equip yourself with a variety of cutting and drilling tools, including a circular saw, drill press, angle grinder, and hole saws. These tools are indispensable for shaping and assembling the components of your sawmill.
-
Measuring Instruments: Precision is key in sawmill construction, so gather measuring instruments such as a tape measure, level, square, and angle gauge. Accurate measurements and alignments are crucial for the functionality and safety of your DIY sawmill.
-
Safety Gear: Prioritize safety by obtaining personal protective equipment, including safety goggles, gloves, and ear protection. Working with power tools and heavy materials necessitates the use of appropriate safety gear to mitigate potential hazards.
By carefully selecting the right materials and tools for your DIY sawmill project, you can lay a solid foundation for a functional and durable lumber mill that meets your woodworking requirements.
Read more: How to Build a DIY Window Frame
Designing Your DIY Sawmill
Designing your DIY sawmill is a critical phase that sets the stage for the construction and functionality of your lumber mill. Consider the following key aspects when conceptualizing the design of your homemade sawmill:
1. Size and Capacity
Determine the anticipated workload and the maximum dimensions of logs you intend to process. This information will guide the sizing of your sawmill to ensure it can accommodate the intended lumber production capacity.
2. Mobility and Portability
If you foresee the need to transport your sawmill to different locations or work on various job sites, factor in portability during the design phase. Incorporating features such as detachable components and trailer compatibility can enhance the mobility of your DIY sawmill.
3. Cutting Adjustability
Plan for adjustable cutting mechanisms to cater to diverse lumber dimensions and cutting requirements. Incorporating features that allow for blade height and angle adjustments will expand the versatility of your sawmill.
Read more: How to Build DIY Window Security Bars
4. Safety Considerations
Prioritize safety in the design of your DIY sawmill by integrating safety guards, emergency shutoff mechanisms, and clear operational instructions. Ensuring the protection of operators and bystanders is paramount in the design phase.
5. Ergonomics and Accessibility
Design the layout of your sawmill to facilitate ease of operation and maintenance. Consider the positioning of controls, access points for blade maintenance, and ergonomic features to enhance user comfort during prolonged operation.
6. Power Source and Transmission
Select an appropriate power source and design the transmission system to efficiently deliver power to the cutting mechanism. Whether utilizing electric motors, gasoline engines, or alternative power sources, ensure the design accommodates the chosen power supply.
7. Material Compatibility
Choose materials that are compatible with the intended lumber processing and environmental conditions. Factor in corrosion resistance, load-bearing capacity, and durability when selecting materials for the frame, support structures, and moving components.
Read more: How to Build a DIY Window Awning
8. Future Expansion
Anticipate potential upgrades or expansions in the future and design your sawmill to accommodate such modifications. Planning for scalability can prolong the usefulness of your DIY sawmill as your woodworking needs evolve.
By meticulously considering these design elements, you can develop a comprehensive blueprint for your DIY sawmill that aligns with your woodworking objectives and operational requirements.
Building the Frame and Structure
Building the frame and structure of your DIY sawmill forms the backbone of the entire construction process. The frame provides the necessary support and stability for the operational components of the sawmill. Here's a detailed guide to help you navigate the crucial phase of constructing the frame and structure of your homemade lumber mill:
1. Foundation Preparation
Begin by selecting a suitable location for setting up your sawmill. Ensure the ground is level and stable to serve as a solid foundation for the frame. Clear the area of any debris or obstructions to create a safe and spacious work environment.
2. Assembling the Base
Lay out the steel beams or treated lumber to form the base of the sawmill. Utilize precise measurements and alignments to position the beams or lumber according to the predetermined design. Secure the components together using welding techniques or heavy-duty fasteners to create a robust foundation.
Read more: How to Build DIY Door Casing
3. Erecting Vertical Supports
Once the base is in place, erect the vertical supports to establish the framework of the sawmill. Weld or fasten the vertical posts to the base, ensuring they are plumb and securely anchored. The vertical supports serve as the pillars for the overall structure and provide essential stability.
4. Installing Cross Bracing
To reinforce the structural integrity of the frame, install cross bracing between the vertical supports. Cross bracing helps distribute the load and prevents lateral movement, enhancing the rigidity of the frame. Weld or fasten the cross braces at strategic points to optimize their supportive function.
5. Constructing the Platform
Design and construct the platform where the logs will be positioned for cutting. Utilize durable lumber or steel grating to form the platform, ensuring it is securely attached to the frame. The platform should accommodate the anticipated log sizes and provide ample space for maneuvering during the cutting process.
6. Integrating Safety Features
During the construction of the frame and structure, prioritize the integration of safety features such as guardrails, safety barriers, and warning signage. Safety considerations should be woven into the design and implementation of the frame to create a secure working environment for operators and bystanders.
Read more: How to Build a DIY Pass Through Window
7. Weatherproofing and Corrosion Protection
Apply appropriate coatings or treatments to the frame and structural components to safeguard them against environmental elements and corrosion. Weatherproofing measures can prolong the lifespan of the sawmill and maintain its structural integrity over time.
8. Quality Assurance Checks
Conduct thorough quality assurance checks throughout the construction process to verify the structural soundness and alignment of the frame. Utilize measuring instruments and inspection protocols to ensure the frame meets the design specifications and safety standards.
By meticulously following these steps and paying attention to detail, you can construct a sturdy and reliable frame and structure for your DIY sawmill, laying the groundwork for the subsequent assembly of operational components and cutting mechanisms.
Installing the Saw Blade and Motor
The installation of the saw blade and motor is a pivotal stage in bringing your DIY sawmill to life. This phase involves integrating the essential components responsible for cutting logs into lumber. Here's a comprehensive guide to walk you through the process of installing the saw blade and motor with precision and efficiency:
-
Saw Blade Selection: Begin by selecting a suitable saw blade tailored to your lumber processing needs. Consider factors such as the blade diameter, tooth configuration, and compatibility with your chosen motor. Ensure the saw blade is designed for the specific type of wood you intend to cut, whether hardwood or softwood.
-
Blade Mounting: Position the saw blade onto the designated mounting hub or arbor of the sawmill. Align the blade carefully to ensure it is centered and balanced, minimizing vibration and enhancing cutting accuracy. Secure the blade in place using the appropriate fasteners and locking mechanisms to prevent slippage during operation.
-
Tensioning the Blade: Depending on the type of saw blade and cutting requirements, tension the blade to the manufacturer's recommended specifications. Proper blade tension is crucial for maintaining blade integrity and optimizing cutting performance. Utilize a tensioning gauge or tension meter to achieve the prescribed blade tension.
-
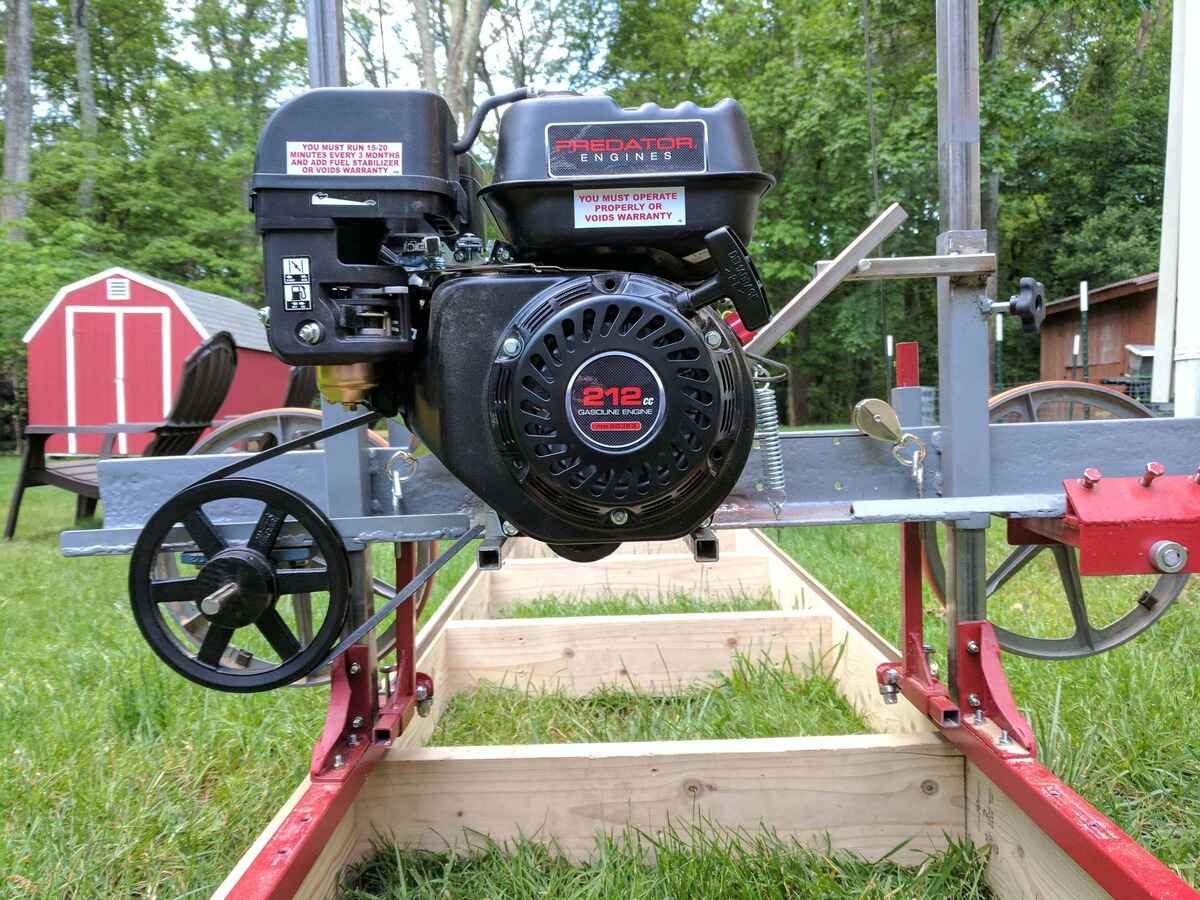
Motor Mounting: Install the motor onto the designated mounting platform or bracket, ensuring it is securely anchored and aligned with the saw blade. The motor should be positioned to facilitate direct power transmission to the saw blade, minimizing energy loss and maximizing cutting efficiency.
-
Power Transmission: Establish the power transmission system connecting the motor to the saw blade. Depending on the motor type and configuration, utilize appropriate pulleys, belts, or direct drive mechanisms to transfer power from the motor to the saw blade. Ensure the power transmission components are properly tensioned and aligned for smooth operation.
-
Belt or Chain Alignment: If utilizing belt or chain-driven power transmission, meticulously align the belts or chains to prevent slippage and premature wear. Proper alignment of the power transmission components is essential for maintaining consistent power delivery to the saw blade during cutting operations.
-
Motor Calibration: Calibrate the motor to achieve the desired cutting speed and torque for optimal lumber processing. Refer to the motor manufacturer's specifications and guidelines for adjusting the motor settings to suit the requirements of your DIY sawmill.
-
Safety Precautions: Prioritize safety measures during the installation of the saw blade and motor. Ensure all safety guards and protective covers are in place to prevent accidental contact with the rotating saw blade. Adhere to safety protocols and guidelines when handling the motor and power transmission components.
By meticulously following these steps and adhering to best practices, you can successfully install the saw blade and motor, bringing your DIY sawmill one step closer to operational readiness. The seamless integration of these critical components sets the stage for transforming raw logs into high-quality lumber with precision and efficiency.
Testing and Fine-Tuning Your Homemade Lumber Mill
After the construction and assembly of your DIY sawmill, the next crucial phase involves testing and fine-tuning the various components to ensure optimal performance and safety. Here's a detailed guide to help you navigate the process of testing and fine-tuning your homemade lumber mill:
-
Functional Testing: Initiate functional testing by powering up the sawmill and observing the operational behavior of the motor, saw blade, and power transmission components. Verify that the motor starts smoothly, and the saw blade rotates without unusual vibrations or noises. Conduct initial test runs without logs to assess the functionality of the sawmill's basic components.
-
Log Processing Trials: Once the initial functional testing is successful, proceed to conduct log processing trials. Select a manageable log of suitable dimensions and feed it into the sawmill to observe the cutting performance. Monitor the cutting precision, blade alignment, and log handling mechanisms during the trial runs. Make adjustments as necessary to optimize the cutting process.
-
Cutting Accuracy Assessment: Evaluate the accuracy of the cuts produced by the sawmill. Measure the resulting lumber dimensions and assess the consistency of the cuts across the length of the log. Fine-tune the blade alignment, tension, and cutting parameters to achieve precise and uniform lumber dimensions.
-
Power and Energy Efficiency: Monitor the power consumption and energy efficiency of the sawmill during operation. Assess the motor's power utilization and the effectiveness of the power transmission system. Fine-tune the motor settings and power transmission components to maximize energy efficiency and minimize operational costs.
-
Safety System Validation: Validate the functionality of the safety features integrated into the sawmill. Test emergency shutoff mechanisms, safety guards, and operational controls to ensure they effectively mitigate potential hazards. Verify that the sawmill complies with safety standards and regulations governing woodworking machinery.
-
Fine-Tuning Adjustments: Based on the observations and assessments during testing, implement fine-tuning adjustments to enhance the overall performance of the sawmill. This may include refining blade tension, optimizing cutting speeds, and adjusting log handling mechanisms. Continuously iterate through testing and adjustment cycles to achieve the desired operational parameters.
-
Dust and Waste Management: Evaluate the effectiveness of the sawmill's dust and waste management systems. Assess the collection and disposal of sawdust and wood waste generated during the cutting process. Fine-tune the waste management mechanisms to maintain a clean and organized work environment.
-
Operational Training and Documentation: As the testing and fine-tuning process progresses, provide operational training for individuals who will be using the sawmill. Develop comprehensive documentation outlining the operational procedures, maintenance protocols, and safety guidelines. Ensure that operators are proficient in handling the sawmill and adhering to best practices.
By meticulously conducting testing and fine-tuning procedures, you can refine the functionality, precision, and safety of your homemade lumber mill. The iterative process of assessment and adjustment is instrumental in optimizing the performance of the sawmill, ultimately enabling you to produce high-quality lumber with efficiency and reliability.
Read more: How to Build a DIY Coffee Bar
Safety Precautions and Maintenance Tips
Ensuring the safety of operators and maintaining the longevity of your DIY sawmill are paramount considerations. Implementing comprehensive safety precautions and adhering to proactive maintenance practices are essential for a secure and efficient woodworking environment. Here's a detailed breakdown of safety measures and maintenance tips to safeguard both personnel and the sawmill itself:
Safety Precautions
-
Personal Protective Equipment (PPE): Prioritize the use of appropriate PPE, including safety goggles, ear protection, gloves, and steel-toed boots. Operators should wear fitted clothing and avoid loose accessories that may pose entanglement hazards.
-
Safety Guards and Barriers: Install robust safety guards around the saw blade and other moving components to prevent accidental contact. Implement physical barriers to restrict unauthorized access to the operational area.
-
Emergency Stop Mechanism: Integrate an easily accessible emergency stop button or lever that instantly halts the sawmill's operation in case of emergencies or imminent hazards.
-
Operator Training: Provide comprehensive training for operators on the safe operation of the sawmill, including proper log handling, blade adjustment procedures, and emergency protocols.
-
Regular Inspections: Conduct routine inspections of the sawmill's components, structural integrity, and safety features to identify and address potential hazards or malfunctions.
-
Fire Prevention: Implement fire prevention measures, such as the installation of fire extinguishers and the removal of combustible materials from the sawmill's vicinity.
-
Clear Communication: Establish clear communication protocols and warning signs to alert personnel of potential dangers and operational status.
Maintenance Tips
-
Lubrication and Cleaning: Regularly lubricate moving parts and clean debris from the sawmill to prevent friction, corrosion, and the accumulation of sawdust that may pose fire hazards.
-
Blade Maintenance: Implement a scheduled blade maintenance routine, including sharpening, tension adjustment, and periodic replacement to ensure optimal cutting performance.
-
Motor and Power Transmission Inspection: Inspect the motor, belts, pulleys, and other power transmission components for wear, misalignment, or damage. Address any issues promptly to prevent operational disruptions.
-
Structural Integrity Checks: Periodically assess the structural integrity of the sawmill's frame, support structures, and platform to identify signs of fatigue, corrosion, or deformation.
-
Electrical System Evaluation: Regularly inspect the electrical wiring, connections, and control systems to detect and rectify potential electrical hazards or malfunctions.
-
Dust and Waste Management: Maintain an efficient sawdust and waste collection system to prevent the accumulation of combustible materials and maintain a clean working environment.
-
Documentation and Records: Keep detailed records of maintenance activities, inspections, and safety assessments to track the sawmill's operational history and identify recurring issues.
By diligently adhering to these safety precautions and maintenance tips, you can foster a secure and reliable operational environment for your DIY sawmill. Prioritizing safety and proactive maintenance not only safeguards personnel but also prolongs the lifespan and functionality of the lumber mill, ensuring consistent and efficient woodworking operations.
Conclusion
In conclusion, venturing into the realm of DIY sawmills presents an exciting opportunity for woodworking enthusiasts to craft their own lumber mill from the ground up. By understanding the basics of sawmills, carefully selecting materials and tools, and meticulously designing and constructing the frame and operational components, individuals can bring their homemade lumber mill to fruition. The installation, testing, and fine-tuning phases are pivotal in ensuring the functionality, precision, and safety of the DIY sawmill, while proactive safety precautions and maintenance practices are essential for sustaining a secure and efficient woodworking environment. Embracing the journey of building a DIY sawmill not only cultivates practical skills and creativity but also opens doors to personalized lumber processing tailored to individual woodworking needs. With a blend of craftsmanship, innovation, and dedication, DIY enthusiasts can embark on the rewarding endeavor of constructing and operating their very own lumber mill, adding a unique dimension to their woodworking pursuits.

