
Home>Create & Decorate>DIY & Crafts>How To Build A Bench On An Existing Deck
DIY & Crafts
How To Build A Bench On An Existing Deck
Published: February 29, 2024

Content Creator specializing in woodworking and interior transformations. Caegan's guides motivate readers to undertake their own projects, while his custom furniture adds a personal touch.
Learn how to enhance your existing deck with a DIY bench. Get step-by-step instructions and craft a cozy outdoor seating area. Perfect for DIY & Crafts enthusiasts!
(Many of the links in this article redirect to a specific reviewed product. Your purchase of these products through affiliate links helps to generate commission for Twigandthistle.com, at no extra cost. Learn more)
Introduction
Building a bench on an existing deck can be a rewarding and practical DIY project that adds both functionality and aesthetic appeal to your outdoor space. Whether you want to create a cozy seating area for relaxation or enhance the overall look of your deck, constructing a bench can be a fulfilling endeavor. By following the steps outlined in this guide, you can transform your deck into a more inviting and versatile area for entertaining, lounging, and enjoying the outdoors.
Adding a bench to your deck not only provides extra seating but also offers a seamless integration of furniture with the existing structure. This can be particularly beneficial if you have limited space and want to maximize the utility of your deck. Additionally, a well-designed bench can serve as a focal point, elevating the visual appeal of the entire deck area.
Before embarking on this project, it's essential to assess the condition and layout of your deck to ensure that it can accommodate the addition of a bench. By carefully evaluating the space and considering various design options, you can make informed decisions that align with your preferences and the existing aesthetics of your deck.
Throughout this guide, you will learn how to select the right bench design, gather the necessary materials and tools, prepare the deck surface, construct the bench frame, install the bench seat, and add finishing touches. Additionally, maintenance tips will be provided to help you preserve the longevity and appearance of your newly built bench.
Embarking on the journey of building a bench on your existing deck is an opportunity to unleash your creativity and craftsmanship while enhancing the functionality and charm of your outdoor living space. With careful planning and attention to detail, you can create a custom bench that complements your deck and fulfills your specific seating needs. Let's dive into the step-by-step process of bringing your vision to life and elevating the comfort and allure of your deck.
Step 1: Assessing the Deck
Before embarking on the project of building a bench on your existing deck, it's crucial to thoroughly assess the condition, layout, and structural integrity of the deck. This initial step sets the foundation for a successful and seamless integration of the bench with the existing deck structure.
Start by examining the overall layout and dimensions of the deck. Take precise measurements to determine the available space for the bench and ensure that it won't obstruct walkways or impede the functionality of the deck. Consider the traffic flow and how the addition of a bench will impact the usability and aesthetics of the deck area.
Next, evaluate the structural stability of the deck. Look for any signs of wear, rot, or damage, especially in the areas where the bench will be attached. It's essential to ensure that the deck can support the additional weight of the bench and occupants without compromising safety. If there are any concerns about the deck's structural integrity, it's advisable to address them before proceeding with the bench construction.
Assess the material and finish of the existing deck. Take note of the type of wood, composite, or other materials used in the deck construction, as well as the finish or coating applied. Understanding these details will help in selecting materials for the bench that complement the deck's existing aesthetics and ensure a cohesive look.
Consider the deck's exposure to the elements. Evaluate how the deck withstands sunlight, moisture, and other environmental factors. This assessment will guide the selection of materials and finishes for the bench to ensure durability and weather resistance.
Furthermore, take into account the design style and theme of the deck. Whether it's a modern, rustic, or traditional deck, the bench should harmonize with the existing design elements to create a cohesive and visually appealing outdoor space.
By thoroughly assessing the deck, you can make informed decisions about the bench design, materials, and construction methods. This proactive approach minimizes potential challenges and ensures that the bench seamlessly integrates with the deck, enhancing its functionality and aesthetic appeal.
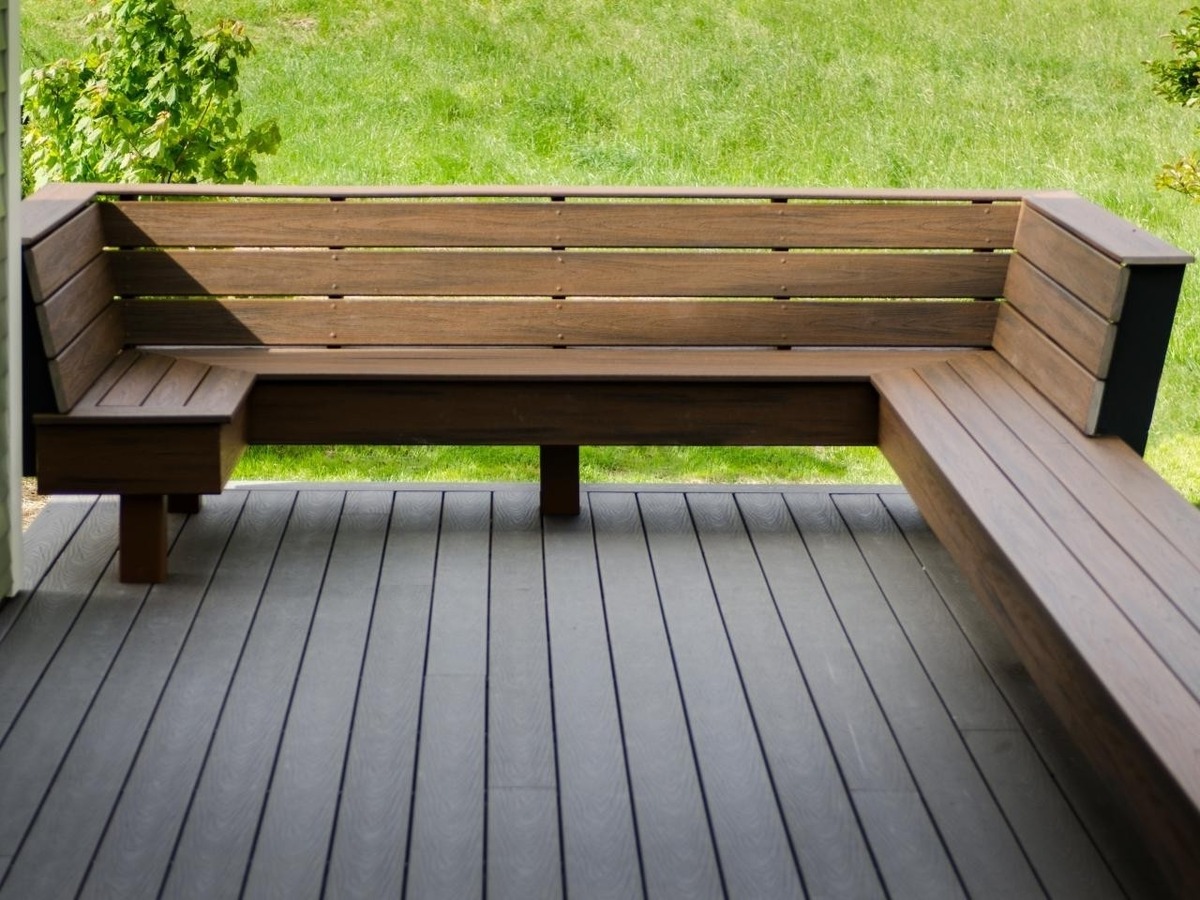
Step 2: Choosing the Right Bench Design
Selecting the right bench design is a pivotal step in the process of building a bench on an existing deck. The chosen design should not only complement the deck's aesthetics but also align with your functional and stylistic preferences. With a myriad of design options available, it's essential to consider factors such as space utilization, seating capacity, comfort, and visual appeal.
One of the primary considerations when choosing a bench design is the available space on the deck. If the deck has limited square footage, a space-efficient bench design, such as a built-in corner bench or a narrow linear bench, can maximize seating without overwhelming the area. Conversely, for larger decks, options like L-shaped benches or multiple smaller benches strategically placed throughout the space can create versatile seating arrangements.
The intended use of the bench also influences the design selection. If the primary purpose is to create a cozy nook for intimate gatherings or relaxation, a curved or semicircular bench design can foster a welcoming and intimate atmosphere. On the other hand, if the bench will often accommodate larger groups or serve as a dining area, a straight bench with a sturdy, wide seat may be more practical.
Consider the existing design elements of the deck, such as railing styles, architectural features, and overall theme, when choosing a bench design. Harmonizing the bench design with these elements ensures a cohesive and visually appealing integration. For instance, a bench with a similar wood finish or complementary color palette can tie the entire deck together, creating a unified and harmonious outdoor space.
Furthermore, prioritize comfort when selecting a bench design. Ergonomically contoured seats, backrests, and cushions can significantly enhance the comfort level, making the bench a welcoming and inviting seating option. Additionally, incorporating features like built-in storage or integrated planters can add functionality to the bench, contributing to a more organized and aesthetically pleasing deck environment.
By carefully considering the available space, intended use, existing design elements, and comfort factors, you can choose a bench design that not only enhances the functionality of the deck but also elevates its visual appeal. The selected design should seamlessly integrate with the existing deck while fulfilling your specific seating needs and reflecting your personal style.
Step 3: Gathering Materials and Tools
Gathering the necessary materials and tools is a crucial preparatory step before embarking on the construction of a bench on an existing deck. By ensuring that you have all the required items at hand, you can streamline the building process and minimize interruptions. Here's a comprehensive list of materials and tools needed for this project:
Materials:
- Lumber: Select high-quality, weather-resistant lumber for the bench frame and seat. The type of wood should complement the existing deck and withstand outdoor conditions. Common choices include cedar, redwood, or pressure-treated pine.
- Fasteners: Choose corrosion-resistant screws, bolts, and nails to secure the bench components. Stainless steel or galvanized fasteners are ideal for outdoor applications, as they offer durability and weather resistance.
- Wood Finish or Sealant: Opt for a suitable finish or sealant to protect the bench from moisture, UV rays, and general wear. The finish should enhance the natural beauty of the wood while providing long-lasting protection.
- Support Brackets: If the bench will be attached to the deck structure, sturdy support brackets or hardware will be necessary to ensure a secure and stable installation.
- Cushions or Upholstery (Optional): If desired, select comfortable and weather-resistant cushions or upholstery to enhance the seating experience. Ensure that the chosen materials can withstand outdoor exposure.
Tools:
- Measuring Tape: A precise measuring tape is essential for taking accurate dimensions and ensuring proper alignment during construction.
- Circular Saw or Miter Saw: A reliable saw for cutting lumber to the required lengths and angles.
- Drill and Bits: A power drill with appropriate drill bits for pilot holes and driving screws into the wood.
- Level: A level is indispensable for ensuring that the bench components are installed evenly and securely.
- Screwdriver Set: Both flathead and Phillips screwdrivers will be needed for assembling and fastening various components.
- Clamps: Clamps are useful for holding components in place during assembly and installation.
- Safety Gear: Personal protective equipment such as safety glasses, gloves, and hearing protection should be worn during the construction process to ensure safety.
By gathering these materials and tools, you will be well-equipped to commence the construction of the bench on your existing deck. Ensuring the availability of high-quality materials and reliable tools sets the stage for a successful and efficient building process, ultimately leading to the creation of a durable and visually appealing outdoor seating solution.
Step 4: Preparing the Deck Surface
Preparing the deck surface is a critical step that sets the stage for the seamless integration of the bench with the existing deck structure. This preparatory phase involves assessing the condition of the deck, ensuring proper anchoring points, and making necessary adjustments to accommodate the bench installation.
Begin by thoroughly cleaning the deck surface to remove any debris, dirt, or grime that may have accumulated over time. Use a suitable deck cleaner and a stiff-bristled brush to scrub the surface, paying attention to areas where the bench will be attached. This cleaning process not only enhances the visual appeal of the deck but also ensures a clean and stable foundation for the bench installation.
Next, inspect the deck for any signs of wear, damage, or rot, especially in the areas where the bench will be anchored. Address any structural concerns by replacing or reinforcing damaged boards, securing loose fasteners, and addressing any underlying issues that may compromise the stability of the bench installation.
Identify the optimal anchoring points for the bench. Depending on the chosen design and placement, the bench may be attached to the deck railing, the deck frame, or a combination of both. Ensure that the selected anchoring points are structurally sound and capable of supporting the weight and usage of the bench.
If the bench will be freestanding, consider the placement of support posts or legs and ensure that the deck surface can accommodate the additional load without compromising its integrity. Proper weight distribution and load-bearing capacity are essential factors to consider when preparing the deck surface for a freestanding bench.
Incorporate any necessary reinforcements or modifications to the deck surface to accommodate the bench installation. This may involve adding blocking between deck joists for secure attachment points, reinforcing the deck frame in the bench installation area, or adjusting the layout of existing features to optimize space utilization.
By meticulously preparing the deck surface, addressing structural considerations, and identifying suitable anchoring points, you can ensure a solid and stable foundation for the bench installation. This proactive approach minimizes potential challenges during the construction phase and sets the groundwork for a successful and enduring integration of the bench with the existing deck.
Step 5: Building the Bench Frame
Building the bench frame is a pivotal phase in the construction process, laying the groundwork for the structural integrity and stability of the bench. The frame serves as the foundational support for the bench seat, providing a robust structure that withstands regular use and outdoor conditions. Here's a detailed overview of the steps involved in constructing the bench frame:
1. Selecting the Lumber
Choose high-quality, durable lumber for the bench frame, ensuring that it can withstand outdoor exposure and support the anticipated weight capacity. Opt for pressure-treated pine, cedar, or redwood, as these materials offer excellent weather resistance and structural strength. Consider the dimensions and design of the bench to determine the required lengths and quantities of lumber for the frame components.
2. Cutting and Assembling the Frame Components
Using precise measurements, cut the lumber to the required lengths for the bench frame components, including the legs, horizontal supports, and any additional bracing. Utilize a circular saw or miter saw to achieve accurate cuts, ensuring that the components fit together seamlessly during assembly. Employ clamps to hold the frame components in place during the assembly process, maintaining alignment and stability.
3. Joining the Frame Components
Assemble the bench frame components using corrosion-resistant screws and appropriate fastening techniques. Pre-drill pilot holes to prevent splitting and ensure secure connections between the frame elements. Utilize a level to confirm that the frame is square and even, making necessary adjustments to achieve a stable and balanced structure. Pay attention to the joinery and ensure that the frame is rigid and capable of supporting the weight of occupants.
4. Reinforcing the Frame for Stability
Consider incorporating additional bracing or cross supports within the frame to enhance its stability and load-bearing capacity. Strategic placement of diagonal braces or support beams can minimize lateral movement and ensure that the bench remains sturdy and secure. Evaluate the overall rigidity of the frame and make any reinforcements as needed to fortify its structural integrity.
5. Finishing and Sealing
Apply a suitable wood finish or sealant to the completed bench frame to protect it from moisture, UV exposure, and general wear. The finish not only enhances the visual appeal of the frame but also contributes to its longevity and resilience in outdoor environments. Ensure that the chosen finish complements the existing deck and harmonizes with the overall aesthetic of the outdoor space.
By meticulously constructing the bench frame with attention to material selection, precise assembly, and structural reinforcement, you establish a solid foundation for the bench seat installation. The robust and well-crafted frame forms the backbone of the bench, ensuring durability, stability, and long-term enjoyment of the outdoor seating solution.
Step 6: Installing the Bench Seat
Installing the bench seat is a pivotal phase that brings the construction process closer to fruition, culminating in a functional and inviting seating solution for your existing deck. This step involves securing the seat onto the previously constructed frame, ensuring a secure and comfortable surface for relaxation, socializing, and enjoying the outdoor ambiance.
1. Selecting the Seat Material
Choose a suitable material for the bench seat that aligns with your aesthetic preferences, comfort requirements, and durability expectations. Common options include weather-resistant lumber, composite decking material, or upholstered cushions, each offering distinct advantages in terms of maintenance, visual appeal, and seating comfort.
2. Cutting and Fitting the Seat Components
Using precise measurements, cut the selected material to the required dimensions for the bench seat. Ensure that the seat aligns seamlessly with the dimensions of the frame, providing a snug and secure fit. If the seat consists of multiple components, such as individual slats or panels, carefully align and fasten them to create a unified and even surface.
3. Attaching the Seat to the Frame
Secure the bench seat onto the frame using appropriate fastening methods, such as screws, bolts, or specialized hardware. Ensure that the seat is evenly positioned and securely anchored to the frame, minimizing any potential movement or instability. Utilize a level to confirm that the seat is flat and even, making any necessary adjustments to achieve a uniform and comfortable seating surface.
4. Enhancing Comfort and Aesthetics
Consider incorporating additional elements to enhance the comfort and visual appeal of the bench seat. This may involve adding cushions, pillows, or decorative elements that complement the overall design of the deck and create an inviting and cozy seating area. Additionally, applying a suitable finish or sealant to the seat material can protect it from environmental factors and preserve its appearance over time.
5. Evaluating Stability and Functionality
Once the bench seat is installed, conduct a thorough assessment of its stability, weight-bearing capacity, and overall functionality. Test the seat for any signs of movement, flexing, or discomfort, ensuring that it provides a secure and enjoyable seating experience. Address any potential issues promptly to guarantee the long-term usability and satisfaction derived from the newly installed bench seat.
By meticulously installing the bench seat with attention to material selection, precise fitting, and comfort considerations, you elevate the functionality and visual appeal of your existing deck. The completed bench seat serves as a welcoming and versatile seating solution, seamlessly integrating with the deck while offering a comfortable and inviting space for outdoor enjoyment.
Step 7: Finishing Touches and Maintenance Tips
After completing the construction of the bench on your existing deck, attention to finishing touches and maintenance is essential to ensure the longevity, visual appeal, and functionality of the newly built seating solution. This phase encompasses adding aesthetic enhancements, addressing weather resistance, and implementing maintenance practices to preserve the bench for years to come.
Aesthetic Enhancements
Consider incorporating decorative elements that elevate the visual appeal of the bench and harmonize with the overall deck aesthetics. This may involve adding throw pillows, seat cushions, or outdoor upholstery that complement the deck's color scheme and design theme. Additionally, integrating planter boxes or built-in storage compartments can enhance both the functionality and visual charm of the bench, creating a multifaceted outdoor seating feature.
Weather Resistance
Apply a high-quality finish or sealant to the entire bench, including the frame and seat, to protect it from the elements. The chosen finish should provide UV protection, moisture resistance, and durability to withstand outdoor exposure. Regularly inspect the bench for signs of wear or damage to the finish, and reapply the sealant as needed to maintain its protective properties.
Maintenance Practices
Implement a routine maintenance schedule to preserve the condition of the bench. This may involve periodic cleaning to remove dirt, debris, and environmental residues that can accumulate over time. Use a gentle cleanser and a soft brush to scrub the bench surface, followed by thorough rinsing. Additionally, inspect the bench for any loose fasteners, signs of wood decay, or structural issues, addressing them promptly to prevent further damage.
Seasonal Considerations
Adjust the maintenance routine based on seasonal changes and weather patterns. In colder climates, protect the bench from snow accumulation and ice formation by covering it with a weatherproof tarp or storing it in a sheltered area when not in use. In warmer climates, monitor the bench for excessive sun exposure and consider applying additional UV protection to maintain its appearance and structural integrity.
By attending to these finishing touches and implementing proactive maintenance practices, you can ensure that the bench remains a durable, visually appealing, and functional addition to your existing deck. The combination of aesthetic enhancements and diligent maintenance contributes to the long-term enjoyment and usability of the bench, creating a welcoming and enduring outdoor seating solution.
Conclusion
In conclusion, the process of building a bench on an existing deck is a gratifying endeavor that combines practical functionality with creative expression. By following the comprehensive steps outlined in this guide, you can transform your deck into a more inviting and versatile outdoor space. From assessing the deck's condition to selecting the right bench design, gathering materials and tools, preparing the deck surface, constructing the bench frame, installing the bench seat, and adding finishing touches, each phase contributes to the successful integration of the bench with the existing deck structure.
The careful assessment of the deck's layout, structural stability, and exposure to environmental elements sets the stage for informed decision-making throughout the project. Choosing the right bench design that aligns with space considerations, functional needs, and aesthetic preferences ensures a harmonious and visually appealing addition to the deck. Gathering high-quality materials and reliable tools, coupled with meticulous preparation of the deck surface, establishes a solid foundation for the bench construction.
The construction of the bench frame and the subsequent installation of the seat exemplify the fusion of craftsmanship and practicality, resulting in a durable and comfortable seating solution. Attention to finishing touches, weather resistance, and maintenance practices underscores the commitment to preserving the bench's longevity and visual allure, ensuring that it remains a cherished feature of your outdoor living space.
Embarking on the journey of building a bench on your existing deck is an opportunity to unleash your creativity, enhance the functionality of your outdoor area, and create a welcoming environment for relaxation and social gatherings. By embracing this DIY project, you not only elevate the aesthetics of your deck but also personalize the space to align with your lifestyle and preferences.
Ultimately, the addition of a custom-built bench enriches the outdoor experience, offering a dedicated space for unwinding, entertaining, and savoring the natural surroundings. Whether enjoying a quiet moment alone or hosting gatherings with friends and family, the bench becomes a focal point that enhances the overall ambiance of your deck.
In essence, the process of building a bench on an existing deck transcends mere construction; it embodies the transformation of a functional structure into a personalized oasis that reflects your unique style and enhances the enjoyment of outdoor living. With careful planning, attention to detail, and a touch of creativity, you can embark on this DIY journey with confidence, knowing that the end result will be a testament to your craftsmanship and a source of joy for years to come.