
Home>Create & Decorate>DIY & Crafts>How To Build A Simple Bench
DIY & Crafts
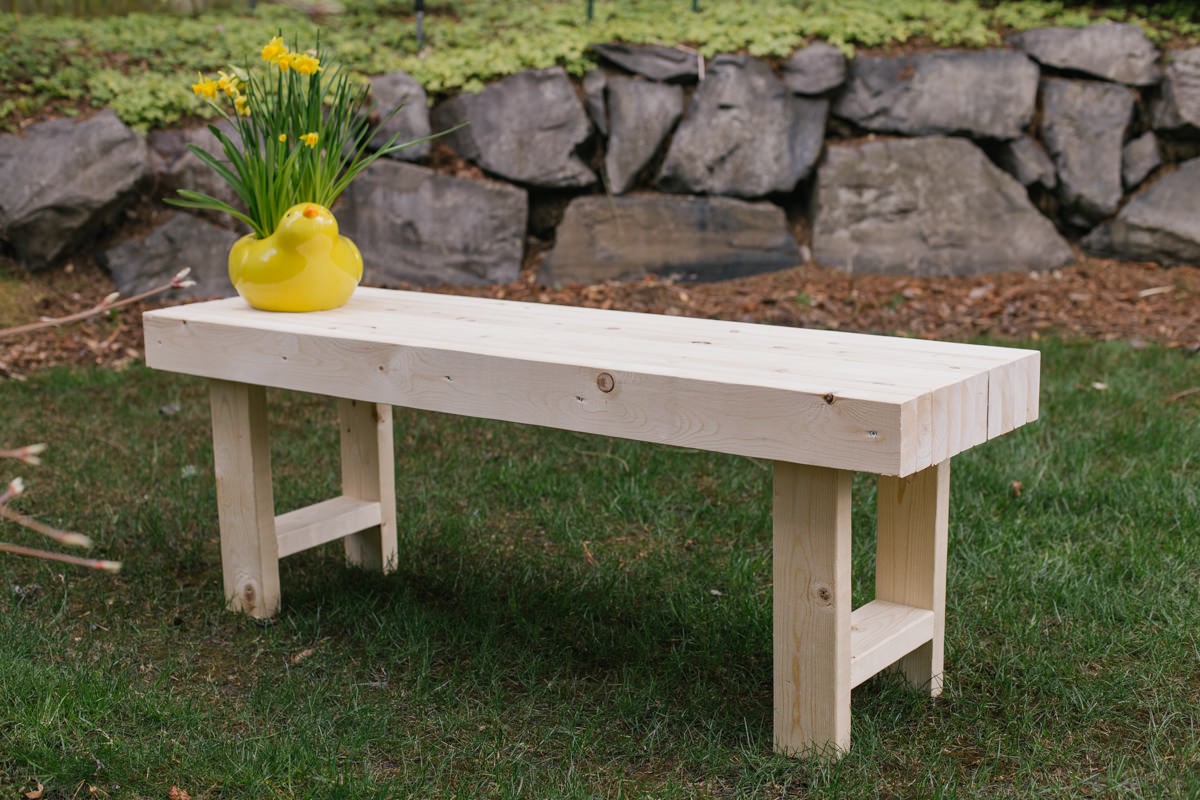
How To Build A Simple Bench
Published: June 2, 2024

Senior Editor in Create & Decorate, Kathryn combines traditional craftsmanship with contemporary trends. Her background in textile design and commitment to sustainable crafts inspire both content and community.
Learn how to build a simple bench with this easy DIY & Crafts tutorial. Create a stylish and functional piece for your home with just a few materials and simple steps.
(Many of the links in this article redirect to a specific reviewed product. Your purchase of these products through affiliate links helps to generate commission for Twigandthistle.com, at no extra cost. Learn more)
Introduction
So, you want to add a cozy and functional seating area to your home or garden? Building a simple bench is a fantastic way to achieve this! Whether you're a seasoned DIY enthusiast or just starting out, constructing a bench can be a rewarding and relatively straightforward project. Not only will it provide a comfortable spot to relax, but it can also enhance the aesthetic appeal of your outdoor or indoor space. In this guide, we'll walk you through the step-by-step process of creating a basic bench that's both sturdy and stylish. Let's roll up our sleeves and get started!
Materials Needed
To build a simple bench, you'll need the following materials:
- Wood: 2×4 lumber for the frame and legs, and a 2×12 or 2×6 board for the seat.
- Wood Screws: 2 ½ inch and 3-inch screws for securing the frame and attaching the seat.
- Wood Glue: For added strength and stability.
- Sandpaper: Coarse and fine grit for smoothing the wood surfaces.
- Wood Stain or Paint: To protect the wood from the elements and enhance its appearance.
- Polyurethane Sealant: Optional, but recommended for outdoor benches to protect against moisture.
- Wood Filler: For filling any gaps or imperfections in the wood.
- Measuring Tape: Essential for accurate dimensions.
- Pencil: For marking measurements and cuts.
- Safety Glasses and Gloves: To protect yourself during cutting and assembly.
- Paintbrushes or Rags: For applying the wood stain or paint.
- Clamps: Helpful for securing pieces together during assembly.
- Circular Saw or Miter Saw: For cutting the wood to size.
- Drill and Drill Bits: For pre-drilling holes and driving screws.
- Screwdriver: For manual screw tightening if needed.
Gathering these materials before you begin will ensure a smooth and efficient bench-building process.
Tools Required
When it comes to building a simple bench, having the right tools at your disposal is crucial for a successful and hassle-free construction process. Here's a list of essential tools you'll need:
-
Circular Saw or Miter Saw: These power saws are indispensable for making precise and straight cuts on the wood. Whether you're using 2x4s for the frame or a larger board for the seat, a reliable saw will ensure clean and accurate cuts.
-
Drill and Drill Bits: A power drill with a set of drill bits is essential for pre-drilling holes and driving screws into the wood. This will help prevent splitting and ensure a secure assembly.
-
Measuring Tape: Accurate measurements are key to a well-built bench. A quality measuring tape will allow you to mark and cut the wood to the exact dimensions required for your project.
-
Pencil: A simple yet indispensable tool for marking measurements and cut lines on the wood. Having a sharp pencil on hand will help ensure precision in your cuts and assembly.
-
Safety Glasses and Gloves: Safety should always be a priority when working with wood and power tools. Protect your eyes with safety glasses and your hands with gloves to prevent any potential injuries during cutting and assembly.
-
Wood Screws: You'll need 2 ½ inch and 3-inch wood screws for securing the frame and attaching the seat. Make sure to have an adequate supply of screws to complete the project without interruptions.
-
Wood Glue: Using wood glue in conjunction with screws will provide added strength and stability to the bench. It's a simple yet effective way to ensure a sturdy and durable final product.
-
Sandpaper: Coarse and fine grit sandpaper is essential for smoothing the wood surfaces and removing any rough edges. This will not only enhance the appearance of the bench but also prevent any splinters.
-
Wood Stain or Paint: Depending on your preference, you'll need wood stain or paint to protect the wood from the elements and enhance its visual appeal. Choose a finish that complements your space and provides the desired level of protection.
-
Polyurethane Sealant: While optional, applying a polyurethane sealant to an outdoor bench can provide additional protection against moisture and prolong its lifespan.
-
Wood Filler: This handy material is used for filling any gaps or imperfections in the wood, ensuring a smooth and flawless finish.
-
Paintbrushes or Rags: If you opt for wood stain or paint, having the right tools for application is essential. Paintbrushes or rags will allow you to apply the finish evenly and achieve the desired look.
-
Clamps: Clamps can be incredibly useful for securing pieces together during assembly, ensuring that everything stays in place as you work on the bench.
-
Screwdriver: While a power drill will handle most of the screw-driving, having a screwdriver on hand can be helpful for manual tightening if needed.
Having these tools ready and organized before you start building your bench will streamline the construction process and help you achieve professional-looking results.
Step 1: Cutting the Wood
The first step in building a simple bench is to cut the wood to the required dimensions. Here's a detailed guide on how to proceed:
-
Measure and Mark: Using a measuring tape and pencil, carefully measure and mark the 2×4 lumber for the frame and legs according to your desired bench dimensions. For the seat, measure and mark the 2×12 or 2×6 board. Accuracy is key at this stage, so double-check your measurements before making any cuts.
-
Set Up Your Saw: Whether you're using a circular saw or miter saw, ensure that it's properly set up and the blade is sharp. This will help you achieve clean and precise cuts.
-
Cut the Frame and Legs: With the measurements and marks in place, carefully cut the 2×4 lumber to create the frame and legs of the bench. Use a square to ensure that your cuts are perfectly perpendicular, resulting in pieces that fit together seamlessly.
-
Cut the Seat: Once the frame and legs are cut, proceed to cut the 2×12 or 2×6 board to the desired length for the seat. Again, accuracy is crucial to ensure a comfortable and well-proportioned seating area.
-
Sand the Edges: After cutting the wood, use sandpaper to smooth out any rough edges and remove splinters. This will not only improve the appearance of the bench but also make it safer to use.
By following these steps, you'll have the necessary components of the bench cut to the correct dimensions, setting the stage for the next phase of the construction process.
Step 2: Assembling the Base
Now that the wood has been cut to the required dimensions, it's time to assemble the base of the bench. Follow these steps to create a sturdy and stable foundation for your seating:
-
Lay Out the Pieces: Begin by laying out the cut pieces of 2×4 lumber for the frame and legs in the desired configuration. This will give you a visual reference and ensure that everything fits together as intended.
-
Pre-Drill Holes: Using a drill and the appropriate drill bit, pre-drill holes in the frame where the pieces will be joined together. This will prevent the wood from splitting when you drive in the screws.
-
Apply Wood Glue: Before securing the pieces with screws, apply wood glue to the joints for added strength and stability. This step is crucial for ensuring that the base of the bench is solid and durable.
-
Secure the Frame: With the pre-drilled holes and wood glue in place, use 2 ½ inch wood screws to secure the frame together. Make sure the corners are square and the frame is level as you attach the pieces.
-
Attach the Legs: Once the frame is assembled, it's time to attach the legs. Position the legs at each corner of the frame and secure them with wood glue and 3-inch wood screws. This will provide the necessary support for the bench.
-
Check for Stability: After assembling the base, check for any wobbling or instability. If needed, make adjustments to ensure that the base is level and solid.
By following these steps, you'll have a well-constructed base for your bench, setting the stage for the next phase of the assembly process.
Step 3: Attaching the Seat
With the base of the bench securely assembled, the next step is to attach the seat, providing a comfortable and functional surface for sitting. Follow these detailed steps to complete this phase of the bench construction:
-
Position the Seat: Place the cut 2×12 or 2×6 board on top of the assembled base, ensuring that it is centered and aligned with the frame. This will create an overhang on each side for a visually appealing look and comfortable seating area.
-
Pre-Drill Holes: Using a drill and the appropriate drill bit, pre-drill holes in the seat board where it will be attached to the frame. This will prevent the wood from splitting and ensure a secure attachment.
-
Apply Wood Glue: Prior to securing the seat, apply wood glue along the top edges of the frame where it will come into contact with the seat. This additional adhesive will enhance the bond between the seat and the base.
-
Secure the Seat: With the pre-drilled holes and wood glue in place, use 3-inch wood screws to attach the seat to the frame. Drive the screws through the pre-drilled holes, ensuring that the seat is firmly and evenly secured to the base.
-
Check for Stability: Once the seat is attached, check for any movement or instability. Sit on the bench to test its sturdiness and make any necessary adjustments to ensure that the seat is securely fastened to the base.
By following these steps, you will have successfully attached the seat to the base, bringing your simple bench one step closer to completion.
Step 4: Sanding and Finishing
After the base and seat of the bench are assembled, the next crucial step is to sand the wood surfaces and apply the finishing touches to enhance the bench's appearance and durability. Follow these detailed steps to complete the sanding and finishing process:
-
Sand the Wood Surfaces: Using coarse grit sandpaper, begin by sanding the entire bench, focusing on smoothing out any rough spots, sharp edges, or imperfections. Work your way across the frame, legs, and seat, ensuring that the wood surfaces are even and free from any splinters.
-
Switch to Fine Grit Sandpaper: Once the initial sanding is complete, switch to fine grit sandpaper to further refine the wood surfaces. This step will help achieve a smooth and polished finish, preparing the bench for the application of wood stain or paint.
-
Remove Dust: After sanding, use a clean cloth or brush to remove any dust or debris from the bench. This will ensure that the wood surfaces are clean and ready for the finishing application.
-
Apply Wood Stain or Paint: Depending on your preference, apply a suitable wood stain or paint to the bench. Use a paintbrush or rag to evenly coat the wood surfaces, following the manufacturer's instructions for the specific product you are using. Ensure that the stain or paint is applied in a well-ventilated area and allow sufficient drying time between coats if multiple coats are required.
-
Apply Polyurethane Sealant (Optional): For outdoor benches or added protection, consider applying a polyurethane sealant after the wood stain or paint has dried. This additional layer of protection will help shield the bench from moisture and prolong its lifespan, especially in outdoor environments.
-
Allow for Drying Time: Once the finishing application is complete, allow the bench to dry thoroughly according to the instructions provided with the wood stain, paint, or sealant. This will ensure that the finish sets properly and provides the desired level of protection and visual appeal.
By following these steps, you will have successfully sanded and applied the finishing touches to your simple bench, resulting in a beautifully crafted and durable seating solution for your home or outdoor space.
Conclusion
In conclusion, building a simple bench can be a gratifying and achievable DIY project for individuals of all skill levels. By following the step-by-step process outlined in this guide, you can create a functional and visually appealing seating solution for your home or outdoor space. From gathering the necessary materials and tools to cutting the wood, assembling the base, attaching the seat, and applying the finishing touches, each stage of the construction process contributes to the creation of a sturdy and stylish bench. Whether you choose to place it in your garden, on your patio, or in your home, the bench you build will undoubtedly become a cherished addition to your living space. Embrace the satisfaction of crafting something with your own hands and enjoy the comfort and beauty of your newly constructed bench.