
Home>Create & Decorate>DIY & Crafts>DIY Dining Table: Create Your Own Customized Piece
DIY & Crafts
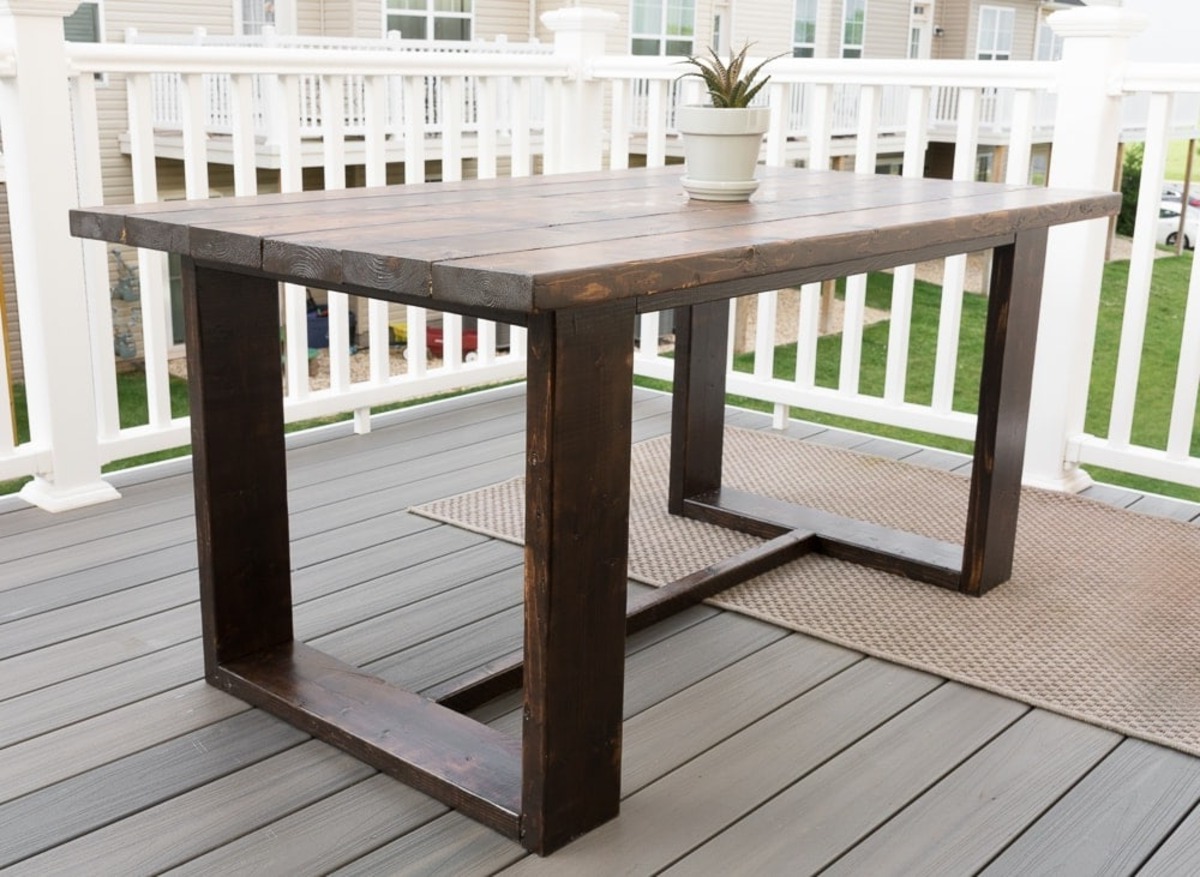
DIY Dining Table: Create Your Own Customized Piece
Published: February 25, 2024

Content Creator specializing in woodworking and interior transformations. Caegan's guides motivate readers to undertake their own projects, while his custom furniture adds a personal touch.
Create your own unique DIY dining table with our easy-to-follow crafts guide. Customize your piece to fit your style and space perfectly. Start your project today!
(Many of the links in this article redirect to a specific reviewed product. Your purchase of these products through affiliate links helps to generate commission for Twigandthistle.com, at no extra cost. Learn more)
Introduction
Welcome to the world of do-it-yourself (DIY) furniture crafting! Creating your own customized dining table can be an immensely rewarding and fulfilling project. Not only does it allow you to unleash your creativity, but it also provides a sense of accomplishment as you bring your vision to life. Whether you're a seasoned DIY enthusiast or a novice looking to embark on your first major woodworking endeavor, this step-by-step guide will walk you through the process of crafting a stunning dining table that perfectly complements your space.
Crafting your own dining table offers a myriad of benefits. Not only can you tailor the design to suit your personal style and specific requirements, but you also have the opportunity to select high-quality materials that align with your preferences and budget. Additionally, the satisfaction of gathering around a table that you've meticulously crafted with your own hands is unparalleled.
Throughout this guide, you'll learn how to select the right materials, accurately measure and cut wood, assemble a sturdy base, attach a flawless tabletop, and expertly sand and finish your creation. Each step is designed to empower you with the knowledge and confidence needed to tackle this project with precision and finesse.
Whether you envision a rustic farmhouse table, a sleek modern design, or a timeless classic, the possibilities are endless when you take the DIY route. By following these instructions and infusing your unique flair, you'll be able to create a dining table that not only serves as a functional centerpiece but also stands as a testament to your craftsmanship and creativity.
So, roll up your sleeves, gather your tools, and let's embark on this exciting journey to craft a one-of-a-kind dining table that will undoubtedly become the heart of your home.
Step 1: Choose Your Materials
Selecting the right materials is the foundational step in creating a durable and visually appealing dining table. The choice of wood will significantly impact the table's overall aesthetic, durability, and longevity. Here's a comprehensive guide to help you navigate through the process of choosing the ideal materials for your DIY dining table:
1. Wood Selection:
- Hardwood vs. Softwood: Hardwoods such as oak, maple, cherry, and walnut are popular choices for dining tables due to their durability and attractive grain patterns. Softwoods like pine and cedar offer a more rustic charm and are often more budget-friendly.
- Consider Grain Patterns: The grain pattern of the wood can add character to your table. For a sleek, modern look, consider woods with straight, consistent grain patterns. If you prefer a more rustic feel, opt for woods with prominent grain and natural imperfections.
2. Tabletop Thickness:
- Stability and Aesthetics: The thickness of the tabletop not only contributes to the table's stability but also influences its visual appeal. Thicker tabletops exude a robust, substantial look, while thinner ones offer a more streamlined and contemporary aesthetic.
3. Finishing Materials:
- Stains and Sealants: Depending on your desired finish, select appropriate stains and sealants to protect the wood from moisture, heat, and daily wear and tear. Consider eco-friendly and non-toxic options for a sustainable and safe finish.
4. Hardware and Fasteners:
- Quality and Durability: Choose high-quality hardware and fasteners to ensure the structural integrity of your table. Stainless steel, brass, or black matte hardware can complement various design styles and provide long-lasting support.
5. Additional Considerations:
- Budget and Sustainability: Evaluate your budget and environmental impact when selecting materials. Reclaimed wood and sustainable options offer a unique character while promoting eco-conscious crafting.
By carefully considering these factors and selecting materials that align with your design vision and practical needs, you'll lay a solid foundation for crafting a stunning and enduring dining table. The next step will involve precise measurements and cutting to bring your vision to fruition.
Step 2: Measure and Cut
Accurate measurements and precise cuts are crucial in ensuring that your DIY dining table comes together seamlessly. This step demands meticulous attention to detail and a methodical approach to achieve a professional-quality result. Here's a comprehensive guide to navigating the process of measuring and cutting the materials for your custom dining table:
1. Gather Essential Tools:
Before diving into the measuring and cutting process, gather essential tools such as a tape measure, combination square, straight edge, and a quality circular saw or table saw. These tools will facilitate precise measurements and clean, straight cuts, laying the groundwork for a well-crafted table.
2. Measure for Accuracy:
Begin by measuring the selected wood materials meticulously, ensuring that the dimensions align with your desired table size. Use a tape measure to determine the length, width, and thickness of the tabletop, as well as the legs and support beams. Double-check all measurements to avoid errors that could compromise the table's structural integrity.
3. Mark and Double-Check:
Once the measurements are confirmed, use a pencil and straight edge to mark the precise cutting lines on the wood. Double-check the markings to guarantee accuracy before proceeding with the cuts. Taking the time to verify measurements and markings will minimize the risk of costly mistakes during the cutting process.
4. Employ Precision Cutting Techniques:
Utilize a high-quality circular saw or table saw to execute the cuts with precision. Ensure that the saw blade is sharp and properly aligned to achieve clean and accurate cuts. Adhere to the marked cutting lines and maintain a steady hand to produce smooth, straight edges on the wood pieces.
5. Consider Safety Measures:
Prioritize safety by wearing appropriate protective gear, including safety goggles and ear protection, when operating power tools. Additionally, work in a well-ventilated area and secure the wood pieces firmly to prevent movement during cutting, reducing the risk of accidents and ensuring the safety of the crafting process.
By meticulously measuring and executing precise cuts, you'll lay the groundwork for assembling a structurally sound and visually appealing dining table. The next step will involve assembling the base, bringing your vision one step closer to reality.
Step 3: Assemble the Base
Assembling the base of your DIY dining table is a pivotal stage that sets the foundation for the table's stability and structural integrity. This step requires precision and attention to detail to ensure that the base is robust and capable of supporting the tabletop. Here's a detailed guide to help you navigate the process of assembling the base for your custom dining table:
-
Lay Out the Components: Begin by laying out all the base components, including the legs, support beams, and any additional bracing or cross members. Organizing the components in the designated assembly area will streamline the process and allow for a clear visual assessment of the layout before assembly.
-
Align and Secure the Legs: Position the legs at the corners of the tabletop, ensuring that they are aligned perfectly and perpendicular to the tabletop surface. Use clamps or braces to hold the legs in place temporarily, allowing for adjustments before securing them permanently.
-
Attach Support Beams: Once the legs are securely positioned, attach the support beams between them to form the base framework. Utilize wood screws or dowels to fasten the support beams to the legs, ensuring a snug and stable connection. The support beams play a crucial role in distributing the weight evenly and reinforcing the base structure.
-
Consider Additional Bracing: Depending on the design and size of your table, you may need to incorporate additional bracing or cross members to enhance the base's stability. These reinforcements can prevent wobbling and ensure that the table can withstand the weight of the tabletop and daily use.
-
Verify Stability and Leveling: After assembling the base components, verify the stability and leveling of the structure. Use a spirit level to ensure that the base is perfectly level on all sides, making any necessary adjustments to achieve a balanced and stable foundation for the tabletop.
-
Reinforce Joints and Connections: Prior to proceeding to the next step, reinforce all joints and connections within the base structure. This can be achieved by adding wood glue to the joints before securing them with screws or dowels, enhancing the overall strength and durability of the base.
By meticulously assembling the base according to these guidelines, you'll establish a sturdy and reliable foundation for your DIY dining table. The next step will involve attaching the tabletop, bringing your vision one step closer to fruition.
Step 4: Attach the Tabletop
Attaching the tabletop is a pivotal stage in bringing your DIY dining table to life, as it not only provides a functional surface for dining and gatherings but also serves as a focal point that showcases your craftsmanship. This step demands precision and attention to detail to ensure a seamless and secure attachment that enhances the overall aesthetic and structural integrity of the table. Here's a comprehensive guide to navigating the process of attaching the tabletop to the base of your custom dining table:
-
Positioning the Tabletop: Carefully position the tabletop on the assembled base, ensuring that it is centered and aligned symmetrically with the base structure. Take the time to make precise adjustments, ensuring that the overhang on all sides is uniform and visually appealing.
-
Securing the Tabletop: Utilize appropriate fastening methods to secure the tabletop to the base effectively. Depending on your design preference and the tabletop material, options such as wood screws, metal brackets, or specialized tabletop fasteners can be employed to achieve a secure attachment while allowing for seasonal wood movement.
-
Consider Expansion Gaps: If you're working with solid wood for the tabletop, it's crucial to account for potential wood movement due to changes in humidity and temperature. Incorporating small expansion gaps between the tabletop and the base allows the wood to expand and contract naturally, minimizing the risk of warping or cracking over time.
-
Enhancing Stability: To enhance the stability of the tabletop, consider adding additional support blocks or brackets underneath the tabletop, especially for larger or heavier tables. These reinforcements can distribute the weight evenly and prevent sagging, ensuring a durable and long-lasting attachment.
-
Finishing Touches: Once the tabletop is securely attached, take the opportunity to inspect the overall alignment and stability. Make any necessary adjustments to ensure that the tabletop sits level and stable on the base, providing a seamless and visually pleasing integration.
By meticulously following these guidelines and taking the time to ensure a precise and secure attachment, you'll bring your DIY dining table one step closer to completion. The next step will involve the crucial process of sanding and finishing, where you'll have the opportunity to refine the table's surface and imbue it with a stunning, personalized finish.
Step 5: Sand and Finish
Once the base and tabletop are assembled, the sanding and finishing process is the transformative stage that elevates your DIY dining table from a collection of wood components to a refined and visually captivating centerpiece. This crucial step involves meticulous sanding to achieve a smooth and uniform surface, followed by the application of a finish that enhances the wood's natural beauty while providing protection against daily use and environmental factors.
1. Sanding Process:
Begin the sanding process by using coarse-grit sandpaper to remove any rough spots, uneven edges, or imperfections on the tabletop and base components. Work systematically, following the wood grain to ensure a consistent and even surface. Gradually transition to finer-grit sandpaper to refine the wood's texture and achieve a silky-smooth finish. Pay special attention to the edges and corners, ensuring that they are rounded and smooth to the touch.
2. Smoothing the Edges:
To create a comfortable and visually appealing dining surface, carefully sand the edges of the tabletop, rounding them slightly to prevent sharp corners. This not only enhances the table's safety but also contributes to its aesthetic appeal, creating a welcoming and tactile dining experience.
3. Selecting the Finish:
Choose a finish that aligns with your design vision and provides the desired level of protection for the wood. Options such as polyurethane, varnish, or natural oils offer varying degrees of sheen, durability, and maintenance requirements. Consider the table's intended use and the aesthetic qualities you wish to emphasize when selecting the finish.
4. Applying the Finish:
Apply the chosen finish methodically, following the manufacturer's instructions for optimal results. Whether brushing, spraying, or wiping on the finish, ensure even coverage across the entire tabletop and base components. Multiple thin coats are often preferable to achieve a lustrous and durable finish, allowing each coat to dry thoroughly before applying the next.
5. Finishing Touches:
After the final coat of finish has dried, inspect the table surface for any imperfections or uneven areas. Lightly sand any rough spots with fine-grit sandpaper and apply a final coat of finish to achieve a flawless and polished appearance. Take pride in the smooth and lustrous finish that enhances the natural beauty of the wood, creating a stunning focal point for your dining space.
By meticulously sanding and applying a high-quality finish, you'll not only protect the wood but also accentuate its inherent character, resulting in a timeless and enduring dining table that reflects your craftsmanship and attention to detail.
Conclusion
Congratulations on successfully crafting your own customized dining table! Through each step of this DIY journey, you've not only honed your woodworking skills but also infused your creativity and personal touch into a functional piece of furniture that will undoubtedly become the heart of your home.
As you stand back and admire your handiwork, take pride in the fact that you've meticulously selected high-quality materials, measured and cut with precision, assembled a sturdy base, expertly attached the tabletop, and meticulously sanded and finished every surface. The result is a stunning dining table that not only serves as a gathering place for meals and conversations but also stands as a testament to your craftsmanship and dedication.
Beyond the tangible outcome, the process of creating your own dining table has likely been a journey of self-discovery and fulfillment. You've embraced the challenges and triumphs of woodworking, gaining valuable skills and confidence along the way. Whether you embarked on this project solo or enlisted the help of friends and family, the shared experience has likely fostered a sense of camaraderie and accomplishment.
As you integrate your newly crafted dining table into your living space, envision the countless memories that will unfold around it. From joyful family meals to lively gatherings with friends, your DIY creation will serve as the backdrop for cherished moments and meaningful connections. Its unique character and the story of its creation will undoubtedly spark conversations and admiration from guests, further enriching the tapestry of your home.
Remember, the skills and knowledge you've acquired throughout this project can be applied to future woodworking endeavors, empowering you to continue creating custom pieces that reflect your individual style and vision. Whether it's crafting additional furniture or embarking on entirely new DIY projects, the experience gained from this undertaking will serve as a solid foundation for future creative pursuits.
As you revel in the satisfaction of completing this DIY dining table, consider sharing your experience with others who may be inspired to embark on similar crafting adventures. Your journey can serve as a source of motivation and guidance for fellow DIY enthusiasts, encouraging them to unleash their creativity and embark on their own woodworking odyssey.
Ultimately, your DIY dining table stands as a testament to the power of creativity, determination, and craftsmanship. It embodies the spirit of individuality and personal expression, enriching your living space with a unique and enduring creation that reflects your passion for DIY craftsmanship. Embrace the pride and fulfillment that come with this accomplishment, and let it inspire you to continue exploring the boundless possibilities of DIY crafting.