
Home>Create & Decorate>DIY & Crafts>How To Build A Chicken Run
DIY & Crafts
How To Build A Chicken Run
Published: February 28, 2024

Senior Editor in Create & Decorate, Kathryn combines traditional craftsmanship with contemporary trends. Her background in textile design and commitment to sustainable crafts inspire both content and community.
Learn how to build a DIY chicken run with our step-by-step guide. Perfect for your backyard and easy to customize. Get started with our tips and ideas!
(Many of the links in this article redirect to a specific reviewed product. Your purchase of these products through affiliate links helps to generate commission for Twigandthistle.com, at no extra cost. Learn more)
Introduction
Welcome to the world of DIY chicken runs! Whether you're a seasoned chicken keeper or just starting out, creating a safe and comfortable space for your feathered friends is essential. A chicken run provides a designated area for your chickens to roam, scratch, and peck while ensuring their safety from predators. It also gives you peace of mind, knowing that your chickens are secure and protected.
In this comprehensive guide, we will walk you through the step-by-step process of building a chicken run from scratch. From choosing the perfect location to adding the finishing touches, you'll learn everything you need to know to create a functional and attractive space for your flock.
Building a chicken run is not only a practical endeavor but also a rewarding one. As you embark on this DIY project, you'll have the opportunity to unleash your creativity and craftsmanship. Whether you're repurposing materials or starting from scratch with new supplies, the process of constructing a chicken run allows you to tailor the design to suit your specific needs and preferences.
By the end of this guide, you'll have the knowledge and confidence to embark on this fulfilling project. So, roll up your sleeves, gather your tools, and get ready to embark on a journey that will not only benefit your chickens but also provide you with a sense of accomplishment and pride.
Let's dive into the exciting world of DIY chicken runs and discover how to create a safe and inviting space for your beloved feathered companions.
Step 1: Choose the Location
Selecting the ideal location for your chicken run is the crucial first step in the construction process. The chosen spot should provide a balance of safety, accessibility, and functionality for both the chickens and the caretaker. Here's a detailed breakdown of factors to consider when choosing the location for your chicken run:
Proximity to the Coop
The location of the chicken run should be in close proximity to the chicken coop. This allows for easy access for the chickens to move between the coop and the run, enabling them to seek shelter, lay eggs, and roost comfortably. Additionally, having the run adjacent to the coop simplifies the daily maintenance tasks, such as feeding, watering, and egg collection.
Sunlight and Shade
Consider the sun's path throughout the day when choosing the location. Opt for an area that receives a good amount of sunlight, as it helps in drying out the ground, reducing moisture, and providing warmth to the chickens. However, it's equally important to ensure that the run has shaded areas to offer relief from the sun during hot weather. Trees or strategically placed shade structures can provide the necessary shelter.
Predators and Security
Assess the potential threats posed by predators in the chosen location. Look out for signs of existing predators and consider measures to deter them. The area should be free from easy access points for predators and should allow for the installation of predator-proof fencing. Additionally, ensure that the ground is secure to prevent digging from burrowing animals.
Terrain and Drainage
Examine the terrain to ensure it is relatively flat and well-drained. A level surface makes it easier to construct the run and provides a stable foundation for the structure. Adequate drainage helps prevent waterlogging, which can lead to muddy and unsanitary conditions. If the area is prone to water accumulation, consider implementing drainage solutions to maintain a dry and hygienic environment for the chickens.
Accessibility for Care and Maintenance
Choose a location that is easily accessible for daily care and maintenance tasks. This includes considerations such as the convenience of refilling food and water containers, cleaning the run, and monitoring the chickens' well-being. Accessibility also extends to the ease of inspecting the perimeter for any signs of wear and tear in the fencing or potential security breaches.
By carefully evaluating these factors, you can select a location that promotes the well-being and safety of your chickens while facilitating efficient care and maintenance. Once the location is chosen, you can proceed to the next step of determining the size of the chicken run, bringing you one step closer to creating a secure and enjoyable space for your feathered companions.
Step 2: Determine the Size
The size of your chicken run plays a pivotal role in ensuring the comfort, well-being, and freedom of movement for your flock. When determining the dimensions of the run, several factors come into play, including the number of chickens, available space, and future expansion considerations.
Number of Chickens
The first consideration in determining the size of your chicken run is the number of chickens it will accommodate. As a general guideline, each chicken should have a minimum of 10 square feet of space in the run. This allows for ample room for foraging, dust bathing, and exercising. However, providing more space than the minimum requirement is always beneficial, as it reduces overcrowding and minimizes the risk of aggression or territorial behavior among the chickens.
Available Space
Assess the available space in your backyard or property to determine the maximum dimensions for the chicken run. Consider the layout of the land and any existing structures or landscaping features that may impact the size and shape of the run. It's essential to strike a balance between maximizing the available space and ensuring that the run remains proportionate to the overall environment.
Future Expansion
Anticipating future expansion of your flock is a prudent consideration when determining the size of the chicken run. Allowing for some flexibility in the initial design can facilitate future modifications or additions to accommodate a growing flock. Planning for potential expansion minimizes the need for extensive redesign or reconstruction down the line, saving time and resources in the long run.
Customization for Specific Breeds
Certain chicken breeds may have specific space requirements based on their size, activity level, and natural behaviors. For example, larger breeds or those known for their active foraging tendencies may benefit from a slightly larger run to accommodate their needs. Tailoring the size of the run to suit the specific characteristics of your chicken breeds can contribute to their overall well-being and contentment.
By carefully considering these factors, you can determine the optimal size for your chicken run, striking a balance between providing ample space for your flock and making efficient use of the available area. Once the size is determined, you can proceed to gather the necessary materials and embark on the exciting journey of constructing the framework for your chicken run.
Step 3: Gather Materials
Gathering the necessary materials is a crucial preparatory step before embarking on the construction of a chicken run. Having the right supplies on hand ensures a smooth and efficient building process, allowing you to focus on bringing your vision to life. Here's a comprehensive list of materials you'll need to gather:
Essential Building Materials:
-
Lumber: Select high-quality lumber for constructing the frame of the chicken run. Pressure-treated wood is recommended for its durability and resistance to decay. Ensure that the dimensions of the lumber align with the design and size specifications of your chicken run.
-
Fencing: Choose sturdy and predator-resistant fencing material to enclose the run. Welded wire mesh or hardware cloth with small gaps is ideal for preventing predators from accessing the chickens. Consider the height and strength of the fencing to provide adequate protection.
-
Hardware: Stock up on essential hardware such as screws, nails, and brackets for securing the structural components. Additionally, hinges and latches will be needed for the door installation.
-
Roofing Materials: If you plan to add a roof to the chicken run, gather roofing materials such as corrugated metal panels or durable outdoor fabric. Ensure that the roofing material provides protection from the elements while allowing for adequate ventilation.
Optional Enhancements:
-
Netting: Consider adding bird netting or overhead wire mesh to provide an extra layer of protection against aerial predators, such as hawks or owls.
-
Shade Cloth: If the chosen location receives ample sunlight, consider acquiring shade cloth to create shaded areas within the run, offering relief to the chickens during hot weather.
-
Door Hardware: If you plan to install a door for easy access to the run, gather door hardware including hinges, a latch, and any additional security features.
-
Finishing Touches: Depending on your design preferences, gather materials for adding finishing touches such as decorative elements, paint or stain for the wood, and landscaping features around the perimeter of the run.
Tools and Equipment:
-
Power Tools: Ensure you have the necessary power tools such as a drill, saw, and screwdriver to facilitate the construction process.
-
Measuring and Marking Tools: Gather measuring tape, a level, and marking tools to ensure accurate and precise construction.
-
Protective Gear: Prioritize safety by obtaining protective gear including gloves, safety goggles, and appropriate clothing for the construction work.
By meticulously gathering these materials and ensuring that you have all the essential tools at your disposal, you'll be well-prepared to commence the construction of your chicken run. With the materials in hand, you can proceed to the next step of building the frame, bringing you closer to the realization of a secure and inviting space for your feathered companions.
Step 4: Build the Frame
Building the frame forms the structural backbone of your chicken run, providing stability and support for the enclosure. The frame serves as the foundation upon which the fencing, roofing, and other components will be installed. Here's a detailed guide on constructing the frame for your chicken run:
Design Considerations
Before commencing the construction, it's essential to have a clear understanding of the design and dimensions of the frame. The frame should align with the predetermined size of the chicken run and accommodate any additional features, such as a roof or integrated nesting boxes. Consider the height of the frame to allow ample headroom for both the chickens and caretakers during maintenance tasks.
Cutting and Assembling the Lumber
Begin by cutting the lumber to the required lengths based on the design specifications. Use a saw to make precise cuts, ensuring that the pieces fit together seamlessly during assembly. The frame typically consists of vertical posts, horizontal beams, and additional supports as needed. Utilize a level to ensure that the frame components are aligned and plumb during assembly, promoting a sturdy and balanced structure.
Securing the Joints
Once the lumber pieces are cut and positioned, secure the joints using appropriate hardware such as screws, nails, or brackets. Reinforce the connections to enhance the overall strength and durability of the frame. Pay special attention to the corners and intersections, as these areas are critical for maintaining the structural integrity of the frame.
Adding Stability and Bracing
Incorporate diagonal bracing within the frame to enhance its stability and resistance to external forces. Diagonal braces help distribute the load evenly and prevent swaying or shifting, especially in areas prone to strong winds or inclement weather. By strategically placing braces within the frame, you can ensure that it remains robust and secure over time.
Preparing for Additional Components
As the frame takes shape, consider any additional components that will be integrated, such as the door and roofing supports. Ensure that the frame is designed to accommodate these elements, allowing for seamless installation in subsequent steps. By preemptively planning for these additions, you can streamline the construction process and avoid the need for extensive modifications later on.
By meticulously following these steps and paying attention to the finer details of frame construction, you can lay a solid foundation for the rest of the chicken run assembly. With the frame in place, you are one step closer to providing your chickens with a safe and comfortable outdoor space to thrive and explore.
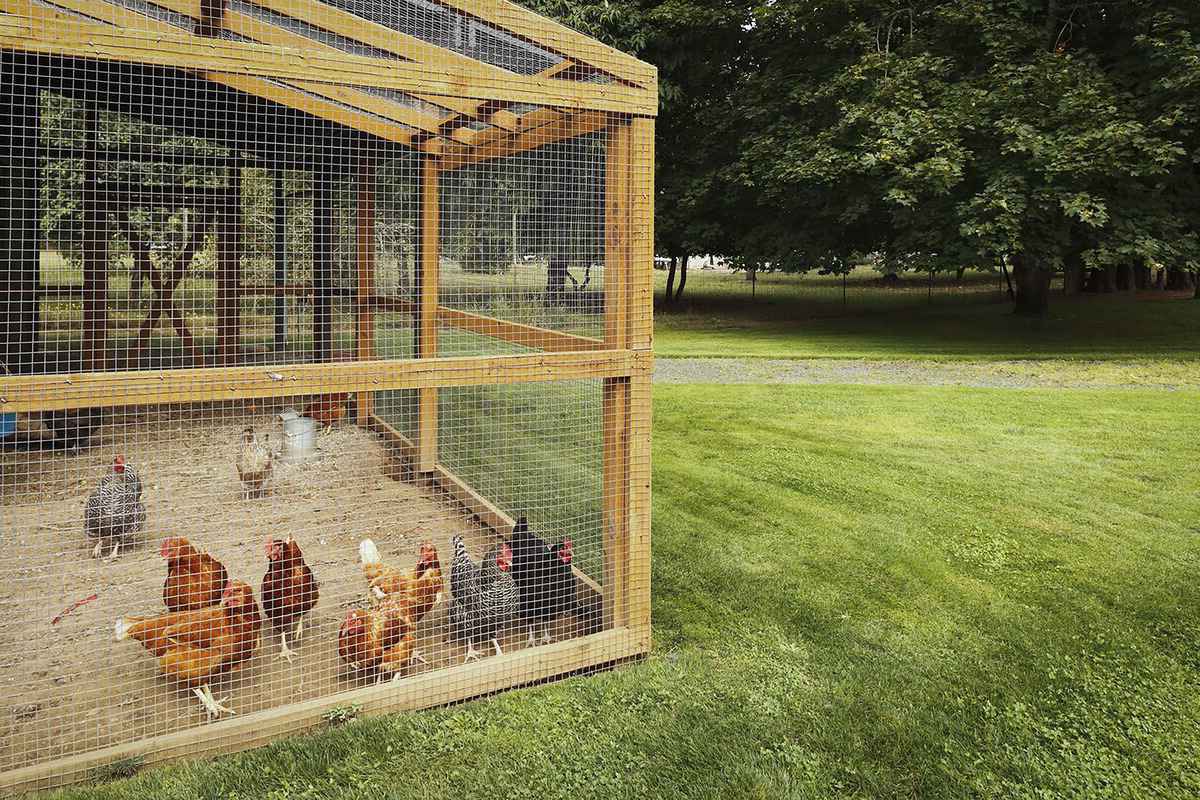
Step 5: Install the Fencing
With the frame of the chicken run securely in place, the next critical step is to install the fencing, creating a protective barrier that ensures the safety and containment of your feathered companions. The fencing serves as a primary defense against potential predators while allowing the chickens to freely explore and forage within the designated area. Here's a detailed guide on the process of installing the fencing for your chicken run:
Selecting the Fencing Material
Carefully choose the appropriate fencing material based on the specific needs of your chicken flock and the prevalent predator threats in your area. Welded wire mesh and hardware cloth are popular choices, known for their durability and ability to withstand attempts by predators to breach the enclosure. Ensure that the fencing material features small gaps to prevent predators from gaining access to the chickens while allowing for adequate ventilation and visibility.
Measuring and Cutting the Fencing
Accurately measure the dimensions of each section of the chicken run to determine the required length of fencing material. Use wire cutters or appropriate tools to cut the fencing to the precise measurements, ensuring a seamless fit around the perimeter of the run. Pay attention to any irregularities in the terrain or the frame, making necessary adjustments to accommodate a snug and secure installation.
Securing the Fencing to the Frame
Begin attaching the fencing to the frame, starting from one corner and working your way around the perimeter. Utilize heavy-duty staples, fencing nails, or suitable fasteners to secure the fencing to the frame at regular intervals. Ensure that the fencing is taut and free from sagging, maintaining a consistent height to prevent potential entry points for predators. Pay special attention to the bottom section of the fencing, securing it firmly to the ground to prevent digging or burrowing attempts by predators.
Overlapping and Reinforcement
In areas where multiple sections of fencing meet, overlap the edges to create a seamless and impenetrable barrier. Secure the overlapping sections using additional fasteners to reinforce the junctions, preventing any gaps that could compromise the integrity of the enclosure. Additionally, consider reinforcing the lower portion of the fencing with buried wire or an apron to deter digging predators and further fortify the perimeter.
Inspecting and Testing the Fencing
Once the fencing is installed, conduct a thorough inspection of the entire enclosure to identify any potential weak points or areas that require additional reinforcement. Test the stability and resilience of the fencing by applying gentle pressure and ensuring that it remains steadfast and secure. Address any identified issues promptly to guarantee the effectiveness of the fencing in safeguarding your chickens.
By meticulously following these steps and prioritizing the secure installation of the fencing, you can establish a robust and reliable barrier that protects your chickens from external threats while allowing them to enjoy the freedom and security of their outdoor environment. With the fencing in place, your chicken run is poised to become a sanctuary where your feathered friends can thrive under your attentive care.
Step 6: Add a Roof
Adding a roof to your chicken run is a crucial step that provides protection from the elements and enhances the overall functionality and comfort of the enclosure. A well-designed roof shields the chickens from rain, snow, and excessive sunlight while promoting a dry and comfortable environment within the run. Here's a detailed guide on the process of adding a roof to your chicken run:
Roofing Material Selection
Carefully select the roofing material based on durability, weather resistance, and suitability for the local climate. Corrugated metal panels, polycarbonate sheets, or outdoor-grade fabric are popular choices known for their ability to withstand varying weather conditions. Consider the slope of the roof to facilitate water runoff and prevent pooling, ensuring that the chosen material effectively channels rainwater away from the run.
Roof Installation Process
Begin by measuring the dimensions of the chicken run to determine the required size of the roof. Cut the roofing material to fit the designated area, allowing for overhang to provide additional coverage and protection. Secure the roofing material to the frame of the run using appropriate fasteners, ensuring that it is firmly anchored and resistant to strong winds. Pay special attention to sealing the edges and junctions to prevent water infiltration and maintain a watertight seal.
Ventilation and Airflow Considerations
Incorporate ventilation features into the roof design to promote airflow and prevent the buildup of heat and humidity within the run. Ridge vents, gable vents, or strategically placed openings facilitate air circulation, creating a comfortable and well-ventilated environment for the chickens. Balancing protection from the elements with adequate ventilation is essential for ensuring the overall well-being and health of the flock.
Additional Roof Enhancements
Consider additional enhancements such as adding a shade cloth or UV-resistant material to create shaded areas within the run. This provides relief from direct sunlight and helps regulate the temperature, especially during hot weather. Furthermore, integrating gutter systems and downspouts can effectively manage rainwater runoff, directing it away from the immediate vicinity of the run and preventing waterlogging in the surrounding area.
Inspection and Maintenance
Once the roof is installed, conduct a thorough inspection to ensure that it is securely in place and free from any potential hazards or vulnerabilities. Regularly inspect the roof for signs of wear, damage, or debris accumulation, and promptly address any issues to maintain its effectiveness in providing protection and comfort for the chickens.
By meticulously following these steps and paying attention to the details of roof installation, you can create a secure and sheltered environment within the chicken run, ensuring that your feathered companions are well-protected from the elements while enjoying the freedom and safety of their outdoor space.
Step 7: Create a Door
The creation of a door for your chicken run is a pivotal element that facilitates easy access for caretaking tasks while ensuring the security and containment of the flock. A well-designed door provides a convenient entry point for tending to the chickens, collecting eggs, and conducting routine maintenance within the run. Here's a detailed guide on the process of creating a door for your chicken run:
Door Design and Sizing
Begin by determining the appropriate dimensions for the door based on the size of the chicken run and the ease of access required for caretaking activities. The door should be proportionate to the overall structure of the run, allowing for smooth opening and closing without obstructing the movement of caretakers or the chickens. Consider the height and width of the door to accommodate various tasks, such as carrying feed and water containers into the run and retrieving eggs from nesting boxes.
Material Selection and Durability
Select durable and weather-resistant materials for constructing the door, ensuring its longevity and ability to withstand outdoor conditions. Pressure-treated lumber, exterior-grade plywood, or metal framing are suitable choices known for their resilience and suitability for outdoor applications. Additionally, choose hardware such as hinges, latches, and handles that are designed to withstand frequent use and provide secure closure.
Installation and Security Features
Position the door within the frame of the chicken run, ensuring that it aligns seamlessly with the surrounding fencing and maintains a secure fit. Install heavy-duty hinges to support the weight of the door and facilitate smooth opening and closing. Incorporate a reliable latch mechanism that effectively secures the door, preventing unauthorized entry and safeguarding the chickens from potential predators. Consider adding additional security features such as predator-resistant mesh or wire reinforcement to fortify the door against external threats.
Accessibility and Functionality
Prioritize ease of use and functionality when creating the door, ensuring that it opens and closes smoothly without any obstructions or impediments. Test the functionality of the door to verify that it provides a wide and unobstructed entry point for caretakers while remaining secure and impenetrable when closed. Additionally, consider integrating a locking mechanism that allows for convenient access while maintaining the integrity of the enclosure, providing peace of mind and security for both the chickens and caretakers.
By meticulously following these steps and focusing on the details of door creation, you can establish a secure and accessible entry point for your chicken run, streamlining caretaking activities and ensuring the safety and containment of your cherished flock. With the door in place, your chicken run is poised to become a functional and well-protected space where the needs of both the chickens and caretakers are thoughtfully addressed.
Step 8: Add Finishing Touches
As you near the completion of your DIY chicken run project, adding finishing touches not only enhances the aesthetic appeal but also contributes to the functionality and comfort of the enclosure. These final details elevate the overall design while addressing specific needs and preferences. Here's a comprehensive guide on the essential finishing touches to consider for your chicken run:
Landscaping and Vegetation
Integrating landscaping elements around the perimeter of the chicken run can enhance its visual appeal and provide additional benefits. Consider planting shrubs, ornamental grasses, or low-maintenance vegetation to create a natural barrier and add a touch of greenery. Select plants that are non-toxic to chickens and are resilient in the local climate, contributing to the overall ambiance of the outdoor space.
Dust Bathing Area
Dust bathing is a natural behavior for chickens, essential for maintaining their plumage and skin health. Create a designated dust bathing area within the run by incorporating a shallow container filled with fine sand or dusting material. Providing this space allows the chickens to engage in their natural grooming behavior, promoting their well-being and contentment.
Perch and Roosting Options
Incorporate perches or roosting bars within the chicken run to offer elevated resting spots for the chickens. Utilize sturdy branches or purpose-built perches to provide varying heights and textures, catering to the chickens' natural instincts. These elevated spaces not only serve as resting areas but also contribute to the chickens' physical activity and mental stimulation.
Feeding and Watering Stations
Ensure that the chicken run includes designated areas for feeding and watering. Install secure and elevated feeding stations to prevent contamination and spillage, promoting a clean and organized feeding environment. Similarly, provide access to clean water in spill-proof containers, ensuring that the chickens have constant access to fresh water within the run.
Decorative Elements and Personalization
Consider adding decorative elements or personalized touches to the chicken run to reflect your individual style and creativity. This could include painted signage, colorful accents, or customized features that infuse personality into the space. Embracing creativity in the finishing touches allows you to tailor the chicken run to align with your unique vision and preferences.
By incorporating these finishing touches, you can transform your chicken run into a harmonious and inviting space that caters to the needs of your feathered companions while reflecting your personal touch. These details not only elevate the functionality of the enclosure but also create a visually appealing and enriching environment for your cherished flock.
Conclusion
As you reach the culmination of the DIY journey in building a chicken run, it's time to reflect on the remarkable transformation from a vision to a tangible sanctuary for your feathered companions. The process of constructing a chicken run embodies a blend of practicality, creativity, and dedication to providing a safe and enriching environment for your cherished flock.
Throughout this comprehensive guide, you've delved into the intricacies of selecting the perfect location, determining the optimal size, gathering materials, and meticulously crafting each component of the chicken run. From the sturdy frame to the protective fencing, the addition of a roof, a secure door, and thoughtful finishing touches, every step has been a testament to your commitment to the well-being of your chickens.
The completion of the chicken run signifies more than just a physical structure; it represents a haven where your chickens can thrive, express their natural behaviors, and find security under your attentive care. It's a testament to the harmonious coexistence of functionality and aesthetics, where practical design meets personalized touches to create a space that resonates with both the needs of the chickens and your individual style.
As you stand back and admire the fruits of your labor, envision the joy and contentment that your chickens will experience within their new outdoor abode. The open space, the fresh air, and the freedom to roam and explore will undoubtedly contribute to their overall well-being, fostering a sense of fulfillment and happiness.
Moreover, the completion of the chicken run marks the beginning of a new chapter in your journey as a caretaker. It's a space where you'll witness the daily rhythms of your flock, observe their interactions, and forge a deeper connection with these remarkable creatures. It's a place where you'll find solace in knowing that you've provided them with a secure and nurturing environment, fostering a bond built on trust and mutual respect.
As you look ahead, envision the countless moments of delight and satisfaction that await you within the confines of the chicken run. From observing their joyful foraging to witnessing their communal activities, the space you've created will serve as a backdrop for countless heartwarming experiences and cherished memories.
In conclusion, the construction of a chicken run transcends the mere assembly of materials; it embodies a labor of love, a testament to your dedication to the well-being of your chickens. It's a tangible expression of your commitment to providing them with a safe haven, where they can flourish and thrive under your attentive stewardship. So, as you take pride in the completion of the chicken run, revel in the knowledge that you've created a space where the simple joys of chicken keeping can unfold in all their splendor.