
Home>Create & Decorate>DIY & Crafts>Pallet Chicken Coop: A DIY Guide To Building Your Own Coop Using Pallets
DIY & Crafts
Pallet Chicken Coop: A DIY Guide To Building Your Own Coop Using Pallets
Published: May 29, 2024

Senior Editor in Create & Decorate, Kathryn combines traditional craftsmanship with contemporary trends. Her background in textile design and commitment to sustainable crafts inspire both content and community.
Learn how to build your own chicken coop using pallets with this comprehensive DIY guide. Perfect for DIY & Crafts enthusiasts!
(Many of the links in this article redirect to a specific reviewed product. Your purchase of these products through affiliate links helps to generate commission for Twigandthistle.com, at no extra cost. Learn more)
Introduction
Are you considering raising chickens in your backyard? Building a chicken coop is an essential step in creating a safe and comfortable home for your feathered friends. If you're a fan of DIY projects and want to save some money, constructing a pallet chicken coop might be the perfect solution for you. In this guide, we'll explore the benefits of using pallets for building a chicken coop and provide you with step-by-step instructions to help you create your own coop using this versatile and cost-effective material. Whether you're a seasoned DIY enthusiast or a beginner looking for a fun and rewarding project, building a pallet chicken coop can be a fulfilling and practical endeavor.
Benefits of Using Pallets for Building a Chicken Coop
When it comes to constructing a chicken coop, using pallets offers a multitude of advantages. Here are some of the key benefits of utilizing pallets for building a chicken coop:
-
Cost-Effective: Pallets are often readily available for little to no cost, making them an affordable option for constructing a chicken coop. This can be especially beneficial for those looking to embark on a budget-friendly DIY project.
-
Sustainability: Repurposing pallets for your chicken coop is an eco-friendly choice. By utilizing materials that might otherwise go to waste, you're contributing to sustainable practices and reducing the demand for new resources.
-
Versatility: Pallets come in various sizes and shapes, providing flexibility in design and construction. Whether you're planning a small coop for a few chickens or a larger one for a growing flock, pallets can be adapted to suit your specific needs.
-
Durability: When properly maintained, pallets can offer durability and strength, ensuring that your chicken coop stands the test of time. With the right treatment and care, pallets can withstand the elements and provide a secure shelter for your feathered companions.
-
Customization: Pallets can be easily modified to create custom features within your chicken coop. From nesting boxes to perches, the versatility of pallets allows for personalized touches that cater to the needs of your chickens.
-
DIY Friendly: Working with pallets can be a rewarding experience for DIY enthusiasts. The process of repurposing and transforming pallets into a functional chicken coop provides a sense of accomplishment and allows for creative expression.
By harnessing the benefits of using pallets for building a chicken coop, you can create a practical, sustainable, and cost-effective housing solution for your poultry. Whether you're a seasoned builder or new to the world of DIY, the advantages of utilizing pallets make them a compelling choice for constructing a chicken coop.
Planning and Designing Your Pallet Chicken Coop
Before diving into the construction phase, it's crucial to lay the groundwork for your pallet chicken coop by carefully planning and designing the structure. Here are the essential steps to consider when planning and designing your pallet chicken coop:
-
Assess Your Space: Begin by evaluating the available space in your backyard or homestead where the chicken coop will be situated. Consider factors such as sunlight exposure, proximity to your home, and accessibility for maintenance and egg collection. Understanding your space will help determine the size and layout of your coop.
-
Determine the Coop Size: Based on the number of chickens you plan to house, calculate the appropriate size for your coop. Each chicken typically requires 2-3 square feet of space within the coop, and outdoor runs should provide at least 8-10 square feet per bird. Factor in additional space for nesting boxes, perches, and storage.
-
Sketch Your Design: Create a rough sketch or blueprint of your pallet chicken coop. Consider the coop's orientation, the placement of doors and windows for ventilation, and the arrangement of nesting boxes and roosts. Sketching out your design will provide a visual guide as you gather materials and begin construction.
-
Incorporate Ventilation and Light: Adequate ventilation and natural light are essential for a healthy chicken coop. Plan for windows or vents that can be opened and closed as needed to maintain proper airflow. Positioning the coop to receive natural sunlight can also contribute to a comfortable and well-lit environment for your chickens.
-
Account for Predators and Security: When designing your pallet chicken coop, prioritize security measures to protect your chickens from potential predators. Consider adding hardware cloth to windows and vents, reinforcing doors with sturdy latches, and ensuring that the coop is elevated to deter burrowing animals.
-
Plan for Easy Maintenance: Design your coop with maintenance in mind. Incorporate features such as removable roosts and nesting boxes, as well as easy access to the interior for cleaning. Planning for convenient maintenance will make caring for your chickens more manageable in the long run.
-
Consider Aesthetics and Landscaping: While functionality is key, you can also consider the aesthetic appeal of your pallet chicken coop. Explore ways to integrate the coop into your landscape, whether through paint, plantings, or decorative elements that complement your outdoor space.
By carefully planning and designing your pallet chicken coop, you can create a functional, secure, and comfortable home for your feathered companions. Taking the time to consider these essential aspects will set the stage for a successful construction process and a thriving chicken habitat.
Choosing the Right Pallets for Your Coop
Selecting the appropriate pallets for your chicken coop is a critical step in ensuring the structural integrity and safety of the coop. When sourcing pallets for your project, consider the following factors to make informed decisions:
1. Pallet Condition
Inspect the condition of the pallets to ensure they are sturdy and free from damage. Look for pallets with intact boards and minimal signs of wear. Avoid pallets with rot, mold, or chemical spills, as these can pose risks to your chickens and compromise the longevity of the coop.
2. Pallet Size and Dimensions
Choose pallets that align with the dimensions of your coop design. Standard pallet sizes are typically 48 x 40 inches, but variations exist. Consider the layout of your coop and how the pallets can be utilized to minimize cutting and waste. Selecting pallets that closely match your intended coop dimensions can streamline the construction process.
3. Pallet Material
Identify the type of wood used in the pallets. Hardwood pallets, such as those made from oak or maple, are known for their durability and resistance to decay. Softwood pallets, often constructed from pine or spruce, are lighter but may require additional treatment to enhance their longevity. Choose pallets made from untreated wood to avoid potential chemical exposure to your chickens.
4. Pallet Treatment and Safety
Prioritize pallets that have not been treated with harmful chemicals or pesticides. Look for pallets stamped with the "HT" mark, indicating heat treatment rather than chemical fumigation. Heat-treated pallets are a safer choice for constructing a chicken coop, as they have been subjected to high temperatures to eliminate pests and pathogens without the use of chemicals.
5. Pallet Sustainability
Opt for pallets that have been responsibly sourced and manufactured. Look for pallets made from sustainably harvested wood and inquire about their previous use. Choosing pallets with a history of non-toxic cargo transportation, such as food or pharmaceuticals, can reduce the risk of chemical contamination.
By carefully considering these factors, you can select the right pallets for your chicken coop, ensuring a safe, sustainable, and structurally sound foundation for your DIY project. Thoughtful pallet selection is key to creating a coop that prioritizes the well-being of your chickens while aligning with your environmental and safety standards.
Tools and Materials Needed
Before embarking on the construction of your pallet chicken coop, it's essential to gather the necessary tools and materials to ensure a smooth and efficient building process. Here's a comprehensive list of the tools and materials you'll need for this DIY project:
Tools:
- Circular Saw: A circular saw will be essential for cutting the pallets to the desired dimensions and shapes.
- Hammer and Pry Bar: These tools will aid in disassembling the pallets and separating the individual boards for use in the coop construction.
- Power Drill: A power drill with screwdriver bits will be used to assemble the pallets and attach various components of the coop.
- Measuring Tape: Accurate measurements are crucial in ensuring the proper alignment and fit of the pallets during construction.
- Level: A level will help ensure that the coop structure is balanced and plumb as you assemble it.
- Staple Gun: This tool will be useful for attaching wire mesh or hardware cloth to the coop for added security.
- Paintbrushes and Rollers: If you plan to paint or seal the coop, having the appropriate brushes and rollers on hand is essential.
Materials:
- Pallets: The primary building material for the coop, the number of pallets needed will depend on the size of your design.
- Wood Screws: Select corrosion-resistant wood screws in various lengths to secure the pallets together and attach additional features.
- Nails: Assorted nails will be used for reinforcing joints and attaching smaller components.
- Wire Mesh or Hardware Cloth: This material will provide added protection against predators when installed over windows, vents, and openings.
- Roofing Materials: Depending on your design, you may need roofing shingles, corrugated metal panels, or other roofing materials to cover the coop.
- Hinges and Latches: These hardware components will be necessary for constructing doors and access points within the coop.
- Nesting Boxes and Perches: If not repurposing these from the pallets, you'll need additional materials to create nesting boxes and perches for the chickens.
- Paint or Sealant (Optional): If you choose to finish the coop with paint or sealant, ensure you have the appropriate products for weatherproofing and protection.
By ensuring you have the right tools and materials at the outset, you can streamline the construction process and minimize interruptions. With these essentials in hand, you'll be well-prepared to bring your pallet chicken coop to life and provide a comfortable habitat for your feathered companions.
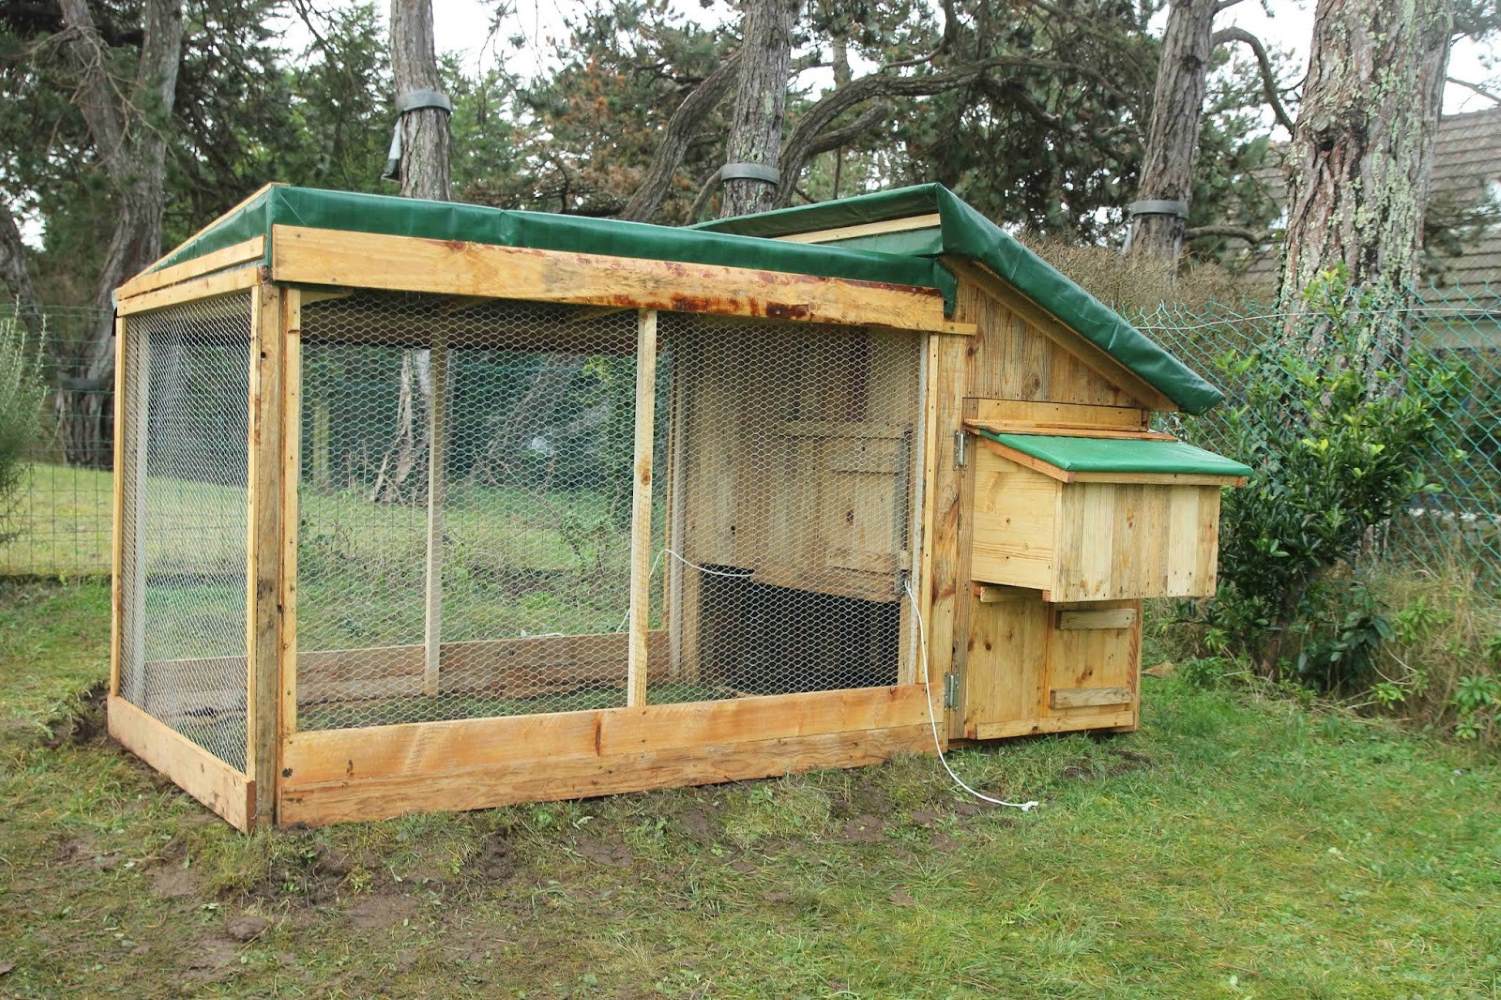
Step-by-Step Instructions for Building Your Pallet Chicken Coop
Now that you've gathered your tools and materials, it's time to roll up your sleeves and start building your pallet chicken coop. Follow these step-by-step instructions to bring your DIY project to life:
1. Disassemble the Pallets
Using a hammer and pry bar, carefully disassemble the pallets, separating the individual boards and removing any protruding nails. Take care to preserve the integrity of the wood during this process, as the boards will form the fundamental building blocks of your coop.
2. Plan the Coop Layout
Lay out the disassembled pallet boards to visualize the layout of your coop. Refer to your design sketch and ensure that the dimensions and orientation align with your initial plans. This step will help you identify any adjustments needed before assembly.
3. Frame the Coop Structure
Begin framing the coop structure by assembling the pallet boards to form the walls, floor, and roof. Use a circular saw to trim the boards to the required lengths and secure them together using wood screws. Ensure the corners are square and the walls are plumb as you build the frame.
4. Install Windows and Vents
If your design includes windows and vents for ventilation, cut openings in the walls and install the appropriate-sized windows. Use hinges to attach the windows, allowing them to open and close as needed. Install wire mesh or hardware cloth over the openings to prevent unwanted intruders.
5. Construct the Roof
Create a sturdy and weatherproof roof for your coop using additional pallet boards or roofing materials. Ensure the roof is sloped to facilitate water runoff and protect the interior from the elements. Secure the roofing materials in place, taking care to seal any gaps to prevent leaks.
6. Add Doors and Access Points
Incorporate doors and access points into the coop design, providing entry for cleaning, egg collection, and chicken care. Install hinges and latches to ensure the doors can be opened and closed securely. Consider adding ramps for easy chicken access to the coop.
7. Customize Nesting Boxes and Perches
If not already integrated into the pallet boards, construct nesting boxes and perches for your chickens. These features provide essential spaces for egg-laying and roosting. Position the nesting boxes in a secluded area to offer privacy for your hens.
8. Secure the Coop Foundation
Ensure the coop is elevated from the ground to prevent moisture buildup and deter pests. Use concrete blocks or wooden posts to create a stable foundation for the coop, providing adequate support and airflow underneath the structure.
9. Apply Finishing Touches
Once the basic structure is complete, consider applying a protective finish to the coop, such as paint or sealant, to enhance its durability and weather resistance. Choose non-toxic products that are safe for your chickens and the environment.
By following these step-by-step instructions, you can construct a functional and sustainable pallet chicken coop that provides a safe and comfortable home for your feathered friends. With careful planning and attention to detail, your DIY coop will be a valuable addition to your backyard or homestead.
Tips for Maintaining and Upgrading Your Coop
Maintaining and upgrading your pallet chicken coop is essential for ensuring the longevity, functionality, and comfort of the habitat for your chickens. Here are some valuable tips to help you effectively maintain and enhance your coop:
-
Regular Cleaning and Inspections: Schedule routine cleaning sessions to remove debris, droppings, and soiled bedding from the coop. Conduct thorough inspections to identify any signs of wear, damage, or potential entry points for pests. Addressing issues promptly can prevent larger problems down the line.
-
Weatherproofing: Check the integrity of the roofing, walls, and windows to ensure they provide adequate protection against the elements. Repair any leaks, reinforce seals, and apply weatherproofing treatments as needed to safeguard the coop from moisture and drafts.
-
Predator Prevention: Continuously assess the security measures in place to deter predators. Inspect the hardware cloth, latches, and door seals to ensure they remain intact and effective. Consider reinforcing vulnerable areas and implementing additional safeguards if necessary.
-
Maintaining Ventilation: Monitor the airflow within the coop to prevent humidity buildup and promote a healthy environment for the chickens. Clean and clear ventilation openings regularly to ensure optimal air circulation.
-
Upgrading Roosts and Nesting Boxes: Assess the condition of the roosts and nesting boxes, and consider upgrading or adding new features to accommodate a growing flock. Provide sufficient space for your chickens to roost comfortably and lay eggs in secure, secluded nesting areas.
-
Implementing Greenery and Shade: Introduce potted plants or hanging vegetation around the coop to provide natural shade and enrichment for the chickens. Select chicken-safe plants and herbs to create a more stimulating and visually appealing environment.
-
Enhancing Accessibility: Evaluate the ease of access for egg collection, cleaning, and maintenance tasks. Consider adding convenient features such as removable panels, hinged openings, or slide-out trays to streamline coop management.
-
Applying Non-Toxic Finishes: If you opt to paint or seal the coop, choose non-toxic and chicken-safe finishes. Regularly inspect and touch up the coatings to maintain their protective qualities and prevent potential chemical exposure to your chickens.
-
Integrating Solar Lighting: Consider installing solar-powered lighting within the coop to extend the daylight hours during darker seasons. This can benefit egg production and provide additional illumination for the chickens.
-
Expansion and Customization: As your flock grows or your needs evolve, be open to expanding or customizing the coop to accommodate changes. Whether it's adding an outdoor run, integrating automated feeders, or creating a dedicated brooding area, adapting the coop to suit your requirements can enhance the overall chicken-keeping experience.
By implementing these maintenance and upgrading tips, you can ensure that your pallet chicken coop remains a secure, comfortable, and sustainable home for your feathered companions. Regular care and thoughtful enhancements will contribute to the well-being of your chickens and the overall success of your DIY coop project.
Conclusion
In conclusion, building a pallet chicken coop offers a rewarding and sustainable approach to providing a safe and comfortable habitat for your chickens. By repurposing pallets, you can create a cost-effective, customizable, and eco-friendly coop that aligns with your DIY aspirations and practical needs. From the initial planning and pallet selection to the construction process and ongoing maintenance, the journey of building and caring for a pallet chicken coop is filled with opportunities for creativity and responsible stewardship.
As you embark on this DIY endeavor, remember the benefits of using pallets for constructing a chicken coop, including their affordability, versatility, and sustainability. Through careful planning and thoughtful design, you can tailor the coop to meet the specific requirements of your flock while integrating essential features for their well-being. With the right tools, materials, and step-by-step guidance, you can bring your vision of a pallet chicken coop to life, creating a functional and aesthetically pleasing space for your chickens to thrive.
Furthermore, the maintenance and upgrading tips provided offer valuable insights into preserving the longevity and functionality of your coop, ensuring that it remains a secure and inviting home for your feathered friends. By incorporating these best practices into your coop management, you can address potential challenges, enhance the living environment for your chickens, and adapt the coop to accommodate future needs.
Ultimately, the process of building and maintaining a pallet chicken coop is a testament to your commitment to sustainable living, self-sufficiency, and animal welfare. Whether you're a seasoned DIY enthusiast or a newcomer to the world of chicken keeping, the journey of creating and caring for a pallet chicken coop is a fulfilling and enriching experience that fosters a deeper connection to your backyard or homestead. Embrace the journey, and enjoy the rewards of providing a lovingly crafted home for your feathered companions.