
Home>Create & Decorate>DIY & Crafts>DIY Outdoor Bench With Back: Step-by-Step Guide
DIY & Crafts
DIY Outdoor Bench With Back: Step-by-Step Guide
Published: April 16, 2024

Content Creator specializing in woodworking and interior transformations. Caegan's guides motivate readers to undertake their own projects, while his custom furniture adds a personal touch.
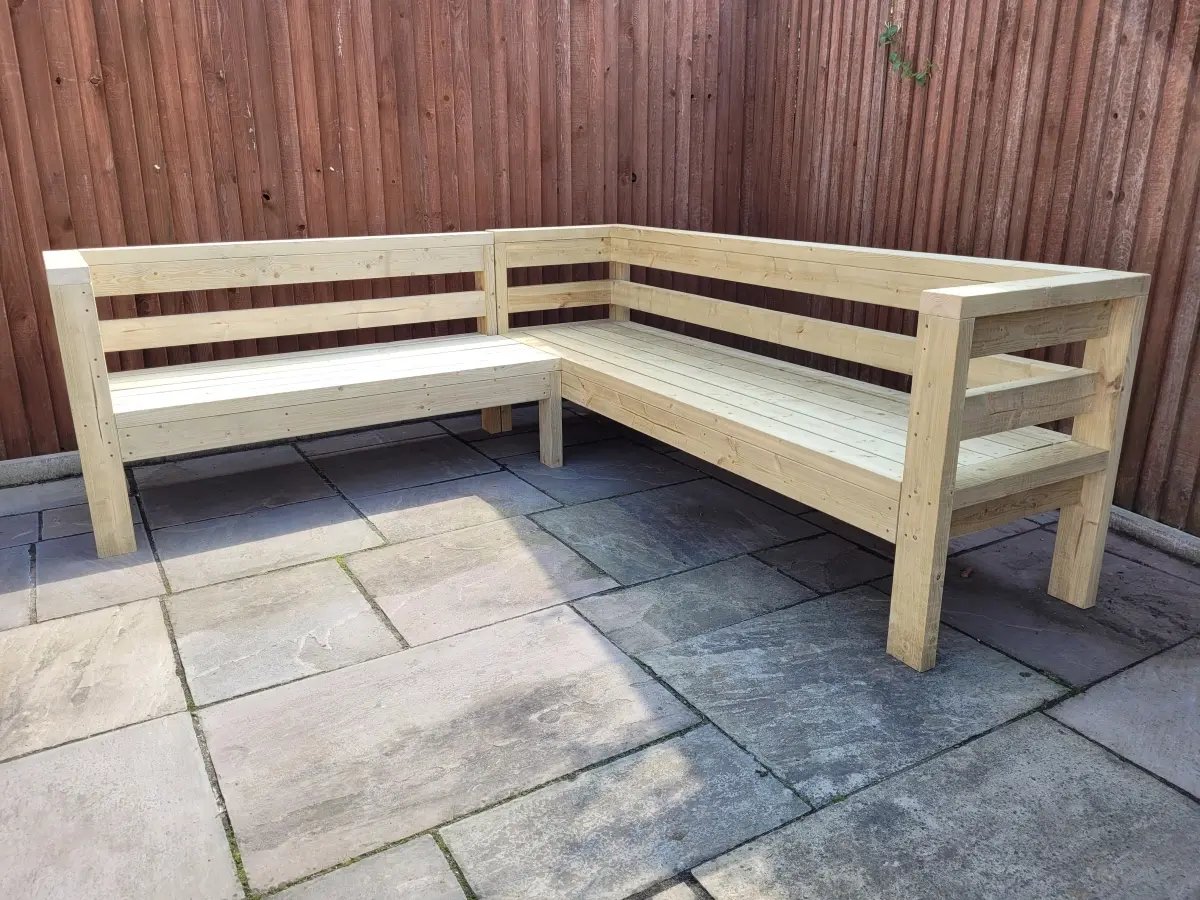
Learn how to build a DIY outdoor bench with a back in this step-by-step guide. Perfect for your next DIY & Crafts project.
(Many of the links in this article redirect to a specific reviewed product. Your purchase of these products through affiliate links helps to generate commission for Twigandthistle.com, at no extra cost. Learn more)
Introduction
Are you looking to add some extra seating to your outdoor space? Building your own DIY outdoor bench with back can be a rewarding and cost-effective project. Not only will it provide a comfortable place to sit and enjoy the outdoors, but it can also add a touch of charm and personality to your backyard or patio. In this step-by-step guide, we will walk you through the process of building your own outdoor bench with a backrest, so you can enjoy the satisfaction of creating a practical and stylish piece of furniture for your outdoor living area.
Materials and Tools Needed
Materials:
- Pressure-treated lumber: 4x4s for the legs, 2x4s for the frame, seat, and back.
- Wood screws: 2 ½ inch and 3-inch screws for securing the frame and attaching the seat and back.
- Wood glue: for added strength and stability.
- Wood stain or paint: to protect the wood from the elements and add a decorative finish.
- Sandpaper: for smoothing rough edges and surfaces.
- Polyurethane sealant: for extra protection against moisture and UV rays.
Tools:
- Circular saw: for cutting the lumber to the desired lengths.
- Drill/driver: for drilling pilot holes and driving screws.
- Clamps: to hold the pieces in place while assembling.
- Measuring tape and pencil: for marking and measuring the wood.
- Sander: for smoothing the wood surfaces before finishing.
- Paintbrushes or a paint sprayer: for applying the wood stain or paint.
- Safety gear: including goggles, gloves, and a dust mask for protection while working with wood and power tools.
Gathering all the necessary materials and tools before starting the project will ensure a smooth and efficient building process.
Step 1: Cutting the Wood
The first step in building your DIY outdoor bench with back is to cut the wood to the required lengths. Using a circular saw and following the measurements from your design plan, carefully cut the pressure-treated lumber into the following pieces:
For the Frame:
- Four 4x4s for the legs, cut to the desired height for the bench.
- Two 2x4s for the front and back of the frame, cut to the same length as the bench.
- Three 2x4s for the seat support, cut to the width of the bench.
For the Seat and Back:
- Two 2x4s for the backrest, cut to the desired height and angle for a comfortable seating position.
- Several 2x4s for the seat, cut to the same width as the bench.
Remember to measure twice and cut once to ensure accuracy and precision in your cuts. Double-check the dimensions before cutting to avoid any mistakes that could affect the overall assembly of the bench. Once all the wood pieces are cut to size, you're ready to move on to the next step in the construction process.
Step 2: Assembling the Frame
With the wood pieces cut to the required lengths, it's time to start assembling the frame of your outdoor bench. Begin by laying out the 4x4s for the legs on a flat surface, ensuring they are evenly spaced and aligned. Use a measuring tape to confirm that the distance between the legs is consistent at the front and back of the bench. Once the legs are in position, use clamps to hold them securely in place.
Next, take the 2x4s cut for the front and back of the frame and position them horizontally between the legs, flush with the top of the legs. Pre-drill pilot holes at an angle through the frame pieces into the legs to prevent the wood from splitting when driving in the screws. Then, use 3-inch wood screws and wood glue to secure the frame pieces to the legs, creating a sturdy and stable base for the bench.
After attaching the front and back pieces, it's time to add the seat support. Place the 2×4 seat support pieces horizontally between the front and back frame, evenly spacing them to provide ample support for the seat boards. Secure the seat support pieces to the frame using wood screws and wood glue, ensuring they are level and well-aligned.
Once the seat support is in place, the basic frame of the outdoor bench should start to take shape. Double-check all the connections and make any necessary adjustments to ensure the frame is level and stable before moving on to the next step in the construction process. With the frame assembled, you're one step closer to completing your DIY outdoor bench with a backrest.
Step 3: Attaching the Seat and Back
With the frame of the outdoor bench securely assembled, the next step is to attach the seat and backrest to complete the construction. Begin by positioning the cut 2x4s for the seat horizontally across the seat support, ensuring they are evenly spaced and aligned. Use a measuring tape to maintain consistent spacing between the seat boards, and make any necessary adjustments to ensure a uniform and comfortable seating surface.
Once the seat boards are in position, use wood screws and wood glue to secure them to the seat support, ensuring a strong and stable connection. Pre-drill pilot holes through the seat boards into the seat support to prevent the wood from splitting when driving in the screws. This will help to ensure a secure and long-lasting attachment.
After attaching the seat, it's time to focus on the backrest of the bench. Position the cut 2x4s for the backrest vertically between the top of the back frame, ensuring they are evenly spaced and aligned. Depending on your design, you may choose to angle the backrest for added comfort. Use a level to ensure the backrest is straight and plumb before securing it to the frame.
Once the backrest is in position, use wood screws and wood glue to attach it to the frame, ensuring a secure and stable connection. Pre-drill pilot holes through the backrest boards into the frame to prevent splitting and ensure a strong attachment. Double-check the alignment and stability of the seat and backrest before moving on to the next step in the construction process.
With the seat and backrest securely attached to the frame, your DIY outdoor bench with a backrest is starting to take shape. The addition of the seat and back not only provides a comfortable place to sit but also adds a stylish and functional element to your outdoor space. With the major components of the bench in place, you're ready to move on to the next step in the construction process.
Step 4: Sanding and Finishing
After the major components of the outdoor bench are assembled, it's time to focus on sanding and finishing to ensure a smooth and polished final product. Start by using a medium-grit sandpaper to smooth out any rough edges, surfaces, and corners of the bench. Pay special attention to the seat, backrest, and armrests (if applicable) to ensure a comfortable and splinter-free sitting experience. Once the rough surfaces are smoothed out, switch to a fine-grit sandpaper to further refine the wood and achieve a silky-smooth finish.
After sanding, it's important to remove any dust and debris from the wood surfaces before applying the finish. Use a clean, dry cloth or a tack cloth to wipe down the entire bench, ensuring that the surface is free from any particles that could affect the finish. Once the bench is clean and dust-free, you're ready to apply the wood finish of your choice.
Whether you prefer a natural wood look or a pop of color, there are various options for finishing your outdoor bench. Wood stain is a popular choice for adding color while allowing the natural grain of the wood to show through. Apply the wood stain evenly with a brush or cloth, following the manufacturer's instructions for the best results. If you prefer a painted finish, choose an outdoor-grade paint that is designed to withstand the elements. Apply the paint in thin, even coats, allowing each coat to dry before applying the next.
Once the wood stain or paint has dried, consider applying a protective sealant to enhance the durability and longevity of the finish. Polyurethane sealant is an excellent choice for outdoor furniture, as it provides a protective barrier against moisture, UV rays, and general wear and tear. Apply the sealant according to the manufacturer's instructions, ensuring complete coverage of the bench to safeguard it from the elements.
With the sanding and finishing process complete, your DIY outdoor bench with a backrest is not only functional and comfortable but also visually appealing and ready to withstand the outdoor elements. The attention to detail in sanding and finishing will ensure that your bench remains a beautiful and inviting addition to your outdoor space for years to come.
Step 5: Adding the Final Touches
After completing the construction and finishing of your DIY outdoor bench with a backrest, it's time to add the final touches that will enhance its functionality and aesthetic appeal. Consider the following details to elevate the overall look and comfort of your outdoor bench:
1. Cushions and Pillows
To make your outdoor bench even more inviting, consider adding cushions and pillows for extra comfort. Choose weather-resistant fabrics and materials that can withstand exposure to the elements. Whether you prefer a pop of color or a neutral palette, cushions and pillows can add a cozy and personalized touch to your outdoor seating area.
2. Armrests and Cup Holders
If you want to increase the functionality of your outdoor bench, consider adding armrests and cup holders. Armrests provide additional support and comfort, while cup holders offer a convenient place to keep beverages while relaxing outdoors. These practical additions can elevate the overall experience of using your outdoor bench.
3. Decorative Accents
Incorporate decorative accents such as carved details, engraved patterns, or custom signage to personalize your outdoor bench. These unique touches can add character and charm to the bench, making it a standout feature in your outdoor space. Consider adding your family name, a meaningful quote, or a decorative motif to make the bench truly your own.
4. Integrated Storage
If you're looking to maximize the functionality of your outdoor bench, consider incorporating integrated storage beneath the seat. A hinged seat that opens to reveal a storage compartment can provide a convenient place to store outdoor essentials such as gardening tools, cushions, or outdoor games. This practical feature adds versatility to your outdoor bench, making it a multi-functional piece of furniture.
5. Weatherproofing
To ensure that your outdoor bench remains in top condition, consider applying a weatherproofing treatment to the wood. This additional layer of protection can help shield the bench from moisture, UV rays, and other outdoor elements, extending its lifespan and maintaining its appearance over time. Regular maintenance and reapplication of weatherproofing treatments will help preserve the beauty and integrity of your outdoor bench.
By adding these final touches, you can customize your DIY outdoor bench with a backrest to suit your preferences and create a welcoming and functional outdoor seating area. Whether you prioritize comfort, practicality, or decorative flair, these details will elevate the overall appeal of your outdoor bench and provide a comfortable and inviting space for relaxation and enjoyment.
Conclusion
In conclusion, building your own DIY outdoor bench with a backrest is a fulfilling and practical project that can enhance the comfort and style of your outdoor living space. By following the step-by-step guide outlined in this article, you can create a customized and durable bench that meets your specific design preferences and seating needs. From cutting the wood and assembling the frame to attaching the seat and back, sanding, finishing, and adding final touches, each stage of the construction process contributes to the creation of a functional and visually appealing outdoor bench.
The use of high-quality materials, precise measurements, and attention to detail throughout the construction and finishing stages will result in a well-crafted and long-lasting outdoor bench. Whether you choose to add cushions, armrests, decorative accents, or integrated storage, the final touches can further personalize and enhance the functionality of your bench. Additionally, applying a weatherproofing treatment will help protect the wood from the elements, ensuring that your outdoor bench remains a beautiful and inviting feature in your outdoor space for years to come.
By taking on the challenge of building your own outdoor bench, you not only save on costs but also gain the satisfaction of creating a practical and stylish piece of furniture that reflects your craftsmanship and creativity. Whether you're enjoying a quiet moment in the garden, hosting outdoor gatherings, or simply taking in the beauty of nature, your DIY outdoor bench with a backrest will provide a comfortable and inviting seating area for relaxation and enjoyment.