
Home>Create & Decorate>DIY & Crafts>Wood Window Building: A DIY Guide
DIY & Crafts
Wood Window Building: A DIY Guide
Published: April 4, 2024

Senior Editor in Create & Decorate, Kathryn combines traditional craftsmanship with contemporary trends. Her background in textile design and commitment to sustainable crafts inspire both content and community.
Learn how to build wood windows with our comprehensive DIY guide. Get expert tips and step-by-step instructions for your next DIY & Crafts project.
(Many of the links in this article redirect to a specific reviewed product. Your purchase of these products through affiliate links helps to generate commission for Twigandthistle.com, at no extra cost. Learn more)
Introduction
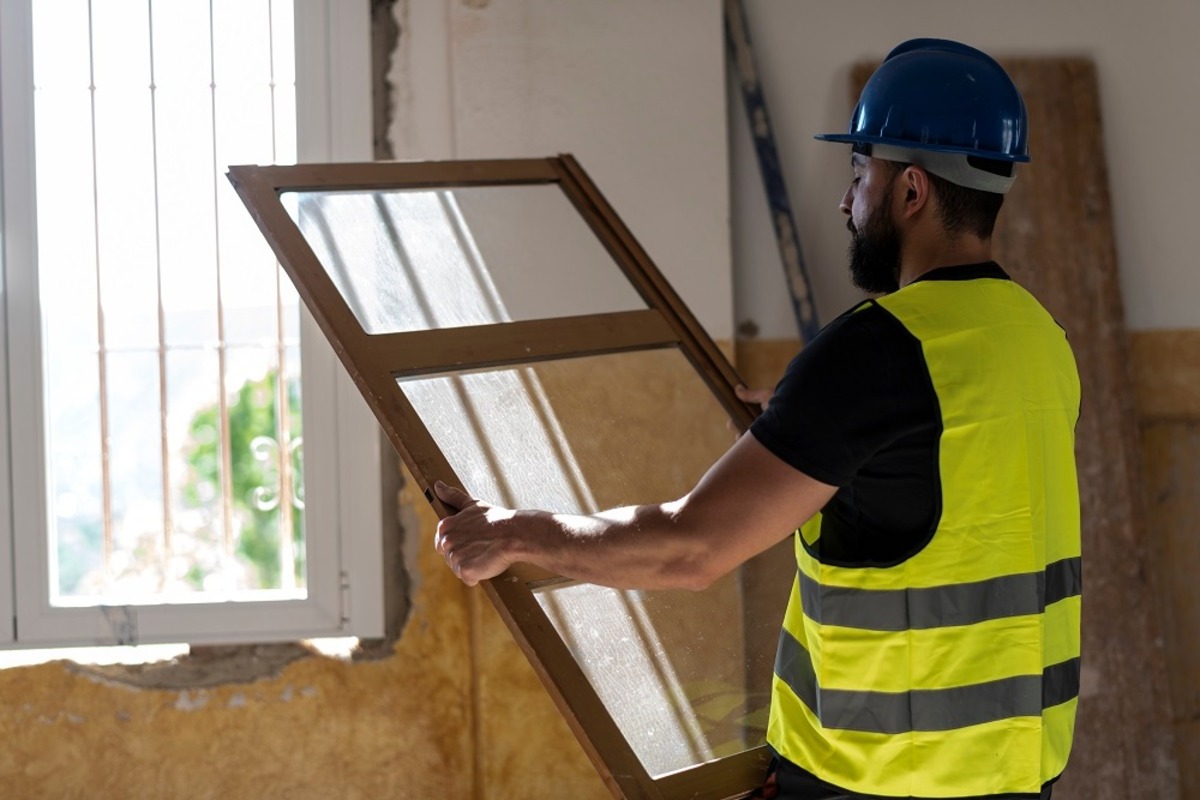
Are you looking to add a touch of rustic charm to your home? Building your own wood window can be a rewarding and cost-effective way to enhance the aesthetic appeal of your living space. Whether you're a seasoned DIY enthusiast or a novice looking for a new project, creating your own wood windows can be a fulfilling endeavor. In this guide, we'll walk you through the process of building your own wood windows, from choosing the right wood to adding the finishing touches. So, roll up your sleeves and get ready to bring a touch of craftsmanship to your home with this DIY wood window building guide.
Choosing the Right Wood for Your Windows
When it comes to building wood windows, selecting the right type of wood is crucial for ensuring durability and visual appeal. Here are some popular wood options to consider for your DIY window project:
1. Cedar
- Cedar is a popular choice for wood windows due to its natural resistance to decay and insects. It's also lightweight and easy to work with, making it ideal for DIY enthusiasts.
2. Redwood
- Known for its rich, reddish-brown hue, redwood is a durable and attractive option for wood windows. It's naturally resistant to rot and decay, making it a long-lasting choice for window construction.
3. Oak
- If you're aiming for a classic, timeless look, oak is a great option for wood windows. It's strong, durable, and offers a beautiful grain pattern that adds character to your windows.
4. Mahogany
- For a touch of elegance, consider using mahogany for your wood windows. It's a hardwood known for its rich, reddish-brown color and resistance to moisture, making it suitable for both interior and exterior windows.
5. Pine
- Pine is a budget-friendly option for wood windows, making it a popular choice for DIY projects. While it may not be as naturally resistant to decay as other woods, proper sealing and maintenance can make it a viable option for window construction.
When choosing the right wood for your windows, consider factors such as durability, resistance to decay, visual appeal, and your budget. Each type of wood has its own unique characteristics, so take the time to select the one that best suits your preferences and the overall aesthetic of your home.
Tools and Materials Needed
Before diving into the process of building your own wood windows, it's essential to gather the necessary tools and materials to ensure a smooth and efficient DIY experience. Here's a comprehensive list of what you'll need:
Tools:
- Measuring Tape: Accurate measurements are crucial for creating well-fitted windows, so a reliable measuring tape is a must-have.
- Circular Saw: This power tool will be essential for cutting the wood to the required dimensions.
- Miter Saw: A miter saw is handy for making precise angled cuts, especially for the window frame.
- Drill and Bits: You'll need a drill for creating pilot holes and attaching the window components.
- Screwdriver Set: Both flathead and Phillips screwdrivers will come in handy during the assembly process.
- Clamps: Clamps are essential for holding the wood pieces together securely while you work on the window frame.
- Wood Chisels: Chisels are useful for fine-tuning joints and ensuring a proper fit.
- Sanding Tools: Sandpaper, sanding blocks, or a power sander will be necessary for smoothing out rough edges and surfaces.
- Woodworking Square: This tool is crucial for ensuring that your window frame is perfectly square and aligned.
Materials:
- Wood: Depending on your preference, choose the type of wood that best suits your aesthetic and functional requirements.
- Wood Glue: A high-quality wood glue will be essential for securing joints and adding strength to the window frame.
- Screws and Nails: Select the appropriate fasteners based on the type of wood you're using and the design of your window.
- Wood Finish or Paint: If you prefer a natural wood look, a wood finish will protect the wood and enhance its appearance. Alternatively, you can opt for paint to match your home's color scheme.
- Glass Panes: Measure the dimensions of the window openings to determine the size of glass panes needed for your windows.
- Window Hardware: Depending on the style of window you're building, you may need hinges, latches, and other hardware for functionality.
By ensuring that you have all the necessary tools and materials at the outset, you'll be well-prepared to embark on your wood window building project with confidence and efficiency.
Measuring and Planning
Accurate measurements and meticulous planning are the foundation of a successful wood window building project. Before you start cutting into your chosen wood, take the time to measure and plan out every detail. Here's a step-by-step guide to help you through the crucial stage of measuring and planning:
-
Measure Window Openings: Begin by measuring the dimensions of the window openings where the new wood windows will be installed. Take precise measurements of the width, height, and depth to ensure that your custom-built windows will fit perfectly.
-
Consider Window Style: Determine the style of window you want to build, whether it's a traditional single-hung window, a classic double-hung window, or a unique custom design. The window style will influence the measurements and the overall construction process.
-
Create Detailed Plans: With the measurements in hand, create detailed plans or blueprints for your wood windows. Consider the placement of glass panes, the size of the window frame components, and any additional features such as decorative mullions or trim.
-
Account for Wood Thickness: When planning the dimensions of the window frame components, remember to account for the thickness of the wood. This is crucial for ensuring that the final window assembly fits snugly within the window openings.
-
Double-Check Measurements: Before proceeding to cut the wood, double-check all measurements to avoid costly mistakes. It's always better to spend extra time verifying measurements than to have to rework or replace components later on.
-
Plan for Joinery: Consider the joinery methods you'll use to connect the window frame components. Whether you opt for traditional mortise and tenon joints, pocket hole joinery, or another method, plan out the joinery details in advance.
-
Select Glass Pane Type: If your wood windows will feature glass panes, decide on the type of glass to be used. Consider factors such as energy efficiency, sound insulation, and safety when choosing the appropriate glass for your windows.
By taking the time to measure accurately and plan meticulously, you'll set the stage for a smooth and successful wood window building process. Thoughtful planning at this stage will help prevent errors and ensure that your custom wood windows turn out exactly as envisioned.
Building the Window Frame
Building the window frame is a critical step in the wood window construction process, as it forms the structural backbone of the window assembly. Here's a detailed guide to help you navigate through the process of building a sturdy and well-crafted window frame:
-
Cutting the Frame Components: Begin by cutting the wood pieces to the precise dimensions outlined in your plans. Use a circular saw and a miter saw to make accurate cuts, ensuring that the frame components fit together seamlessly.
-
Assembling the Frame: Lay out the cut pieces according to your window frame design. Use clamps to hold the components in place as you assemble the frame. Apply wood glue to the joints for added strength, and use screws or nails to secure the connections.
-
Ensuring Squareness: Check the frame for squareness by measuring the diagonals. The frame should be perfectly square to ensure that the window operates smoothly and fits correctly within the window opening.
-
Adding Reinforcements: Depending on the size of the window and the type of wood used, you may need to add reinforcements to the frame for added stability. This could involve adding support bars or diagonal braces to prevent warping or sagging over time.
-
Creating Rabbets for Glass: If your window design includes inset glass panes, create rabbets along the inner edges of the frame to accommodate the glass. Use a router or chisel to carefully carve out the rabbets, ensuring a precise fit for the glass panes.
-
Installing Mullions and Dividers: For windows with multiple panes or a divided light design, install mullions and dividers within the frame. These components add visual interest and support the individual glass panes.
-
Applying Finishing Touches: Once the frame is assembled, sanded, and smoothed, apply a wood finish or paint according to your preferences. This not only enhances the appearance of the window but also protects the wood from moisture and wear.
By following these steps and paying attention to detail, you can create a robust and aesthetically pleasing window frame that forms the foundation for the rest of the wood window assembly. Take your time during this stage to ensure that the frame is well-constructed and ready for the next steps in the window building process.
Installing the Glass Panes
Installing the glass panes is a crucial step in completing your wood window construction. Whether you're creating single-pane windows or intricate multi-pane designs, the process of installing the glass requires precision and attention to detail. Here's a detailed guide to help you navigate through the installation of glass panes in your custom wood windows:
-
Preparing the Frame: Before installing the glass, ensure that the window frame is clean, dry, and free of any debris. Any rough edges or splinters should be smoothed out to prevent damage to the glass.
-
Measuring the Glass: Accurately measure the dimensions of the window openings to determine the exact size of the glass panes needed. It's essential to measure both the width and height of the openings to ensure a proper fit.
-
Choosing the Right Glass: Depending on your preferences and the specific requirements of your windows, select the appropriate type of glass. Options include clear glass for unobstructed views, tempered glass for enhanced safety, or insulated glass for improved energy efficiency.
-
Applying Glazing Compound: If your window design calls for traditional glazing, apply a thin layer of glazing compound along the rabbets or window frame where the glass will be placed. This compound helps to secure the glass in place and create a weatherproof seal.
-
Setting the Glass: Carefully place the glass pane into the prepared opening, ensuring that it fits snugly against the glazing compound. If your window design includes multiple panes, repeat this process for each individual pane, taking care to maintain consistent spacing and alignment.
-
Securing the Glass: Once the glass is in position, use glazier's points or glass clips to secure the glass within the frame. These small metal or plastic clips hold the glass in place and prevent it from shifting or rattling within the window assembly.
-
Applying Additional Sealant: Depending on the window design and your local climate, consider applying a bead of silicone or caulk around the edges of the glass to provide an extra layer of protection against moisture and drafts.
-
Finishing Touches: After the glass panes are securely in place, clean off any excess glazing compound or sealant, and ensure that the glass surfaces are free of smudges or marks. This step will leave your windows looking pristine and ready for the final stages of the wood window building process.
By following these steps and taking the time to install the glass panes with care, you can ensure that your wood windows not only look beautiful but also provide the functionality and durability expected from high-quality craftsmanship. The installation of glass panes is a defining moment in the wood window building process, bringing your custom creations one step closer to completion.
Adding Finishing Touches
Once the window frame and glass panes are in place, it's time to add the finishing touches that will elevate the visual appeal and functionality of your custom wood windows. Here's a detailed guide to the essential steps involved in adding those final, defining details:
-
Installing Hardware: Depending on the style of your wood windows, install the necessary hardware such as hinges, latches, and handles. Choose hardware that complements the overall aesthetic of the windows while providing smooth operation and security.
-
Applying Weather Stripping: To enhance the energy efficiency and weather resistance of your wood windows, apply weather stripping along the edges where the window sashes meet the frame. This helps to create a tight seal, preventing drafts and moisture infiltration.
-
Adding Decorative Trim: Consider adding decorative trim or molding to the exterior and interior of the windows. This not only adds visual interest but also conceals any gaps between the window frame and the wall, creating a polished, professional look.
-
Applying a Protective Finish: Once all components are in place, apply a protective finish to the wood surfaces. Whether you opt for a clear sealant to showcase the natural beauty of the wood or a coat of paint to match your home's color scheme, the finish will safeguard the wood from the elements and prolong the lifespan of your windows.
-
Testing and Adjusting Operation: Before considering the wood windows complete, thoroughly test the operation of the windows. Open and close them to ensure smooth movement and proper alignment. Make any necessary adjustments to the hardware or components to guarantee optimal functionality.
-
Cleaning and Polishing: After the installation process is complete, clean the glass panes and polish any exposed hardware. This final step will leave your wood windows looking immaculate and ready to enhance the visual appeal of your home.
By paying attention to these finishing touches, you can ensure that your custom wood windows not only look stunning but also deliver reliable performance and durability. These details add the perfect final flourishes to your DIY wood window building project, leaving you with a sense of accomplishment and a beautiful addition to your home.
Conclusion
In conclusion, embarking on a DIY wood window building project can be a fulfilling and rewarding endeavor for anyone looking to add a touch of craftsmanship to their home. From selecting the right wood and gathering the necessary tools and materials to meticulously measuring, planning, and constructing the window frame, each step contributes to the creation of a custom wood window that reflects your personal style and enhances the aesthetic appeal of your living space.
The process of installing glass panes and adding the finishing touches, including hardware, weather stripping, decorative trim, and protective finishes, ensures that your wood windows not only look beautiful but also provide functionality, energy efficiency, and long-term durability. By following this comprehensive guide, you can take pride in the creation of custom wood windows that stand as a testament to your DIY skills and attention to detail.
Whether you're a seasoned DIY enthusiast or a novice looking to expand your skills, the satisfaction of building your own wood windows and the visual impact they bring to your home make the effort well worth it. So, roll up your sleeves, gather your tools, and get ready to infuse your living space with the timeless charm of custom-crafted wood windows.