
Home>Create & Decorate>DIY & Crafts>How To Build A Beehive
DIY & Crafts
How To Build A Beehive
Published: February 24, 2024

Senior Editor in Create & Decorate, Kathryn combines traditional craftsmanship with contemporary trends. Her background in textile design and commitment to sustainable crafts inspire both content and community.
Learn how to build a beehive with our step-by-step DIY guide. Explore creative crafts and projects for beekeeping enthusiasts. Start your beekeeping journey today!
(Many of the links in this article redirect to a specific reviewed product. Your purchase of these products through affiliate links helps to generate commission for Twigandthistle.com, at no extra cost. Learn more)
Introduction
Welcome to the fascinating world of beekeeping! Building your own beehive can be a rewarding and fulfilling DIY project that not only provides a safe and comfortable home for bees but also allows you to enjoy the sweet rewards of honey production. Whether you're a seasoned DIY enthusiast or a beginner looking to delve into the world of beekeeping, constructing a beehive is a practical and enjoyable endeavor.
In this comprehensive guide, we will walk you through the step-by-step process of building a beehive from scratch. From gathering the necessary materials to assembling the hive components, we'll cover everything you need to know to create a sturdy and functional beehive that will support the health and productivity of your bee colony.
As you embark on this journey, it's important to approach the project with a sense of curiosity and respect for the vital role that bees play in our ecosystem. By constructing a well-designed beehive, you are not only providing a safe habitat for these industrious insects but also contributing to the preservation of pollinators, which are essential for the health of plants and the production of many crops.
Throughout this guide, we'll provide detailed instructions, helpful tips, and insights into the significance of each step in the beehive construction process. Whether you plan to keep bees for honey production, pollination, or simply to support the local bee population, this guide will equip you with the knowledge and skills to create a welcoming and functional hive for your buzzing companions.
So, roll up your sleeves, gather your tools, and let's dive into the fulfilling and environmentally impactful journey of building a beehive. Get ready to witness the marvels of nature up close and savor the sweet fruits of your labor as you embark on this DIY adventure!
Materials Needed
Before embarking on the exciting journey of building a beehive, it's essential to gather all the necessary materials and tools to ensure a smooth and efficient construction process. Here's a comprehensive list of the items you'll need to bring your beehive to life:
Wood:
- Pine or Cedar Boards: Select high-quality, untreated pine or cedar boards for constructing the hive boxes and frames. These woods are durable and resistant to decay, providing a safe and comfortable environment for the bees.
Hardware:
- Nails and Screws: Choose galvanized or stainless steel nails and screws to withstand the outdoor elements and prevent rusting.
- Wood Glue: Opt for weather-resistant wood glue to reinforce the joints and ensure the structural integrity of the hive.
Hive Components:
- Frames: Purchase or cut wooden frames to support the honeycomb foundation within the hive boxes.
- Foundation Sheets: Acquire beeswax or plastic foundation sheets to provide a base for the bees to build their honeycomb.
Protective Gear:
- Beekeeping Suit: Invest in a protective beekeeping suit to shield yourself from bee stings during hive inspection and maintenance.
- Veil and Gloves: Ensure you have a sturdy veil and durable gloves to further protect yourself while working with the bees.
Tools:
- Saw: A reliable saw will be essential for cutting the wood to the required dimensions.
- Hammer and Screwdriver: Have a hammer and screwdriver on hand for assembling the hive components.
- Measuring Tape: Accurate measurements are crucial in ensuring the precise construction of the hive.
Additional Supplies:
- Paint or Wood Stain: Consider applying a protective coat of paint or wood stain to the exterior of the hive for weather resistance and aesthetic appeal.
- Beehive Stand: If desired, acquire or construct a sturdy stand to elevate the hive off the ground and provide stability.
By gathering these materials and tools, you'll be well-prepared to commence the construction of your beehive with confidence and efficiency. With a clear understanding of the essential components required for the project, you can proceed to the next steps of cutting the wood and assembling the hive frames, bringing you one step closer to creating a welcoming abode for your future bee colony.
Step 1: Cutting the Wood
The initial step in constructing a beehive involves precision and careful attention to detail when cutting the wood components. The dimensions of the hive boxes, frames, and other structural elements play a crucial role in ensuring the functionality and stability of the hive. Here's a detailed breakdown of the wood cutting process:
Hive Box Panels
Begin by measuring and marking the pine or cedar boards according to the dimensions of the hive boxes. Typically, a standard Langstroth hive consists of deep hive bodies and medium or shallow supers. Use a reliable saw to make precise cuts, ensuring that the panels are uniform in size and free from any splintering.
Frame Components
Next, focus on cutting the wooden components for the frames that will support the honeycomb. Measure and cut the sidebars, top bars, and bottom bars to the specified lengths, maintaining accuracy to facilitate seamless assembly later in the process.
Roof and Base
If your hive design includes a gabled roof or a solid base, proceed to cut the additional components accordingly. The roof panels should be cut to the desired dimensions, ensuring a snug fit when assembled. Similarly, the base components should be accurately cut to provide a stable foundation for the hive.
Precision and Accuracy
Throughout the wood cutting process, prioritize precision and accuracy to ensure that all components fit together seamlessly during assembly. Double-check measurements and make clean, straight cuts to achieve uniformity and structural integrity in the hive construction.
By meticulously cutting the wood components to the specified dimensions, you are laying the foundation for a well-crafted beehive that will provide a secure and comfortable home for your bee colony. With the wood pieces cut to perfection, you are now ready to progress to the next step of assembling the frames, bringing you closer to the realization of your beekeeping aspirations.
Step 2: Assembling the Frames
With the wood components precisely cut to the required dimensions, the next pivotal phase in constructing a beehive involves assembling the frames. The frames serve as the supportive structure for the honeycomb, providing a stable foundation for the bees to build and store their honey. Here's a detailed breakdown of the process of assembling the frames:
Frame Components
Begin by organizing the cut wooden components for the frames, including the sidebars, top bars, and bottom bars. Lay out the pieces in a clear and spacious work area, ensuring that all components are easily accessible for assembly.
Frame Jig
Consider using a frame jig, a helpful tool that aids in aligning and securing the frame components during assembly. The frame jig simplifies the process by providing a stable platform for constructing the frames, ensuring uniformity and precision in the final product.
Assembly Process
Start by placing the bottom bar horizontally on a flat surface, followed by positioning the sidebars vertically at each end of the bottom bar. Secure the sidebars to the bottom bar using galvanized nails or screws, ensuring a firm and stable connection.
Next, attach the top bar horizontally across the upper ends of the sidebars, forming a complete rectangular frame structure. Utilize wood glue in conjunction with nails or screws to reinforce the joints, enhancing the durability and longevity of the frames.
Foundation Installation
Once the frames are assembled, insert the foundation sheets, whether made of beeswax or plastic, into the frames. The foundation sheets provide the bees with a base upon which to construct their honeycomb, facilitating the production and storage of honey within the hive.
Quality Check
After assembling the frames, conduct a thorough quality check to ensure that each frame is sturdy, level, and free from any structural flaws. Attention to detail during this phase is crucial, as well-constructed frames contribute to the overall stability and functionality of the beehive.
By meticulously assembling the frames with precision and care, you are establishing a solid framework that will support the bees' natural activities within the hive. The completed frames, equipped with foundation sheets, are essential components that will contribute to the health and productivity of your bee colony. With the frames assembled to perfection, you are now prepared to advance to the next stage of building the hive boxes, bringing you one step closer to realizing your beekeeping aspirations.
Step 3: Building the Hive Boxes
Building the hive boxes is a pivotal stage in the construction of a beehive, as these boxes serve as the primary living quarters for the bee colony. The design and assembly of the hive boxes play a crucial role in providing a secure and functional habitat for the bees to thrive and carry out their essential activities. Here's a detailed exploration of the process of building the hive boxes, encompassing the key steps and considerations involved in this significant phase of beehive construction.
Hive Box Design
Begin by visualizing the design and dimensions of the hive boxes, taking into account the specific requirements of your beekeeping endeavors. Whether you opt for deep hive bodies, medium supers, or shallow supers, it's essential to ensure that the dimensions align with industry standards and the needs of your bee colony. The hive boxes should be spacious enough to accommodate the bees' brood rearing and honey storage while maintaining ease of handling during hive inspections and maintenance.
Panel Assembly
Lay out the precut panels for the hive boxes, including the front, back, sides, and bottom. Arrange the panels in a clear and organized manner, ready for assembly. Begin by attaching the sides to the front and back panels, forming the basic structure of the hive box. Utilize wood glue along with galvanized nails or screws to secure the panels, ensuring a robust and durable connection.
Frame Rests
Incorporate frame rests within the hive boxes to provide support for the frames and maintain proper spacing between the combs. Position the frame rests at the designated intervals within the hive boxes, ensuring that they are aligned and securely attached to the interior walls. The frame rests play a crucial role in facilitating the bees' construction of honeycomb and promoting efficient hive management.
Ventilation and Entrance
Integrate ventilation features and an entrance for the bees within the hive boxes to ensure proper airflow and accessibility. Consider incorporating screened bottom boards or ventilation holes to regulate the hive's temperature and humidity, creating a conducive environment for the bees. Additionally, provide a well-defined entrance for the bees to enter and exit the hive, contributing to their foraging activities and overall well-being.
Quality Assurance
Upon completing the assembly of the hive boxes, conduct a thorough quality check to verify the structural integrity and functionality of the components. Ensure that the hive boxes are level, sturdy, and free from any irregularities that may compromise their effectiveness. Attention to detail during this phase is essential in creating a reliable and accommodating living space for the bee colony.
By meticulously building the hive boxes with attention to detail and precision, you are establishing a fundamental element of the beehive that will support the bees' activities and contribute to the overall success of your beekeeping venture. The completed hive boxes, equipped with essential features and a robust structure, are integral components that will provide a secure and nurturing habitat for your bee colony. With the hive boxes constructed to perfection, you are now prepared to advance to the next stage of adding the frames and finalizing the hive assembly, bringing you closer to the realization of your beekeeping aspirations.
Step 4: Adding the Frames to the Boxes
With the hive boxes meticulously constructed and prepared, the next crucial step in the beehive assembly process involves adding the frames to the boxes. This phase marks the integration of the foundational components that will support the bees' natural activities within the hive, including brood rearing and honey production. Here's a detailed exploration of the process of adding the frames to the boxes, encompassing the essential steps and considerations involved in this pivotal stage of beehive construction.
Frame Placement
Begin by carefully positioning the assembled frames within the hive boxes, ensuring that they are evenly spaced and aligned to facilitate efficient hive management and bee movement. The frames should fit snugly within the designated frame rests, providing stability and support for the bees' comb-building endeavors. Proper frame placement is essential in optimizing the use of space within the hive and promoting the bees' productivity.
Spacing and Alignment
Maintain consistent spacing between the frames to allow for ease of inspection and manipulation during hive maintenance. The uniform alignment of the frames within the hive boxes contributes to the bees' ability to construct straight and orderly combs, facilitating their brood rearing and honey storage activities. Attention to detail in ensuring precise frame placement and alignment is crucial in creating an organized and functional hive environment.
Hive Configuration
Consider the configuration of the frames within the hive boxes, taking into account the specific needs of your bee colony and the objectives of your beekeeping endeavors. Whether you opt for a brood chamber dedicated to the bees' reproductive activities or honey supers designed for honey storage, the arrangement of the frames plays a significant role in supporting the bees' natural behaviors and optimizing honey production.
Hive Expansion
Anticipate the future expansion of the hive by strategically placing frames that accommodate the bees' increasing population and honey storage requirements. By incorporating frames that allow for seamless hive expansion, you are laying the groundwork for the sustained growth and prosperity of your bee colony. The thoughtful arrangement of frames within the hive boxes sets the stage for the bees' continued development and the accumulation of honey reserves.
Quality Assurance
Upon adding the frames to the boxes, conduct a meticulous quality check to ensure that the frames are securely positioned, level, and free from any irregularities that may impede the bees' activities. Attention to detail during this phase is essential in creating an optimal environment for the bees to thrive and fulfill their vital roles within the hive. By verifying the precise placement and alignment of the frames, you are contributing to the overall functionality and success of your beekeeping venture.
By thoughtfully adding the frames to the boxes with precision and care, you are establishing a supportive framework that will facilitate the bees' natural activities within the hive. The completed integration of frames within the hive boxes sets the stage for the bees to commence their vital tasks of comb construction, brood rearing, and honey production. With the frames seamlessly incorporated into the hive boxes, you are now prepared to advance to the final stage of adding the roof and base, bringing you one step closer to the realization of your beekeeping aspirations.
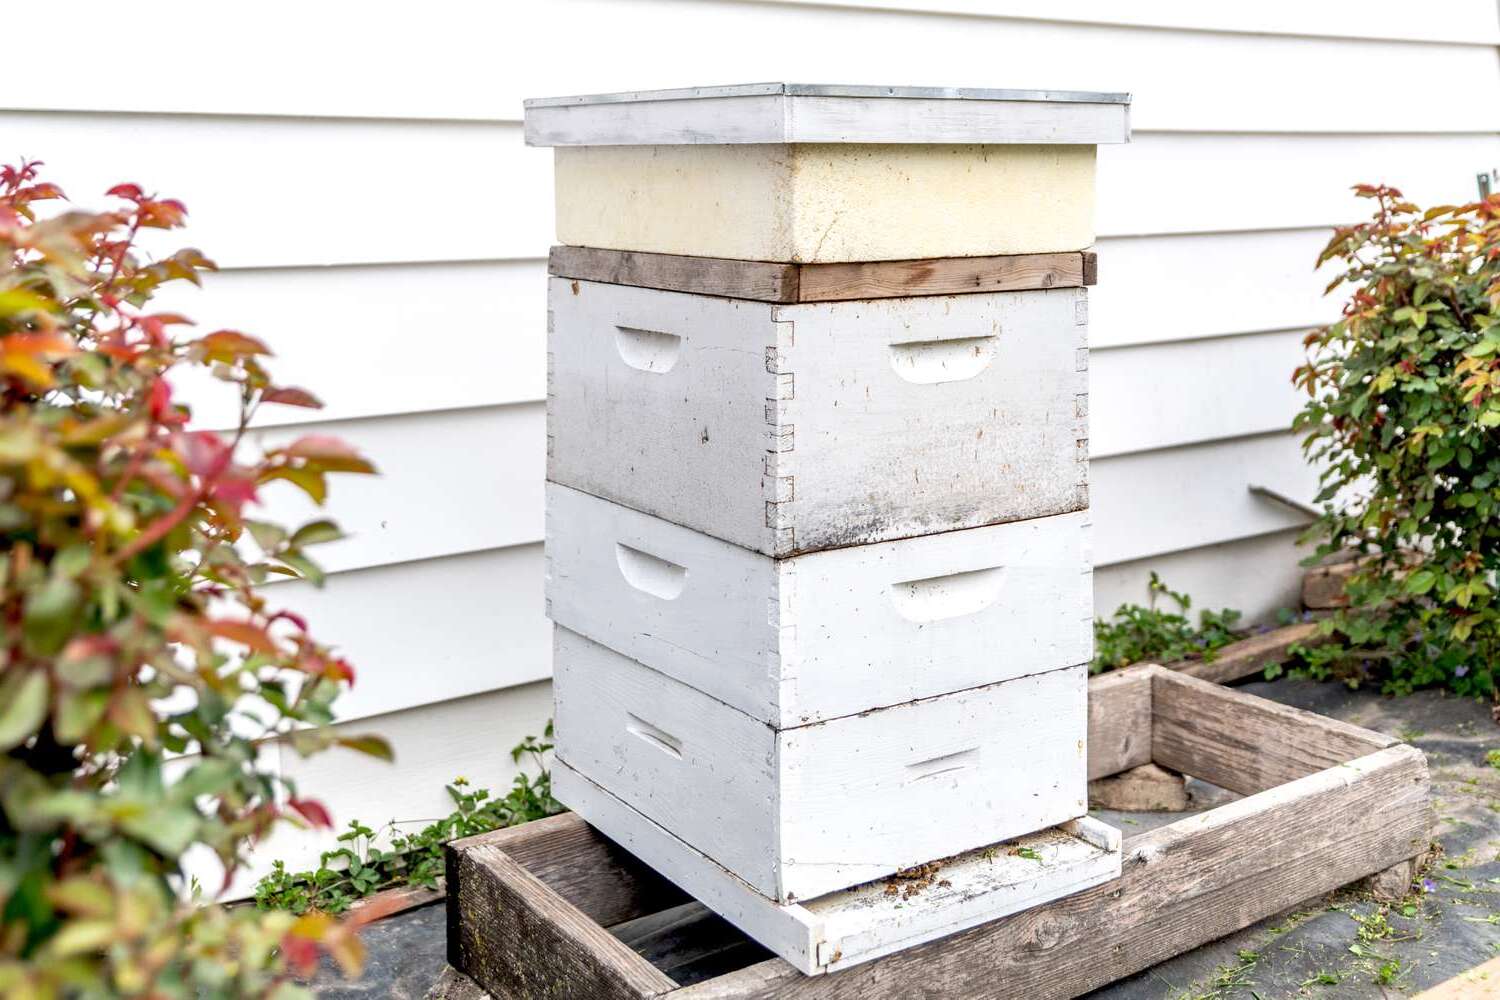
Step 5: Adding the Roof and Base
As you approach the final stage of constructing your beehive, the addition of the roof and base is a critical step that ensures the structural completion and protection of the hive. This phase not only provides shelter and security for the bee colony but also contributes to the overall functionality and longevity of the hive. Here's a detailed exploration of the process of adding the roof and base, encompassing the essential steps and considerations involved in this pivotal stage of beehive construction.
Roof Installation
Begin by selecting a well-constructed and weather-resistant roof that will shield the hive from the elements and provide insulation. Carefully position the roof atop the hive boxes, ensuring a secure and snug fit that prevents moisture infiltration and maintains a stable internal environment for the bees. Whether you opt for a gabled roof, telescoping cover, or migratory cover, prioritize a design that offers protection while allowing for adequate ventilation and hive access.
Weatherproofing
Consider applying a protective coating of paint or wood stain to the exterior of the roof, enhancing its resistance to weathering and prolonging its lifespan. Weatherproofing the roof contributes to the hive's durability and ensures that it remains a reliable shelter for the bee colony throughout the changing seasons. Additionally, inspect the roof for any gaps or potential entry points for pests, sealing them as needed to safeguard the hive's interior.
Base Assembly
Integrate a sturdy and stable base for the hive, ensuring that it provides adequate elevation and support. Whether you opt for a solid bottom board or a screened bottom board, prioritize a design that promotes proper hive ventilation and aids in pest management. Position the base beneath the hive boxes, ensuring that it is level and securely supports the entire hive structure.
Hive Stability
Verify that the roof and base components are securely attached to the hive, providing stability and protection against external disturbances. A well-secured roof and base contribute to the overall structural integrity of the hive, ensuring that it remains steadfast and resilient in various environmental conditions. Attention to detail during this phase is crucial in creating a secure and enduring habitat for the bee colony.
By thoughtfully adding the roof and base with precision and care, you are completing the essential components of the beehive, providing a secure and functional habitat for the bee colony. The integration of the roof and base marks the final stage of hive construction, ensuring that the bees have a sheltered and stable environment to thrive and carry out their vital activities. With the roof and base securely in place, you have successfully realized your vision of constructing a welcoming and protective home for your buzzing companions.
Conclusion
Congratulations on successfully completing the construction of your very own beehive! This remarkable journey has not only equipped you with valuable DIY skills but has also connected you with the captivating world of beekeeping. As you reflect on the meticulous process of gathering materials, cutting wood, assembling frames, building hive boxes, adding frames, and finalizing with the roof and base, you have laid the foundation for a thriving bee colony and a bountiful harvest of honey.
By embarking on this DIY endeavor, you have embraced the essential role of bees in our ecosystem and contributed to the preservation of these vital pollinators. Your dedication to creating a safe and nurturing habitat for bees is a commendable step towards supporting the health of plants and the sustainability of our natural environment.
As you stand back and admire the completed beehive, envision the bustling activity that will soon fill its chambers. The gentle hum of bees, the meticulous construction of honeycomb, and the harmonious rhythm of their collective efforts will soon grace your apiary. Your commitment to beekeeping not only promises the joy of harvesting pure, golden honey but also fosters a deeper connection with nature and a profound appreciation for the intricate workings of a bee colony.
Moving forward, as you embark on your beekeeping journey, remember to approach your newfound role as a steward of bees with patience, respect, and a willingness to learn. Regular hive inspections, attentive care, and a keen observation of your bees' behavior will further enrich your understanding of these remarkable creatures and their vital contributions to our world.
As you savor the sweet rewards of your labor, may the journey of beekeeping inspire you to explore the wonders of nature, cultivate a deeper sense of environmental stewardship, and share the joys of honey production with friends and family. Your commitment to sustainable beekeeping practices and the nurturing of a thriving bee colony will undoubtedly leave a positive impact on your local ecosystem and contribute to the broader efforts of conserving pollinators.
With your newly constructed beehive standing as a testament to your dedication and passion for beekeeping, you are poised to embark on a fulfilling and enriching journey that celebrates the marvels of nature and the invaluable contributions of bees. Embrace this new chapter with enthusiasm, curiosity, and a deep appreciation for the remarkable world of beekeeping that awaits you.