
Home>Create & Decorate>DIY & Crafts>DIY Pool Waterfall: Create Your Own Backyard Oasis
DIY & Crafts
DIY Pool Waterfall: Create Your Own Backyard Oasis
Published: April 11, 2024

Senior Editor in Create & Decorate, Kathryn combines traditional craftsmanship with contemporary trends. Her background in textile design and commitment to sustainable crafts inspire both content and community.
Transform your backyard into a tranquil oasis with our DIY pool waterfall guide. Get creative with DIY & Crafts to enhance your outdoor space.
(Many of the links in this article redirect to a specific reviewed product. Your purchase of these products through affiliate links helps to generate commission for Twigandthistle.com, at no extra cost. Learn more)
Introduction
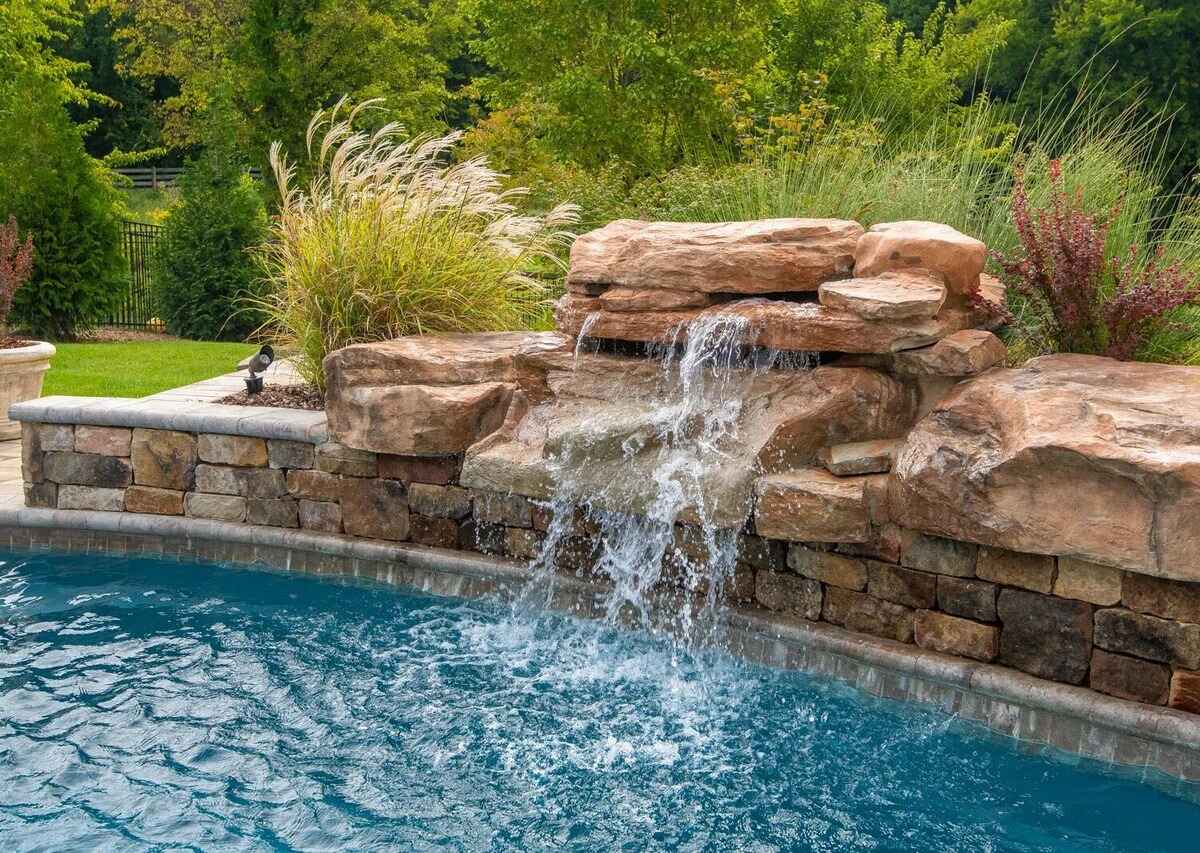
So, you've got a pool in your backyard, and you're looking to take it to the next level. What better way to do that than by adding a DIY pool waterfall? Not only will it enhance the aesthetic appeal of your pool area, but the soothing sound of cascading water will create a tranquil oasis right in your own backyard. In this article, we'll guide you through the process of creating your very own backyard paradise with a stunning DIY pool waterfall. From choosing the right location to adding the finishing touches, we've got you covered. Let's dive in and turn your pool area into a relaxing retreat!
Choosing the Right Location for Your DIY Pool Waterfall
When it comes to creating a DIY pool waterfall, the first step is to carefully consider the location. Here are some key factors to keep in mind:
-
Proximity to the Pool: The ideal location for your DIY pool waterfall is near the pool area to ensure that the cascading water enhances the overall pool experience. Consider a spot where the waterfall can flow directly into the pool, creating a seamless and visually appealing connection.
-
Natural Surroundings: Take into account the natural surroundings of your backyard. Look for a location where the waterfall can blend harmoniously with the existing landscape. If you have existing rock formations or landscaping features, incorporating the waterfall into this setting can create a more organic and cohesive look.
-
Accessibility: Accessibility is another important consideration. Ensure that the location you choose for the DIY pool waterfall is easily accessible for maintenance and repairs. You'll want to be able to reach the waterfall for cleaning and upkeep without any difficulty.
-
Safety: Safety should always be a priority. Avoid placing the waterfall in an area where it may pose a hazard, especially if you have children or pets. Consider the depth of the pool and any potential risks associated with the waterfall's location.
By carefully considering these factors, you can select the perfect location for your DIY pool waterfall, ensuring that it complements your pool area and enhances the overall ambiance of your backyard oasis.
Gathering Materials and Tools
Before diving into the construction of your DIY pool waterfall, it's essential to gather all the necessary materials and tools. Here's a comprehensive list to ensure you have everything you need to bring your backyard oasis to life:
Materials:
- Rocks and Boulders: Select a variety of rocks and boulders in different shapes and sizes to create a natural-looking waterfall. Consider using a mix of flat rocks for the waterfall spillway and larger boulders for the surrounding structure.
- Pond Liner: Choose a durable pond liner that is large enough to accommodate the size of your waterfall. The liner will help retain the water and prevent leakage.
- Pump and Tubing: Invest in a high-quality water pump and flexible tubing to circulate the water from the pool to the waterfall. The pump should be powerful enough to create a steady flow of water over the rocks.
- Waterfall Spillway: Purchase a waterfall spillway kit to create a smooth and consistent water flow over the rocks. The spillway will help achieve a natural-looking waterfall effect.
- Waterproof Sealant: Use waterproof sealant to secure the rocks in place and prevent water from escaping through gaps or crevices.
- Decorative Plants: Consider adding aquatic plants or landscaping elements around the waterfall to enhance its visual appeal and blend it seamlessly with the surrounding environment.
Tools:
- Shovel and Digging Tools: Prepare the ground for the waterfall by digging and shaping the area where the rocks will be placed.
- Level: Ensure the rocks and boulders are positioned evenly by using a level to maintain a balanced and natural-looking waterfall structure.
- Utility Knife: Use a utility knife to trim the pond liner and tubing to the required size, ensuring a proper fit for the waterfall design.
- Gloves and Safety Gear: Protect your hands and wear appropriate safety gear, especially when handling heavy rocks and using sealants.
- Measuring Tape: Take accurate measurements to plan the layout and dimensions of the waterfall structure.
By gathering these materials and tools, you'll be well-prepared to embark on the construction of your DIY pool waterfall. With careful planning and the right resources at your disposal, you can create a stunning and tranquil oasis in your backyard that will be enjoyed for years to come.
Designing Your DIY Pool Waterfall
Designing your DIY pool waterfall is a crucial step in the process, as it sets the foundation for the visual appeal and functionality of the final structure. Here are the key aspects to consider when designing your DIY pool waterfall:
1. Layout and Flow
Begin by envisioning the layout of your waterfall. Consider the natural flow of water and how it will cascade over the rocks. Create a rough sketch or plan to map out the placement of the rocks, boulders, and spillway. Visualize the path of the water as it travels from the top of the waterfall to the pool, ensuring a smooth and visually pleasing flow.
2. Rock Arrangement
Experiment with different rock arrangements to achieve the desired aesthetic for your DIY pool waterfall. Play around with the positioning of the rocks to create varying levels and textures, mimicking the appearance of a natural waterfall. Consider the placement of larger boulders as anchor points and smaller rocks to create cascading tiers.
3. Integration with Landscape
Ensure that the design of your DIY pool waterfall seamlessly integrates with the surrounding landscape. Take into account existing plants, trees, and other landscaping features to create a cohesive and harmonious look. Incorporating natural elements into the design will enhance the overall appeal of the waterfall and its surroundings.
4. Water Feature Options
Explore different water feature options to enhance the visual and auditory experience of your DIY pool waterfall. Consider incorporating LED lighting to illuminate the cascading water at night, creating a captivating and enchanting ambiance. Additionally, you may choose to include a misting feature or decorative water spouts to add a unique touch to the waterfall design.
5. Safety Considerations
As you design your DIY pool waterfall, prioritize safety measures to ensure a secure and enjoyable environment. Avoid creating steep or uneven surfaces that may pose a slipping hazard. Incorporate gradual slopes and gentle curves to guide the water flow, creating a safe and inviting space for relaxation.
By carefully considering these design elements, you can create a captivating and well-planned DIY pool waterfall that complements your backyard oasis. The design phase sets the stage for the construction and installation process, allowing you to bring your vision to life with precision and creativity.
Building the Structure
Building the structure of your DIY pool waterfall is a pivotal phase that brings your design to life. Follow these essential steps to construct a sturdy and visually appealing waterfall structure:
-
Prepare the Foundation: Begin by preparing the foundation for the waterfall structure. Clear the designated area of any debris and ensure the ground is level and stable. This will provide a solid base for the rocks and boulders that will form the waterfall.
-
Lay the Pond Liner: Place the pond liner over the prepared foundation, ensuring it extends beyond the intended waterfall area. Smooth out any wrinkles or folds in the liner to create a seamless surface for the water to flow over.
-
Position the Rocks and Boulders: Carefully position the rocks and boulders according to your design plan. Start with the larger boulders as anchor points and then fill in the surrounding areas with smaller rocks to create a natural-looking cascade. Experiment with different arrangements until you achieve a visually pleasing and structurally sound layout.
-
Secure the Rocks: Once the rocks are in place, use waterproof sealant to secure them to the pond liner and to each other. This will prevent shifting and ensure a stable and durable waterfall structure. Pay close attention to the seams and crevices between the rocks to create a watertight seal.
-
Create Water Flow: Install the water pump and tubing according to the manufacturer's instructions. Position the pump at the base of the waterfall structure and connect the tubing to the waterfall spillway. Test the water flow to ensure a steady and even cascade over the rocks.
-
Fine-Tune the Appearance: Take a step back and assess the overall appearance of the waterfall structure. Make any necessary adjustments to the positioning of the rocks and the water flow to achieve the desired aesthetic and functionality.
By following these steps, you can build a robust and visually captivating structure for your DIY pool waterfall. The careful placement of rocks, secure sealing, and proper water flow are essential elements in creating a stunning and enduring centerpiece for your backyard oasis.
Adding the Water Feature
Once the foundational structure of your DIY pool waterfall is in place, it's time to add the essential water feature that will bring it to life. Follow these steps to ensure a seamless and visually captivating water flow:
-
Install the Water Pump: Position the water pump at the base of the waterfall structure, ensuring it is securely anchored. Connect the pump to a power source and test its functionality to ensure a steady and consistent water flow.
-
Attach the Tubing: Connect the flexible tubing to the water pump, ensuring a secure and watertight fit. Position the tubing to guide the water flow from the pump to the top of the waterfall, where it will cascade over the rocks.
-
Adjust the Water Flow: Fine-tune the water flow to achieve the desired cascade effect. Depending on the pump's settings, you may be able to adjust the flow rate to create a gentle trickle or a more robust waterfall effect. Experiment with different flow settings to find the perfect balance for your DIY pool waterfall.
-
Test for Leaks: Once the water pump and tubing are in place, carefully inspect the connections for any signs of leakage. Run a test cycle to ensure that the water flows smoothly without any unexpected leaks or disruptions.
-
Add Decorative Elements: Consider incorporating additional decorative elements to enhance the water feature. LED lighting can be strategically positioned to illuminate the cascading water, creating a mesmerizing visual effect, especially during evening hours. Additionally, you may choose to include misting features or decorative water spouts to add a unique touch to the waterfall design.
-
Fine-Tune the Visual Appeal: Step back and assess the overall visual impact of the water feature. Make any necessary adjustments to the water flow, lighting, and decorative elements to achieve the desired ambiance and aesthetic appeal.
By carefully adding the water feature to your DIY pool waterfall, you can create a captivating and tranquil focal point in your backyard oasis. The soothing sound of cascading water combined with the visual allure of the waterfall will elevate the ambiance of your pool area, providing a serene and relaxing environment for you and your guests to enjoy.
Landscaping Around Your DIY Pool Waterfall
Landscaping around your DIY pool waterfall is a crucial step in creating a cohesive and visually stunning backyard oasis. By integrating landscaping elements, you can enhance the natural beauty of the waterfall and seamlessly blend it with the surrounding environment. Here are the essential steps to consider when landscaping around your DIY pool waterfall:
-
Selecting Plants and Greenery: Choose a variety of aquatic plants, shrubs, and greenery to adorn the area around the waterfall. Opt for plants that thrive in moist environments and can withstand occasional splashes of water. Consider incorporating colorful flowering plants to add vibrancy and visual interest to the landscape.
-
Creating a Rock Garden: Surround the base of the waterfall with a carefully curated rock garden. Use a combination of river rocks, pebbles, and decorative stones to create a natural and textured border around the waterfall. The rock garden will not only enhance the aesthetic appeal but also provide a practical barrier to contain soil and prevent erosion.
-
Incorporating Natural Elements: Integrate natural elements such as driftwood, logs, or tree stumps to add a rustic and organic touch to the landscape. These elements can be strategically positioned to create visual focal points and enhance the overall natural ambiance of the waterfall area.
-
Establishing Pathways and Access Points: Create pathways or stepping stone arrangements to provide easy access to the waterfall area. Incorporate durable and slip-resistant materials to ensure safety and convenience for those enjoying the backyard oasis. Consider adding seating areas or benches where individuals can relax and appreciate the tranquil surroundings.
-
Balancing Hardscape and Softscape: Achieve a harmonious balance between hardscape and softscape elements around the waterfall. While rocks, pathways, and decorative features contribute to the hardscape, the lush greenery, plants, and flowers form the softscape. Striking a balance between these elements creates a visually appealing and well-rounded landscape design.
-
Enhancing with Water Features: Consider adding additional water features such as a small pond, fountain, or decorative water bowls near the DIY pool waterfall. These features can complement the cascading water of the waterfall and create a multi-dimensional aquatic environment that adds depth and interest to the landscape.
By carefully landscaping around your DIY pool waterfall, you can create a captivating and immersive outdoor space that invites relaxation and rejuvenation. The thoughtful integration of plants, natural elements, and hardscape features will elevate the visual appeal of the waterfall area, transforming it into a picturesque and inviting retreat within your backyard.
Maintenance and Care for Your Backyard Oasis
Maintaining your DIY pool waterfall and the surrounding backyard oasis is essential to ensure its longevity and continued enjoyment. By implementing regular maintenance and care practices, you can preserve the beauty and functionality of the waterfall while creating a serene and inviting environment for relaxation. Here are the key maintenance tasks and care tips to keep your backyard oasis in pristine condition:
1. Cleaning and Debris Removal
Regularly clean the rocks, boulders, and surrounding areas of the waterfall to remove debris, leaves, and other organic matter. Use a gentle brush or soft cloth to wipe away any buildup and prevent the accumulation of dirt and algae. Additionally, clear any debris from the pool area to maintain water clarity and cleanliness.
2. Inspecting and Sealing
Periodically inspect the sealant and waterproofing around the rocks and pond liner to ensure there are no signs of wear or damage. Address any areas where the sealant may have deteriorated and reapply waterproof sealant as needed to maintain a watertight and secure structure.
3. Checking Water Flow and Pump Functionality
Regularly check the water flow over the rocks and ensure that the pump is functioning optimally. Clean the pump and remove any debris that may obstruct the water flow. Test the pump's functionality and adjust the water flow as necessary to maintain a steady and consistent cascade.
4. Monitoring Water Quality
Monitor the water quality in the pool and the waterfall area to ensure it remains balanced and free from contaminants. Test the water regularly for pH levels, chlorine concentration, and clarity. Maintain proper chemical balance and filtration to preserve the visual appeal and hygiene of the water feature.
5. Pruning and Trimming
Trim and prune the surrounding plants, shrubs, and greenery to maintain a tidy and well-manicured landscape. Remove any overgrowth that may obstruct the view of the waterfall or impede access to the area. Additionally, trim any aquatic plants to prevent them from encroaching on the waterfall structure.
6. Winterization and Seasonal Care
Prepare the DIY pool waterfall for seasonal changes, especially during winter. Implement winterization practices to protect the waterfall from freezing temperatures and ice formation. Drain the water feature, disconnect the pump, and take necessary precautions to safeguard the structure during colder months.
7. Professional Maintenance
Consider scheduling periodic professional maintenance and inspections for the DIY pool waterfall. Engage a qualified technician to assess the functionality of the water pump, inspect the structural integrity, and provide expert care to ensure the longevity of the waterfall and its components.
By adhering to these maintenance and care practices, you can uphold the beauty and functionality of your backyard oasis, creating a tranquil and well-maintained environment for relaxation and enjoyment. Regular attention to cleaning, inspection, and seasonal care will contribute to the enduring appeal of your DIY pool waterfall and the surrounding landscape.