
Home>Create & Decorate>DIY & Crafts>How To Build A Fire Pit With Rocks
DIY & Crafts
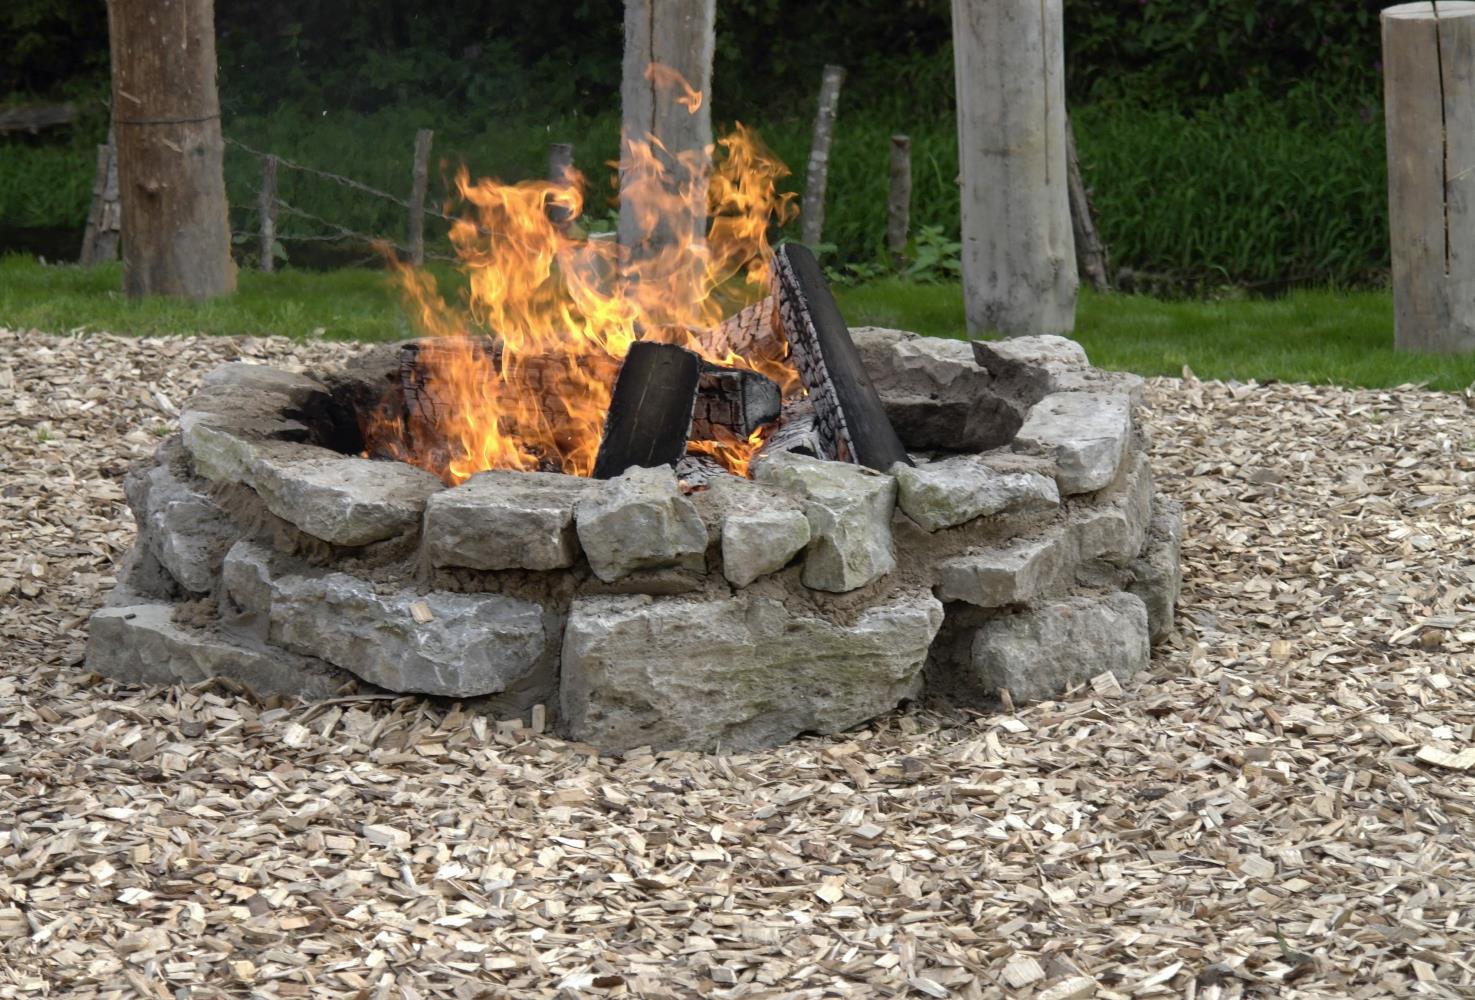
How To Build A Fire Pit With Rocks
Published: May 28, 2024

Content Creator specializing in woodworking and interior transformations. Caegan's guides motivate readers to undertake their own projects, while his custom furniture adds a personal touch.
Learn how to build a DIY fire pit with rocks for your outdoor space. Get creative with these easy-to-follow instructions and enhance your backyard with this fun and practical project. Perfect for DIY & Crafts enthusiasts!
(Many of the links in this article redirect to a specific reviewed product. Your purchase of these products through affiliate links helps to generate commission for Twigandthistle.com, at no extra cost. Learn more)
Introduction
So, you want to add a cozy and inviting atmosphere to your backyard? Building a fire pit with rocks is a fantastic way to achieve that! Whether you're looking to roast marshmallows with the family or simply enjoy the warmth and ambiance of a crackling fire, a DIY fire pit can be a great addition to your outdoor space. In this article, we'll guide you through the step-by-step process of building a fire pit with rocks, from choosing the right location to adding the finishing touches. Let's get started on creating a gathering spot that will be the envy of all your friends and neighbors!
Choosing the Right Location
When it comes to building a fire pit with rocks, choosing the right location is crucial. Here are some key factors to consider:
-
Safety First: Ensure that the location is a safe distance away from any structures, overhanging trees, or flammable materials. A minimum of 10 feet of clearance is recommended.
-
Local Regulations: Check with your local municipality or homeowners' association for any regulations or permits required for building a fire pit. Compliance with local regulations is essential to avoid any legal issues down the road.
-
Wind Direction: Take note of the prevailing wind direction in your area. You'll want to position the fire pit so that the smoke doesn't blow directly into your home or seating area.
-
Accessibility: Consider the proximity to your home and seating areas. You'll want the fire pit to be easily accessible and visible from your outdoor living space.
-
Ground Surface: Choose a level area with a solid ground surface, such as gravel or sand. Avoid building the fire pit on grass or other flammable surfaces.
By carefully considering these factors, you can ensure that you select the perfect spot for your DIY fire pit, creating a safe and enjoyable outdoor gathering space.
Gathering the Necessary Materials
Before you start building your fire pit with rocks, it's essential to gather all the necessary materials. Here's what you'll need:
-
Rocks: Look for durable, heat-resistant rocks such as lava rocks or fire bricks. These will form the main structure of your fire pit.
-
Shovel: A shovel will be essential for digging the pit and preparing the ground.
-
Level: To ensure that your fire pit is stable and even, a level will come in handy during the construction process.
-
Measuring Tape: Precision is key when building a fire pit, so a measuring tape will help you ensure that everything is properly spaced and aligned.
-
Masonry Adhesive: This will be used to secure the rocks in place and create a sturdy fire pit structure.
-
Gravel: Adding a layer of gravel at the base of the fire pit will help with drainage and provide a stable foundation.
-
Sand: You'll need sand for leveling the base and creating a smooth surface for the fire pit.
-
Safety Gear: Don't forget to prioritize safety! Gloves and safety goggles are essential when working with rocks and masonry adhesive.
By gathering these materials in advance, you'll be well-prepared to tackle the construction of your DIY fire pit with rocks.
Preparing the Ground
Before you start stacking rocks and building the fire pit, it's crucial to properly prepare the ground to ensure a stable and long-lasting structure. Here's a step-by-step guide to preparing the ground for your DIY fire pit with rocks:
-
Mark the Area: Use a can of spray paint or a rope to mark the perimeter of the fire pit on the ground. This will give you a clear outline to work within and help maintain the desired shape and size.
-
Dig the Pit: Using a shovel, dig a hole within the marked perimeter. The depth of the pit will depend on the size of the rocks you're using, but a depth of around 8-12 inches is generally suitable. As you dig, ensure that the walls of the pit are straight and even.
-
Add Gravel: Once the pit is dug, add a layer of gravel to the bottom. This will aid in drainage and provide a stable base for the fire pit. Use a tamper to compact the gravel and create a level surface.
-
Level the Base: Spread a layer of sand over the gravel to create a level base for the rocks. Use a level to ensure that the sand is evenly distributed and provides a flat surface for the first layer of rocks.
By taking the time to properly prepare the ground, you'll create a solid foundation for your fire pit, ensuring that it stands the test of time and provides a safe and enjoyable outdoor gathering space.
Building the Fire Pit
Now comes the exciting part – building the fire pit! Follow these steps to construct a sturdy and visually appealing fire pit with rocks:
-
Lay the First Layer: Start by placing the largest and most stable rocks as the base layer. Position them in a circle, ensuring that they fit snugly together. This layer will form the foundation of your fire pit, so take your time to align the rocks evenly.
-
Stack the Rocks: Once the base layer is in place, begin stacking additional layers of rocks on top. Gradually work your way up, staggering the rocks like a puzzle to create a stable and visually appealing structure. Use rocks of varying sizes to add texture and visual interest to the fire pit.
-
Use Masonry Adhesive: To reinforce the stability of the fire pit, apply masonry adhesive between the rocks as you stack them. This will help secure the rocks in place and create a durable bond. Be sure to follow the manufacturer's instructions when using the adhesive.
-
Check for Level: Periodically use a level to ensure that the rocks are being stacked evenly and that the fire pit is taking shape as intended. Adjust the positioning of the rocks as needed to maintain a level and balanced structure.
-
Create a Safe Height: As you stack the rocks, aim for a height of around 12-18 inches. This will help contain the fire and provide a safe barrier while allowing for ample ventilation. Avoid building the fire pit too high, as this can pose safety risks.
-
Finish the Top Layer: Once the desired height is reached, add a final layer of rocks to create a finished edge. This will give the fire pit a polished look and provide a smooth surface for seating or resting cooking implements.
By following these steps, you'll be well on your way to creating a beautiful and functional fire pit with rocks that will be the centerpiece of your outdoor space.
Adding the Finishing Touches
After completing the construction of the fire pit with rocks, it's time to add the finishing touches to enhance its functionality and visual appeal. Here are some essential steps to complete your DIY fire pit project:
-
Grate or Screen: Consider adding a grate or spark screen to your fire pit. A grate can be placed over the fire to support cooking utensils, allowing you to enjoy outdoor cooking. On the other hand, a spark screen helps contain embers and sparks, providing an added layer of safety.
-
Seating: Surround your fire pit with comfortable seating options. Whether it's outdoor chairs, benches, or built-in stone seating, creating a cozy and inviting space for gatherings and relaxation is essential.
-
Lighting: Incorporate lighting around the fire pit area to extend its functionality into the evening hours. Options such as string lights, solar-powered lanterns, or even tiki torches can add ambiance and ensure visibility in the dark.
-
Storage: Consider adding storage for firewood and other essentials near the fire pit. This could be in the form of a built-in wood storage area, a decorative firewood rack, or storage benches that serve a dual purpose.
-
Decorative Elements: Add decorative elements such as potted plants, decorative rocks, or outdoor artwork to personalize the space and create a welcoming atmosphere.
-
Safety Signage: If you have specific rules or safety guidelines for using the fire pit, consider adding signage to communicate these to your guests. This can include reminders about fire safety, proper use of the fire pit, and emergency procedures.
By adding these finishing touches, you can elevate your DIY fire pit with rocks from a simple construction project to a fully functional and inviting outdoor gathering space. These details will not only enhance the aesthetics of the fire pit but also contribute to its safety and usability for years to come.
Safety Precautions
When it comes to enjoying your newly constructed fire pit with rocks, safety should always be a top priority. Here are some essential safety precautions to keep in mind:
-
Keep a Fire Extinguisher Handy: It's crucial to have a fire extinguisher within easy reach of the fire pit. In the event of an unexpected flare-up or emergency, having a fire extinguisher nearby can help prevent small fires from escalating.
-
Clear the Surrounding Area: Before lighting a fire, ensure that the area around the fire pit is clear of any flammable materials, such as dry leaves, paper, or debris. Maintaining a clear zone around the fire pit can help prevent accidental fires and ensure a safe environment.
-
Supervise the Fire: Never leave a fire pit unattended, especially when it's actively burning. Assign a responsible adult to supervise the fire at all times and ensure that it is fully extinguished before leaving the area.
-
Use Safe Ignition Methods: Avoid using flammable liquids such as gasoline to ignite the fire. Instead, opt for safe and approved ignition methods such as kindling, fire starters, or a long-reach lighter. Always follow the manufacturer's guidelines for any ignition tools used.
-
Monitor Wind Conditions: Be mindful of wind conditions when using the fire pit. Strong winds can cause the fire to behave unpredictably and may blow embers or smoke in undesirable directions. Consider postponing the use of the fire pit during windy conditions.
-
Practice Fire Safety: Educate all users of the fire pit, especially children, about fire safety. Establish clear rules for behavior around the fire pit, including maintaining a safe distance, refraining from throwing objects into the fire, and using caution when roasting marshmallows or cooking over the flames.
-
Extinguish the Fire Properly: When you're finished using the fire pit, make sure to fully extinguish the fire. Use water to douse the flames, stir the embers, and add more water until the ashes are cool to the touch. This ensures that the fire is completely out and reduces the risk of smoldering embers reigniting.
By adhering to these safety precautions, you can enjoy your fire pit with peace of mind, knowing that you've taken the necessary steps to create a safe and enjoyable outdoor experience for you and your guests.
Conclusion
In conclusion, building a fire pit with rocks can be a rewarding and enjoyable DIY project that adds both functionality and aesthetic appeal to your outdoor space. By carefully selecting the location, gathering the necessary materials, preparing the ground, constructing the fire pit, adding finishing touches, and prioritizing safety, you can create a gathering spot that will be the envy of all your friends and neighbors. Whether you're looking to host cozy gatherings, enjoy outdoor cooking, or simply unwind by the warmth of a crackling fire, a well-built fire pit with rocks can become the focal point of your outdoor living area. With proper planning and attention to detail, you can create a safe, inviting, and visually stunning fire pit that will provide years of enjoyment for you and your loved ones. So, roll up your sleeves, gather your materials, and get ready to transform your backyard into a welcoming oasis with a custom-built fire pit.