
Home>Create & Decorate>DIY & Crafts>How To Build A Run In Shed
DIY & Crafts
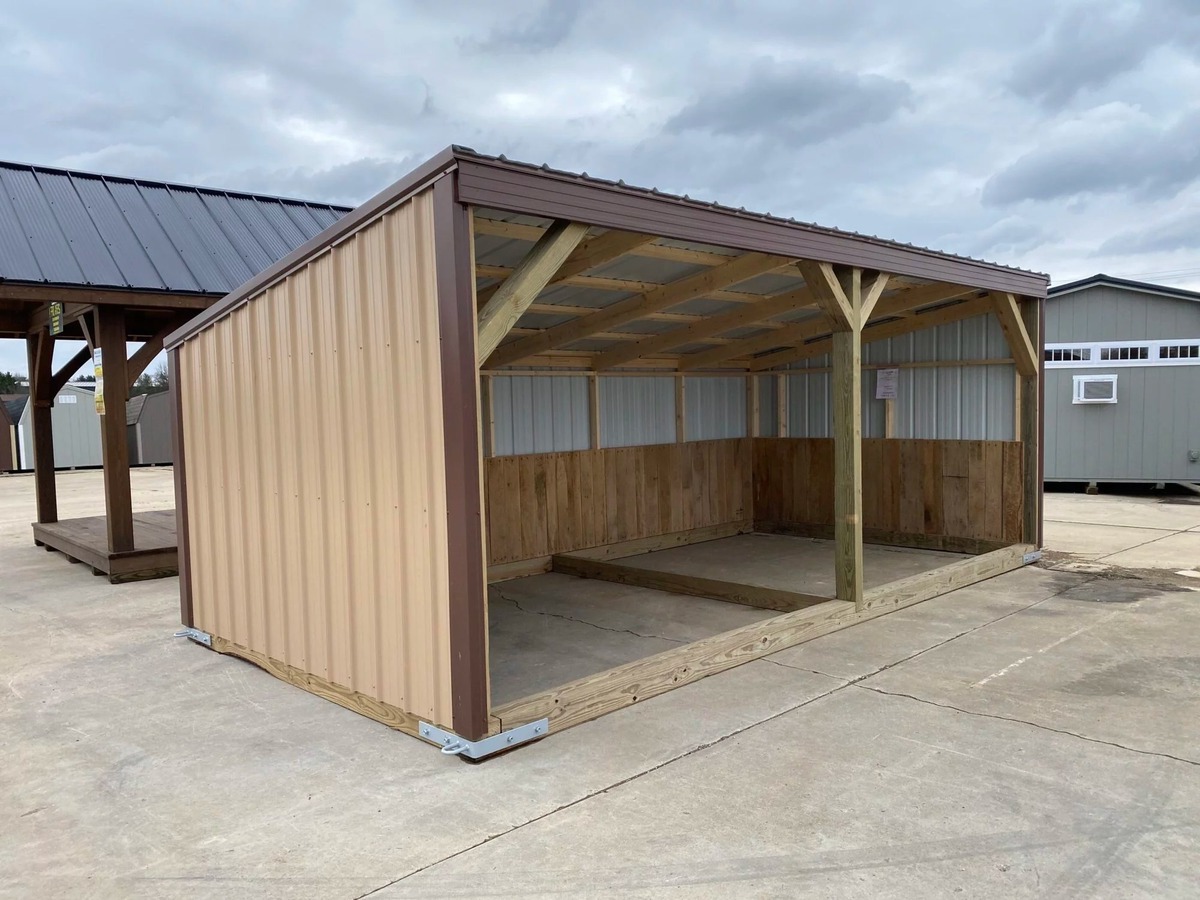
How To Build A Run In Shed
Published: February 24, 2024

Senior Editor in Create & Decorate, Kathryn combines traditional craftsmanship with contemporary trends. Her background in textile design and commitment to sustainable crafts inspire both content and community.
Discover step-by-step instructions for building a DIY run-in shed for your horses or livestock. Get creative with our easy-to-follow crafting tips and techniques.
(Many of the links in this article redirect to a specific reviewed product. Your purchase of these products through affiliate links helps to generate commission for Twigandthistle.com, at no extra cost. Learn more)
Introduction
Building a run-in shed is a rewarding and practical DIY project that provides shelter for animals such as horses, goats, and other livestock. Whether you're a seasoned DIY enthusiast or a novice looking to embark on a new project, constructing a run-in shed can be a fulfilling endeavor that offers both functional and aesthetic benefits.
A run-in shed, also known as a loafing shed or a three-sided shelter, is a simple yet essential structure designed to provide animals with protection from the elements. It offers a shaded area during hot summer days and a dry refuge during inclement weather. Additionally, a well-built run-in shed can contribute to the overall well-being of your animals by providing them with a comfortable and secure space to rest and seek shelter.
By embarking on the journey of building a run-in shed, you not only create a safe haven for your animals but also gain valuable hands-on experience in construction and carpentry. This project allows you to exercise your creativity and problem-solving skills while working with a variety of materials and tools.
Throughout this guide, you will be taken through a step-by-step process, from selecting the ideal location for your run-in shed to adding the finishing touches. Each step is designed to provide you with a comprehensive understanding of the construction process, ensuring that you are well-equipped to tackle this project with confidence.
So, roll up your sleeves, gather your tools, and get ready to embark on a fulfilling journey of building a run-in shed that will not only serve as a practical shelter for your animals but also stand as a testament to your DIY prowess. Let's dive into the details and get started on this exciting and rewarding endeavor.
Step 1: Choose a Location
Selecting the ideal location for your run-in shed is a crucial first step in the construction process. The chosen site should not only provide a safe and comfortable environment for your animals but also offer convenience and practicality for daily maintenance and monitoring. Here's a detailed guide to help you make an informed decision when choosing the location for your run-in shed.
Consider the Terrain
Assess the terrain of your property to identify a suitable location for the run-in shed. Look for a level area that is well-drained to prevent water accumulation and ensure a dry and stable foundation for the structure. Avoid low-lying areas that are prone to flooding, as they can pose a risk to the safety and comfort of your animals.
Accessibility
Choose a location that is easily accessible for both you and your animals. Consider proximity to existing fencing, grazing areas, and water sources to facilitate seamless movement and access. Additionally, ensure that the chosen site allows for convenient delivery of materials and construction equipment, minimizing logistical challenges during the building process.
Sun and Wind Exposure
Evaluate the sun and wind exposure of potential locations to provide optimal comfort for your animals. A well-placed run-in shed should offer adequate shade during hot summer days while also providing protection from prevailing winds and harsh weather conditions. Observing the sun's path and prevailing wind directions can help you identify the most suitable orientation for the shed.
Safety and Security
Prioritize the safety and security of your animals when choosing the location. Select a spot that offers good visibility from your home or other vantage points, allowing you to monitor the well-being of your animals from a distance. Additionally, consider factors such as proximity to potential hazards, such as dense vegetation, steep slopes, or neighboring properties, to ensure a safe and secure environment for your animals.
Future Expansion
Anticipate future needs and potential expansion when selecting the location for your run-in shed. Choose a site that allows for flexibility and scalability, accommodating the addition of more shelters or the expansion of existing facilities as your animal population or property requirements evolve.
By carefully considering these factors and conducting a thorough assessment of your property, you can confidently choose a location that meets the needs of your animals while aligning with your long-term goals for the run-in shed. This thoughtful approach sets the stage for a successful and harmonious integration of the structure into your property, laying the foundation for a functional and well-planned shelter for your animals.
Step 2: Gather Materials and Tools
Gathering the necessary materials and tools is a pivotal preparatory step before embarking on the construction of a run-in shed. By ensuring that you have all the required items at your disposal, you can streamline the building process and minimize interruptions, allowing for a more efficient and organized workflow. Here's a comprehensive list of materials and tools you'll need to gather before diving into the construction phase.
Materials
-
Lumber: Acquire high-quality lumber, including pressure-treated or weather-resistant wood, for the structural framework, walls, and roof components of the run-in shed. The specific dimensions and quantities will depend on the size and design of the shed.
-
Roofing Materials: Select durable roofing materials such as metal panels, shingles, or corrugated plastic sheets to provide reliable protection from the elements. Ensure that the chosen roofing material is suitable for the local climate and offers long-term durability.
-
Fasteners: Stock up on a variety of fasteners, including nails, screws, and bolts, to secure the structural components and ensure structural integrity. Opt for corrosion-resistant fasteners to enhance the longevity of the shed.
-
Foundation Materials: Depending on the chosen foundation type, gather concrete blocks, gravel, or other suitable materials to establish a stable and level base for the shed.
-
Hardware and Bracing: Procure hinges, latches, braces, and other hardware necessary for assembling doors, windows, and other functional elements of the run-in shed.
-
Waterproofing and Sealants: Invest in quality waterproofing materials and sealants to protect the wood from moisture and extend the lifespan of the structure.
-
Ventilation Components: If applicable, acquire ventilation components such as vents or louvers to ensure adequate airflow within the shed, promoting a comfortable environment for the animals.
Tools
-
Measuring and Marking Tools: Gather measuring tape, carpenter's square, chalk line, and marking tools to ensure accurate and precise cuts and placements during construction.
-
Cutting Tools: Equip yourself with a circular saw, handsaw, and miter saw for cutting lumber and other materials to the required dimensions.
-
Fastening Tools: Prepare a reliable assortment of hammers, screwdrivers, drills, and impact drivers for fastening and securing various components of the shed.
-
Leveling and Plumb Tools: Have a spirit level, plumb bob, and leveling tools on hand to maintain straight and level alignments throughout the construction process.
-
Safety Gear: Prioritize safety by obtaining personal protective equipment, including gloves, safety goggles, and dust masks, to safeguard yourself during the building phase.
-
Lifting and Transport Tools: Depending on the size and weight of materials, consider acquiring lifting equipment such as a hand truck or wheelbarrow to facilitate the movement of heavy items.
By diligently gathering the essential materials and tools outlined above, you can set the stage for a smooth and efficient construction process, laying the groundwork for the successful realization of your run-in shed project. With careful preparation and attention to detail, you can embark on the construction phase with confidence, knowing that you are well-equipped to bring your vision to life.
Step 3: Build the Base
The construction of a sturdy and level base forms the foundation of a well-built run-in shed, providing structural stability and ensuring longevity. The base serves as the fundamental support for the entire structure, bearing the weight of the shed and safeguarding it against ground moisture and shifting. Here's a detailed guide on how to effectively build the base for your run-in shed.
Select the Foundation Type
Choose a suitable foundation type based on your specific requirements and the characteristics of your property. Common options include concrete piers, skids, or a concrete slab. Each foundation type offers distinct advantages in terms of cost, durability, and ease of installation. Consider factors such as soil composition, local building codes, and the intended lifespan of the shed when making this crucial decision.
Prepare the Site
Clear the designated area for the base, removing any vegetation, rocks, or debris that may impede the construction process. Use a shovel, rake, or power equipment to ensure that the site is level and free from obstructions. Taking the time to properly prepare the site sets the stage for a smooth and precise installation of the base components.
Install Footings or Skids
If opting for a foundation type that requires footings or skids, proceed with their installation according to the predetermined layout and spacing. Ensure that the footings are securely anchored in the ground and aligned to support the structural framework of the shed. For skid-based foundations, position and level the skids to provide a stable and elevated platform for the shed.
Construct Support Beams
Lay out and assemble the support beams on top of the footings or skids, ensuring that they are accurately positioned and securely fastened. Use treated lumber or suitable alternatives to resist decay and moisture damage. Employ precise measurements and leveling tools to guarantee that the support beams are aligned and parallel, forming a solid and reliable base for the shed.
Verify Levelness and Stability
Prioritize the verification of levelness and stability at each stage of the base construction. Utilize a spirit level and other leveling tools to confirm that the base components are perfectly level and aligned. Additionally, conduct thorough inspections to ensure that the base exhibits structural stability and can adequately support the weight of the shed without any signs of shifting or settling.
By meticulously following these steps and adhering to best practices in base construction, you can establish a robust and dependable foundation for your run-in shed. The careful execution of this crucial phase sets the stage for the seamless progression of the construction process, bringing you one step closer to the realization of a functional and resilient shelter for your animals.
Step 4: Construct the Walls
Constructing the walls of a run-in shed marks a significant phase in the building process, shaping the structure and defining its enclosure. The walls not only provide essential protection and privacy for the animals but also contribute to the overall stability and integrity of the shed. Here's a detailed guide on how to effectively construct the walls of your run-in shed, ensuring precision and durability throughout the process.
Frame Assembly
Commence the wall construction by assembling the framing components, including vertical studs, horizontal plates, and bracing elements. Use high-quality lumber, preferably pressure-treated for enhanced durability and resistance to moisture. Employ precise measurements and carpentry tools to ensure that the framing components are accurately cut and aligned, forming the skeletal framework of the walls.
Wall Height and Orientation
Determine the desired height of the walls based on the intended functionality and the specific needs of the animals. Consider factors such as ventilation, natural light penetration, and the overall aesthetic appeal when establishing the wall height. Additionally, confirm the proper orientation of the walls to align with the overall layout and design of the run-in shed, ensuring seamless integration with the base and roof components.
Wall Sheathing and Cladding
Once the framing is in place, proceed to install the sheathing and cladding materials to enclose the walls. Opt for robust and weather-resistant materials such as plywood, oriented strand board (OSB), or metal siding to provide structural rigidity and protection from the elements. Secure the sheathing and cladding using appropriate fasteners, ensuring a secure and uniform attachment across the entire wall surface.
Door and Window Openings
If incorporating doors and windows into the walls, carefully cut and frame the openings to accommodate these functional elements. Install sturdy door frames and window casings, ensuring proper alignment and weatherproofing to prevent drafts and moisture infiltration. Consider the size and placement of openings to optimize natural light and airflow within the shed while facilitating easy access for the animals and caretakers.
Structural Reinforcement
Prioritize the reinforcement of the wall structure to enhance its resilience and longevity. Incorporate diagonal bracing, corner bracing, and additional framing elements as needed to fortify the walls against external forces and structural stresses. By reinforcing the walls, you ensure that the run-in shed can withstand the rigors of daily use and environmental conditions, providing a secure and enduring shelter for the animals.
By meticulously following these steps and adhering to best practices in wall construction, you can establish robust and reliable walls for your run-in shed. The careful execution of this crucial phase sets the stage for the seamless progression of the construction process, bringing you one step closer to the realization of a functional and resilient shelter for your animals.
Step 5: Install the Roof
The installation of the roof is a pivotal phase in the construction of a run-in shed, as it provides crucial protection from the elements and completes the enclosure of the structure. A well-constructed roof not only shields the animals from rain, snow, and harsh sunlight but also contributes to the overall structural integrity and aesthetic appeal of the shed. Here's a detailed guide on how to effectively install the roof of your run-in shed, ensuring precision and durability throughout the process.
Roof Design and Material Selection
Begin the roof installation process by determining the appropriate design and selecting the suitable roofing materials. Consider factors such as local climate, anticipated snow loads, and aesthetic preferences when choosing the roof design. Common roofing materials for run-in sheds include metal panels, asphalt shingles, and corrugated plastic sheets. Select a material that offers durability, weather resistance, and low maintenance to ensure long-term performance.
Roof Framing and Trusses
Prepare the roof framing and trusses to provide the structural framework for the roofing material. Use high-quality lumber and precise measurements to construct the trusses, ensuring that they are engineered to support the chosen roofing material and withstand environmental stresses. Position the trusses at the predetermined intervals, securing them to the wall framing and ensuring proper alignment and stability.
Roof Sheathing and Underlayment
Once the trusses are in place, proceed with the installation of the roof sheathing and underlayment. Apply plywood or oriented strand board (OSB) as the sheathing material, providing a solid and uniform substrate for the roofing material. Additionally, incorporate a weather-resistant underlayment to enhance waterproofing and protect the interior of the shed from potential moisture infiltration. Proper installation of sheathing and underlayment is essential for ensuring a durable and watertight roof.
Roofing Material Installation
Carefully install the selected roofing material according to the manufacturer's guidelines and best practices. Whether it's metal panels, shingles, or corrugated sheets, ensure that the material is securely fastened and properly aligned to provide effective weather protection. Pay attention to overlapping seams, flashing details, and edge treatments to create a seamless and watertight roof surface. Additionally, consider proper ventilation and insulation measures to optimize the climate control within the shed.
Finishing Touches and Trim Work
Complete the roof installation by adding finishing touches and trim work to enhance the functionality and aesthetics of the shed. Install ridge caps, drip edges, and other trim components to provide a polished and professional appearance while improving weather resistance. Pay attention to details such as overhangs and eaves to ensure proper water runoff and protection of the shed's exterior walls. By meticulously attending to these finishing elements, you can elevate the overall quality and performance of the roof.
By diligently following these steps and adhering to best practices in roof installation, you can establish a robust and reliable roof for your run-in shed. The careful execution of this crucial phase sets the stage for the seamless completion of the construction process, bringing you one step closer to the realization of a functional and resilient shelter for your animals.
Step 6: Add Finishing Touches
As the construction of the run-in shed nears completion, adding finishing touches plays a pivotal role in enhancing the functionality, aesthetics, and overall durability of the structure. These final details not only contribute to the visual appeal of the shed but also address essential functional aspects, ensuring that the shelter is well-equipped to meet the needs of the animals and withstand environmental challenges.
Weatherproofing and Sealing
Prioritize the application of weatherproofing treatments and sealants to safeguard the exterior surfaces of the shed against moisture, UV exposure, and potential decay. Seal all joints, seams, and penetrations to create a protective barrier, preventing water infiltration and preserving the integrity of the structure over time. Additionally, consider applying a fresh coat of exterior paint or stain to enhance the shed's resistance to weathering and elevate its visual appeal.
Interior Comfort and Functionality
Focus on optimizing the interior environment of the run-in shed to promote comfort and functionality for the animals. Install appropriate bedding materials, such as straw or shavings, to create a cozy and clean resting area. Consider incorporating feeders, water troughs, and secure storage solutions to facilitate daily care and maintenance activities, ensuring a well-organized and efficient space for animal management.
Ventilation and Airflow
Evaluate the ventilation system within the shed to ensure adequate airflow and air quality for the animals. Install adjustable vents or windows to regulate temperature and humidity levels, promoting a comfortable and healthy environment. Proper ventilation not only enhances the well-being of the animals but also contributes to the longevity of the shed by mitigating moisture-related issues.
Security and Accessibility
Address security and accessibility aspects by installing sturdy latches, locks, and hardware to secure doors and openings. Ensure that the shed is easily accessible for routine cleaning, maintenance, and animal care tasks. Consider the placement of lighting fixtures to provide illumination during low-light conditions, enhancing safety and visibility within the shed.
Landscaping and Surroundings
Integrate the run-in shed harmoniously into its surroundings by considering landscaping elements and site enhancements. Create a clear and level approach to the shed, facilitating easy movement for both animals and caretakers. Consider the addition of gravel or paving around the shed to minimize mud and facilitate drainage, contributing to a cleaner and more functional exterior environment.
By meticulously attending to these finishing touches, you can elevate the overall quality and functionality of the run-in shed, ensuring that it serves as a reliable and inviting shelter for your animals. These thoughtful details not only enhance the immediate usability of the shed but also contribute to its long-term resilience and integration into the surrounding property.
Conclusion
As you reach the culmination of the run-in shed construction journey, it's essential to reflect on the significance of this endeavor and the impact it will have on the well-being of your animals and the overall functionality of your property. The completion of a run-in shed represents not only the physical manifestation of your craftsmanship and dedication but also a testament to your commitment to providing a safe and comfortable environment for your animals.
Throughout the construction process, you have navigated through the intricacies of site selection, material procurement, and meticulous craftsmanship, all with the goal of creating a shelter that seamlessly integrates into your property while serving as a reliable refuge for your animals. The careful consideration given to every aspect, from the foundation to the finishing touches, underscores your dedication to creating a space that prioritizes the comfort, safety, and health of your animals.
As you stand back and admire the newly constructed run-in shed, envision the positive impact it will have on your daily routines and the well-being of your animals. This structure represents more than just a shelter; it embodies the bond between caretaker and animals, providing a sanctuary where they can seek refuge from the elements and find comfort in familiar surroundings.
The completion of the run-in shed marks the beginning of a new chapter, where the functionality and aesthetics of your property are enhanced, and the daily care of your animals is streamlined. It stands as a symbol of your dedication to responsible animal husbandry and your commitment to creating a harmonious and nurturing environment for your beloved companions.
As you move forward, tending to the needs of your animals within the newly constructed run-in shed, may it serve as a constant reminder of the rewards that come with dedication, craftsmanship, and the fulfillment that arises from creating a space that prioritizes the well-being of those under your care.
With the completion of this project, you have not only built a run-in shed but have also cultivated a space where the bond between caretaker and animals is strengthened, and where the values of compassion and stewardship are brought to life. This achievement stands as a testament to your commitment to creating a nurturing and functional environment for your animals, enriching both their lives and your own.