
Home>Create & Decorate>DIY & Crafts>How To Build A Single Step For A Deck
DIY & Crafts
How To Build A Single Step For A Deck
Published: February 29, 2024

Content Creator specializing in woodworking and interior transformations. Caegan's guides motivate readers to undertake their own projects, while his custom furniture adds a personal touch.
Learn how to build a single step for your deck with this easy DIY & Crafts tutorial. Enhance your outdoor space with a custom-built step.
(Many of the links in this article redirect to a specific reviewed product. Your purchase of these products through affiliate links helps to generate commission for Twigandthistle.com, at no extra cost. Learn more)
Introduction
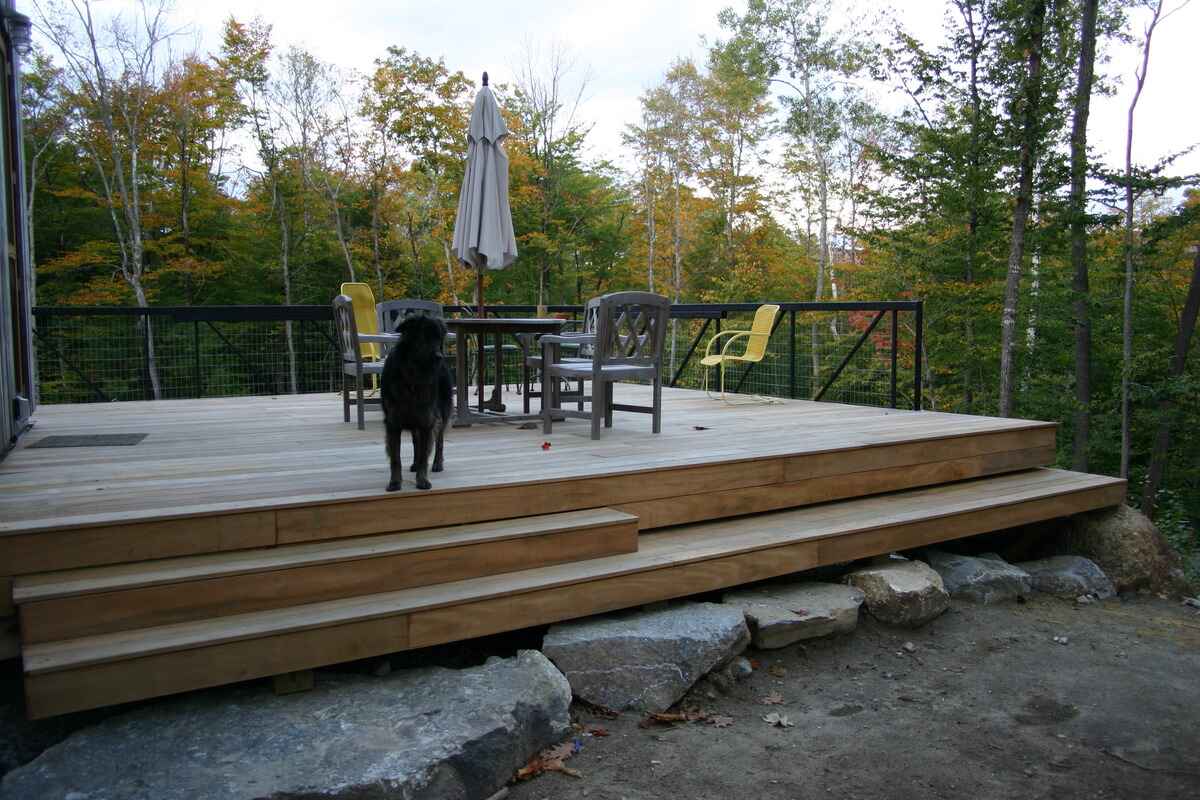
Building a single step for a deck may seem like a simple task, but it's an essential element that can enhance both the functionality and aesthetics of your outdoor space. Whether you're adding a step to improve accessibility or to create a seamless transition from your deck to the surrounding landscape, this DIY project can make a significant difference.
A well-constructed step not only provides a safe passage but also adds character to your deck, making it more inviting and visually appealing. By following the step-by-step guide outlined in this article, you'll be able to create a sturdy and attractive single step that complements your deck while serving its practical purpose.
From gathering the necessary materials and tools to the finishing touches, each stage of the process plays a crucial role in ensuring that your single step is built to last. By taking the time to measure, dig, set, and attach with precision, you'll be rewarded with a durable and well-crafted addition to your outdoor living space.
So, roll up your sleeves, gather your tools, and let's dive into the detailed steps required to build a single step for your deck. With a bit of effort and a touch of creativity, you'll soon have a functional and visually appealing step that enhances the overall charm and usability of your deck.
Step 1: Gather Materials and Tools
Before embarking on the construction of a single step for your deck, it's crucial to gather all the necessary materials and tools. Having everything at hand will streamline the building process and ensure that you can work efficiently without interruptions. Here's a comprehensive list of the items you'll need:
Materials:
- Lumber: Select high-quality, pressure-treated lumber for durability and resistance to decay. The dimensions will depend on the size of the step you intend to build.
- Gravel or Concrete: This will be used for securing the post that supports the step.
- Galvanized Screws or Nails: Choose fasteners that are suitable for outdoor use to ensure the structural integrity of the step.
- Concrete Mix: If you opt for a concrete footing, you'll need a reliable concrete mix to secure the post in place.
- Step Tread: You can use a pre-cut step tread or cut one from the same type of lumber used for the step.
Tools:
- Measuring Tape: Accurate measurements are essential for a precise and stable construction.
- Level: This tool will help ensure that the step is even and well-balanced.
- Shovel: Necessary for digging the hole for the post.
- Circular Saw: If you need to cut the lumber to specific dimensions, a circular saw will be indispensable.
- Drill/Driver: For attaching the step tread and fastening the lumber together.
- Safety Gear: Don't forget safety glasses, work gloves, and any other protective gear necessary for the construction process.
By gathering these materials and tools, you'll be well-prepared to move on to the next step of measuring and marking the area for your single step. With everything in place, you can proceed with confidence, knowing that you have everything you need to create a sturdy and visually appealing addition to your deck.
Step 2: Measure and Mark the Area
Accurate measurements and precise markings are crucial for the successful construction of a single step for your deck. Before you start digging or cutting any lumber, take the time to carefully measure and mark the area where the step will be installed.
Begin by determining the dimensions of the step. Consider the height of the step, ensuring that it aligns with the surrounding landscape and provides a comfortable transition from the deck to the ground. Additionally, measure the width of the step, taking into account the space available and the desired aesthetic appeal.
Using a measuring tape, mark the location where the step will be positioned. Ensure that the area is clear of any obstructions and that the ground is level. If necessary, use a level to confirm that the surface is even, as this will contribute to the stability and longevity of the step.
Next, mark the spot where the post will be set. This is a critical step, as the post will provide the necessary support for the step. Use a stake or a temporary marker to indicate the precise location where the post will be placed. Double-check the measurements and markings to avoid any errors that could impact the structural integrity of the step.
Once you have accurately measured and marked the area, take a moment to visualize the placement of the step within the overall deck design. Consider how it will complement the existing structure and enhance the accessibility and functionality of the outdoor space. With the area measured and marked, you are now ready to proceed to the next step of digging the hole for the post, bringing you one step closer to completing your well-crafted single step for the deck.
By meticulously measuring and marking the area, you are laying the foundation for a successful construction process. These initial steps set the stage for the precise execution of the project, ensuring that the single step integrates seamlessly with your deck while providing a safe and visually appealing transition to the surrounding environment.
Step 3: Dig the Hole
With the area measured and marked, it's time to move on to the crucial step of digging the hole where the post will be set. This step is fundamental to the stability and longevity of the single step, as the post will provide essential support and ensure that the step remains secure and level over time.
Begin by using a shovel to dig a hole at the marked spot. The depth of the hole will depend on the height of the step and the local building codes. Typically, a depth of around 12 to 18 inches is sufficient to secure the post and provide the necessary stability for the step.
As you dig, periodically check the depth of the hole to ensure that it aligns with the required measurements. It's essential to maintain a consistent depth throughout the hole to guarantee that the post will be firmly anchored once it's set in place.
While digging, pay attention to the composition of the soil. If the ground is particularly soft or prone to erosion, consider adding a layer of gravel at the bottom of the hole to enhance stability and drainage. This additional measure can contribute to the long-term durability of the step by preventing the post from shifting or sinking over time.
Once the hole has reached the appropriate depth and the soil is adequately prepared, it's time to set the post. Carefully lower the post into the hole, ensuring that it stands upright and aligns with the surrounding landscape. Use a level to confirm that the post is perfectly vertical, as this will directly impact the stability and appearance of the completed step.
With the post securely positioned in the hole, it's time to fill the surrounding space with concrete. This will further anchor the post and provide a solid foundation for the step. Follow the manufacturer's instructions for mixing and pouring the concrete, ensuring that it completely fills the hole and securely encases the post.
As the concrete sets, periodically check the post to maintain its vertical alignment. This attention to detail during the setting process will contribute to the overall stability and structural integrity of the step. Once the concrete has fully cured, the post will be firmly anchored, laying the groundwork for the next steps in constructing your single step for the deck.
By meticulously digging the hole and setting the post with precision, you are establishing a solid foundation for the construction of the step. This foundational work is essential for ensuring the long-term stability and durability of the step, setting the stage for the subsequent stages of the building process.
Step 4: Set the Post
Setting the post is a critical phase in the construction of a single step for your deck. The post serves as the primary support for the step, and its proper installation is essential for ensuring the stability and longevity of the structure. With the hole already dug and prepared, it's time to focus on securely positioning the post and ensuring that it aligns with the surrounding landscape.
Carefully lower the post into the hole, taking care to maintain its upright position. The post should stand vertically, aligning with the markings and the overall design of the step. Using a level is crucial at this stage, as it allows you to confirm that the post is perfectly plumb. This step is vital for ensuring that the completed step will be even and well-balanced, contributing to its structural integrity and visual appeal.
Once the post is in position, it's time to secure it in place. This is typically achieved by filling the surrounding space with concrete. The concrete serves to anchor the post firmly in the hole, providing a solid foundation for the step. When pouring the concrete, ensure that it completely fills the hole and encases the post, leaving no gaps or air pockets that could compromise its stability.
As the concrete sets, it's important to periodically check the post to maintain its vertical alignment. This attention to detail during the setting process is crucial for ensuring that the post remains securely positioned and that the concrete cures evenly. By consistently monitoring the post's alignment, you can address any potential issues promptly, contributing to the overall stability and structural integrity of the step.
Once the concrete has fully cured, the post will be firmly anchored in place, laying the groundwork for the subsequent steps in constructing your single step for the deck. The completion of this phase marks a significant milestone in the building process, bringing you one step closer to the realization of a sturdy and visually appealing addition to your outdoor living space.
By setting the post with precision and attention to detail, you are establishing a solid foundation for the construction of the step. This foundational work is essential for ensuring the long-term stability and durability of the step, setting the stage for the subsequent stages of the building process.
Step 5: Attach the Step Tread
With the post securely set and the foundation in place, the next crucial step in building a single step for your deck is attaching the step tread. The step tread not only provides a functional surface for stepping but also contributes to the overall aesthetic appeal of the step. By following the detailed process outlined below, you'll be able to ensure that the step tread is securely attached, providing a durable and visually appealing finishing touch to your single step.
Measure and Cut the Tread
Begin by measuring the dimensions of the step to determine the size of the tread required. Use a measuring tape to accurately assess the width and depth of the step, ensuring that the tread will fit snugly and provide ample stepping space. Once the measurements are confirmed, use a circular saw to cut the tread from the selected lumber, ensuring precise and clean edges for a professional finish.
Position and Secure the Tread
Carefully position the cut tread on top of the step, ensuring that it aligns evenly and overhangs slightly if desired. Use galvanized screws or nails to secure the tread to the step, driving them through the tread and into the underlying lumber. Ensure that the fasteners are evenly spaced and driven in securely, providing a stable and reliable attachment that can withstand regular use and outdoor conditions.
Finishing Touches
Once the tread is securely attached, take a moment to inspect the step and ensure that the tread is level and well-aligned. Use a level to confirm that the tread is even, making any necessary adjustments to guarantee a stable and balanced surface for stepping. Additionally, consider applying a protective finish to the tread to enhance its durability and resistance to outdoor elements, prolonging its lifespan and maintaining its visual appeal over time.
By meticulously attaching the step tread with precision and attention to detail, you are adding the final functional and aesthetic element to your single step. This phase marks the completion of the construction process, bringing you one step closer to enjoying a well-crafted addition to your deck that enhances both its usability and visual charm.
Step 6: Finishing Touches
With the structural elements of the single step in place, attention to the finishing touches is essential to ensure that the completed construction not only serves its functional purpose but also enhances the overall aesthetic appeal of your deck. This phase involves adding final details and protective measures to ensure that your newly built step remains durable, visually appealing, and well-prepared to withstand outdoor conditions.
Sanding and Smoothing
Before applying any protective finish, it's important to sand the surfaces of the step to ensure a smooth and even texture. Use sandpaper to gently sand the exposed areas, including the step tread and any visible edges. This process helps to remove any rough spots or splinters, creating a comfortable and safe surface for stepping. Pay particular attention to corners and edges, ensuring that they are rounded and free of any sharp protrusions.
Protective Finish
Applying a protective finish is crucial for safeguarding the step against moisture, UV exposure, and general wear and tear. Select a high-quality outdoor wood sealant or stain that is specifically designed for the type of lumber used in the construction of the step. Using a brush or roller, evenly apply the protective finish to all exposed surfaces, including the step tread and the sides of the step. Ensure that the finish penetrates the wood to provide long-lasting protection against the elements.
Visual Enhancement
In addition to providing protection, the finishing touches offer an opportunity to enhance the visual appeal of the step. Consider the overall aesthetic of your deck and outdoor space, and choose a finish that complements the existing design. Whether you opt for a natural wood finish that highlights the grain of the lumber or a colored stain that coordinates with the deck's color scheme, the finishing touch should contribute to the cohesive and inviting atmosphere of the outdoor area.
Regular Maintenance
Once the finishing touches are complete, it's important to establish a regular maintenance routine to preserve the appearance and functionality of the step. Periodically inspect the step for any signs of wear, such as fading or water absorption. Depending on the type of protective finish used, reapplication may be necessary to maintain optimal protection. Additionally, consider incorporating the step into your regular deck maintenance schedule, which may include cleaning, resealing, and general upkeep to ensure that the step remains a durable and attractive feature of your outdoor living space.
By meticulously attending to the finishing touches, you are ensuring that your newly constructed single step is not only structurally sound but also visually appealing and well-protected against the elements. This final phase of the construction process marks the culmination of your efforts, resulting in a well-crafted and enduring addition to your deck that enhances both its functionality and overall charm.
Conclusion
In conclusion, the construction of a single step for your deck is a rewarding and impactful DIY project that can significantly enhance the accessibility, functionality, and visual appeal of your outdoor living space. By following the detailed steps outlined in this guide, you have embarked on a journey to create a sturdy and visually appealing addition to your deck that seamlessly integrates with the surrounding landscape.
From the initial gathering of materials and tools to the precise measurements, digging of the hole, setting of the post, attachment of the step tread, and the final finishing touches, each phase of the construction process plays a crucial role in ensuring the long-term stability and durability of the step. By approaching each step with attention to detail and precision, you have laid the foundation for a well-crafted and enduring addition to your deck.
The completion of the single step not only provides a safe and convenient transition from your deck to the ground but also adds character and charm to your outdoor space. The careful selection of materials, precise measurements, and meticulous construction process have culminated in the creation of a functional and visually appealing step that complements the overall design of your deck.
As you admire the completed step, take pride in the craftsmanship and effort invested in its construction. The attention to detail, from the secure setting of the post to the application of a protective finish, ensures that your newly built step is well-prepared to withstand outdoor conditions while maintaining its visual appeal over time.
Moving forward, incorporate the step into your regular deck maintenance routine to preserve its appearance and functionality. By establishing a consistent maintenance schedule and addressing any signs of wear or weathering promptly, you can ensure that the step remains a durable and attractive feature of your outdoor living space for years to come.
In undertaking this DIY project, you have not only expanded your skills and knowledge but also contributed to the enhancement of your outdoor living environment. The completion of the single step serves as a testament to your ability to create functional and visually appealing additions through thoughtful planning and meticulous execution.
With the completion of the single step, take a moment to appreciate the transformation it has brought to your deck. Whether it's the improved accessibility, the seamless integration with the surrounding landscape, or the added visual charm, the step stands as a testament to your dedication to creating a welcoming and functional outdoor space.
As you enjoy the fruits of your labor, take pride in the well-crafted single step that now graces your deck, serving as a reminder of the transformative power of DIY projects and the enduring impact they can have on your living space.