
Home>Create & Decorate>DIY & Crafts>How To Build A Metal Stud Wall
DIY & Crafts
How To Build A Metal Stud Wall
Published: April 21, 2024

Content Creator specializing in woodworking and interior transformations. Caegan's guides motivate readers to undertake their own projects, while his custom furniture adds a personal touch.
Learn how to build a metal stud wall with our easy DIY guide. Perfect for your next home improvement project. Get started today!
(Many of the links in this article redirect to a specific reviewed product. Your purchase of these products through affiliate links helps to generate commission for Twigandthistle.com, at no extra cost. Learn more)
Introduction
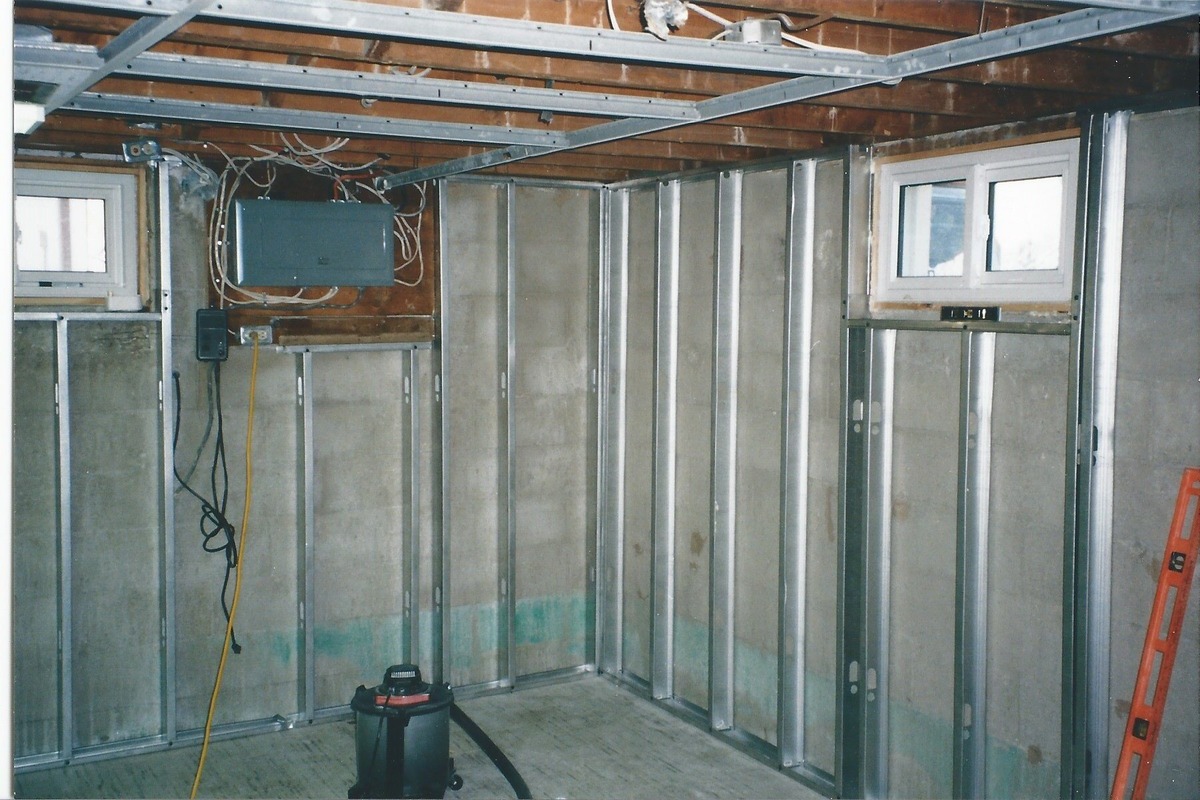
So, you're looking to add a new wall to your home or workspace, and you've decided to go with a metal stud wall. Building a metal stud wall is a great choice for its durability, fire resistance, and ease of installation. In this article, I'll guide you through the step-by-step process of building a metal stud wall, from gathering the necessary materials to adding the finishing touches. Whether you're a seasoned DIY enthusiast or a beginner looking to take on a new project, building a metal stud wall is a manageable and rewarding endeavor. Let's get started!
Materials Needed
Before you begin building your metal stud wall, it's essential to gather all the necessary materials and tools. Here's what you'll need:
- Metal studs: These will form the framework of your wall. Make sure to choose the appropriate length and gauge for your project.
- Bottom and top tracks: These will provide support for the metal studs and help maintain the wall's stability.
- Screws or fasteners: You'll need these to secure the metal studs and tracks in place.
- Insulation: If you want to improve the wall's thermal and acoustic properties, insulation is a must.
- Drywall: This will be used to cover the metal stud wall and create a smooth, paintable surface.
- Utility knife: You'll use this to cut the metal studs and drywall to the required dimensions.
- Tape measure: Essential for accurately measuring the dimensions of the wall and the materials.
- Level: This tool will ensure that your metal stud wall is straight and plumb.
- Screw gun or drill: You'll need this to drive screws or fasteners into the metal studs and tracks.
- Safety gear: Always prioritize safety. Wear gloves, safety glasses, and a dust mask when working with metal studs, insulation, and drywall.
Gathering these materials and tools before you start will help streamline the construction process and ensure that you have everything you need to build a sturdy and well-constructed metal stud wall.
Preparing the Area
Before you dive into the construction of your metal stud wall, it's crucial to prepare the area where the wall will be installed. Here's what you need to do:
-
Clear the Space: Remove any furniture, decorations, or obstructions from the area where the wall will be built. This will provide you with ample space to work and maneuver the materials.
-
Locate and Mark Utilities: Before you start framing the wall, identify and mark the location of electrical wires, plumbing, and any other utilities in the wall's path. This will prevent accidental damage to these essential components during the construction process.
-
Check for Level and Plumb: Use a level and plumb line to ensure that the floor and ceiling where the wall will be installed are both level and perpendicular. If necessary, make any adjustments to ensure a straight and true starting point for your metal stud wall.
-
Prepare the Floor and Ceiling: If the floor and ceiling are not level, use shims or furring strips to create a level surface for the bottom and top tracks of the metal stud wall. This step is crucial for the stability and alignment of the wall.
-
Secure Bottom Track: Once the floor is prepared, secure the bottom track in place using concrete screws or other appropriate fasteners. The bottom track will serve as the base for the metal studs and provide structural support for the wall.
By thoroughly preparing the area where the metal stud wall will be constructed, you'll set the stage for a smooth and successful installation process. Taking the time to address these preparatory steps will contribute to the overall quality and longevity of your metal stud wall.
Measuring and Cutting the Metal Studs
Accurate measurements and precise cuts are crucial for the successful construction of a metal stud wall. Here's a detailed guide on how to measure and cut the metal studs for your project:
-
Measure the Wall: Use a tape measure to determine the height and width of the wall where the metal studs will be installed. Take precise measurements, accounting for any variations in the floor or ceiling.
-
Mark the Metal Studs: Transfer the measurements onto the metal studs, marking the locations where cuts will be made. Use a pencil or a scribe to create clear and visible guidelines for cutting.
-
Cutting the Metal Studs: Utilize a sharp pair of aviation snips or a chop saw equipped with a metal-cutting blade to cut the metal studs to the required lengths. Follow the marked guidelines carefully to ensure accuracy.
-
Trimming for Outlets and Openings: If the wall will include electrical outlets or door/window openings, make the necessary cuts in the metal studs to accommodate these features. Use a metal-cutting blade or snips to create precise openings as per the wall design.
-
Deburring the Edges: After cutting the metal studs, use a deburring tool or a metal file to smooth out any rough or sharp edges. This step is essential for ensuring a safe and professional finish.
-
Double-Check Measurements: Before proceeding with the installation, double-check the dimensions of the cut metal studs to ensure they align with the wall's specifications. Accuracy at this stage will contribute to a seamless assembly process.
By meticulously measuring and cutting the metal studs according to the wall's dimensions and design, you'll lay the foundation for a structurally sound and visually appealing metal stud wall. Taking the time to execute precise cuts will streamline the installation process and contribute to the overall quality of the finished wall.
Installing the Bottom and Top Tracks
The installation of the bottom and top tracks is a critical step in building a sturdy and stable metal stud wall. Here's a detailed guide on how to install the bottom and top tracks for your project:
-
Positioning the Bottom Track: Begin by placing the bottom track along the floor where the wall will be constructed. Ensure that the track is aligned with the layout marks and is positioned perpendicular to the nearby walls. Use a level to confirm that the bottom track is straight and level. Secure the bottom track in place by using concrete screws or appropriate fasteners, ensuring that it is firmly anchored to the floor.
-
Cutting and Fitting the Bottom Track: If the wall spans a long distance, you may need to cut the bottom track to fit the specific length required. Use a hacksaw or a metal-cutting blade to make precise cuts, and then fit the track securely in place. Ensure that the seams of the bottom track are tightly connected and supported by the floor.
-
Installing the Top Track: Once the bottom track is securely in place, proceed to install the top track along the ceiling. Position the top track parallel to the bottom track and use a level to confirm that it is straight and level. Secure the top track by attaching it to the ceiling joists or rafters using appropriate fasteners. Ensure that the top track is aligned with the layout marks and is parallel to the bottom track.
-
Securing the Top Track: Similar to the bottom track, if the wall spans a long distance, you may need to cut the top track to fit the specific length required. Use a hacksaw or a metal-cutting blade to make precise cuts, and then secure the track in place. Ensure that the seams of the top track are tightly connected and properly supported by the ceiling structure.
-
Verifying Alignment: Once both the bottom and top tracks are installed, verify that they are parallel to each other and that the wall's layout marks are accurately represented. Use a tape measure to confirm that the distance between the bottom and top tracks is consistent along the entire length of the wall.
By meticulously installing the bottom and top tracks with precision and attention to detail, you'll establish a solid foundation for the metal stud wall. The proper alignment and secure attachment of the tracks are essential for the overall stability and integrity of the wall structure.
Placing and Securing the Metal Studs
With the bottom and top tracks in place, it's time to proceed with placing and securing the metal studs to form the framework of the wall. Here's a detailed guide on how to effectively position and secure the metal studs for your project:
-
Marking Stud Placement: Begin by marking the layout of the metal studs on the bottom and top tracks according to the predetermined spacing. Typically, metal studs are spaced 16 or 24 inches apart, center to center. Use a tape measure and pencil to make clear and accurate marks along both tracks, indicating the placement of each metal stud.
-
Positioning the Metal Studs: Once the layout marks are in place, position the metal studs vertically between the bottom and top tracks, aligning them with the marked locations. Ensure that the flanges of the metal studs are facing inward, creating a channel for running electrical wiring or plumbing if necessary.
-
Securing the Metal Studs: With the metal studs in position, use self-tapping screws or appropriate fasteners to secure them to the bottom and top tracks. Drive the screws through the flanges of the metal studs into the tracks, ensuring a tight and secure connection. Be mindful of maintaining the vertical alignment and straightness of the metal studs as you secure them in place.
-
Checking for Plumb and Alignment: As you progress with securing the metal studs, periodically use a level to check for plumb and ensure that the studs are perfectly vertical. Adjust the positioning of the studs as needed to maintain their alignment and straightness. Consistently verifying the plumb and alignment of the metal studs will contribute to the overall stability and appearance of the wall.
-
Securing Intersecting Metal Studs: In areas where metal studs intersect, secure them together using steel stud screws or fasteners. This will enhance the structural integrity of the wall and prevent any movement or shifting between the intersecting studs.
-
Trimming and Customizing Studs: If the wall design includes openings for doors, windows, or other features, trim the metal studs to accommodate these elements. Use aviation snips or a metal-cutting blade to make precise cuts, ensuring that the studs fit seamlessly around the openings.
By meticulously placing and securing the metal studs according to the predetermined layout and design, you'll establish a robust framework for the metal stud wall. The proper alignment, secure attachment, and attention to detail during this phase are essential for the structural integrity and longevity of the wall.
Adding Insulation
Once the metal studs are securely in place, the next crucial step in building a metal stud wall is adding insulation to enhance thermal and acoustic properties. Here's a detailed guide on how to effectively add insulation to your metal stud wall:
-
Selecting the Insulation: Choose insulation material that suits your specific needs and local building codes. Common options include fiberglass batts, mineral wool, or foam board insulation. Consider the desired R-value, which indicates the insulation's thermal resistance, and ensure that the chosen material fits snugly within the wall cavities.
-
Measuring and Cutting Insulation: Use a tape measure to determine the dimensions of the wall cavities between the metal studs. Cut the insulation material to the appropriate length and width using a utility knife or insulation cutting tool. Ensure that the insulation fits tightly within the cavities without being compressed, as compression can reduce its effectiveness.
-
Inserting the Insulation: Carefully place the cut insulation pieces into the wall cavities between the metal studs. Press the insulation firmly against the back of the studs, ensuring that there are no gaps or voids. If necessary, use a putty knife or similar tool to adjust the position of the insulation and ensure a snug fit.
-
Sealing Air Gaps: Pay attention to sealing any gaps or seams in the insulation to prevent air infiltration. Use insulation foam or caulk to seal around electrical boxes, plumbing penetrations, and any other openings in the wall. This step is crucial for maximizing the insulation's effectiveness and improving energy efficiency.
-
Soundproofing Considerations: If soundproofing is a priority, consider using specialized soundproofing insulation or adding additional layers of standard insulation. Soundproofing insulation can help reduce airborne and impact noise transmission, making it an ideal choice for interior walls in residential or commercial settings.
By meticulously adding insulation to your metal stud wall, you'll enhance its energy efficiency, thermal performance, and acoustic characteristics. Proper insulation contributes to a comfortable and quiet indoor environment while also improving the overall sustainability of the structure.
Attaching Drywall
Attaching drywall is a pivotal step in the construction of a metal stud wall, as it provides the surface for finishing and painting. Here's a detailed guide on how to effectively attach drywall to your metal stud wall:
-
Selecting the Drywall: Choose the appropriate type and thickness of drywall based on the intended use and local building codes. Common options include standard drywall, moisture-resistant drywall for areas prone to humidity, and fire-resistant drywall for enhanced safety.
-
Measuring and Cutting Drywall: Use a tape measure and a utility knife to measure and cut the drywall panels to fit the dimensions of the wall. Score the front-facing paper of the drywall along the measured lines, then snap the panel along the score line and cut through the back paper to complete the cut.
-
Positioning the Drywall: Lift the cut drywall panels into place, ensuring that the edges align with the center of the metal studs. Begin with the ceiling and then proceed to the walls. If necessary, use drywall shims to adjust the positioning and ensure a snug fit against the studs.
-
Securing the Drywall: Use drywall screws to secure the panels to the metal studs, spacing the screws approximately 12 inches apart along the studs. Drive the screws slightly below the surface of the drywall without breaking the paper, ensuring a flush finish. A screw gun or drill fitted with a drywall bit can streamline this process.
-
Taping and Mudding Joints: Apply drywall joint tape over the seams between the panels, then use a taping knife to spread joint compound (mud) over the tape and feather it out along the edges. Repeat this process for all seams and corners, applying multiple layers of mud and allowing each layer to dry before sanding.
-
Sanding and Finishing: Once the joint compound is dry, use a sanding block or pole sander to smooth out any imperfections and create a seamless surface. Be sure to wear a dust mask during sanding to protect your respiratory system. After sanding, the drywall is ready for priming and painting to achieve the desired aesthetic.
By meticulously attaching drywall to your metal stud wall and following proper finishing techniques, you'll create a smooth and durable surface ready for painting or other wall treatments. The quality of the drywall installation and finishing directly impacts the overall appearance and longevity of the wall.
Finishing Touches
After the drywall is securely in place and the joints are seamlessly mudded and sanded, it's time to focus on the finishing touches that will elevate the appearance and functionality of your metal stud wall. Here's a detailed guide on how to add the final touches to your wall:
-
Priming the Surface: Before applying paint or other wall treatments, it's essential to prime the drywall surface. Use a high-quality primer to seal the drywall, promote adhesion, and create an even base for the paint. Priming also helps prevent the drywall from absorbing too much paint, resulting in a more uniform finish.
-
Painting the Wall: Once the primer has dried, it's time to apply the desired paint color to the wall. Whether you opt for a bold hue, a calming neutral, or a textured finish, carefully apply the paint using a roller or brush. Multiple coats may be necessary to achieve the desired depth of color and coverage. Consider using low-VOC or zero-VOC paint for a more environmentally friendly option.
-
Installing Trim and Molding: Adding trim and molding can enhance the visual appeal of your metal stud wall. Install baseboards along the bottom of the wall, crown molding at the ceiling junction, and door/window casings as needed. Choose trim styles that complement the overall aesthetic of the space and ensure precise cuts and seamless joints for a professional finish.
-
Electrical and Fixture Installation: If the wall includes electrical outlets, switches, or light fixtures, this is the stage to install them. Carefully cut openings in the drywall for the electrical boxes, then connect the wiring and securely mount the outlets and fixtures. Always follow electrical codes and safety guidelines when working with wiring and electrical components.
-
Applying Texture or Wallpaper: Depending on your design preferences, you may choose to add texture or wallpaper to the wall. Texturing techniques such as orange peel or knockdown can add depth and visual interest to the surface. Alternatively, applying wallpaper can introduce patterns, textures, and colors that complement the overall decor of the space.
-
Sealing and Caulking: Inspect the perimeter of the wall, including the joints between the wall and adjacent surfaces, and apply caulk to seal any gaps or seams. This step helps improve the wall's insulation, prevent air infiltration, and create a clean, finished look. Use paintable caulk for a seamless appearance after painting.
-
Final Inspection and Touch-Ups: Once all the finishing touches are in place, conduct a thorough inspection of the wall. Look for any imperfections, blemishes, or areas that may require touch-ups. Address any issues by sanding, patching, or repainting as needed to achieve a flawless final result.
By meticulously attending to the finishing touches of your metal stud wall, you'll transform it into a polished, functional, and visually appealing element of your space. Each detail contributes to the overall impression of the wall and ensures that it seamlessly integrates with the surrounding environment.
Conclusion
Congratulations! By following the step-by-step guide outlined in this article, you have successfully learned how to build a metal stud wall from start to finish. From gathering the necessary materials to adding the finishing touches, you've gained valuable insights into the construction process. Building a metal stud wall offers numerous benefits, including durability, fire resistance, and ease of installation. Whether you're enhancing a residential space or creating a functional partition in a commercial setting, the skills and knowledge you've acquired will empower you to tackle future DIY projects with confidence. Remember, attention to detail, precision in measurements, and adherence to safety protocols are key elements in achieving a professional-quality metal stud wall. Embrace the sense of accomplishment that comes with completing this project, and enjoy the enhanced functionality and aesthetic appeal that your newly constructed metal stud wall brings to your environment.