
Home>Create & Decorate>DIY & Crafts>How To Build A Mantel
DIY & Crafts
How To Build A Mantel
Published: April 21, 2024

Content Creator specializing in woodworking and interior transformations. Caegan's guides motivate readers to undertake their own projects, while his custom furniture adds a personal touch.
Learn how to build a beautiful mantel with our DIY & Crafts guide. Get step-by-step instructions and create a stunning focal point for your home.
(Many of the links in this article redirect to a specific reviewed product. Your purchase of these products through affiliate links helps to generate commission for Twigandthistle.com, at no extra cost. Learn more)
Introduction
So, you've got a fireplace that's just begging for a little extra pizzazz, huh? Well, building a mantel is a fantastic way to add some charm and character to your living space. Whether you're a seasoned DIY enthusiast or a newbie looking to tackle your first big project, creating your own mantel can be a rewarding and budget-friendly endeavor. In this guide, we'll walk you through the steps to build a beautiful mantel that will become the focal point of your room. Let's roll up our sleeves and get started!
Choosing the Right Materials
When it comes to building a mantel, selecting the right materials is crucial for both the aesthetic appeal and the structural integrity of your project. Here are some key materials you'll need to consider:
1. Wood
Wood is a popular choice for mantel construction due to its versatility and timeless appeal. Hardwoods like oak, maple, or cherry are durable options that can be stained or painted to match your decor. Alternatively, reclaimed wood adds a rustic charm and eco-friendly touch to your mantel.
2. Stone or Brick
For a more traditional or rustic look, consider using stone or brick for your mantel. These materials can add a sense of grandeur and warmth to your fireplace, creating a striking focal point in the room.
3. MDF or Plywood
If you're on a budget or prefer a more lightweight option, medium-density fiberboard (MDF) or plywood can be viable choices for constructing a mantel. These materials are easy to work with and can be painted to achieve the desired finish.
4. Decorative Molding and Trim
To add intricate details and embellishments to your mantel, consider incorporating decorative molding and trim. These elements can elevate the overall look of your mantel and create a polished, custom appearance.
5. Hardware and Fasteners
Don't forget to gather the necessary hardware and fasteners, such as screws, nails, brackets, and anchors, to securely assemble and install your mantel.
By carefully selecting the right materials for your mantel, you can ensure that it not only complements your fireplace and room decor but also stands the test of time.
Measuring and Planning
Before diving into the construction of your mantel, it's essential to take precise measurements and develop a solid plan to ensure a seamless and professional-looking outcome. Here's how to go about it:
-
Measure Your Fireplace: Begin by measuring the width, height, and depth of your fireplace. These measurements will serve as the foundation for designing the dimensions of your mantel. It's crucial to account for any protrusions, such as hearths or mantel legs, to ensure a precise fit.
-
Consider Proportions: Take into consideration the proportions of your room and fireplace when planning the size and design of your mantel. A mantel that is too large or too small in relation to the fireplace and the room can throw off the visual balance.
-
Create a Design Sketch: Sketch out your desired mantel design, incorporating details such as the shape, molding, and any decorative elements. This visual representation will help you conceptualize the final product and make necessary adjustments before construction begins.
-
Gather Necessary Tools: Make a list of the tools required for the project, such as a saw, drill, level, tape measure, and safety equipment. Having the right tools on hand will streamline the building process and ensure precision.
-
Plan for Installation: Consider how the mantel will be installed and secured to the wall. If you're attaching it to a brick or stone fireplace, you'll need specific hardware and tools for that application.
-
Account for Clearances: Be mindful of clearances required for the mantel shelf. If your mantel will be installed above a fireplace, there are specific clearance guidelines to follow for safety and code compliance.
By meticulously measuring and planning the construction of your mantel, you'll lay a solid foundation for a successful and visually appealing project. Taking the time to plan and prepare will ultimately save you time and frustration during the building process.
Building the Frame
Now that you've got your materials selected and a solid plan in place, it's time to roll up your sleeves and start building the frame for your mantel. This foundational step will provide the structure and support for the rest of your mantel project. Here's how to tackle this crucial phase:
-
Cutting the Pieces: Begin by cutting the wood or other chosen material to the appropriate lengths and angles according to your design plan. Use a saw and miter box to ensure clean, precise cuts for a professional finish.
-
Assembling the Legs and Shelf: If your mantel design includes legs or corbels, assemble these components first. Use wood glue and screws to securely attach the legs to the shelf, creating the basic framework of the mantel.
-
Adding the Cross Braces: To reinforce the structure and prevent sagging, add cross braces to the back of the mantel frame. These braces will provide additional support and stability, especially for wider mantels.
-
Securing the Frame: Once the frame is assembled, use a level to ensure it is straight and plumb. Secure the frame to the wall studs using appropriate hardware, such as L-brackets or wall anchors, depending on your wall type.
-
Filling and Sanding: Fill any visible nail holes or gaps with wood filler and sand the entire frame to create a smooth surface. This step is crucial for achieving a flawless finish when it comes time to paint or stain your mantel.
-
Priming and Painting: If you plan to paint your mantel, apply a coat of primer to the frame before adding your chosen paint color. This will help the paint adhere evenly and provide a professional, long-lasting finish.
By following these steps, you'll successfully build a sturdy and visually appealing frame for your mantel. With the frame in place, you're now ready to move on to the exciting part – adding the finishing touches that will bring your mantel to life.
Adding the Finishing Touches
With the frame of your mantel securely in place, it's time to add the finishing touches that will elevate the overall look and feel of your project. These final steps will bring your mantel to life and create a polished, custom appearance that complements your fireplace and room decor. Here's how to add those all-important finishing touches:
-
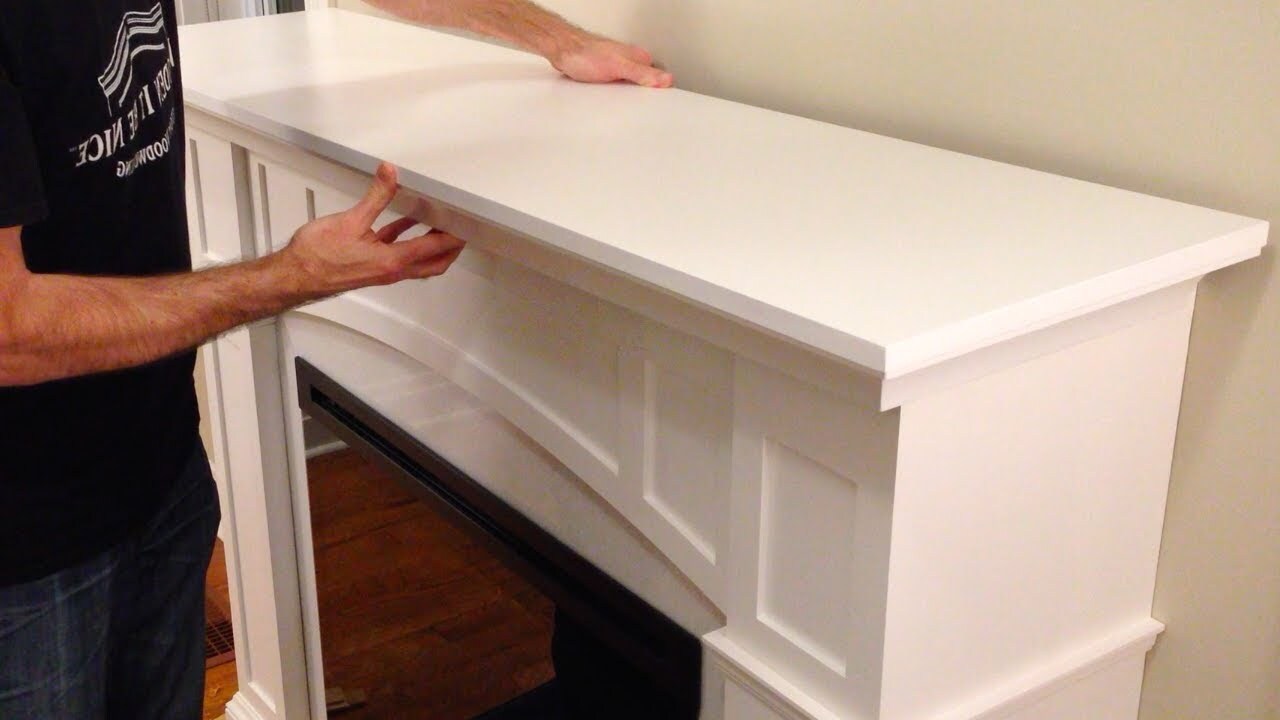
Installing the Mantel Shelf: Carefully install the mantel shelf onto the frame, ensuring it is level and securely attached. Use a stud finder to locate the wall studs for optimal support, and then use appropriate hardware to affix the shelf to the frame.
-
Applying Decorative Molding: If your design includes decorative molding or trim, now is the time to add these embellishments. Whether it's crown molding, intricate carvings, or simple trim, these details can enhance the visual appeal of your mantel and create a polished, custom look.
-
Staining or Painting: Depending on your design preference, apply the chosen stain or paint to the mantel frame and shelf. Whether you opt for a rich, stained finish that showcases the natural beauty of the wood or a painted finish that complements your room decor, this step will bring your mantel to life.
-
Adding Decorative Elements: Consider incorporating decorative elements such as corbels, brackets, or ornamental accents to further enhance the aesthetic appeal of your mantel. These details can add character and personality to your mantel, making it a standout feature in your living space.
-
Accessorizing the Mantel: Once the construction is complete, it's time to style and accessorize your mantel. Whether it's displaying family photos, artwork, or decorative objects, adding personal touches will make your mantel feel like a curated focal point in the room.
-
Final Inspection and Touch-Ups: Take a step back and inspect the completed mantel for any imperfections or areas that may need touch-ups. Address any issues with sanding, filling, or repainting to ensure a flawless finish.
By following these steps, you'll add the perfect finishing touches to your mantel, creating a stunning focal point that enhances the beauty and character of your living space. With the project complete, you can now sit back, relax, and enjoy the warmth and charm of your newly built mantel.
Conclusion
In conclusion, building a mantel is a gratifying DIY project that can transform the look and feel of your living space. By carefully choosing the right materials, meticulously measuring and planning, constructing a sturdy frame, and adding the perfect finishing touches, you can create a stunning mantel that becomes the focal point of your room. Whether you opt for a classic wood design, a rustic stone finish, or a sleek modern look, the process of building a mantel allows you to unleash your creativity and craftsmanship. With your new mantel in place, you'll have a beautiful and functional addition to your home that exudes warmth, character, and personal style. So, roll up your sleeves, gather your tools, and embark on the journey of building a mantel that will leave a lasting impression.