
Home>Home & Furniture>Doors & Windows>DIY Hidden Door: Step-by-Step Guide To Creating A Secret Entrance
Doors & Windows
DIY Hidden Door: Step-by-Step Guide To Creating A Secret Entrance
Published: June 7, 2024
Editor-in-Chief with a decade in home renovation and a passion for vintage furniture. Diane is known for her weekend treasure hunts at flea markets, enriching our content with unique style insights.
Discover how to build your own hidden door with our step-by-step guide. Create a secret entrance with ease and add a touch of mystery to your home. Perfect for DIY enthusiasts and those interested in doors & windows.
(Many of the links in this article redirect to a specific reviewed product. Your purchase of these products through affiliate links helps to generate commission for Twigandthistle.com, at no extra cost. Learn more)
Introduction
Have you ever dreamed of having a secret entrance in your home, like something out of a spy movie or a medieval castle? Well, with a little bit of creativity and some DIY skills, you can make that dream a reality. In this step-by-step guide, we will walk you through the process of creating your very own DIY hidden door. Whether you want to add a touch of mystery to your home or simply make the most of limited space, a hidden door can be a fun and practical addition to any room. So, roll up your sleeves and get ready to embark on this exciting DIY project!
Choosing the Right Location
When it comes to creating a hidden door in your home, the first step is to choose the right location. The ideal spot for a hidden door is in an area that is not immediately visible, such as a corner or a less trafficked area of the room. Consider the purpose of the hidden door – is it for practicality, aesthetics, or both? For example, a hidden door leading to a home office might be best placed in a quiet corner of the living room, while a hidden door leading to a storage area could be tucked away in a hallway or under a staircase. Additionally, take into account the surrounding decor and architectural features of the room to ensure that the hidden door will blend in seamlessly with its surroundings.
- Assess the traffic flow in the room
- Consider the purpose of the hidden door
- Take into account the surrounding decor and architectural features
Remember, the location you choose will ultimately determine the functionality and visual impact of your hidden door, so take the time to carefully consider the best placement for this exciting addition to your home.
Selecting the Type of Hidden Door
When it comes to creating a hidden door, there are several types to choose from, each with its own unique features and benefits. The type of hidden door you select will depend on factors such as available space, your DIY skill level, and the overall aesthetic you want to achieve. Here are some popular types of hidden doors to consider:
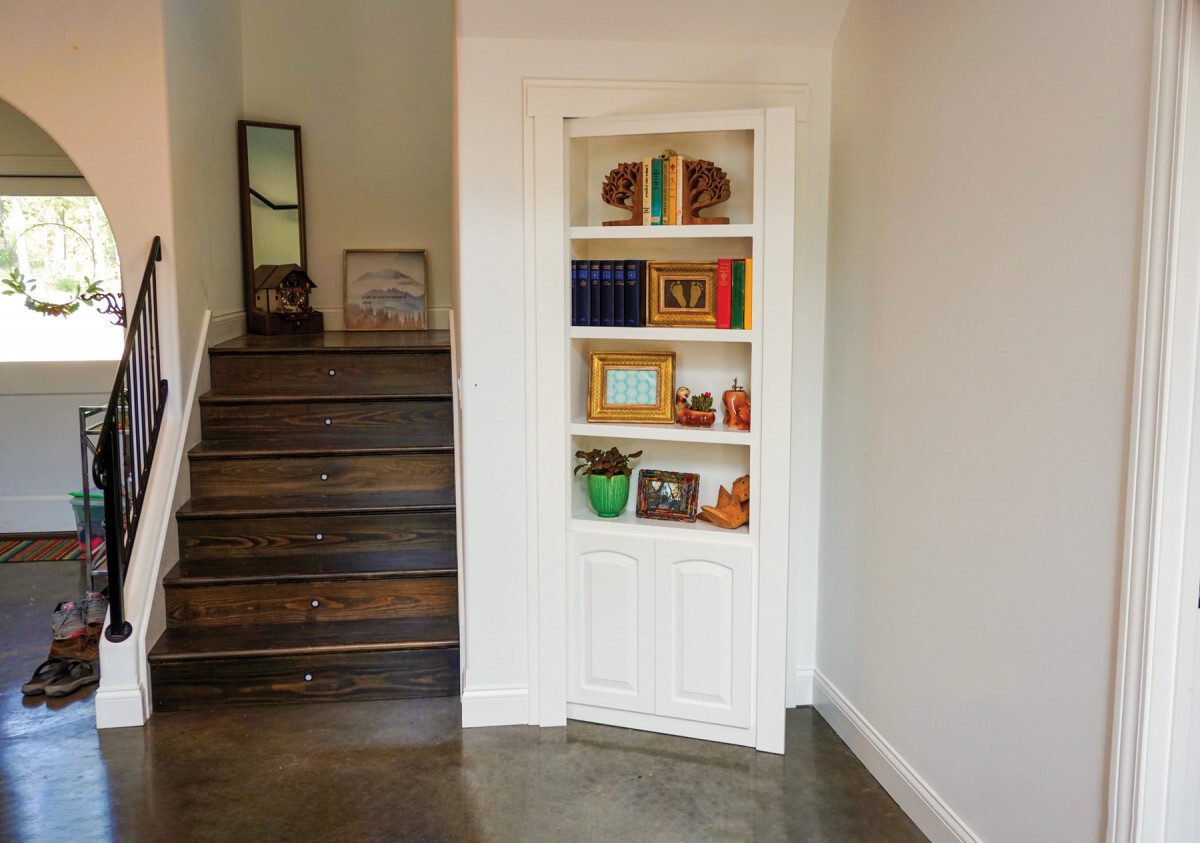
1. Swinging Bookcase Door
A swinging bookcase door is a classic choice for a hidden entrance. This type of door is designed to look like a built-in bookcase, complete with shelves and decorative trim. When closed, it seamlessly blends in with the surrounding bookshelves, but with a gentle push or pull, it swings open to reveal a hidden passage. This type of hidden door is perfect for creating a secret entrance to a home library, office, or even a cozy reading nook.
2. Sliding Wall Panel Door
For rooms with limited space, a sliding wall panel door can be a practical and stylish choice. This type of hidden door consists of a large panel that slides to the side to reveal the entrance. It's a great option for areas where a swinging door might be impractical, such as narrow hallways or rooms with furniture placed close to the entrance. With the right hardware and a smooth sliding mechanism, a sliding wall panel door can add a touch of modern elegance to your home.
3. Mirrored Hidden Door
If you're looking to add a touch of glamour to your hidden entrance, a mirrored hidden door might be the perfect choice. This type of door features a full-length mirror on one side, disguising the entrance and adding a functional element to the room. When opened, the mirror reveals the hidden passage behind it. A mirrored hidden door is a great option for bedrooms, walk-in closets, or dressing rooms, where the mirror can serve a dual purpose while adding a touch of mystery to the space.
4. Under-Staircase Hidden Door
For homes with a staircase, utilizing the space underneath for a hidden door can be a clever way to maximize space. Whether it's a storage area, a cozy reading nook, or a playroom for kids, an under-staircase hidden door can transform an otherwise unused space into a functional and intriguing feature of your home. By selecting the type of hidden door that best suits your space and personal style, you can ensure that your DIY project will not only be practical but also a visually stunning addition to your home.
Gathering Materials and Tools
Before diving into the construction of your DIY hidden door, it's essential to gather all the necessary materials and tools. Having everything at hand will streamline the process and ensure a smoother workflow. Here's a comprehensive list of materials and tools you'll need to get started:
Materials
- Wood: Depending on the type of hidden door you've chosen, you'll need a suitable amount of wood for the door itself. Consider the dimensions of the doorway and the design of the hidden door when selecting the wood.
- Hinges: Choose sturdy hinges that can support the weight of the door and allow for smooth opening and closing.
- Hardware: This includes screws, nails, and any decorative hardware such as handles or knobs that you may want to add to the hidden door.
- Paint or Stain: If you plan to paint or stain the door to match the surrounding decor, make sure to have the appropriate paint or stain and any necessary brushes or rollers.
Tools
- Saw: A saw will be essential for cutting the wood to the required dimensions for the door.
- Drill: You'll need a drill for attaching hinges, hardware, and any additional components of the hidden door.
- Measuring Tape: Accurate measurements are crucial for ensuring the door fits the doorway perfectly, so a measuring tape is a must-have.
- Level: To ensure the door is installed straight and level, a level will be indispensable during the installation process.
- Screwdriver: Both a flathead and a Phillips screwdriver will likely be needed for various components of the hidden door.
By gathering these materials and tools, you'll be well-prepared to tackle the construction of your DIY hidden door. It's always a good idea to double-check the materials list against your project's specific requirements before starting to ensure a smooth and efficient building process.
Measuring and Cutting the Door
Accurate measurements and precise cutting are crucial steps in the construction of a DIY hidden door. Before picking up any tools, take the time to measure the doorway where the hidden door will be installed. Use a measuring tape to record the height and width of the doorway, ensuring that the measurements are precise. It's essential to measure not only the doorway itself but also the surrounding trim and any obstructions that may affect the installation of the hidden door.
Once the measurements are confirmed, transfer them to the piece of wood selected for the door. Use a pencil and a straight edge to mark the dimensions on the wood, double-checking the measurements before making any cuts. When cutting the wood, it's best to use a saw that is suitable for the type of wood being used. Whether it's a circular saw, jigsaw, or handsaw, ensure that the cutting tool is appropriate for achieving clean and accurate cuts.
When cutting the wood, follow the marked lines carefully to ensure that the door will fit the doorway precisely. Take your time and use steady, even strokes to avoid any jagged edges or uneven cuts. If the hidden door has any special features, such as decorative trim or insets, be sure to account for these in the cutting process to achieve the desired design.
After the door has been cut to the correct dimensions, take the time to sand the edges and surfaces to ensure a smooth and professional finish. Sanding the wood will not only remove any rough edges but also prepare the surface for painting or staining, if desired. Once the door is cut and sanded, it will be ready for the next steps in the construction process, bringing you one step closer to completing your DIY hidden door project.
Installing Hinges and Hardware
Once the door is cut to the correct dimensions and sanded, the next crucial step is to install the hinges and hardware. Proper installation of hinges and hardware is essential for the functionality and aesthetic appeal of your DIY hidden door. Here's a detailed guide on how to install hinges and hardware for a seamless and professional finish.
1. Positioning the Hinges
- Begin by positioning the hinges on the door. Depending on the type of hidden door you've chosen, you may need two or more hinges to support the weight of the door.
- Use a pencil to mark the placement of the hinges on the edge of the door. Ensure that the hinges are positioned evenly and at the correct distance from the top and bottom of the door to allow for smooth operation.
2. Preparing the Door Frame
- With the door positioned in the doorway, mark the corresponding placement of the hinges on the door frame.
- Use a chisel to create recesses for the hinges to sit flush with the surface of the door frame. Take care to chisel out the recesses to the appropriate depth to ensure that the hinges will be level with the door frame.
3. Attaching the Hinges
- Once the recesses are prepared, attach the hinges to the door frame using screws and a screwdriver. Ensure that the hinges are securely fastened to the door frame to provide stable support for the hidden door.
4. Adding Hardware
- Depending on the design of your hidden door, you may need to add additional hardware such as handles, knobs, or latches.
- Position the hardware on the door and mark the placement before attaching them securely with screws. Take the time to ensure that the hardware is aligned and level for a polished and professional look.
5. Testing the Operation
- After installing the hinges and hardware, test the operation of the hidden door to ensure that it opens and closes smoothly.
- Make any necessary adjustments to the hinges or hardware to ensure that the door operates seamlessly and aligns properly with the door frame.
By following these steps, you can ensure that the hinges and hardware are installed correctly, providing the foundation for a functional and visually appealing hidden door. With the hinges and hardware in place, your DIY hidden door is one step closer to completion, bringing you closer to enjoying your own secret entrance in your home.
Creating the Secret Entrance
Now that the hidden door is constructed and the hinges and hardware are in place, it's time to create the secret entrance. This step is where the magic happens, as you transform a seemingly ordinary doorway into a covert passage. Here's how to bring the hidden door to life and create a seamless secret entrance:
1. Concealing the Door
To create a convincing secret entrance, it's essential to conceal the presence of the hidden door. Depending on the type of hidden door you've chosen, there are various methods for achieving this. For a swinging bookcase door, consider filling the shelves with real books and decorative items to blend the door seamlessly with the surrounding bookcase. If you've opted for a sliding wall panel door, ensure that the panel matches the wall's texture and color to create a seamless disguise. For a mirrored hidden door, strategically placing furniture or decor in front of the mirror can help maintain the illusion of a solid wall. By concealing the door effectively, you'll create a sense of intrigue and mystery around the secret entrance.
2. Securing the Entrance
In addition to concealing the door, it's important to secure the entrance to maintain the element of surprise. Depending on your preference, you can use a hidden latch or locking mechanism to ensure that the door remains closed and undetectable to unsuspecting visitors. This added security not only enhances the clandestine nature of the hidden door but also provides peace of mind knowing that the entrance can be secured when desired.
3. Adding a Touch of Drama
To elevate the experience of discovering the secret entrance, consider adding a touch of drama to the reveal. This can be achieved through creative lighting, sound effects, or even a hidden switch or mechanism that triggers the opening of the door. By incorporating these elements, you can turn the act of entering the hidden passage into an exciting and memorable experience for yourself and your guests.
4. Personalizing the Entrance
Finally, consider personalizing the secret entrance to reflect your unique style and personality. Whether it's adding decorative accents, artwork, or a welcoming sign, infusing the entrance with personal touches can make it feel like a special and inviting space. This is an opportunity to let your creativity shine and transform the hidden door into a feature that truly reflects your individuality.
By following these steps, you can bring the hidden door to life and create a secret entrance that is both functional and captivating. With the secret entrance complete, you can now enjoy the thrill of having your very own hidden passage in your home, adding a touch of mystery and excitement to your living space.
Adding Finishing Touches
Once the hidden door and secret entrance are in place, it's time to add the finishing touches to complete the transformation. These final details will not only enhance the functionality of the hidden door but also elevate its visual appeal and overall impact on the space. Here are some essential finishing touches to consider for your DIY hidden door project:
1. Concealment Enhancements
To further enhance the concealment of the hidden door, consider adding additional elements that blend the door seamlessly with its surroundings. This could include painting the door to match the adjacent walls, adding trim or molding to create a cohesive look, or even integrating the door into a larger built-in feature, such as a custom cabinetry or wall paneling. By refining the concealment of the hidden door, you can ensure that it remains a well-kept secret within your home.
2. Functional Integration
Incorporating functional elements into the hidden door can enhance its practicality and usability. For example, installing built-in storage compartments or shelving within the hidden door can maximize space and provide added functionality to the room. Additionally, integrating organizational features, such as hooks or racks, can further optimize the hidden door's utility while maintaining its covert nature.
3. Decorative Accents
Adding decorative accents to the hidden door and its surrounding area can elevate its visual appeal and contribute to the overall ambiance of the space. Consider incorporating artistic elements, such as custom artwork, murals, or decorative hardware, to infuse personality and style into the hidden entrance. By treating the hidden door as a design feature, you can turn it into a captivating focal point within your home.
4. Lighting Effects
Strategic lighting can enhance the allure of the hidden door and create a dramatic effect when revealing the secret entrance. Consider installing discreet LED lighting around the door frame or within the concealed passage to add an element of intrigue and ambiance. Whether it's soft, ambient lighting or dynamic color-changing effects, lighting can play a significant role in enhancing the overall experience of the hidden entrance.
5. Custom Signage or Markings
Personalizing the hidden door with custom signage, enigmatic markings, or symbolic motifs can add an extra layer of mystery and charm to the secret entrance. Whether it's a cryptic message, a whimsical symbol, or a personalized moniker, incorporating unique signage can contribute to the enchanting allure of the hidden passage. This personalized touch can make the hidden door feel like a special and exclusive feature within your home.
By attending to these finishing touches, you can elevate the hidden door from a functional addition to a captivating and immersive element of your living space. Each detail contributes to the overall impact of the hidden entrance, creating an experience that is both practical and enchanting. With the finishing touches in place, your DIY hidden door project will be a testament to your creativity and craftsmanship, adding a touch of magic to your home.
Conclusion
In conclusion, creating a DIY hidden door is a rewarding and captivating project that can add an element of mystery and intrigue to your home. From selecting the right location and type of hidden door to gathering materials, measuring, cutting, and installing hinges and hardware, each step contributes to the transformation of a seemingly ordinary doorway into a secret passage. By concealing the door, securing the entrance, adding a touch of drama, and personalizing the space, you can bring the hidden door to life and create a captivating secret entrance that reflects your unique style and personality. With the addition of finishing touches, such as concealment enhancements, functional integration, decorative accents, lighting effects, and custom signage, the hidden door becomes a fully immersive and enchanting feature within your home. Whether it's a swinging bookcase door, a sliding wall panel door, a mirrored hidden door, or an under-staircase hidden door, the possibilities for creating a hidden entrance are as diverse as your imagination. Embrace the challenge, unleash your creativity, and embark on the journey of bringing a touch of magic to your living space with your very own DIY hidden door.