Home>Create & Decorate>DIY & Crafts>DIY Deck: Transform Your Outdoor Space With These Step-by-Step Instructions


DIY & Crafts
DIY Deck: Transform Your Outdoor Space With These Step-by-Step Instructions
Published: February 29, 2024

Content Creator specializing in woodworking and interior transformations. Caegan's guides motivate readers to undertake their own projects, while his custom furniture adds a personal touch.
Transform your outdoor space with our step-by-step DIY deck instructions. Get creative with DIY & Crafts to enhance your outdoor living experience.
(Many of the links in this article redirect to a specific reviewed product. Your purchase of these products through affiliate links helps to generate commission for Twigandthistle.com, at no extra cost. Learn more)
Introduction
Welcome to the world of DIY deck building! Whether you're a seasoned DIY enthusiast or just starting to explore the joys of crafting and construction, building your own deck can be a rewarding and transformative project. A well-designed and expertly constructed deck can elevate your outdoor space, providing a versatile area for relaxation, entertainment, and enjoying the beauty of nature right in your own backyard.
Building a deck from scratch allows you to customize every aspect to suit your preferences and needs. From choosing the perfect materials to crafting a layout that complements your home's architecture, the possibilities are endless. Not to mention, the sense of accomplishment that comes with creating a functional and aesthetically pleasing outdoor oasis with your own hands is truly unparalleled.
In this comprehensive guide, we will walk you through the step-by-step process of planning, gathering materials, preparing the site, and constructing your very own deck. Whether you're envisioning a cozy platform for morning coffee or a spacious entertainment area for hosting gatherings, this guide will equip you with the knowledge and confidence to bring your dream deck to life.
So, roll up your sleeves, grab your tools, and get ready to embark on an exciting journey of creativity and craftsmanship. By the end of this guide, you'll be well-prepared to tackle each phase of the DIY deck-building process, from laying the foundation to adding the finishing touches that will make your deck a beloved extension of your home.
Let's dive in and discover how you can transform your outdoor space with a stunning DIY deck that reflects your style and enhances your lifestyle.
Step 1: Planning and Designing Your DIY Deck
Planning and designing your DIY deck is the crucial first step that sets the foundation for a successful and satisfying construction process. This phase allows you to unleash your creativity and envision the perfect outdoor space that aligns with your lifestyle and aesthetic preferences.
1. Visualize Your Ideal Deck
Begin by visualizing how you intend to use your deck. Are you envisioning a cozy retreat for intimate gatherings, a spacious entertainment area for hosting barbecues, or a multifunctional space that accommodates various activities? Consider the furniture, plants, and accessories you plan to incorporate to create a clear picture of your ideal deck.
2. Assess Your Space and Regulations
Survey your outdoor space to determine the ideal location and size for your deck. Consider factors such as sunlight exposure, existing landscaping, and proximity to the house. Additionally, familiarize yourself with local building codes and regulations to ensure compliance with any necessary permits or restrictions.
3. Create a Detailed Plan
Sketch a rough layout of your deck, taking into account the dimensions, shape, and potential features such as stairs, railings, and built-in seating. This plan will serve as a blueprint for the subsequent phases of the project, guiding your material calculations and construction process.
Read more: DIY Outdoor Concrete Countertops
4. Select Suitable Materials
Choose the materials for your deck based on durability, maintenance requirements, and aesthetic appeal. Options include pressure-treated lumber, composite decking, and tropical hardwoods. Consider the environmental impact, cost, and longevity of each material to make an informed decision that aligns with your vision and budget.
5. Incorporate Safety Features
Integrate safety features into your design, such as sturdy railings, secure staircases, and proper lighting. Prioritizing safety ensures that your deck is not only visually appealing but also a secure and comfortable space for you and your guests.
6. Seek Inspiration and Expert Advice
Explore design inspirations from home improvement magazines, online platforms, and local home improvement stores. Additionally, consulting with professionals or experienced DIYers can provide valuable insights and practical tips for optimizing your deck design.
By dedicating ample time to planning and designing your DIY deck, you lay the groundwork for a seamless and gratifying construction journey. This phase allows you to fine-tune your vision, address potential challenges, and set the stage for bringing your dream deck to life. With a well-crafted plan in hand, you're ready to move on to the next phase of the DIY deck-building process: gathering materials and tools.
Step 2: Gathering Materials and Tools
Gathering the necessary materials and tools is a pivotal phase in the DIY deck-building process. By ensuring that you have all the essential components and equipment at your disposal, you set the stage for a smooth and efficient construction journey. Here's a detailed breakdown of the materials and tools you'll need to bring your deck-building vision to fruition.
Materials
-
Decking Boards: Select high-quality decking boards based on your design preferences and budget. Options include pressure-treated lumber for a traditional look, composite decking for low maintenance, or tropical hardwoods for a luxurious aesthetic.
-
Support Posts and Beams: Choose durable support posts and beams to form the structural framework of your deck. These components provide stability and load-bearing capacity, making them essential for a safe and long-lasting deck.
-
Hardware: Stock up on corrosion-resistant screws, nails, and joist hangers to secure the structural elements of your deck. Opt for galvanized or stainless steel hardware to withstand outdoor conditions and prevent rusting.
-
Concrete and Gravel: If your deck design includes a foundation or footings, acquire concrete mix and gravel for the installation of sturdy support elements. Proper foundation construction is crucial for the structural integrity of your deck.
-
Railing and Balusters: If your design incorporates railing systems, choose railing posts, balusters, and railings that align with your aesthetic and safety requirements. Consider materials such as wood, metal, or composite for the railing components.
-
Finishing Touches: Enhance the visual appeal and functionality of your deck with finishing touches such as post caps, decorative lighting, and trim pieces. These details add character and charm to your outdoor space.
Tools
-
Power Tools: Equip yourself with essential power tools including a circular saw, drill/driver, impact driver, and a power sander. These tools facilitate precise cutting, fastening, and sanding during the construction process.
-
Hand Tools: Gather a comprehensive set of hand tools such as a hammer, tape measure, level, framing square, and adjustable wrench. These tools are indispensable for accurate measurements, leveling, and assembly tasks.
-
Safety Gear: Prioritize safety by obtaining protective gear including safety glasses, work gloves, and a dust mask. Ensuring a safe working environment is essential for preventing accidents and injuries.
-
Material Handling Equipment: If you're working with heavy materials, consider renting or purchasing equipment such as a wheelbarrow or a dolly to transport and maneuver items with ease.
-
Personal Protective Equipment (PPE): Depending on the nature of your project, consider additional PPE such as steel-toed boots and a hard hat for enhanced safety on the construction site.
By meticulously procuring the required materials and tools, you set the stage for a successful and efficient deck-building endeavor. With these essential components at your disposal, you're ready to transition to the next phase: preparing the site for construction.
Step 3: Preparing the Site
Preparing the site for deck construction is a critical phase that lays the groundwork for a sturdy and long-lasting outdoor structure. This phase involves a series of essential tasks aimed at ensuring the site is properly leveled, cleared of obstructions, and equipped to support the weight and dimensions of the deck. By meticulously preparing the site, you create a stable foundation for the subsequent stages of the construction process.
Clearing and Leveling the Ground
The first step in site preparation involves clearing the designated area of any vegetation, debris, or obstacles that may impede the construction process. Use a shovel, rake, or a rented skid-steer loader to remove grass, rocks, and roots, ensuring a clean and level surface for the deck foundation.
Read more: How to Build a DIY Transom Window
Marking the Layout
Once the ground is cleared, mark the layout of the deck using stakes and string. This step allows you to visualize the exact dimensions and shape of the deck, ensuring precise alignment with your initial design plan. Use a measuring tape and a carpenter's square to verify that the layout corresponds to your intended deck dimensions.
Excavation and Footing Installation
If your deck design requires footings or a foundation, excavation becomes a crucial task. Use a post hole digger or a rented auger to dig holes for the footings according to the specified depth and diameter outlined in your design plan. Subsequently, pour concrete into the holes and insert the footing forms to create a solid base for the deck's support posts.
Grading and Drainage Considerations
Proper grading and drainage are essential for preventing water accumulation and ensuring the longevity of your deck. Evaluate the slope of the site and make adjustments as necessary to direct water away from the deck area. Additionally, consider installing a gravel or stone base to facilitate drainage and minimize moisture-related issues.
Site Inspection and Compliance
Before proceeding with the construction, conduct a thorough site inspection to verify that the prepared area aligns with local building codes and regulations. Ensure that the site meets the necessary requirements for deck construction, including setbacks from property lines and adherence to any height restrictions.
By meticulously executing the site preparation phase, you establish a solid foundation for the subsequent stages of deck construction. With the site cleared, leveled, and equipped to support the deck structure, you're ready to progress to the next phase: building the frame of your DIY deck.
Step 4: Building the Frame
Building the frame of your DIY deck is a pivotal phase that forms the structural skeleton of the entire outdoor space. The frame provides the essential support for the decking boards, ensuring stability, load-bearing capacity, and longevity for your deck. This phase involves precise measurements, accurate assembly, and meticulous attention to detail to create a sturdy and reliable foundation for your outdoor oasis.
1. Setting the Ledger Board
Begin by attaching a ledger board to the exterior wall of your house, ensuring it is level and securely anchored. The ledger board serves as the primary attachment point for the deck frame and provides crucial support for the structure. Use lag screws or through-bolts to affix the ledger board, following local building codes and best practices for secure attachment.
2. Installing Support Posts and Beams
Position and install support posts and beams according to your deck design plan, ensuring proper spacing and alignment. Use a post level to verify that the posts are plumb and securely anchored to the footings or foundation. Subsequently, attach the beams to the support posts, creating a robust framework that forms the basis for the deck's load-bearing capacity.
3. Adding Joists and Bracing
Once the support posts and beams are in place, install the joists perpendicular to the beams, ensuring consistent spacing and alignment. Secure the joists to the beams using joist hangers and galvanized nails or screws, providing a stable platform for the decking boards. Additionally, incorporate diagonal bracing to reinforce the frame and minimize lateral movement, enhancing the structural integrity of the deck.
Read more: DIY Deck Cover: Transform Your Outdoor Space
4. Verifying Level and Square
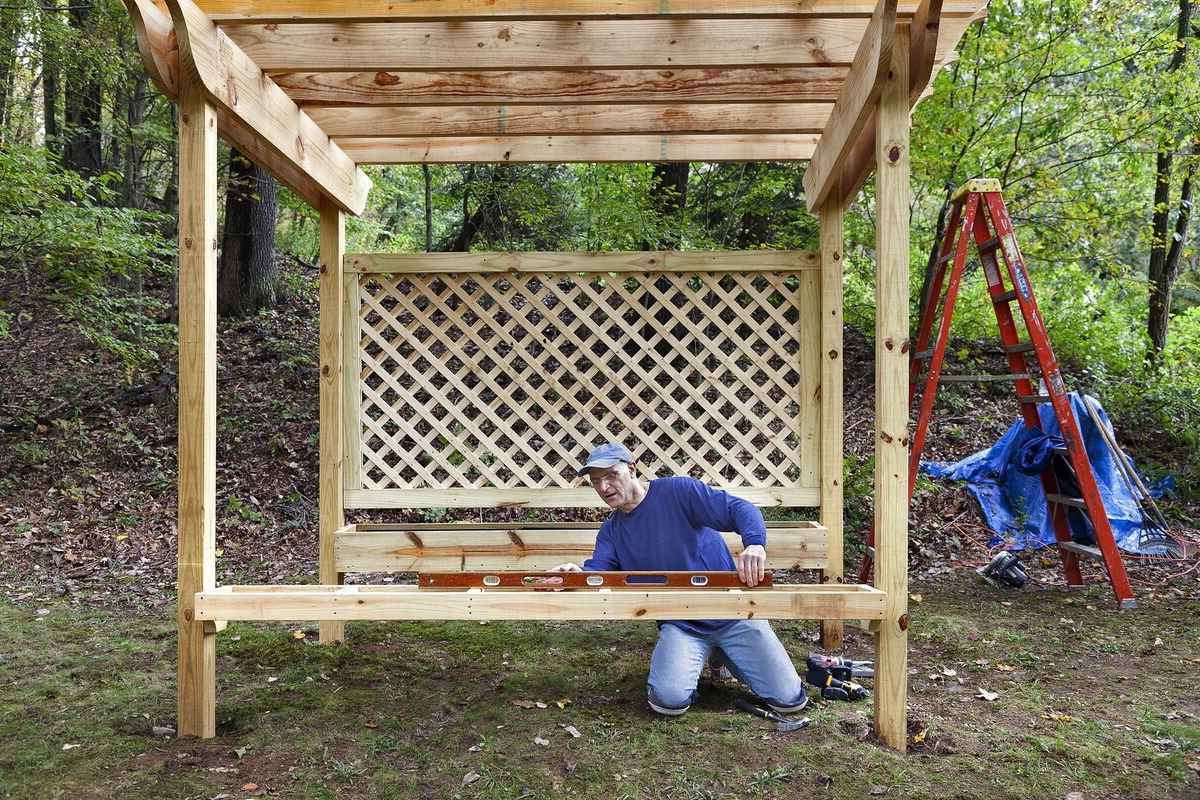
Throughout the frame construction process, consistently verify the levelness and squareness of the structure. Use a carpenter's level and framing square to ensure that the ledger board, support posts, beams, and joists are precisely aligned and perpendicular. This meticulous attention to detail is essential for creating a level and structurally sound deck that withstands the test of time.
5. Incorporating Drainage and Ventilation
Integrate proper drainage and ventilation considerations into the frame construction to mitigate moisture-related issues. Create a slight slope in the frame to facilitate water runoff and prevent pooling. Additionally, incorporate ventilation openings or spacers between the decking boards to promote air circulation and minimize moisture accumulation, enhancing the durability of the deck structure.
By meticulously executing the frame construction phase, you establish a robust and reliable foundation for the subsequent stages of deck building. With the frame in place, you're ready to progress to the next phase: installing the decking boards and bringing your DIY deck one step closer to completion.
Step 5: Installing Decking Boards
The installation of decking boards marks a significant milestone in the construction of your DIY deck, as it transforms the sturdy frame into a functional and visually captivating outdoor space. This phase requires precision, attention to detail, and a keen eye for aesthetics to ensure that the decking boards are flawlessly aligned, securely fastened, and poised to withstand the elements for years to come.
1. Selecting the Right Boards
Before commencing the installation process, carefully select the decking boards that align with your design preferences, budget, and maintenance considerations. Options range from traditional pressure-treated lumber to low-maintenance composite decking and luxurious tropical hardwoods. Consider factors such as durability, color variations, and texture to make an informed choice that complements your overall deck design.
2. Planning the Layout
Begin by planning the layout of the decking boards, considering factors such as board orientation, pattern variations, and potential seam locations. Visualize the arrangement of the boards to optimize the aesthetic appeal and minimize waste. Additionally, account for any features such as access panels or integrated patterns that require special attention during the installation process.
3. Securing the First Board
Start the installation by securing the first decking board to the frame, ensuring it is aligned with the outer edge of the deck and perpendicular to the support joists. Use corrosion-resistant screws or nails to fasten the board, maintaining consistent spacing between the boards to facilitate drainage and expansion. Employ a carpenter's square to verify that the first board is perfectly perpendicular to the frame, setting the foundation for a uniform and visually pleasing deck surface.
4. Continuing the Installation
Proceed to install the subsequent decking boards, staggering the end joints and maintaining consistent spacing to create a seamless and structurally sound deck surface. Utilize a pneumatic nailer or a drill/driver to expedite the fastening process, ensuring that each board is securely affixed to the joists. Pay close attention to the alignment and spacing of the boards, making necessary adjustments to accommodate any irregularities in the frame or decking material.
5. Incorporating Finishing Touches
As the decking boards near completion, incorporate finishing touches such as trim pieces, fascia boards, and concealed fastening systems to enhance the visual appeal and functionality of the deck. Consider adding decorative elements such as border patterns, contrasting colors, or integrated lighting to elevate the overall aesthetic impact of the deck surface.
By meticulously executing the installation of decking boards, you bring your DIY deck one step closer to realization, creating a versatile and inviting outdoor space that reflects your style and craftsmanship. With the decking boards securely in place, you're poised to progress to the subsequent phases of adding railing, balusters, and the final finishing touches that will transform your deck into a cherished extension of your home.
Step 6: Adding Railing and Balusters
The addition of railing and balusters serves as a pivotal phase in the construction of your DIY deck, enhancing both the safety and aesthetic appeal of the outdoor space. Railing systems not only provide essential support and security but also contribute to the overall visual impact of the deck, creating a defined boundary and adding character to the structure.
1. Selecting Railing Materials and Styles
Begin by selecting the railing materials and styles that align with your design vision and functional requirements. Options range from traditional wood railings to sleek metal designs and low-maintenance composite systems. Consider the durability, maintenance needs, and compatibility with your deck's aesthetic when making this crucial decision. Additionally, explore various railing styles, such as straight balusters, curved designs, or glass panels, to find the perfect complement to your deck's overall look.
2. Measuring and Planning
Prior to installation, meticulously measure the perimeter of your deck to determine the precise length of railing segments needed. Account for any staircases, transitions, or unique features that require customized railing solutions. Create a detailed plan for the layout of the railing system, considering factors such as post placement, baluster spacing, and the integration of any decorative elements or accessories.
3. Installing Railing Posts
Secure the railing posts to the deck frame, ensuring they are plumb and securely anchored. Use corrosion-resistant fasteners to affix the posts, providing a solid foundation for the railing system. Verify that the posts are evenly spaced and aligned according to your design plan, maintaining consistency and structural integrity throughout the installation process.
Read more: DIY: Painting Bathroom Cabinets Step-by-Step
4. Attaching Balusters and Rails
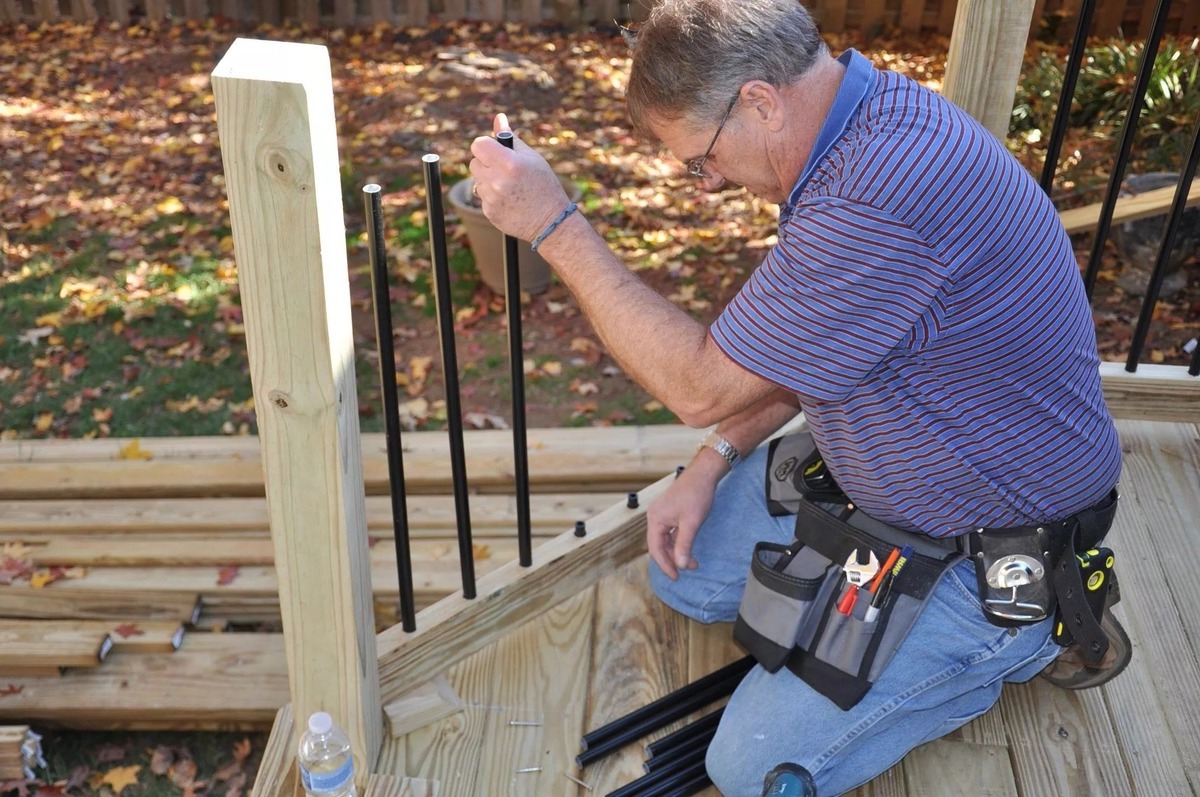
Once the posts are in place, proceed to attach the balusters and rails to create a secure and visually appealing railing system. Utilize appropriate connectors and fasteners to affix the balusters to the bottom rail, ensuring consistent spacing and alignment. Subsequently, attach the top rail, verifying that it aligns with the overall design plan and complies with safety regulations.
5. Adding Finishing Touches
Incorporate finishing touches such as post caps, decorative accents, and lighting elements to elevate the visual impact of the railing system. Consider integrating post cap lights, solar-powered accents, or ornamental details to infuse personality and functionality into the railing design. These subtle enhancements contribute to the overall ambiance of the deck and create a welcoming outdoor environment.
By meticulously executing the installation of railing and balusters, you elevate the safety, functionality, and aesthetic appeal of your DIY deck, creating a space that is both secure and visually captivating. With the railing system securely in place, you're poised to progress to the final phase of adding finishing touches and maintenance tips that will complete your transformative deck-building journey.
Step 7: Finishing Touches and Maintenance Tips
As you near the completion of your DIY deck construction, the addition of finishing touches and the implementation of maintenance tips are essential for ensuring that your outdoor oasis is not only visually stunning but also built to withstand the test of time. This phase allows you to infuse personality, functionality, and longevity into your deck, creating a space that seamlessly integrates with your lifestyle and elevates the overall appeal of your home.
1. Applying Protective Finishes
Consider applying protective finishes to your deck to enhance its durability and resistance to outdoor elements. Options include clear sealants, stains, or specialized deck oils that provide protection against UV rays, moisture, and general wear and tear. These finishes not only safeguard the natural beauty of the wood but also contribute to the longevity of your deck, minimizing the need for frequent maintenance.
Read more: How to Build DIY Closet Doors
2. Incorporating Outdoor Furnishings
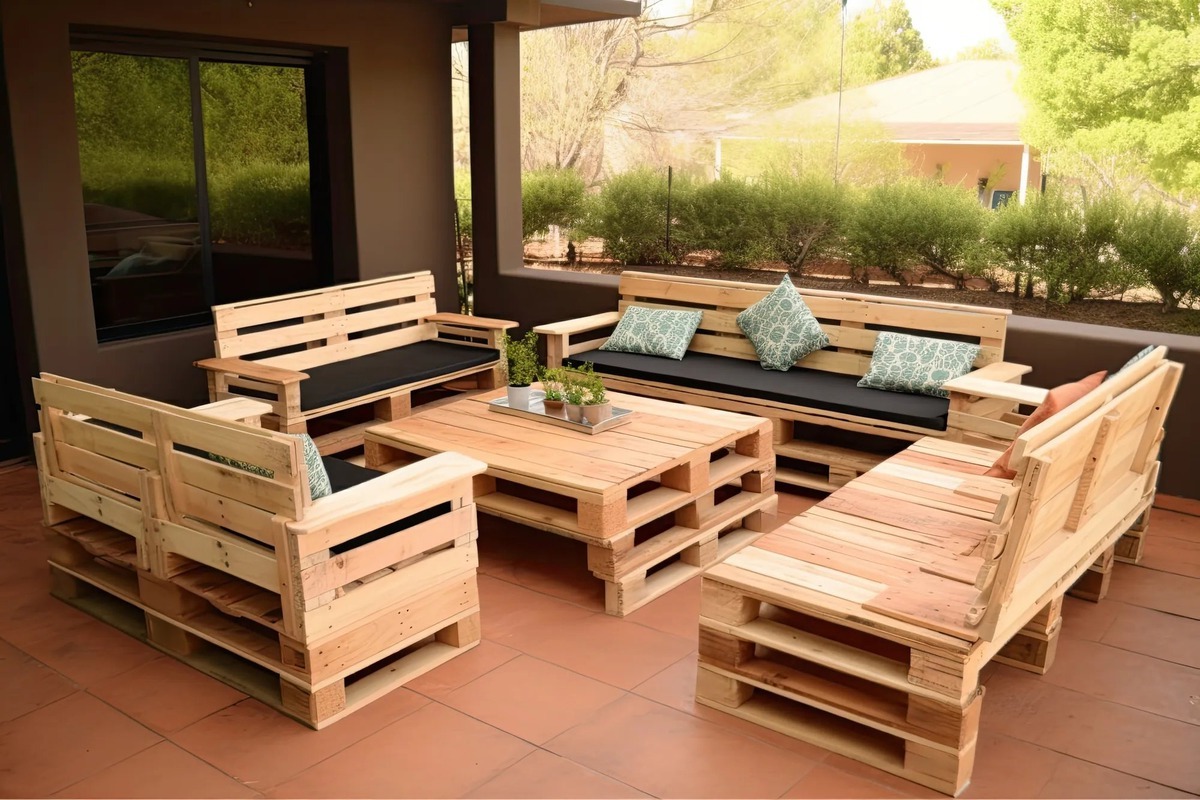
Personalize your deck with carefully selected outdoor furnishings that cater to your lifestyle and entertainment preferences. Whether it's a cozy seating area, a dining set for al fresco meals, or a hammock for leisurely relaxation, the right furnishings can transform your deck into a functional and inviting extension of your home. Opt for weather-resistant materials and versatile pieces that can withstand outdoor conditions while adding comfort and style to your deck.
3. Implementing Lighting Solutions
Enhance the ambiance and usability of your deck by incorporating strategic lighting solutions. From overhead string lights and lanterns to recessed deck lighting and solar-powered fixtures, lighting plays a crucial role in extending the enjoyment of your outdoor space into the evening hours. Thoughtfully placed lighting not only adds a touch of enchantment to your deck but also contributes to safety and visibility during nighttime gatherings.
4. Establishing a Maintenance Routine
Developing a regular maintenance routine is key to preserving the beauty and structural integrity of your deck. This may include periodic cleaning to remove debris, mold, or mildew, as well as inspections for loose fasteners, damaged boards, or signs of wear. Additionally, consider seasonal maintenance tasks such as reapplying protective finishes, tightening hardware, and addressing any potential issues to ensure that your deck remains a cherished and well-maintained asset.
5. Embracing Greenery and Décor
Infuse your deck with greenery and decorative accents to create a vibrant and inviting outdoor retreat. Incorporate potted plants, hanging baskets, and vertical gardens to introduce natural elements and add a touch of serenity to your deck. Furthermore, consider integrating decorative elements such as outdoor rugs, throw pillows, and artwork to personalize the space and reflect your unique style.
By attending to these finishing touches and implementing proactive maintenance tips, you elevate your DIY deck from a construction project to a beloved and enduring feature of your home. Embracing these final details ensures that your deck not only meets your immediate needs but also continues to enrich your outdoor experiences for years to come.
Read more: How to Build Sliding Wardrobe Doors
Conclusion
Congratulations on completing the transformative journey of building your very own DIY deck! From the initial stages of planning and designing to the meticulous execution of construction phases, you've demonstrated creativity, craftsmanship, and a passion for enhancing your outdoor living space. As you stand back and admire the stunning result of your efforts, it's evident that your DIY deck has evolved into a versatile and inviting extension of your home.
Throughout this comprehensive guide, you've delved into the intricacies of deck construction, from selecting materials and tools to adding the finishing touches that infuse personality and functionality into your outdoor oasis. By meticulously planning, measuring, and assembling each component, you've not only created a visually captivating deck but also a safe and durable space that aligns with your lifestyle and aesthetic preferences.
Your DIY deck is more than just a construction project; it's a reflection of your creativity, dedication, and the joy of hands-on craftsmanship. As you envision the countless moments of relaxation, entertainment, and connection that await on your deck, you can take pride in the fact that you've transformed a vision into a tangible and cherished reality.
Moving forward, your DIY deck will serve as a backdrop for memorable gatherings, tranquil moments of solitude, and the simple pleasures of outdoor living. By embracing the maintenance tips and infusing your deck with personal touches, you're poised to nurture and enjoy this space for years to come, creating lasting memories and experiences that enrich your home and lifestyle.
As you bask in the satisfaction of completing your DIY deck project, remember that the skills, creativity, and determination you've cultivated throughout this endeavor extend far beyond the construction site. You've honed your ability to envision, plan, and bring to life a significant addition to your home, embodying the spirit of DIY craftsmanship and the joy of creating something truly remarkable with your own hands.
So, as you step onto your newly constructed deck, take a moment to savor the sense of accomplishment and the anticipation of the countless moments that await in this captivating outdoor space. Your DIY deck stands as a testament to your ingenuity, perseverance, and the transformative power of hands-on creativity. Embrace it, cherish it, and let it become a cherished cornerstone of your home and lifestyle.


