
Home>Create & Decorate>DIY & Crafts>How To Make A Catapult With Popsicle Sticks
DIY & Crafts
How To Make A Catapult With Popsicle Sticks
Published: May 10, 2024

Senior Editor in Create & Decorate, Kathryn combines traditional craftsmanship with contemporary trends. Her background in textile design and commitment to sustainable crafts inspire both content and community.
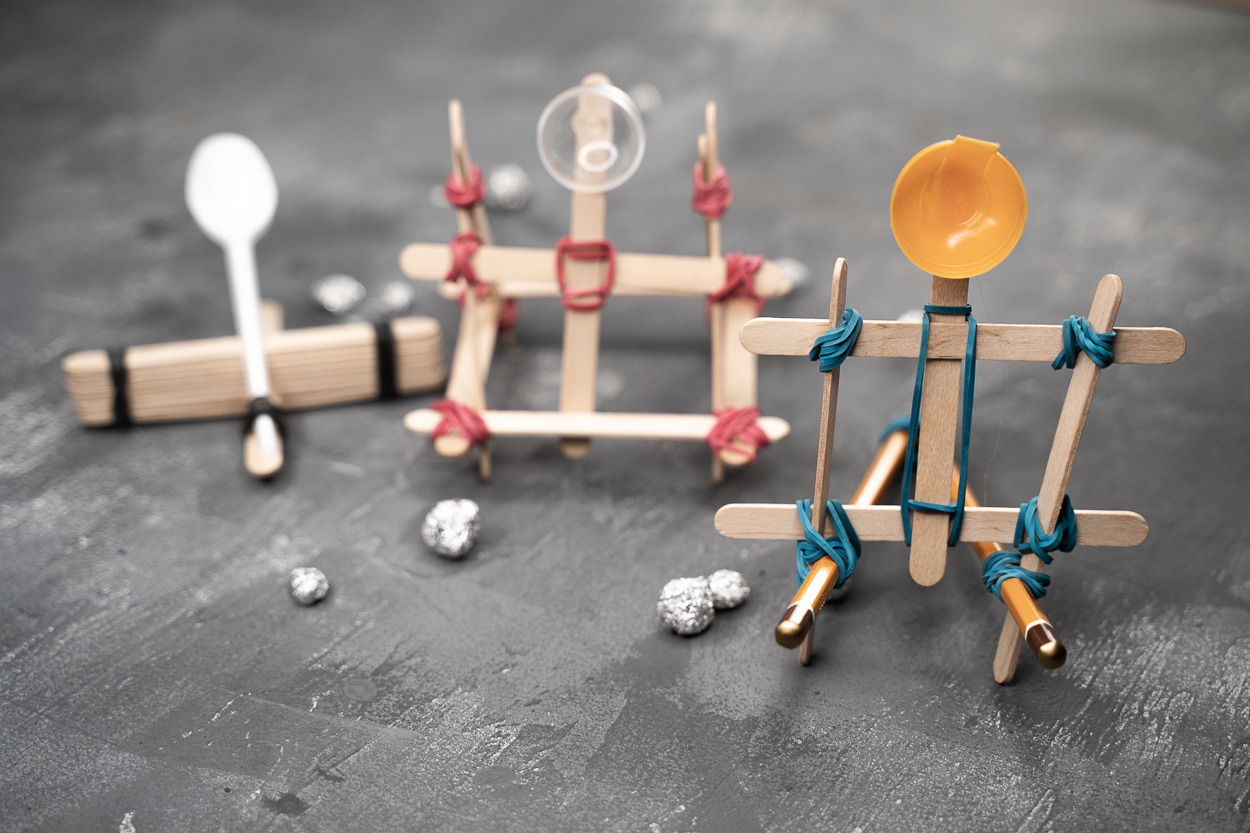
Learn how to make a DIY catapult with popsicle sticks in this fun and easy craft project. Perfect for kids and adults who love DIY & crafts!
(Many of the links in this article redirect to a specific reviewed product. Your purchase of these products through affiliate links helps to generate commission for Twigandthistle.com, at no extra cost. Learn more)
Introduction
So, you want to learn how to make a catapult with popsicle sticks? Well, you're in for a fun and exciting DIY project! Building a catapult can be a great way to spend an afternoon, and it's a fantastic opportunity to learn about physics and engineering in a hands-on way. Whether you're a student working on a school project or just someone who loves to tinker and build, making a catapult is a rewarding and entertaining endeavor. In this article, we'll guide you through the step-by-step process of creating your very own catapult using popsicle sticks and a few other simple materials. Get ready to unleash your inner engineer and have a blast with this awesome project!
Materials Needed
To get started on your catapult-building adventure, you'll need to gather a few basic materials. Here's what you'll need:
-
Popsicle sticks: These will form the main structure of your catapult. You'll need a good amount of popsicle sticks, so make sure to stock up on these.
-
Hot glue gun and glue sticks: The hot glue gun will be used to securely attach the popsicle sticks together, so it's an essential tool for this project.
-
Rubber bands: You'll need rubber bands to provide the tension necessary for your catapult to launch objects.
-
Plastic spoon: This will serve as the launching mechanism for your catapult, so make sure to have a few plastic spoons on hand.
-
Small objects to launch: Whether it's marshmallows, small candies, or tiny foam balls, you'll need some lightweight objects to test out your catapult once it's built.
-
Scissors: These will come in handy for cutting and trimming the rubber bands to the right size.
-
Ruler: A ruler will help you measure and cut the popsicle sticks to the correct lengths.
-
Marker: You'll need a marker to make some markings on the popsicle sticks for precise cutting and assembly.
Now that you've got all your materials ready, it's time to dive into the exciting process of building your very own catapult!
Step 1: Building the Base
To kick off the catapult construction, you'll start by creating the base, which serves as the foundation for the entire structure. Follow these steps to build the base of your popsicle stick catapult:
-
Gather Your Popsicle Sticks: Begin by collecting a handful of popsicle sticks. Lay them out on a flat surface, ensuring that they are clean and free from any sticky residue.
-
Create the Base Frame: Take two popsicle sticks and lay them parallel to each other, with a small gap between them. Then, take two more popsicle sticks and place them perpendicular to the first two sticks, forming a rectangular frame. Use a hot glue gun to secure the corners of the frame, ensuring that the structure is sturdy.
-
Reinforce the Corners: Apply a small amount of hot glue to the inner corners of the frame to reinforce the joints. This will help prevent the base from coming apart when under tension.
-
Add Support Beams: To strengthen the base, glue additional popsicle sticks diagonally across the rectangular frame. This will provide extra support and stability to the base of your catapult.
-
Let It Dry: Allow the base to dry completely before moving on to the next step. This will ensure that the structure is solid and able to withstand the tension and force exerted during the catapult's operation.
Once you've completed these steps, you'll have a sturdy and reliable base for your popsicle stick catapult. With the foundation in place, you're ready to move on to the next phase of the construction process.
Step 2: Creating the Arm
Now that you have a solid base for your catapult, it's time to focus on constructing the arm, which is responsible for launching the projectiles. Follow these detailed steps to create the arm of your popsicle stick catapult:
-
Gather Your Popsicle Sticks: Begin by selecting a few popsicle sticks of the same length. These sticks will form the arm of your catapult, so make sure they are sturdy and free from any cracks or splinters.
-
Assemble the Arm Structure: Take two popsicle sticks and lay them parallel to each other. Then, place another popsicle stick perpendicular to the first two sticks, forming a "T" shape. Use hot glue to secure the perpendicular stick to the parallel sticks, ensuring a strong bond.
-
Reinforce the Joints: Apply additional hot glue to the joints of the "T" shape to reinforce the connections. This will prevent the arm from coming apart when the catapult is in use.
-
Create the Pouch: At one end of the arm, attach a small container or pouch using hot glue. This pouch will hold the projectile in place before it is launched. You can use a bottle cap, small plastic container, or even a piece of folded paper to create the pouch.
-
Let It Dry: Allow the arm structure to dry completely before moving on to the next step. This will ensure that the pouch and joints are securely attached and ready for the next phase of assembly.
With the arm of your catapult now constructed, you're one step closer to completing your DIY project. The arm plays a crucial role in the catapult's functionality, and by following these steps carefully, you'll have a sturdy and reliable arm ready to be integrated into the catapult's design.
Step 3: Attaching the Arm to the Base
Now that you have the base and arm of your catapult ready, it's time to bring them together by attaching the arm to the base. Follow these steps to securely integrate the arm with the base of your popsicle stick catapult:
-
Position the Arm: Place the arm of the catapult on top of the base, ensuring that it is centered and aligned with the midpoint of the base frame. This positioning is crucial for achieving optimal launching performance.
-
Secure the Arm: Use a hot glue gun to attach the base of the arm to the center of the base frame. Apply a generous amount of hot glue to create a strong bond between the arm and the base, ensuring that it is firmly secured in place.
-
Reinforce the Connection: To further reinforce the attachment, apply additional hot glue around the joints where the arm meets the base. This extra reinforcement will help prevent the arm from shifting or coming loose during the catapult's operation.
-
Allow It to Set: Give the hot glue ample time to set and dry completely. This will ensure that the arm is securely and permanently attached to the base, creating a stable and reliable foundation for the catapult's launching mechanism.
By following these steps, you'll successfully integrate the arm with the base of your popsicle stick catapult, bringing you one step closer to completing this exciting DIY project. With the arm securely attached, your catapult is beginning to take shape, and you're well on your way to having a fully functional homemade catapult ready for action.
Step 4: Adding the Launching Mechanism
Now that the base and arm of your catapult are securely in place, it's time to focus on adding the launching mechanism, which will enable your catapult to propel objects through the air. Follow these detailed steps to incorporate the launching mechanism into your popsicle stick catapult:
-
Prepare the Plastic Spoon: Take a plastic spoon and position it at the end of the arm, opposite the base. The spoon will serve as the launching mechanism for your catapult, so ensure that it is securely attached to the arm.
-
Attach the Spoon: Use a hot glue gun to affix the plastic spoon to the end of the arm. Apply a generous amount of hot glue to create a strong and durable bond between the spoon and the arm, ensuring that it is firmly in place.
-
Reinforce the Connection: To further reinforce the attachment, apply additional hot glue around the junction where the spoon meets the arm. This extra reinforcement will help prevent the spoon from detaching during the catapult's operation.
-
Test the Mechanism: Once the hot glue has dried completely, test the launching mechanism by placing a small object, such as a marshmallow or a lightweight ball, into the spoon. Pull down the opposite end of the arm to create tension and release it to launch the object. Make any necessary adjustments to ensure that the launching mechanism functions smoothly.
-
Fine-Tune the Tension: Experiment with the positioning of the rubber bands and the angle of the spoon to optimize the tension and trajectory of the launched objects. By fine-tuning these elements, you can achieve greater accuracy and distance with your catapult.
With the launching mechanism now integrated into your popsicle stick catapult, you're one step closer to completing this engaging DIY project. The addition of the plastic spoon as the launching mechanism brings your catapult to life, and you're on the verge of having a fully functional homemade catapult ready for testing and enjoyment.
Step 5: Testing and Adjusting
Now that your popsicle stick catapult is fully assembled, it's time to put it to the test and make any necessary adjustments to ensure optimal performance. Follow these steps to test and fine-tune your homemade catapult:
-
Gather Lightweight Objects: Collect a variety of lightweight objects such as marshmallows, small candies, or tiny foam balls. These items will serve as projectiles for testing the catapult's launching capabilities.
-
Load the Catapult: Place one of the lightweight objects into the spoon of the catapult, ensuring that it is positioned securely for launching.
-
Create Tension: Pull down the opposite end of the arm to create tension in the catapult's launching mechanism. The amount of tension will determine the force with which the object is launched.
-
Release and Launch: Once the tension is set, release the arm to launch the object. Observe the trajectory and distance traveled by the launched object.
-
Evaluate Performance: Assess the performance of the catapult by observing the distance, accuracy, and consistency of the launched objects. Take note of any issues or areas for improvement.
-
Make Adjustments: If necessary, make adjustments to the catapult's design, such as altering the tension of the rubber bands, repositioning the spoon, or reinforcing any weak points in the structure. These adjustments can enhance the catapult's performance and accuracy.
-
Repeat Testing: Test the catapult multiple times with different objects and varying levels of tension to gather comprehensive data on its performance. This iterative testing process allows you to fine-tune the catapult for optimal results.
-
Document Findings: Keep a record of the catapult's performance during testing, noting any adjustments made and their impact on the launching capabilities. This documentation will guide future modifications and improvements.
By thoroughly testing and adjusting your popsicle stick catapult, you can refine its functionality and unleash its full potential as a fun and educational DIY project. Embrace the iterative nature of testing and adjusting, and enjoy the process of optimizing your homemade catapult for hours of entertainment and learning.
Conclusion
Congratulations on successfully creating your very own popsicle stick catapult! Through the step-by-step process outlined in this guide, you've not only built a fun and engaging DIY project but also gained valuable insights into physics, engineering, and hands-on problem-solving. Your homemade catapult is a testament to your creativity and ingenuity, and it's ready to provide hours of entertainment and learning opportunities.
As you reflect on the journey of constructing your catapult, remember that experimentation and iteration are key to refining its performance. Whether you're fine-tuning the tension of the rubber bands, adjusting the launching angle, or exploring different projectile options, the process of testing and adjusting is an integral part of the catapult-building experience.
Now that your popsicle stick catapult is complete, it's time to unleash its potential. Gather your lightweight projectiles, set up a safe and open space for testing, and let the catapult launch objects through the air. Observe the trajectory, distance, and accuracy of the launched objects, and continue to make adjustments to optimize its performance.
As you embark on this exciting journey with your homemade catapult, remember to document your findings, celebrate your successes, and embrace the spirit of curiosity and exploration. Whether you're using your catapult for educational demonstrations, friendly competitions, or simply enjoying the thrill of launching objects, your DIY creation is a testament to your passion for hands-on learning and creative expression.
With your newfound knowledge and hands-on experience, you've not only built a popsicle stick catapult but also cultivated a deeper appreciation for the principles of physics and engineering. So, go ahead, have a blast with your homemade catapult, and continue to explore the endless possibilities of DIY and home improvement projects.