
Home>Create & Decorate>DIY & Crafts>DIY Catapult: How To Build Your Own Mini Siege Weapon
DIY & Crafts
DIY Catapult: How To Build Your Own Mini Siege Weapon
Published: February 29, 2024

Senior Editor in Create & Decorate, Kathryn combines traditional craftsmanship with contemporary trends. Her background in textile design and commitment to sustainable crafts inspire both content and community.
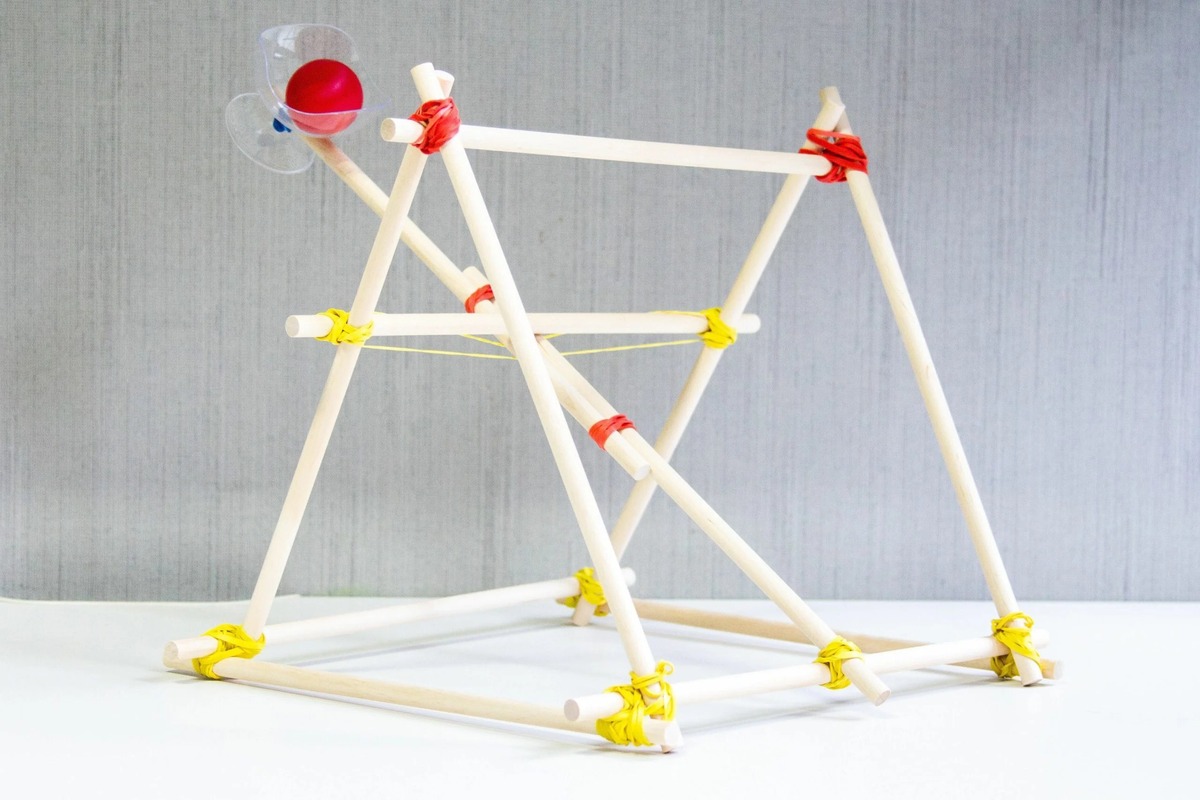
Learn how to create your own DIY catapult with this step-by-step guide. Perfect for DIY & Crafts enthusiasts looking for a fun and educational project.
(Many of the links in this article redirect to a specific reviewed product. Your purchase of these products through affiliate links helps to generate commission for Twigandthistle.com, at no extra cost. Learn more)
Introduction
Welcome to the exciting world of DIY catapults! If you've ever been fascinated by medieval siege weapons or simply love hands-on crafting, then you're in for a treat. In this comprehensive guide, we'll delve into the art of creating your very own mini siege weapon. Whether you're a history enthusiast, a crafty individual, or someone looking for a fun project, building a DIY catapult is a fantastic way to unleash your creativity and learn about physics and engineering concepts in a hands-on manner.
The word "catapult" conjures up images of ancient battles and epic sieges, but fear not – you won't need a castle or a moat to enjoy this project. With some basic materials and a dash of ingenuity, you can construct a miniature version of this iconic weapon right in your own backyard or workshop. Not only is it a great way to spend your time, but it's also an excellent opportunity to learn about mechanics, physics, and problem-solving as you bring this ancient invention to life.
By embarking on this DIY catapult journey, you'll not only gain a deeper understanding of how these fascinating machines work, but you'll also have a blast (pun intended) testing and fine-tuning your creation. Whether you're a student looking for a hands-on science project, a parent seeking a fun and educational activity for your kids, or simply someone with a passion for building and experimenting, this DIY catapult project is sure to ignite your imagination and provide hours of enjoyment.
So, roll up your sleeves, gather your materials, and get ready to embark on an adventure that combines history, engineering, and creativity. Let's catapult into the world of DIY siege weapons and unleash our inner engineers and craftsmen!
Materials Needed
To embark on this thrilling DIY catapult project, you'll need a selection of materials that are readily available at hardware stores, craft shops, or even lying around your home. Here's a comprehensive list of the items you'll require to bring your mini siege weapon to life:
Base Materials:
- Sturdy wooden board or plank for the base
- Strong wooden dowels or rods for the frame
- Wood glue or strong adhesive
- Nails or screws for securing the components
- Small metal washers or nuts for reinforcement
Arm and Launching Mechanism:
- Lightweight yet durable wooden or plastic arm
- Elastic bands or strong rubber bands for the launching mechanism
- Small metal spoon or cup for holding the projectile
- Eye hook or small metal ring for attaching the launching bands
- Small metal or plastic bucket for holding the projectile
Projectiles:
- Small foam or rubber balls for safe testing
- Miniature marshmallows or pom-poms for fun indoor launches
- Lightweight clay balls for outdoor testing
Tools:
- Saw for cutting the wooden components to size
- Hammer for driving in nails or screws
- Drill for creating holes in the wooden pieces
- Sandpaper for smoothing rough edges
- Measuring tape or ruler for precise construction
Optional Decorative Elements:
- Non-toxic paint for adding a splash of color
- Decorative stickers or decals for personalizing your catapult
- Miniature flags or banners for a touch of medieval flair
By gathering these materials, you'll be well-equipped to dive into the exciting process of constructing your very own DIY catapult. With these items at your disposal, you'll soon be on your way to creating a fascinating and functional miniature siege weapon that's bound to impress and entertain.
Step 1: Building the Base
The foundation of any catapult lies in its base, providing stability and support for the entire structure. To begin this exciting DIY project, you'll first focus on constructing the sturdy base that will serve as the platform for your mini siege weapon.
-
Selecting the Base Material: Start by choosing a sturdy wooden board or plank as the foundation for your catapult. Opt for a material that is robust enough to withstand the tension and force exerted during the launching process. A wooden base provides the necessary weight and stability for the catapult while allowing for easy attachment of the frame and arm components.
-
Cutting and Shaping: Using a saw, carefully cut the wooden board to your desired dimensions. A rectangular shape is commonly used for the base, providing ample surface area for stability. Smooth any rough edges with sandpaper to ensure a neat and polished finish.
-
Assembling the Frame: Next, it's time to attach the wooden dowels or rods to the base to form the frame of the catapult. Position the rods at strategic points along the edges of the base, ensuring they are securely attached using wood glue and reinforced with nails or screws. This frame will provide the necessary structure and support for the catapult's arm and launching mechanism.
-
Reinforcement: To further fortify the base and frame, consider adding small metal washers or nuts at the points where the rods meet the base. This reinforcement helps distribute the tension and pressure evenly, enhancing the overall durability of the catapult.
By meticulously crafting a robust and well-structured base, you're laying the groundwork for a successful DIY catapult project. With the base in place, you're now ready to progress to the next thrilling phase of constructing the arm – a pivotal component that will bring your mini siege weapon to life.
Step 2: Constructing the Arm
The arm of a catapult is a crucial component responsible for propelling the projectile through the air. Constructing a well-designed and resilient arm is essential for achieving optimal launching performance. In this step, we'll delve into the intricate process of crafting the arm, ensuring that it is both sturdy and flexible to withstand the forces exerted during the launching phase.
Selecting the Arm Material
The choice of material for the arm plays a pivotal role in determining the catapult's overall strength and functionality. Opt for a lightweight yet durable wooden or plastic arm that can withstand the tension of the launching mechanism while remaining agile enough to facilitate swift projectile release.
Shaping and Refinement
Using a saw, carefully shape the selected material into the desired dimensions for the arm. The arm should be long enough to provide ample leverage for launching, yet not too heavy as to impede its movement. Smooth any rough edges with sandpaper to ensure a sleek and polished finish, minimizing friction during the launching process.
Attaching the Arm to the Base
Position the arm at the designated point on the base, ensuring that it is securely affixed to the frame. Utilize wood glue or a strong adhesive to firmly attach the arm to the base, reinforcing the connection with nails or screws for added stability. The arm should be positioned at an optimal angle to facilitate efficient projectile release and trajectory.
Integrating the Launching Mechanism
As the arm serves as the launching lever, it is essential to integrate the launching mechanism seamlessly. Attach a small metal spoon or cup at the end of the arm to hold the projectile securely. Additionally, affix an eye hook or small metal ring to the base, providing a point for attaching the elastic bands or rubber bands that will power the launching mechanism.
Fine-Tuning and Balancing
Once the arm is in place, conduct thorough testing to ensure that it moves smoothly and freely. Fine-tune the arm's positioning and balance to optimize its range of motion and launching power. A well-constructed and precisely balanced arm is fundamental to the catapult's overall performance and accuracy.
By meticulously crafting and integrating the arm into the catapult's structure, you're one step closer to witnessing the impressive capabilities of your DIY siege weapon. The arm, serving as the powerhouse of the catapult, is a testament to the ingenuity and craftsmanship that goes into creating this remarkable medieval-inspired creation.
Step 3: Attaching the Arm to the Base
Attaching the arm to the base is a critical phase in the construction of your DIY catapult. This step involves securing the arm, which serves as the launching lever, to the base in a manner that ensures stability, precision, and optimal functionality. The seamless integration of the arm into the catapult's structure is essential for achieving smooth and powerful projectile launches.
To begin, carefully position the arm at the designated point on the base, taking into account the desired angle and trajectory for launching projectiles. The arm should be aligned to provide the necessary leverage and range of motion while maintaining a secure attachment to the base.
Utilize a high-quality wood glue or a strong adhesive to firmly affix the arm to the base, ensuring a robust and enduring connection. The adhesive should be applied generously to create a solid bond between the arm and the base, minimizing any potential for movement or detachment during the catapult's operation.
In addition to the adhesive, reinforce the attachment by securing the arm to the base with nails or screws. This dual method of attachment enhances the overall stability of the arm, preventing any potential wobbling or displacement during the catapult's launching process.
As you affix the arm to the base, pay close attention to the alignment and positioning to guarantee that the arm is centered and balanced. A well-aligned arm ensures that the launching mechanism operates smoothly and efficiently, maximizing the catapult's launching power and accuracy.
Once the arm is securely attached to the base, conduct thorough checks to verify the stability and integrity of the connection. Gently test the arm's movement to ensure that it pivots smoothly and freely, without any signs of instability or misalignment.
By meticulously executing the process of attaching the arm to the base, you are laying the groundwork for a robust and reliable catapult structure. The successful integration of the arm into the base sets the stage for the next phase of adding the launching mechanism, bringing you one step closer to witnessing the impressive capabilities of your DIY siege weapon.
Step 4: Adding the Launching Mechanism
The addition of the launching mechanism marks a pivotal stage in the construction of your DIY catapult, as it empowers the siege weapon to propel projectiles with precision and force. This step involves integrating the essential components that will harness potential energy and convert it into kinetic energy, ultimately launching the projectiles into the air. The seamless incorporation of the launching mechanism is crucial for achieving optimal performance and unlocking the full potential of your mini siege weapon.
Begin by attaching a small metal spoon or cup to the end of the arm, serving as the receptacle for holding the projectile. The spoon or cup should be securely affixed to the arm, ensuring that it can contain the projectile and release it swiftly and smoothly upon launch. This component plays a pivotal role in facilitating the controlled release of the projectile, dictating its trajectory and distance.
Next, affix an eye hook or small metal ring to the base at a strategic point, providing a secure anchor for attaching the elastic bands or rubber bands that will power the launching mechanism. The bands should be attached to the arm near the spoon or cup, creating tension that will store potential energy as the arm is pulled back and released during the launching process.
Carefully select and attach the elastic bands or rubber bands, ensuring that they are taut and capable of storing sufficient potential energy to propel the projectile. The bands should be positioned to provide the necessary tension for a powerful launch while allowing for smooth and controlled release when the arm is triggered.
As the launching mechanism takes shape, conduct thorough testing to ensure that the bands are securely attached and capable of storing and releasing energy effectively. Fine-tune the tension of the bands to achieve the desired launching power, taking into account the weight and aerodynamics of the projectiles to be launched.
By meticulously integrating the launching mechanism into your DIY catapult, you are harnessing the principles of physics and engineering to create a functional and captivating siege weapon. The successful addition of the launching mechanism sets the stage for the final phase of testing and adjusting, where you will witness the impressive capabilities of your handcrafted mini catapult in action.
Step 5: Testing and Adjusting
With the construction of your DIY catapult nearing completion, it's time to embark on the exhilarating phase of testing and adjusting. This pivotal step involves putting your mini siege weapon through its paces, fine-tuning its components, and optimizing its performance to achieve precise and powerful projectile launches.
To commence the testing phase, gather a selection of projectiles suited for your catapult, such as small foam or rubber balls for safe indoor testing, miniature marshmallows or pom-poms for entertaining launches, or lightweight clay balls for outdoor experimentation. These projectiles will allow you to gauge the catapult's launching capabilities while ensuring safety and enjoyment during the testing process.
Position your DIY catapult in an open and clear space, ensuring that there are no obstructions or hazards in the vicinity. This provides a safe and unobstructed environment for conducting the initial test launches and making necessary adjustments to the catapult's components.
Carefully load the chosen projectile into the spoon or cup at the end of the catapult's arm, ensuring that it is securely positioned for launch. With the projectile in place, pull back the arm to create tension in the launching mechanism, harnessing potential energy that will be released upon launch.
Release the arm and observe the trajectory and distance covered by the launched projectile. Take note of the launching power, accuracy, and any potential issues such as misfires or instability in the catapult's components. This initial test launch serves as a baseline for evaluating the catapult's performance and identifying areas for improvement.
Based on the observations from the initial test launch, make necessary adjustments to the catapult's components. This may involve fine-tuning the tension of the launching bands, optimizing the positioning of the arm, or reinforcing the base and frame for enhanced stability. Iteratively test and adjust the catapult, refining its components to achieve optimal launching power, accuracy, and reliability.
As you continue to test and adjust your DIY catapult, take the opportunity to engage in hands-on experimentation and problem-solving. Observe the impact of various adjustments on the catapult's performance, fostering a deeper understanding of physics and mechanics while honing your skills as a craftsman and engineer.
By meticulously testing and adjusting your DIY catapult, you are not only refining its functionality but also gaining valuable insights into the principles of engineering and design. This iterative process of experimentation and refinement culminates in the transformation of a collection of components into a fully functional and captivating siege weapon, ready to unleash its impressive capabilities with precision and power.
Conclusion
In conclusion, the journey of constructing your very own DIY catapult has been a remarkable fusion of history, engineering, and hands-on creativity. From the initial selection of materials to the meticulous integration of the launching mechanism, every step has been a testament to the ingenuity and craftsmanship that goes into creating this captivating mini siege weapon.
As you reflect on the process, you've not only gained practical insights into the mechanics of catapults but also delved into the realms of physics and engineering. The careful selection and shaping of materials, the precise alignment of components, and the iterative process of testing and adjusting have provided a hands-on education in fundamental principles that underpin the functioning of this ancient yet timeless invention.
Beyond the technical aspects, the construction of a DIY catapult has been a journey of creativity and imagination. The opportunity to personalize and decorate your siege weapon, whether with a splash of color, decorative embellishments, or a touch of medieval flair, has added a unique and personal dimension to your creation.
Moreover, the testing and adjusting phase has not only honed the catapult's launching capabilities but has also fostered a spirit of experimentation and problem-solving. Each adjustment made, each projectile launched, has been a step towards refining the catapult's performance, fostering a deeper understanding of the interplay between tension, release, and trajectory.
As you stand on the brink of witnessing the impressive capabilities of your handcrafted mini catapult, you are not merely a craftsman but an engineer, an experimenter, and a creator. The culmination of this project is not just a functional siege weapon but a testament to the power of hands-on learning, the joy of creation, and the thrill of bringing history to life.
So, as you prepare to unleash the power of your DIY catapult, remember that you've not only built a remarkable creation but have also embarked on a journey of discovery, learning, and innovation. Whether it's for educational purposes, a fun family project, or simply a testament to your passion for hands-on crafting, your DIY catapult stands as a testament to the timeless allure of creating something extraordinary with your own hands.