
Home>Create & Decorate>DIY & Crafts>DIY End Table: How To Create A Stylish And Functional Piece For Your Living Space
DIY & Crafts
DIY End Table: How To Create A Stylish And Functional Piece For Your Living Space
Published: May 9, 2024

Senior Editor in Create & Decorate, Kathryn combines traditional craftsmanship with contemporary trends. Her background in textile design and commitment to sustainable crafts inspire both content and community.
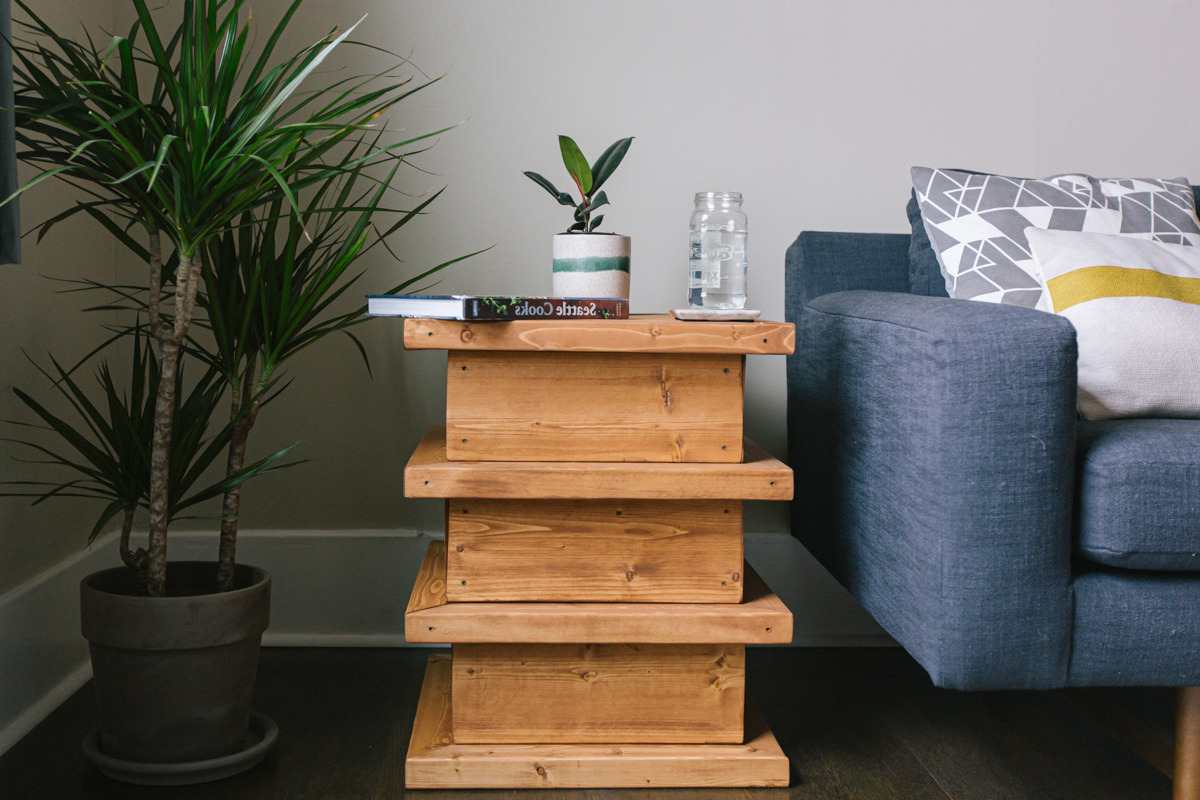
Learn how to make a stylish and functional DIY end table for your living space with our easy-to-follow guide. Perfect for DIY & Crafts enthusiasts!
(Many of the links in this article redirect to a specific reviewed product. Your purchase of these products through affiliate links helps to generate commission for Twigandthistle.com, at no extra cost. Learn more)
Introduction
Are you looking to add a personal touch to your living space while also enhancing its functionality? Creating your own DIY end table can be a rewarding and budget-friendly project that allows you to showcase your creativity and craftsmanship. In this article, we will guide you through the process of designing, constructing, and styling a stylish and functional end table that will complement your home decor. Whether you're a seasoned DIY enthusiast or a beginner looking to embark on your first home improvement project, this step-by-step guide will help you bring your vision to life. So, roll up your sleeves and get ready to dive into the world of DIY furniture making!
Choosing the Right Materials
When embarking on a DIY end table project, selecting the right materials is crucial for ensuring the durability and aesthetic appeal of the final piece. Here are some key considerations to keep in mind when choosing materials for your DIY end table:
1. Wood Selection
Opt for high-quality, sturdy wood such as oak, maple, or walnut for the tabletop and legs. These woods are not only durable but also offer a timeless and elegant look that can complement various interior styles.
2. Hardware
Selecting the right hardware, such as screws, brackets, and fasteners, is essential for ensuring the structural integrity of your end table. Choose hardware that is sturdy and corrosion-resistant to guarantee the longevity of your creation.
3. Decorative Elements
Consider incorporating decorative elements such as metal accents, glass inserts, or intricate carvings to add visual interest to your end table. These details can elevate the overall design and make your DIY piece stand out.
4. Finishing Materials
When it comes to finishing materials, opt for high-quality wood stains, paints, or varnishes to protect the wood and enhance its natural beauty. Additionally, consider using protective pads or glides for the table legs to prevent damage to your floors.
By carefully selecting the right materials, you can ensure that your DIY end table not only looks stunning but also stands the test of time. Now that you've chosen the perfect materials, it's time to move on to the next step: designing your end table.
Designing Your End Table
Designing your DIY end table is where you can let your creativity run wild. Whether you prefer a sleek and modern look or a rustic and charming vibe, the design phase is your opportunity to tailor the end table to your personal style and the existing decor of your living space. Here are some key steps to consider when designing your end table:
-
Functional Considerations: Before diving into the aesthetics, consider the functionality of your end table. Will it primarily serve as a surface for placing drinks and snacks, or do you need additional storage space for books and magazines? Determining the intended use will help you design a table that meets your specific needs.
-
Dimensions and Proportions: Take precise measurements to determine the ideal height, width, and depth of your end table. Consider the scale of your furniture and the available space to ensure that the table harmonizes with its surroundings.
-
Style and Aesthetic: Choose a design style that complements your existing decor. Whether it's sleek and minimalist, industrial and rugged, or ornate and traditional, aligning the style of your end table with the overall aesthetic of the room will create a cohesive look.
-
Sketch or Mockup: Create a rough sketch or a digital mockup of your design to visualize the final product. This will help you refine the details and make any necessary adjustments before moving on to the construction phase.
-
Incorporate Personal Touches: Consider adding personal touches such as custom engravings, inlaid patterns, or unique hardware to make your end table truly one-of-a-kind.
By carefully considering these design elements, you can create a blueprint for your DIY end table that reflects your personal style and meets your practical needs. With the design phase complete, you're ready to move on to the exciting part: bringing your vision to life through the construction process.
Step-by-Step Construction Process
Now that you have a clear design in mind, it's time to roll up your sleeves and dive into the construction process. Follow these step-by-step instructions to bring your DIY end table to life:
-
Prepare Your Workspace: Set up a well-lit and spacious work area where you can comfortably assemble your end table. Ensure that you have all the necessary tools and materials within reach.
-
Cutting the Wood: Using a saw, carefully cut the wood according to your precise measurements. Whether it's the tabletop, legs, or additional shelves, accuracy is key to achieving a professional-looking end result.
-
Assemble the Frame: Begin by assembling the frame of the end table. This may involve attaching the legs to the tabletop or creating a sturdy base for the table. Use clamps to hold the pieces together securely as you work.
-
Joinery and Fastening: Depending on your design, you may need to employ joinery techniques such as mortise and tenon, dowel joints, or pocket hole screws to securely fasten the components together. Take your time to ensure strong and stable connections.
-
Add Additional Features: If your design includes shelves, drawers, or other features, now is the time to incorporate them into the structure. Pay attention to alignment and ensure that everything fits seamlessly.
-
Sand and Smooth: Once the basic structure is assembled, use sandpaper to smooth out any rough edges and surfaces. This step is crucial for achieving a professional finish and ensuring that your end table is safe to touch.
-
Apply Finish: Whether you prefer a natural wood finish, a pop of color, or a protective sealant, now is the time to apply the chosen finish to your end table. Follow the manufacturer's instructions and allow sufficient drying time.
-
Attach Hardware: If your design includes hardware such as drawer pulls or decorative accents, carefully attach them to the end table. Pay attention to alignment and symmetry for a polished look.
-
Final Inspection: Once the construction and finishing touches are complete, inspect the end table for any imperfections or areas that may need additional attention. Make any necessary adjustments to ensure a flawless final product.
By following these step-by-step instructions, you can confidently navigate the construction process and create a stylish and functional DIY end table that adds a personal touch to your living space. With the construction phase complete, it's time to add the finishing touches to elevate the overall look of your creation.
Finishing Touches
After completing the construction phase of your DIY end table, it's time to add the finishing touches that will elevate the overall look and ensure that your creation is ready to take its place in your living space. Here are the essential steps to consider when adding the final details to your end table:
-
Final Sanding: Before applying any finish, give your end table a final sanding to ensure that the surface is smooth and free of any imperfections. Use fine-grit sandpaper to achieve a silky texture that invites touch.
-
Stain or Paint Application: Depending on your design preferences, apply a wood stain or paint to enhance the appearance of your end table. Stains can bring out the natural beauty of the wood grain, while paint allows you to add a pop of color that complements your decor.
-
Protective Finish: Once the stain or paint has dried, apply a protective finish such as polyurethane, lacquer, or wax to safeguard the wood and enhance its durability. This step is crucial for protecting your end table from everyday wear and tear.
-
Polishing and Buffing: If you've opted for a glossy finish, use a polishing compound and a soft cloth to buff the surface of your end table. This will create a lustrous shine and a professional-looking finish.
-
Reinforcement and Stability: Inspect the structural integrity of your end table and reinforce any joints or connections if necessary. Ensuring that your end table is stable and sturdy is essential for its long-term functionality.
-
Add Protective Pads: To prevent scratches and damage to your floors, attach adhesive protective pads to the bottom of the table legs. This simple addition will help preserve both your end table and your flooring.
-
Final Inspection: Take a moment to carefully inspect every aspect of your end table, from the finish to the hardware. Look for any overlooked imperfections and make any final adjustments to ensure that your end table meets your standards.
By paying attention to these finishing touches, you can transform your DIY end table into a polished and functional piece of furniture that seamlessly integrates into your living space. With the construction and finishing phases complete, it's time to explore how you can style and decorate your newly crafted end table to showcase its beauty and functionality.
Styling and Decorating Your DIY End Table
Now that your DIY end table is complete, it's time to showcase its beauty and functionality by styling and decorating it to complement your living space. Here are some creative and practical tips for styling and decorating your newly crafted end table:
-
Functional Arrangement: Consider the primary function of your end table and arrange it accordingly. If it's intended for holding reading materials, a table lamp, or decorative items, ensure that there is ample space for these essentials.
-
Balance and Symmetry: Create visual harmony by incorporating balanced elements on the end table. For example, if you have a lamp on one side, balance it with a stack of books or a decorative object on the other side.
-
Personal Touches: Infuse your personality into the styling by adding personal touches such as framed photos, small potted plants, or unique trinkets that reflect your interests and experiences.
-
Layering: Experiment with layering different elements to add depth and visual interest. Consider placing a decorative tray or a small basket on the table to contain smaller items and create dimension.
-
Mixing Materials: Introduce a variety of materials such as glass, metal, or ceramic to add texture and diversity to the tabletop. This can create a visually dynamic and inviting display.
-
Seasonal Decor: Change up the decor on your end table to reflect the seasons or holidays. For example, during the festive season, incorporate seasonal accents such as candles, ornaments, or themed decor to add a touch of celebration.
-
Functional Storage: If your end table includes shelves or drawers, utilize them for practical storage. Stow away remote controls, coasters, or other small items to keep the tabletop clutter-free.
-
Artful Lighting: If space allows, consider adding a stylish table lamp to provide both functional lighting and a decorative element. The right lamp can enhance the ambiance of the room and serve as a focal point on the end table.
-
Color Coordination: Coordinate the decor on your end table with the color scheme of the room. Whether it's through the use of complementary or contrasting colors, a cohesive color palette can tie the entire space together.
-
Showcasing Artwork: Display small pieces of artwork or sculptures on the end table to create a mini gallery. This can be a great way to showcase your favorite art pieces and add a touch of sophistication to the space.
By incorporating these styling and decorating tips, you can transform your DIY end table into a stylish and functional focal point in your living space. Whether it's in the living room, bedroom, or any other area, your end table will not only serve a practical purpose but also reflect your unique style and creativity.
Conclusion
Congratulations on completing your journey of creating a stylish and functional DIY end table! By following the step-by-step guide provided in this article, you have not only honed your woodworking skills but also added a personalized touch to your living space. Your DIY end table is a testament to your creativity and craftsmanship, and it is sure to become a cherished piece of furniture in your home. As you admire your handiwork, take pride in the fact that you have not only saved money by crafting your own furniture but have also tailored the design to perfectly suit your needs and style. Whether you're a seasoned DIY enthusiast or a beginner, this project has allowed you to unleash your creativity and make a meaningful addition to your home. As you enjoy the functionality and beauty of your DIY end table, let it serve as a reminder of the satisfaction and sense of accomplishment that comes with creating something with your own hands. Cheers to your DIY success and the stylish new addition to your living space!