
Home>Home & Furniture>Roof>How To Build A Pitched Roof Frame
Roof
How To Build A Pitched Roof Frame
Published: March 6, 2024
Editor-in-Chief with a decade in home renovation and a passion for vintage furniture. Diane is known for her weekend treasure hunts at flea markets, enriching our content with unique style insights.
Learn how to build a sturdy and durable pitched roof frame for your construction project with our comprehensive guide. Expert tips and techniques for constructing a reliable roof.
(Many of the links in this article redirect to a specific reviewed product. Your purchase of these products through affiliate links helps to generate commission for Twigandthistle.com, at no extra cost. Learn more)
Introduction
Are you considering adding a new structure to your property or perhaps replacing an old roof? Building a pitched roof frame is a fundamental skill for any DIY enthusiast or homeowner looking to take on a construction project. Whether it's for a new shed, a garage, or even a house extension, understanding how to build a pitched roof frame is essential. In this guide, we will walk you through the step-by-step process of constructing a sturdy and reliable pitched roof frame for your next project. So, grab your tools and let's get started!
Understanding the Basics of Pitched Roof Frames
A pitched roof, also known as a sloping roof, is a popular choice for many structures due to its classic and timeless aesthetic appeal. It consists of two main components: rafters and a ridge board. The rafters are the inclined beams that support the roof, while the ridge board runs horizontally at the peak of the roof, connecting the upper ends of the rafters. The angle of the rafters, known as the pitch, determines the steepness of the roof. The pitch not only affects the appearance of the roof but also its ability to shed water and withstand various weather conditions.
When constructing a pitched roof frame, it's crucial to consider the pitch, span, and load-bearing capacity. The pitch of the roof will influence the design and size of the rafters, as well as the type of materials required. Additionally, the span, or the distance between the walls that the roof will cover, will determine the length of the rafters. Understanding these basic principles is essential for creating a structurally sound and durable pitched roof frame.
In addition to the pitch, span, and load-bearing capacity, it's important to consider local building codes and regulations when designing and building a pitched roof frame. These regulations may dictate specific requirements for factors such as snow load, wind resistance, and overall structural integrity. Adhering to these guidelines will ensure that your roof meets safety standards and is built to last.
By familiarizing yourself with the fundamentals of pitched roof frames, you'll be better equipped to plan and execute your construction project with confidence. Whether you're a seasoned DIY enthusiast or a first-time builder, having a solid understanding of the basics will set the foundation for a successful roof construction endeavor.
Tools and Materials Needed
Before embarking on the construction of a pitched roof frame, it's essential to gather the necessary tools and materials to ensure a smooth and efficient building process. Here's a comprehensive list of the tools and materials you'll need for this project:
Tools:
- Circular Saw: For cutting the rafters and ridge board to the required dimensions.
- Power Drill: To secure the rafters, ridge board, and sheathing in place.
- Hammer: For driving nails and securing components.
- Tape Measure: To accurately measure and mark the dimensions of the roof components.
- Speed Square: For marking and measuring angles, ensuring precise cuts.
- Ladder: To access the roof safely during construction.
- Chalk Line: For creating straight and level guidelines on the roof surface.
- Safety Gear: Including gloves, goggles, and a hard hat for personal protection.
Materials:
- Lumber: Select high-quality, pressure-treated lumber for the rafters, ridge board, and bracing.
- Roofing Nails or Screws: To secure the components together.
- Metal Brackets and Straps: For additional structural support and connections.
- Roof Sheathing: Choose plywood or oriented strand board (OSB) for the roof deck.
- Roofing Material: Whether it's asphalt shingles, metal panels, or another roofing material of your choice.
- Wood Sealer or Paint: To protect the lumber from moisture and prolong its lifespan.
- Roofing Felt or Underlayment: Provides an additional layer of protection against water infiltration.
By ensuring that you have all the necessary tools and materials on hand, you'll be well-prepared to tackle each step of the pitched roof frame construction process. Having the right equipment and supplies at your disposal will contribute to the efficiency and success of your roofing project.
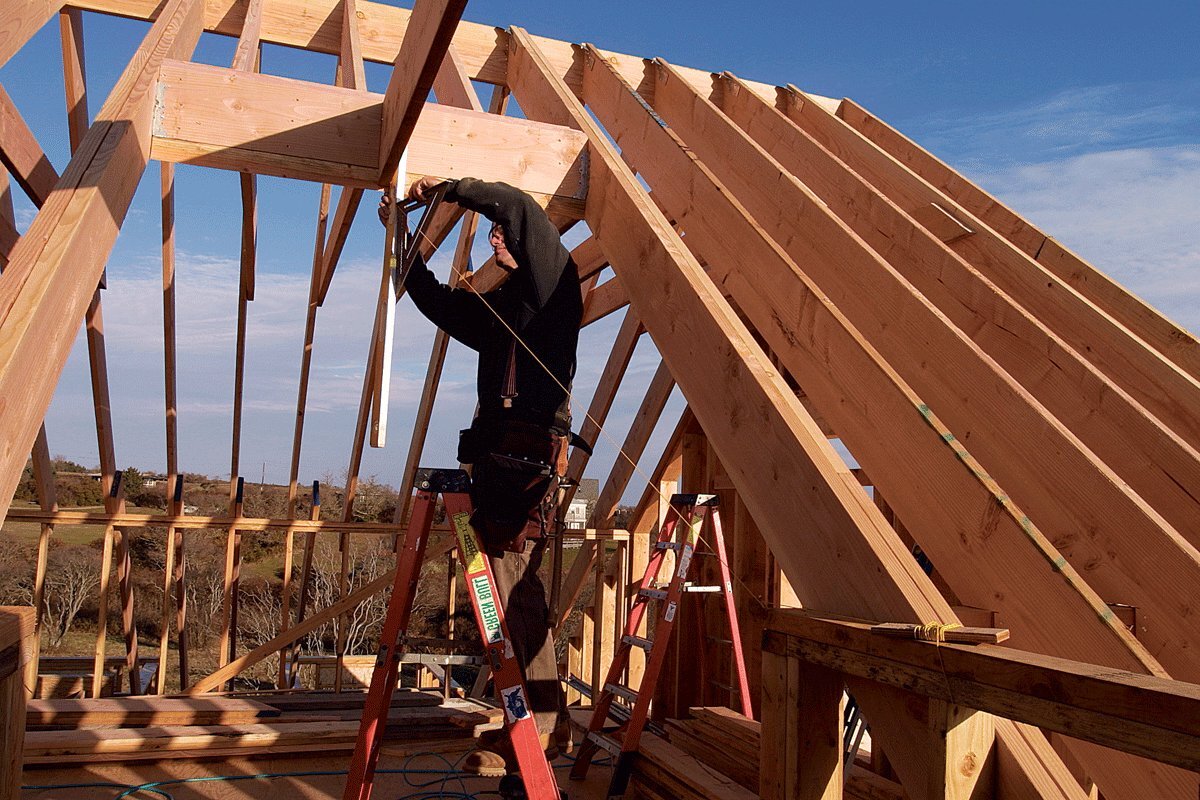
Step 1: Measuring and Marking the Roof
Before diving into the construction of a pitched roof frame, the initial step involves precise measurement and marking of the roof structure. This critical phase sets the foundation for the entire roofing project and ensures that the subsequent steps proceed smoothly and accurately.
1.1 Assessing the Roof Dimensions
Begin by measuring the span and rise of the roof to determine the required length and angle of the rafters. The span refers to the horizontal distance between the walls that the roof will cover, while the rise indicates the vertical distance from the top of the wall to the peak of the roof. These measurements are essential for calculating the length and pitch of the rafters.
1.2 Determining Rafter Length and Pitch
Using the measured span and rise, calculate the length of the rafters and the desired pitch of the roof. The pitch, typically expressed as a ratio (e.g., 4:12), represents the incline of the roof and influences the angle at which the rafters will be cut. Ensure accuracy in these calculations, as they directly impact the structural integrity and aesthetic appeal of the roof.
1.3 Marking the Rafters
With the rafter dimensions and pitch determined, mark the precise angles and lengths on the lumber using a speed square and tape measure. Clearly indicate the plumb cut (top end) and bird's mouth (bottom end) of each rafter to facilitate proper assembly and installation.
1.4 Transferring Measurements to the Ridge Board
Once the rafters are marked and cut, transfer the corresponding measurements to the ridge board, ensuring alignment and symmetry. This step is crucial for ensuring that the rafters will fit securely and uniformly along the ridge board, forming a stable and balanced roof structure.
1.5 Verifying Accuracy
Before proceeding to the next phase, double-check all measurements and markings to confirm their accuracy. Precision at this stage is paramount, as any errors in measurement or marking can lead to inconsistencies and complications during the assembly and installation of the roof components.
By meticulously measuring and marking the roof according to these guidelines, you'll establish a solid framework for the subsequent stages of constructing a pitched roof frame. This meticulous attention to detail at the outset will contribute to the overall stability, functionality, and visual appeal of the completed roof structure.
Step 2: Cutting and Assembling the Rafters
Once the roof dimensions have been accurately measured and marked, the next crucial step in building a pitched roof frame involves cutting and assembling the rafters. The rafters play a pivotal role in supporting the roof structure and distributing its weight evenly, making precise cutting and assembly essential for the integrity of the entire roof.
2.1 Cutting the Rafters
Using the marked measurements as a guide, carefully cut the rafters to the specified dimensions using a circular saw. Pay close attention to the angles and cuts, ensuring that they align with the calculated pitch and design of the roof. The accuracy of these cuts directly impacts the stability and alignment of the roof frame.
2.2 Creating Bird's Mouth Cuts
At the lower end of each rafter, create bird's mouth cuts to allow for a secure and flush fit over the wall plates. These cuts are essential for ensuring proper weight distribution and load-bearing capacity, as they enable the rafters to sit firmly on the supporting walls.
2.3 Assembling the Rafters
Once the rafters are cut to size and the necessary notches are made, proceed to assemble them on the ground before lifting them into position. Align the rafters according to their designated locations on the roof, ensuring that they are evenly spaced and parallel to one another. This pre-assembly step streamlines the installation process and minimizes potential errors during roof construction.
2.4 Installing Rafter Bracing
To reinforce the structural integrity of the rafters, install bracing between them to prevent lateral movement and maintain their position. Bracing also helps distribute the load more evenly across the rafters, enhancing the overall stability and resilience of the roof frame.
2.5 Securing the Rafters
Using appropriate fasteners such as nails or screws, securely attach the rafters to the ridge board and wall plates. Ensure that each rafter is firmly anchored in place, providing a solid foundation for the roof structure.
By meticulously executing the cutting and assembly of the rafters, you lay the groundwork for a robust and dependable pitched roof frame. Attention to detail during this phase is crucial, as it directly influences the structural integrity and longevity of the completed roof.
Step 3: Installing the Ridge Board
The installation of the ridge board is a pivotal step in the construction of a pitched roof frame, as it serves as the central point of connection for the rafters, providing stability and support to the entire roof structure.
3.1 Positioning the Ridge Board
Begin by positioning the ridge board at the peak of the roof, ensuring that it is centered and aligned with the markings and measurements previously established. The ridge board should run perpendicular to the rafters, extending along the length of the roof and serving as a crucial anchor point for the rafters.
3.2 Securing the Ridge Board
Once the ridge board is correctly positioned, secure it in place by attaching it to the upper ends of the rafters. Use appropriate fasteners, such as nails or screws, to firmly anchor the ridge board to each rafter, ensuring a secure and stable connection. It is essential to verify that the ridge board is level and straight, as any deviations can impact the overall alignment and integrity of the roof frame.
3.3 Adding Structural Support
To enhance the structural integrity of the ridge board and distribute the load evenly, consider adding additional support in the form of braces or collar ties. These components help prevent the ridge board from sagging under the weight of the roof and reinforce its ability to withstand external forces, such as wind uplift.
3.4 Ensuring Alignment and Symmetry
Verify that the ridge board is aligned symmetrically with the centerline of the roof, maintaining uniform spacing between the rafters on either side. This alignment is crucial for the overall balance and stability of the roof structure, ensuring that the load is evenly distributed and supported across the entire frame.
3.5 Verifying Stability
Before proceeding to the next phase of roof construction, thoroughly inspect the installed ridge board to confirm its stability and secure attachment to the rafters. Any signs of instability or misalignment should be addressed promptly to prevent potential complications during the subsequent stages of the roofing process.
By meticulously following these steps for installing the ridge board, you establish a solid foundation for the pitched roof frame, ensuring that the roof structure is well-supported and capable of withstanding the elements with resilience and durability.
Step 4: Attaching the Rafters to the Ridge Board
Attaching the rafters to the ridge board is a critical phase in the construction of a pitched roof frame, as it establishes the structural integrity and stability of the entire roof structure. Properly securing the rafters to the ridge board ensures that the weight of the roof is evenly distributed and supported, contributing to the overall resilience and longevity of the roof.
4.1 Aligning the Rafters
Before attaching the rafters to the ridge board, ensure that they are aligned and positioned correctly according to the predetermined markings and measurements. Proper alignment is essential for maintaining the intended pitch and symmetry of the roof, preventing potential issues during the attachment process.
4.2 Securing the Rafters
Using appropriate fasteners, such as nails or screws, securely attach the lower ends of the rafters to the ridge board. Ensure that each rafter is firmly anchored in place, providing a solid and reliable connection that can withstand the forces exerted on the roof. The use of metal brackets or straps may also be employed to reinforce the attachment and enhance the structural integrity of the roof frame.
4.3 Verifying Stability
After attaching the rafters to the ridge board, carefully inspect the connections to verify their stability and strength. Any signs of instability or inadequate attachment should be addressed promptly to prevent potential issues during the subsequent phases of roof construction.
4.4 Ensuring Uniform Spacing
Maintain uniform spacing between the rafters along the ridge board, ensuring that they are evenly distributed and aligned. Consistent spacing contributes to the balanced distribution of the roof load and supports the overall stability and functionality of the roof structure.
4.5 Adding Additional Support
Consider adding collar ties or other forms of bracing to reinforce the connection between the rafters and the ridge board. These additional supports help distribute the load more evenly and prevent potential movement or displacement of the rafters, enhancing the overall resilience of the roof frame.
By meticulously following these steps for attaching the rafters to the ridge board, you establish a robust and dependable connection that forms the backbone of the pitched roof frame. Attention to detail during this phase is crucial, as it directly influences the structural integrity and longevity of the completed roof.
Step 5: Adding Support and Bracing
Once the rafters are securely attached to the ridge board, the next crucial step in building a pitched roof frame involves adding support and bracing to enhance the overall stability and resilience of the roof structure.
5.1 Installing Collar Ties
Consider installing collar ties, also known as rafter ties, to connect opposing rafters within the roof frame. These horizontal members are positioned higher up on the rafters and serve to prevent the outward thrust exerted by the roof, thereby resisting the potential spreading of the walls. Collar ties effectively work to maintain the structural integrity of the roof and prevent the rafters from spreading apart under the weight and forces acting upon the roof.
5.2 Adding Rafter Bracing
Incorporate diagonal bracing between the rafters to further reinforce the roof structure and minimize lateral movement. Rafter bracing helps distribute the load more evenly across the rafters, reducing the risk of sway and enhancing the overall stability of the roof frame. By strategically placing diagonal bracing, you can effectively counteract the forces that may cause the roof to shift or deform, ensuring a robust and durable construction.
5.3 Securing Support Components
Using appropriate fasteners, such as nails or screws, securely attach the collar ties and bracing to the rafters and other structural elements of the roof frame. It is essential to ensure that these support components are firmly anchored in place, providing additional reinforcement to the roof structure and contributing to its ability to withstand external forces and loads.
5.4 Verifying Alignment and Symmetry
After adding support and bracing components, carefully inspect the roof frame to verify that the collar ties and bracing are aligned symmetrically and positioned according to the predetermined design. Uniform placement and secure attachment of these support elements are crucial for maintaining the stability and balance of the roof structure, ensuring that it can effectively resist the various forces it may encounter.
5.5 Enhancing Structural Resilience
By incorporating collar ties and rafter bracing, you significantly enhance the structural resilience and load-bearing capacity of the pitched roof frame. These support components work in tandem to fortify the roof structure, mitigating the potential for movement, deformation, and instability, ultimately contributing to a durable and dependable roof that can withstand the test of time.
Incorporating these support and bracing elements into the pitched roof frame reinforces its ability to withstand external forces and loads, ensuring a robust and resilient construction that provides long-term protection and structural integrity.
Step 6: Installing Roof Sheathing
The installation of roof sheathing is a pivotal step in the construction of a pitched roof frame, as it provides a solid base for the roofing material and contributes to the overall stability and integrity of the roof structure.
6.1 Preparing the Roof Surface
Before installing the roof sheathing, ensure that the roof surface is clean, level, and free of any debris or protrusions. This preparation is essential for creating a smooth and uniform substrate for the sheathing, promoting proper adhesion and structural support.
6.2 Selecting the Sheathing Material
Choose the appropriate sheathing material, such as plywood or oriented strand board (OSB), based on the specific requirements of your roofing project. Consider factors such as the anticipated roof load, local building codes, and the desired aesthetic and functional characteristics of the sheathing material.
6.3 Cutting and Fitting the Sheathing
Using the measurements and dimensions of the roof, carefully cut the sheathing panels to fit the surface, ensuring a snug and precise fit. Pay attention to the alignment and orientation of the sheathing panels, aiming to minimize gaps and overlaps while maximizing coverage and support.
6.4 Securing the Sheathing
Once the sheathing panels are cut to size, securely attach them to the rafters and roof trusses using appropriate fasteners, such as nails or screws. Follow the specified nailing patterns and spacing guidelines to ensure that the sheathing is firmly anchored and provides uniform support across the entire roof surface.
6.5 Overlapping and Sealing Joints
When installing multiple sheathing panels, ensure that they overlap according to the manufacturer's recommendations, creating a continuous and watertight surface. Seal the joints between the panels using an appropriate sealant or flashing tape to prevent water infiltration and enhance the overall weather resistance of the roof.
6.6 Verifying Structural Integrity
After the sheathing is installed, carefully inspect the roof surface to verify its structural integrity and uniform attachment. Address any loose or improperly secured sheathing panels to ensure a solid and reliable substrate for the final roofing material.
By meticulously following these steps for installing roof sheathing, you establish a sturdy and dependable foundation for the pitched roof frame, ensuring that the roof structure is well-supported and capable of withstanding the elements with resilience and durability.
Conclusion
In conclusion, constructing a pitched roof frame is a fundamental aspect of building or renovating a structure, and mastering this skill empowers DIY enthusiasts and homeowners to take on roofing projects with confidence. By understanding the basics of pitched roof frames, gathering the necessary tools and materials, and following the step-by-step process outlined in this guide, individuals can create a sturdy and reliable roof structure that enhances the functionality and aesthetic appeal of their properties.
From measuring and marking the roof to cutting and assembling the rafters, installing the ridge board, adding support and bracing, and finally, installing roof sheathing, each phase of the construction process plays a crucial role in shaping a resilient and durable pitched roof frame. Attention to detail, precision in measurements, and the use of quality materials and fasteners are essential elements that contribute to the overall success of the project.
By meticulously executing each step and adhering to best practices in roof construction, individuals can create a pitched roof frame that not only provides protection from the elements but also adds value to the property. Whether it's for a new shed, a garage, or a house extension, a well-constructed pitched roof frame stands as a testament to the craftsmanship and dedication of the builder.
In the end, the completion of a pitched roof frame marks the culmination of hard work, skill, and attention to detail, resulting in a structure that offers shelter, security, and enduring quality. With the knowledge and expertise gained from this guide, individuals are well-equipped to embark on their own pitched roof construction projects, creating functional and visually appealing additions to their homes or properties.