
Home>Create & Decorate>DIY & Crafts>How To Make A Skateboard Deck
DIY & Crafts
How To Make A Skateboard Deck
Published: February 23, 2024

Senior Editor in Create & Decorate, Kathryn combines traditional craftsmanship with contemporary trends. Her background in textile design and commitment to sustainable crafts inspire both content and community.
Learn how to make your own skateboard deck with our step-by-step DIY guide. Get creative with our crafting tips and tricks. Perfect for DIY & Crafts enthusiasts!
(Many of the links in this article redirect to a specific reviewed product. Your purchase of these products through affiliate links helps to generate commission for Twigandthistle.com, at no extra cost. Learn more)
Introduction
So, you've decided to take on the exciting challenge of making your own skateboard deck. Congratulations! Crafting your own skateboard deck is not only a rewarding and creative endeavor, but it also allows you to customize the design and dimensions to perfectly suit your style and preferences. Whether you're a seasoned skater or a DIY enthusiast looking for a new project, making a skateboard deck from scratch is a fantastic way to express your creativity and passion for skateboarding.
By crafting your own skateboard deck, you have the opportunity to tailor every aspect of the board to your liking, from the type of wood used to the shape and design. This hands-on approach not only results in a unique and personalized skateboard, but it also provides a deeper understanding of the construction and functionality of skateboards.
Throughout this guide, you'll learn the step-by-step process of creating a skateboard deck, from selecting the right materials to shaping the board and adding your own custom graphics. Whether you're aiming for a classic, retro-inspired design or a modern, artistic flair, the possibilities are endless when it comes to crafting your own skateboard deck.
So, roll up your sleeves, gather your materials, and get ready to embark on an exciting journey of creativity and craftsmanship. Let's dive into the process of making a skateboard deck that reflects your individuality and passion for skateboarding.
Materials and Tools Needed
Before diving into the process of making a skateboard deck, it's essential to gather the necessary materials and tools. Ensuring that you have the right supplies will set the stage for a successful and enjoyable crafting experience. Here's a comprehensive list of the materials and tools you'll need to create your own skateboard deck:
Materials:
-
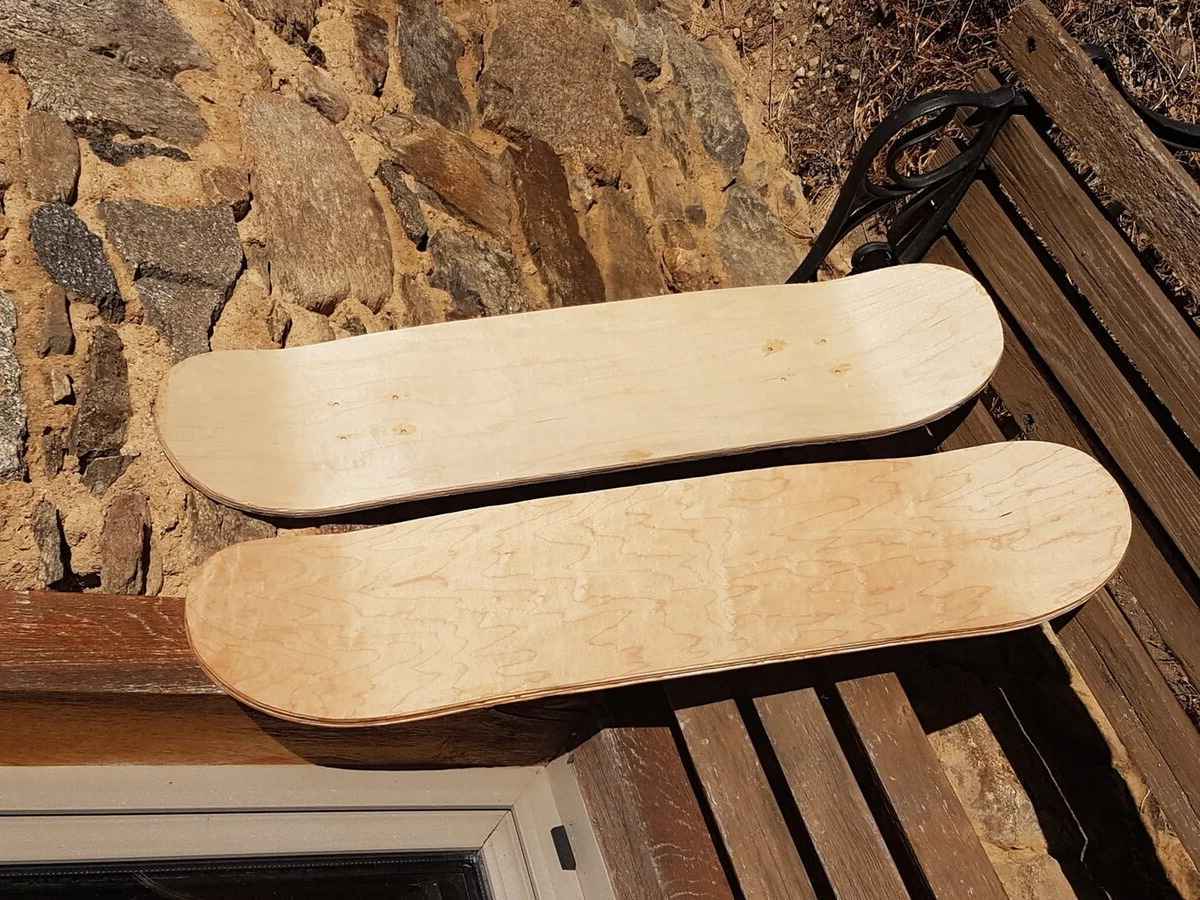
Wood: Selecting high-quality, sturdy wood is crucial for crafting a durable skateboard deck. The most commonly used wood for skateboard decks is maple plywood, known for its strength and flexibility. Look for high-grade maple plywood with a thickness of approximately 1/8 inch (3mm) to 1/4 inch (6mm).
-
Grip Tape: This abrasive adhesive-backed material is applied to the top surface of the skateboard deck to provide traction for the skater's feet. Grip tape comes in various colors and designs, allowing you to personalize the look of your skateboard.
-
Graphics Transfer Paper: If you plan to add custom graphics or designs to your skateboard deck, you'll need graphics transfer paper. This specialized paper allows you to transfer intricate designs onto the deck's surface with precision.
-
Finish: To protect the wood and enhance the aesthetics of your skateboard deck, you'll need a clear finish. Polyurethane or a similar sealant is commonly used to provide a durable and glossy coating.
Tools:
-
Jigsaw or Bandsaw: A jigsaw or bandsaw will be used to cut the initial shape of the skateboard deck from the plywood. These versatile cutting tools allow for precision and flexibility in shaping the board.
-
Wood Clamps: Wood clamps are essential for securing the plywood during the cutting and shaping process. They ensure that the wood remains stable and stationary while you work on it.
-
Sandpaper and Sanding Block: Smooth out rough edges and refine the contours of the skateboard deck using sandpaper and a sanding block. This step is crucial for achieving a professional finish and ensuring a comfortable riding experience.
-
Drill and Drill Bits: You'll need a drill and various drill bits to create holes for mounting the trucks to the skateboard deck. Additionally, a countersink bit is useful for creating recessed holes to accommodate the screw heads.
-
Router: A router equipped with a round-over bit is used to round the edges of the skateboard deck, enhancing its appearance and safety by reducing sharp edges.
-
Paintbrushes: If you plan to apply custom designs or graphics to your skateboard deck, a set of paintbrushes will be necessary for precision painting and detailing.
By gathering these materials and tools, you'll be well-prepared to embark on the exciting journey of crafting your own skateboard deck. With everything in place, you're ready to move on to the next steps of preparing the wood and shaping the deck.
Preparing the Wood
Before diving into the intricate process of shaping and customizing your skateboard deck, it's crucial to start with properly preparing the wood. This initial step sets the foundation for the structural integrity and overall quality of the deck. Here's a detailed guide on how to prepare the wood for your skateboard deck:
-
Selecting the Right Plywood: Begin by carefully selecting high-quality maple plywood for your skateboard deck. Look for plywood with a thickness ranging from 1/8 inch (3mm) to 1/4 inch (6mm). The plywood should be sturdy and resilient, capable of withstanding the rigors of skateboarding while providing the necessary flexibility for a smooth ride.
-
Creating a Template: To ensure precision and consistency in shaping the skateboard deck, it's beneficial to create a template using cardboard or a similar material. The template should outline the desired dimensions and curvature of the deck, serving as a guide for the cutting and shaping process.
-
Securing the Plywood: Once you have the plywood and template ready, secure the plywood to a stable work surface using wood clamps. This ensures that the plywood remains steady and immobile during the cutting and shaping procedures, allowing for accurate and controlled manipulation.
-
Tracing the Template: With the plywood securely in place, use a pencil to trace the outline of the template onto the plywood. Take your time to ensure precise tracing, as this will determine the final shape and dimensions of the skateboard deck.
-
Cutting the Outline: Using a jigsaw or bandsaw, carefully cut along the traced outline to shape the plywood into the initial form of the skateboard deck. Exercise caution and patience during this step, as precise cutting is essential for achieving the desired shape and curvature.
-
Refining the Contours: After cutting the outline, use a combination of sandpaper and a sanding block to refine the contours of the skateboard deck. Smooth out any rough edges and imperfections, ensuring a uniform and professional finish. Pay close attention to the concave shape of the deck, as this contributes to the board's performance and maneuverability.
By meticulously following these steps, you'll successfully prepare the wood for your skateboard deck, laying the groundwork for the subsequent stages of shaping, designing, and finishing the board. With the wood prepared, you're now ready to move on to the exciting process of shaping the deck to your desired specifications.
Shaping the Deck
Shaping the skateboard deck is a pivotal stage in the crafting process, as it directly influences the board's performance, aesthetics, and overall feel. This step allows you to impart a unique personality to your skateboard deck, tailoring its shape and curvature to match your riding style and preferences. Here's a comprehensive guide on how to expertly shape your skateboard deck:
Creating the Concave
The concave, or the slight curvature along the width of the skateboard deck, plays a crucial role in providing control and responsiveness while riding. To create the concave, you can utilize a concave mold or form, which is typically made of sturdy material such as metal or wood. Place the prepared plywood on the concave mold and use a combination of clamps and pressure to gradually shape the wood, ensuring that it conforms to the desired concave profile. This process demands precision and patience, as the resulting concave greatly influences the board's handling characteristics.
Tail and Nose Shaping
The tail and nose of the skateboard deck contribute to its maneuverability and pop, making their shaping a critical aspect of the crafting process. Using a template or reference, carefully mark the positions of the tail and nose on the plywood. Employ a jigsaw or bandsaw to sculpt the tail and nose to the desired dimensions, ensuring symmetry and balance between the two ends. Pay close attention to the angles and curves, as these elements significantly impact the board's performance during tricks and maneuvers.
Rounding the Edges
Rounding the edges of the skateboard deck serves multiple purposes, including enhancing safety, improving aesthetics, and providing a comfortable grip. A router equipped with a round-over bit is an effective tool for this task, allowing you to smoothly round the edges while maintaining consistency and precision. This step not only adds a professional touch to the deck but also reduces the risk of sharp edges causing injury during handling or riding.
Fine-Tuning and Smoothing
Once the primary shaping is complete, it's essential to meticulously inspect the deck for any imperfections or rough areas. Utilize sandpaper and a sanding block to fine-tune the contours, ensuring a seamless and uniform surface. Smooth out any irregularities and refine the transitions between the concave, tail, and nose, aiming for a flawless finish that reflects the craftsmanship and attention to detail invested in the deck.
By following these detailed steps, you'll expertly shape your skateboard deck, infusing it with personalized characteristics and performance-enhancing features. With the shaping process completed, you're now ready to add custom graphics or designs to your skateboard deck, further elevating its visual appeal and individuality.
Adding Graphics or Designs
Adding custom graphics or designs to your skateboard deck is a captivating and expressive way to imbue the board with your personal style and creativity. Whether you're aiming for a bold and eye-catching graphic or a subtle, minimalist design, this stage allows you to transform the skateboard deck into a unique work of art. Here's a detailed exploration of the process of adding graphics or designs to your skateboard deck:
Preparing the Surface
Before applying any graphics or designs, it's crucial to ensure that the surface of the skateboard deck is clean, smooth, and free of any debris or imperfections. Begin by gently wiping the deck with a damp cloth to remove any dust or particles. Once the surface is clean and dry, carefully inspect it for any blemishes or rough areas. Utilize fine-grit sandpaper to smooth out any imperfections, creating a pristine canvas for the graphics or designs.
Choosing the Design
Selecting the right design for your skateboard deck is an exciting and personal decision. Whether you opt for a vibrant and intricate illustration, a striking pattern, or a custom logo, the design should reflect your personality and resonate with your artistic vision. If you're creating your own design, consider sketching it out on paper beforehand to visualize how it will appear on the deck. Alternatively, if you're using pre-made graphics or decals, ensure that they align with your aesthetic preferences and complement the overall theme of the skateboard.
Applying the Graphics
When it comes to applying graphics or designs to the skateboard deck, you have several options to consider. If you're using graphics transfer paper, carefully follow the manufacturer's instructions to transfer the design onto the deck with precision. This process typically involves applying heat and pressure to transfer the graphic onto the wood, resulting in a detailed and long-lasting imprint. Alternatively, if you're painting the design directly onto the deck, use high-quality acrylic or spray paint to ensure vibrant colors and durability. Exercise patience and attention to detail during this stage, as precision is key to achieving a professional and visually striking result.
Protecting the Design
Once the graphics or designs are applied to the skateboard deck, it's essential to protect them from wear and tear. Consider applying a clear finish or sealant over the graphics to safeguard them from scratches, fading, and moisture. Polyurethane or a similar sealant provides a durable and glossy coating, preserving the integrity of the design while enhancing the overall aesthetics of the deck. Ensure that the finish is applied evenly and smoothly, allowing the graphics to shine through while receiving the necessary protection.
By following these steps, you'll seamlessly integrate custom graphics or designs into your skateboard deck, elevating its visual appeal and making a bold statement. With the graphics or designs in place and protected, your skateboard deck is now a stunning reflection of your artistic flair and individuality, ready to hit the streets or skate parks with style and confidence.
Applying Finish
Applying the finish to your skateboard deck is a crucial step that not only enhances the visual appeal of the board but also provides essential protection against wear and tear. The finish serves as a shield, safeguarding the wood from moisture, scratches, and the impact of regular skating activities. Additionally, a well-applied finish contributes to the overall longevity and durability of the skateboard deck, ensuring that it remains in top condition for countless riding sessions.
To begin the process of applying the finish, it's important to select a high-quality sealant that is specifically designed for wooden surfaces. Polyurethane is a popular choice due to its exceptional durability and resistance to abrasion. Before applying the finish, ensure that the skateboard deck is clean and free of any dust or debris. Wipe the surface with a damp cloth and allow it to dry completely before proceeding.
Using a high-quality paintbrush, carefully apply the first coat of the finish to the skateboard deck, ensuring even coverage across the entire surface. It's essential to follow the manufacturer's instructions regarding the application and drying times for the specific sealant being used. Typically, the first coat should be allowed to dry completely before applying subsequent coats to build up the desired level of protection and sheen.
Between each coat of finish, lightly sand the surface of the skateboard deck using fine-grit sandpaper. This step helps to smooth out any imperfections and ensures proper adhesion of the subsequent coats. After sanding, remove any dust or particles from the surface before applying the next coat of finish. Building up multiple thin coats of sealant yields a more resilient and uniform finish compared to applying a single thick coat.
Once the final coat of finish has been applied and allowed to dry thoroughly, inspect the skateboard deck for any unevenness or imperfections. If necessary, lightly sand the surface once more to achieve a smooth and flawless finish. The completed finish should exhibit a glossy and protective layer that accentuates the natural beauty of the wood while showcasing the custom graphics or designs.
By meticulously applying the finish to your skateboard deck, you not only enhance its aesthetic appeal but also ensure that it is well-equipped to withstand the demands of skateboarding. With the finish in place, your skateboard deck is now ready to hit the streets or skate parks, showcasing its personalized design and craftsmanship while delivering a reliable and enjoyable riding experience.
Conclusion
In conclusion, the process of making a skateboard deck from scratch is a deeply rewarding and creative endeavor that allows individuals to express their passion for skateboarding while showcasing their craftsmanship and artistic flair. From selecting high-quality materials to shaping the deck, adding custom graphics, and applying a protective finish, every step in the crafting journey contributes to the creation of a unique and personalized skateboard deck.
Crafting a skateboard deck provides a profound sense of ownership and connection to the board, as every aspect, from the choice of wood to the design elements, reflects the individual's personality and style. The hands-on approach to creating a skateboard deck fosters a deeper appreciation for the artistry and engineering behind these iconic pieces of sports equipment.
By meticulously shaping the deck to desired specifications, individuals can tailor the concave, tail, and nose to match their riding style, enhancing the board's performance and maneuverability. The addition of custom graphics or designs further elevates the skateboard deck, transforming it into a captivating work of art that resonates with the skater's unique vision.
The application of a protective finish not only enhances the visual appeal of the deck but also ensures its longevity and resilience against the rigors of skateboarding. The glossy finish serves as a testament to the dedication and attention to detail invested in the crafting process, culminating in a skateboard deck that is not only visually striking but also built to withstand countless riding sessions.
Ultimately, the journey of making a skateboard deck is a testament to the creativity, dedication, and passion of individuals who seek to infuse their personal touch into every aspect of their skateboarding experience. Whether it's cruising through the streets, mastering tricks at the skate park, or displaying the deck as a piece of art, the handmade skateboard deck stands as a tangible representation of the skater's ingenuity and love for the sport.
As the wheels hit the pavement and the skateboard comes to life, it embodies the spirit of individuality and self-expression, carrying with it the pride of its creator. The process of making a skateboard deck transcends the act of crafting a functional piece of equipment; it is a celebration of creativity, craftsmanship, and the enduring bond between a skater and their board.