Home>Outdoors & Camping>Landscaping>How To Build A Swale

Landscaping
How To Build A Swale
Published: March 7, 2024

Content Creator for Outdoors & Camping, Sophie turns any yard into a sustainable paradise. Her dedication to DIY outdoor projects and volunteer work in community gardens shares joy and knowledge.
Learn how to build a swale for effective landscaping. Discover the benefits and step-by-step process of creating a swale on your property. Ideal for sustainable and eco-friendly land management.
(Many of the links in this article redirect to a specific reviewed product. Your purchase of these products through affiliate links helps to generate commission for Twigandthistle.com, at no extra cost. Learn more)
Introduction
So, you're looking to learn how to build a swale, huh? Well, you've come to the right place! Building a swale can be a fantastic way to manage water runoff on your property, prevent soil erosion, and even create a more sustainable and eco-friendly landscape. In this guide, we'll walk you through the process of building a swale step by step, from understanding what a swale is to designing, excavating, and maintaining it. By the end of this article, you'll be equipped with all the knowledge you need to create your very own swale and reap the benefits it has to offer. Let's get started!
Read more: How To Build A Clubhouse
Understanding Swales
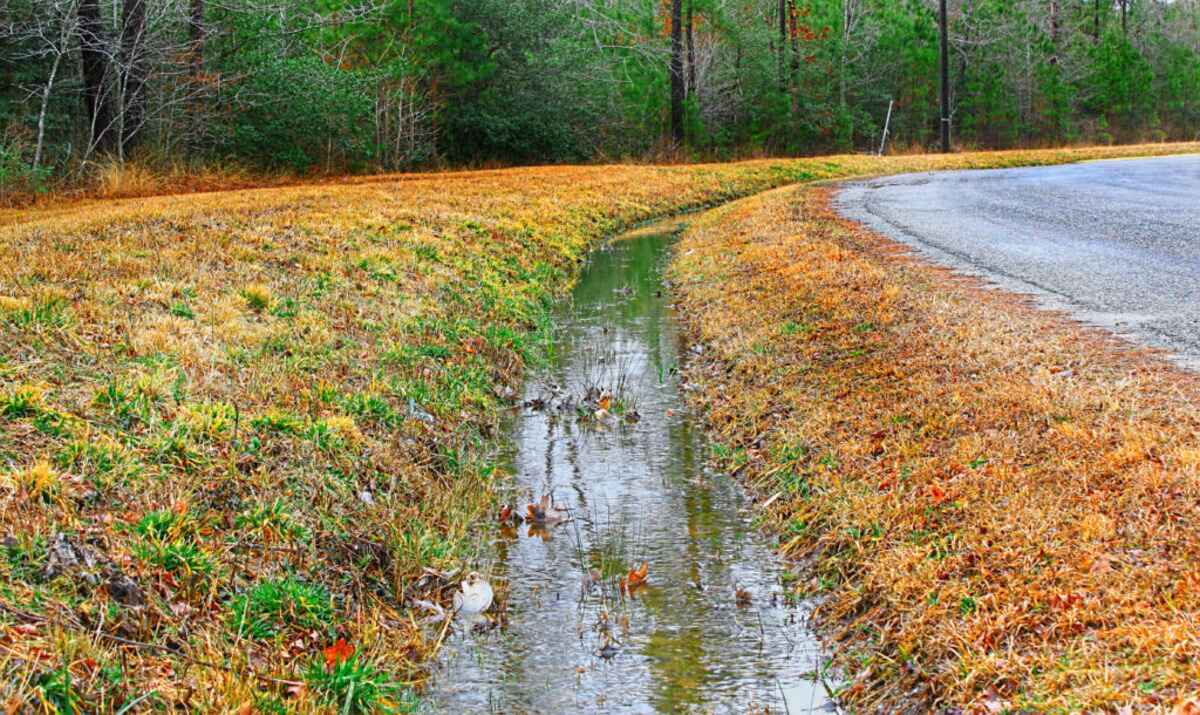
So, what exactly is a swale? A swale is a low-lying trench or depression that is designed to manage water runoff by slowing it down, spreading it out, and allowing it to percolate into the soil. Essentially, it's a sustainable and effective way to manage water on your property. Swales are commonly used in permaculture and sustainable landscaping to prevent soil erosion, recharge groundwater, and create a more resilient landscape.
Benefits of Swales
- Erosion Control: Swales help to prevent soil erosion by slowing down and capturing runoff, allowing the water to infiltrate the soil rather than washing it away.
- Water Conservation: By capturing and storing water in the soil, swales can help to recharge groundwater and reduce the need for irrigation.
- Flood Prevention: Swales can help to mitigate the impact of heavy rainfall by capturing and slowing down excess water, reducing the risk of flooding.
- Soil Improvement: The water captured in swales can help to improve soil moisture levels, which is beneficial for plant growth and overall soil health.
Types of Swales
- Contour Swales: These are designed along the contour lines of the land to capture and slow down water as it flows across the landscape.
- Keyline Swales: Keyline swales are typically used to manage water flow on larger properties and are designed using the keyline pattern, which is based on the natural topography of the land.
- Rain Garden Swales: These swales are designed to capture and manage water runoff from roofs, driveways, and other impervious surfaces, often incorporating native plants to enhance water infiltration and provide habitat for wildlife.
By understanding the purpose and types of swales, you can better appreciate their role in sustainable water management and landscape design.
Choosing the Right Location
When it comes to building a swale, choosing the right location is crucial for its effectiveness. Here are some key factors to consider when selecting the ideal spot for your swale:
-
Observing Water Flow: Take the time to observe how water flows across your property during rainfall. Look for areas where water tends to accumulate or flow rapidly. These are potential locations for your swale.
-
Identifying Problem Areas: Are there areas on your property that are prone to erosion or flooding during heavy rain? These are prime candidates for a swale to help manage water runoff and prevent further damage.
-
Assessing Soil Type: Consider the soil type in the area where you plan to build the swale. Soil that has good permeability and drainage will allow the swale to function more effectively.
-
Proximity to Structures: Take into account the proximity of buildings, fences, and other structures when choosing the location for your swale. You'll want to ensure that the swale is strategically placed to manage water runoff without causing any damage to nearby structures.
-
Sunlight and Vegetation: Consider the amount of sunlight the area receives and the existing vegetation. While some plants thrive in moist conditions, others may prefer drier soil. Additionally, the presence of vegetation can help stabilize the swale and enhance its overall effectiveness.
-
Accessibility: Think about the accessibility of the location for building and maintaining the swale. You'll want to choose a spot that is easily accessible for excavation and planting, as well as ongoing maintenance.
By carefully considering these factors, you can select the optimal location for your swale, ensuring that it effectively manages water runoff and contributes to the overall health and sustainability of your landscape.
Read more: How To Build A Sauna
Designing the Swale
Designing a swale involves careful planning to ensure that it effectively manages water runoff and integrates seamlessly into your landscape. Here are the key steps to consider when designing your swale:
Assessing Water Flow
Before designing your swale, it's essential to assess the natural flow of water across your property. Identify the high points where water accumulates and the low points where it drains away. This will help you determine the best location and shape for your swale to capture and slow down water runoff effectively.
Determining Swale Size and Shape
The size and shape of your swale will depend on various factors, including the amount of water runoff it needs to manage, the slope of the land, and the overall landscape design. In general, swales are designed with a gentle slope to encourage water to flow slowly and infiltrate the soil. The length and depth of the swale will be determined by the volume of water it needs to accommodate and the specific goals you have for managing water on your property.
Planning Inlet and Outlet
Consider where the water will enter and exit the swale. The inlet should be strategically positioned to capture water runoff, while the outlet should allow excess water to flow out gradually. This ensures that the swale effectively manages water without causing overflow or erosion.
Read more: How To Build A Trebuchet
Incorporating Plantings
Integrating vegetation into your swale design can enhance its effectiveness and aesthetic appeal. Native plants with deep root systems are ideal for stabilizing the swale, improving water infiltration, and providing habitat for wildlife. Consider the types of plants that thrive in moist conditions and can tolerate periodic inundation.
Accounting for Maintenance
When designing your swale, think about how you will access and maintain it over time. Incorporate access points for regular inspection, cleaning, and maintenance to ensure that the swale continues to function optimally.
By carefully considering these design elements, you can create a swale that not only effectively manages water runoff but also enhances the overall beauty and sustainability of your landscape.
Excavating and Shaping the Swale
Excavating and shaping the swale is a critical step in the construction process, as it determines the swale's capacity to manage water runoff effectively. Here's a detailed guide on how to excavate and shape your swale:
Marking the Swale
Begin by marking the outline of the swale on the ground using stakes and string. This will provide a clear visual guide for the excavation process and ensure that the swale follows the intended path and shape.
Read more: How To Build A Trailer
Excavation Depth and Width
The depth and width of the swale will depend on the volume of water it needs to accommodate and the slope of the land. Typically, swales are excavated to a depth of 1-2 feet and a width of 3-4 feet, but these dimensions can vary based on specific site conditions and water management goals.
Sloping the Sides
As you excavate the swale, slope the sides gradually to create a gentle gradient. This slope encourages water to flow slowly and allows it to percolate into the soil. The exact slope will depend on the soil type and the amount of water runoff the swale needs to manage.
Smoothing and Compacting
Once the swale is excavated to the desired depth and shape, use a shovel or a grading tool to smooth out the bottom and sides of the swale. This helps to ensure a consistent flow of water and prevents erosion. Additionally, compact the soil gently to stabilize the swale and prevent future settling.
Incorporating Berms
In some cases, it may be beneficial to create berms on the downhill side of the swale using the excavated soil. Berms help to further slow down water flow, capture sediment, and create micro-habitats for plants and wildlife. Carefully shape and compact the berms to enhance their effectiveness.
Read more: How To Build A Dock
Installing Perforated Pipe (Optional)
Depending on the specific water management needs of your property, you may choose to install a perforated pipe at the bottom of the swale to facilitate water infiltration and drainage. This can be particularly useful in areas with heavy clay soils or high water tables.
Mulching and Stabilizing
After the swale is shaped and excavated, consider adding a layer of mulch to the bottom to help retain moisture, reduce erosion, and encourage the establishment of vegetation. Additionally, consider planting native grasses, shrubs, or trees along the swale to stabilize the soil and enhance its water management capabilities.
By following these steps, you can effectively excavate and shape your swale to create a functional and aesthetically pleasing water management feature on your property.
Planting and Maintaining the Swale
Once the swale is excavated and shaped, it's time to focus on planting and maintaining this essential water management feature. Proper planting and ongoing maintenance are crucial for the swale to function effectively and contribute to the overall health of your landscape.
Selecting Native Plants
When it comes to planting the swale, choosing the right vegetation is key. Native plants are well-adapted to the local climate and soil conditions, making them ideal for stabilizing the swale, enhancing water infiltration, and providing habitat for wildlife. Look for native grasses, sedges, rushes, and flowering perennials that thrive in moist conditions and can tolerate periodic inundation. These plants will not only help prevent erosion but also contribute to the biodiversity of your landscape.
Read more: How To Build A Pantry
Planting Techniques
Before planting, prepare the soil in and around the swale to create an optimal environment for the vegetation to take root. Loosen the soil, remove any debris, and incorporate organic matter to improve soil structure and fertility. When planting, space the vegetation evenly along the swale, taking into account the mature size of the plants to ensure they have sufficient room to grow. Water the newly planted vegetation thoroughly to help establish their root systems.
Mulching and Watering
After planting, apply a layer of mulch around the base of the plants to retain moisture, suppress weed growth, and protect the soil from erosion. Organic mulch, such as wood chips or straw, can also contribute to the overall health of the swale by gradually breaking down and enriching the soil. Additionally, provide regular watering, especially during the establishment phase, to support the growth and vitality of the newly planted vegetation.
Ongoing Maintenance
Maintaining the swale is essential to ensure its long-term effectiveness. Regularly inspect the swale for any signs of erosion, sediment buildup, or invasive vegetation. Remove any debris or sediment that may accumulate in the swale to prevent obstruction of water flow. Prune and weed the planted vegetation as needed to promote healthy growth and prevent overcrowding. Periodically replenish the mulch layer to maintain soil moisture and fertility.
Monitoring and Adaptation
As the vegetation in the swale matures, monitor its performance and adapt as necessary. Some plants may thrive and spread rapidly, while others may require additional care or replacement. Observe how the swale manages water runoff during rainfall events and make adjustments as needed to optimize its effectiveness. By staying attentive to the swale's performance and the condition of its vegetation, you can ensure that it continues to fulfill its water management and ecological functions.
By following these planting and maintenance practices, you can establish a thriving and resilient swale that not only manages water runoff effectively but also enhances the beauty and sustainability of your landscape.
Read more: How To Build A Wardrobe
Conclusion
In conclusion, building a swale is a valuable investment in sustainable water management and landscape resilience. By understanding the principles of swales, carefully selecting the right location, designing the swale to suit your property, and executing the excavation and shaping process, you can create a functional and aesthetically pleasing water management feature. Additionally, by incorporating native plantings and implementing ongoing maintenance practices, you can ensure that the swale continues to fulfill its water management and ecological functions effectively. With the benefits of erosion control, water conservation, flood prevention, and soil improvement, a well-designed and well-maintained swale can contribute to the overall health and sustainability of your landscape. So, roll up your sleeves, grab your shovel, and get ready to build a swale that not only manages water runoff but also enhances the beauty and resilience of your property.

