
Home>Create & Decorate>DIY & Crafts>How To Build A Wood Shed
DIY & Crafts
How To Build A Wood Shed
Published: February 24, 2024

Content Creator specializing in woodworking and interior transformations. Caegan's guides motivate readers to undertake their own projects, while his custom furniture adds a personal touch.
Learn how to build a wood shed with our DIY & Crafts guide. Get step-by-step instructions and tips for creating your own backyard storage solution. Start your project today!
(Many of the links in this article redirect to a specific reviewed product. Your purchase of these products through affiliate links helps to generate commission for Twigandthistle.com, at no extra cost. Learn more)
Introduction
Welcome to the ultimate guide on how to build a wood shed! Whether you're a seasoned DIY enthusiast or a beginner looking to embark on a new project, constructing a wood shed can be a rewarding and practical endeavor. A wood shed provides valuable storage space for garden tools, outdoor equipment, firewood, and more, while also adding a charming rustic touch to your property.
In this comprehensive guide, we will walk you through each step of the process, from planning and preparation to adding the finishing touches. By the end, you'll have the knowledge and confidence to tackle this project with ease.
Building a wood shed is not only a practical solution for storage needs but also an opportunity to showcase your craftsmanship and creativity. With the right guidance and a can-do attitude, you'll be amazed at what you can accomplish. So, roll up your sleeves, gather your tools, and let's dive into the exciting world of wood shed construction!
Step 1: Planning and Preparation
Before diving into the physical construction of your wood shed, it's crucial to lay a solid foundation through meticulous planning and thorough preparation. This initial step sets the stage for a successful and efficient building process, ensuring that your wood shed meets your specific needs and stands the test of time.
1. Determine Shed Size and Location
The first consideration in planning your wood shed is determining its size and the ideal location on your property. Assess the amount of storage space you require and consider any future needs. Additionally, take into account local building codes and regulations that may dictate the shed's size and placement.
2. Create a Detailed Blueprint
Once you've settled on the shed's size and location, it's time to create a detailed blueprint or plan. This blueprint should encompass the shed's dimensions, the layout of doors and windows, and the materials needed for construction. A well-thought-out blueprint serves as a roadmap for the entire building process, minimizing errors and ensuring a cohesive final product.
3. Gather Necessary Permits and Clearances
Before breaking ground, it's essential to obtain any required permits and clearances from local authorities. Building codes and zoning regulations vary by location, so it's crucial to research and adhere to these guidelines. Failing to secure the necessary permits can result in costly delays and potential legal issues down the line.
4. Assess and Prepare the Building Site
With the blueprint in hand and permits secured, it's time to assess and prepare the chosen building site. Clear the area of any debris, rocks, or vegetation that may impede construction. Additionally, ensure that the ground is level and stable, as this will form the foundation for your wood shed.
5. Compile a Detailed Materials List
Compile a comprehensive list of materials and tools needed for the construction process. This includes lumber, fasteners, roofing materials, and any specialized tools required for the job. Having a detailed materials list ensures that you have everything on hand when you begin building, minimizing interruptions and last-minute trips to the hardware store.
By meticulously planning and preparing for the construction of your wood shed, you set the stage for a smooth and successful building process. This initial investment of time and effort pays dividends as you progress through the subsequent steps, ultimately leading to the creation of a sturdy and functional wood shed that meets your storage needs for years to come.
Step 2: Gathering Materials and Tools
With the planning and preparation phase complete, it's time to shift focus to gathering the essential materials and tools required for building your wood shed. This step is crucial in ensuring a seamless construction process and a high-quality end result. By carefully sourcing the necessary components and equipment, you set the stage for a smooth and efficient building experience.
1. Lumber and Building Materials
The backbone of any wood shed is, of course, the lumber. Depending on the size and design of your shed, you'll need to procure various dimensions of lumber, including studs, joists, rafters, and siding. Opt for high-quality, pressure-treated lumber that offers durability and resistance to decay. Additionally, gather the necessary building materials such as concrete for the foundation, fasteners, and insulation to ensure structural integrity and weatherproofing.
2. Roofing and Siding Materials
Selecting the right roofing and siding materials is essential for protecting your wood shed from the elements. Consider options such as asphalt shingles, metal roofing panels, or cedar shingles for the roof, ensuring they are suited to your local climate. For the siding, options include plywood, oriented strand board (OSB), or cedar clapboard. Choose materials that not only provide weather resistance but also complement the overall aesthetic of your property.
3. Essential Tools
Equipping yourself with the right tools is paramount to the success of your wood shed construction project. Essential tools include a circular saw, power drill, hammer, level, tape measure, and framing square. Additionally, specialized tools such as a nail gun, roofing nailer, and miter saw may be necessary depending on the complexity of your shed design. Ensure that all tools are in good working condition and that you have a sufficient supply of nails, screws, and other fasteners.
4. Safety Gear
Prioritize safety by gathering the necessary protective gear, including work gloves, safety goggles, and a dust mask. Construction sites can present various hazards, and wearing appropriate safety gear is essential to prevent accidents and injuries during the building process.
5. Miscellaneous Supplies
Don't overlook the importance of miscellaneous supplies such as wood preservative, paint or stain, and sealant. These items contribute to the longevity and visual appeal of your wood shed, protecting it from moisture, UV exposure, and insect damage.
By diligently gathering the required materials and tools, you lay a solid foundation for the construction phase of your wood shed project. This meticulous preparation ensures that you have everything you need at your fingertips, allowing you to focus on the craftsmanship and artistry of bringing your wood shed to life.
Step 3: Building the Foundation
The foundation of a wood shed is the literal and metaphorical base upon which the entire structure rests. A well-constructed foundation is essential for providing stability, preventing moisture infiltration, and ensuring the longevity of the shed. In this crucial step, we will delve into the process of building a solid foundation for your wood shed, setting the stage for a durable and resilient structure.
1. Clearing and Leveling the Site
Before laying the foundation, it's imperative to clear the building site of any debris, rocks, or vegetation. This ensures a clean and level surface for the foundation to rest upon. Use a shovel, rake, and a long straight board to level the ground, checking for evenness in all directions. A level and stable base is fundamental to the structural integrity of the wood shed.
2. Choosing the Foundation Type
There are several options for the type of foundation, including concrete slab, concrete blocks, and skids. The choice of foundation type depends on factors such as local building codes, soil composition, and personal preference. A concrete slab offers a permanent and solid base, while concrete blocks provide versatility and elevation. Skids, or pressure-treated runners, are an excellent option for sheds requiring mobility or minimal ground disturbance.
3. Preparing and Pouring Concrete (If Applicable)
If you opt for a concrete foundation, the next step involves preparing the site for pouring concrete. This entails creating formwork to contain the concrete, ensuring it is level and square. Once the formwork is in place, the concrete can be poured and leveled using a screed board and bull float. Proper curing and drying time are essential to achieve a strong and stable foundation.
4. Installing Concrete Blocks or Skids
For those choosing concrete blocks or skids, the installation process involves strategically placing the blocks or skids according to the shed's blueprint. Ensure that they are level and properly aligned to support the shed's weight evenly. This step is critical in providing a secure and balanced foundation for the wood shed.
5. Adding Moisture Barrier and Insulation
To safeguard the wood shed from moisture and ground contact, it's advisable to add a moisture barrier, such as plastic sheeting, between the foundation and the shed floor. Additionally, insulation may be installed to provide thermal protection and prevent moisture buildup within the shed.
By meticulously attending to the foundation-building process, you establish a solid groundwork for the rest of the wood shed construction. A well-executed foundation ensures the structural integrity and longevity of the shed, laying the groundwork for the subsequent phases of the building process.
Step 4: Constructing the Frame
With the foundation in place, the next pivotal step in building a wood shed is constructing the frame. The frame serves as the skeletal structure of the shed, providing support, stability, and a framework for the walls, roof, and doors. This phase requires precision and attention to detail to ensure that the frame is sturdy, level, and able to withstand the elements.
1. Cutting and Assembling the Lumber
The construction of the frame begins with cutting the lumber to the dimensions specified in the shed blueprint. Using a circular saw or a miter saw, carefully cut the studs, joists, and rafters to the appropriate lengths, ensuring clean and accurate cuts. Once the lumber is cut, it's time to assemble the frame components according to the blueprint. This involves positioning the studs and joists at precise intervals and securing them together using nails or screws. A framing square is indispensable for ensuring that the frame is perfectly square and true, preventing any structural issues down the line.
2. Installing Wall Bracing and Headers
To reinforce the frame and provide additional structural support, wall bracing is installed at strategic points within the frame. This bracing helps prevent lateral movement and ensures the shed can withstand external forces such as wind or seismic activity. Additionally, headers are installed above door and window openings to bear the weight of the structure above. Proper installation of wall bracing and headers is crucial in fortifying the frame and ensuring its resilience.
3. Erecting the Wall Frames
Once the individual components are assembled, the wall frames are erected and secured to the foundation. This step involves lifting the wall frames into position and ensuring they are plumb and aligned according to the blueprint. Temporary bracing may be used to hold the frames in place while they are secured to the foundation. Careful attention to detail during this phase is essential to ensure that the walls are straight, level, and structurally sound.
4. Adding Roof Rafters and Trusses
With the wall frames in place, the focus shifts to adding the roof rafters or trusses, depending on the shed design. These components form the framework for the roof and are installed atop the wall frames. Precision is key in positioning and securing the rafters or trusses to ensure they form a stable and even base for the roof structure.
5. Checking for Squareness and Alignment
Throughout the frame construction process, it's imperative to regularly check for squareness and alignment. Using a framing square and a level, verify that the frame components are perfectly square and level, making any necessary adjustments as you progress. This meticulous attention to detail ensures that the frame is structurally sound and ready for the next phase of construction.
By meticulously constructing the frame, you establish the backbone of the wood shed, setting the stage for the addition of siding, roofing, and finishing touches. A well-built frame forms the basis for a sturdy and resilient structure, ensuring that your wood shed stands the test of time and provides reliable storage for years to come.
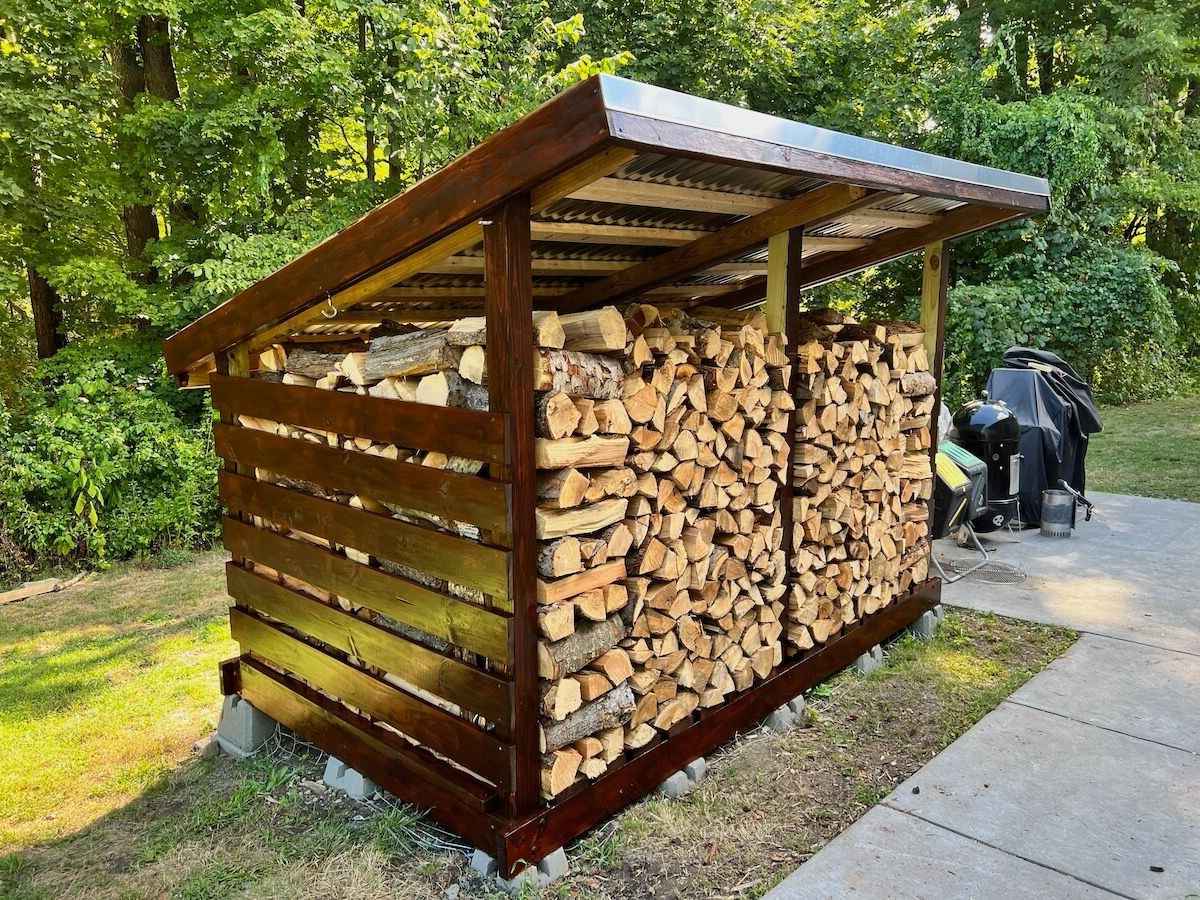
Step 5: Adding the Siding and Roof
With the frame of the wood shed securely in place, the focus now shifts to adding the siding and roof, two critical components that not only enhance the shed's aesthetic appeal but also provide essential protection from the elements. This phase of the construction process requires careful attention to detail and precision to ensure that the shed is weatherproof, durable, and visually appealing.
1. Installing the Siding
The siding serves as the outer skin of the wood shed, offering protection from wind, rain, and other environmental factors while adding character to the structure. Common siding options include plywood, oriented strand board (OSB), cedar clapboard, or vinyl siding, each with its unique aesthetic and functional properties. The installation process involves carefully measuring and cutting the siding panels to fit the dimensions of the shed's walls. Once cut, the panels are affixed to the frame using nails or screws, ensuring a snug and weather-resistant fit. Properly installed siding not only enhances the shed's appearance but also acts as a barrier against moisture and pests, contributing to the shed's longevity.
2. Roofing the Shed
The roof is a critical element in protecting the shed's interior from precipitation and sunlight. When it comes to roofing materials, options abound, including asphalt shingles, metal roofing panels, cedar shingles, or corrugated fiberglass. The choice of roofing material depends on factors such as climate, budget, and aesthetic preferences. The installation process involves laying down a protective underlayment, followed by the application of the chosen roofing material according to manufacturer specifications. Properly installed roofing not only safeguards the shed from the elements but also contributes to its overall structural integrity and insulation.
3. Weatherproofing and Finishing Touches
Once the siding and roofing are in place, attention turns to weatherproofing and adding finishing touches. This includes sealing gaps and joints in the siding to prevent water infiltration, applying a weather-resistant finish or paint to protect the wood from UV exposure and moisture, and installing trim around doors and windows for a polished appearance. Additionally, gutter installation may be considered to manage rainwater runoff and further protect the shed's foundation and surroundings.
By meticulously adding the siding and roof, you not only enhance the functionality and durability of the wood shed but also elevate its visual appeal. A well-protected and aesthetically pleasing exterior ensures that the shed seamlessly integrates into its surroundings while providing reliable storage and shelter for your outdoor equipment and belongings.
Step 6: Finishing Touches and Maintenance
As the construction of the wood shed nears completion, attention turns to the crucial phase of adding finishing touches and implementing a maintenance plan to ensure the longevity and functionality of the structure. This final step involves meticulous attention to detail and proactive measures to protect the shed from wear and tear, while also enhancing its overall aesthetic appeal.
1. Sealing and Waterproofing
One of the primary considerations in the finishing touches phase is the application of a high-quality sealant or wood preservative to protect the shed from moisture, UV exposure, and insect damage. This step not only enhances the shed's durability but also enriches the natural beauty of the wood, creating a visually appealing finish.
2. Door and Window Installation
Installing sturdy and weather-resistant doors and windows is essential to complete the wood shed and make it fully functional. Properly sealed and secure doors and windows not only provide convenient access to the shed's interior but also contribute to its overall weatherproofing and insulation.
3. Interior Organization and Shelving
To maximize the utility of the wood shed, consider incorporating interior shelving, hooks, and storage solutions to keep tools, equipment, and supplies organized. A well-organized interior not only enhances accessibility but also minimizes clutter, creating a more efficient and user-friendly space.
4. Landscaping and Integration
Integrating the wood shed into its surroundings through thoughtful landscaping and placement can elevate its visual impact. Consider adding pathways, plantings, or decorative elements to seamlessly blend the shed into the overall landscape, creating a harmonious and inviting outdoor space.
5. Regular Maintenance Plan
Implementing a proactive maintenance plan is essential to preserve the wood shed's structural integrity and appearance over time. This plan may include regular inspections for signs of wear, repainting or resealing as needed, and addressing any minor repairs promptly to prevent larger issues from arising.
By attending to these finishing touches and establishing a maintenance plan, you ensure that your wood shed remains a functional, attractive, and enduring addition to your property. With proper care and attention, the wood shed will continue to serve as a reliable storage solution and a charming focal point for years to come.
Conclusion
Congratulations on completing the construction of your wood shed! This journey from planning and preparation to the finishing touches has been a testament to your dedication, craftsmanship, and ingenuity. As you stand back and admire the sturdy structure that now graces your property, it's important to reflect on the significance of this accomplishment.
Your wood shed is more than just a storage space; it's a tangible representation of your ability to transform raw materials into a functional and aesthetically pleasing structure. It stands as a testament to your resourcefulness and determination, showcasing your capacity to take on a challenging project and see it through to fruition.
Beyond its practical utility, your wood shed adds a touch of rustic charm to your property, enhancing its visual appeal and creating a focal point that seamlessly integrates into the natural surroundings. The craftsmanship and attention to detail that you've poured into every aspect of the shed's construction are evident in its sturdy frame, weather-resistant siding, and protective roof.
As you move forward, utilizing the shed for storage and organization, it's essential to remember the care and effort that went into its creation. Regular maintenance, including inspections, resealing, and minor repairs, will ensure that the shed remains a reliable and enduring asset for years to come.
Moreover, the skills and knowledge you've gained throughout this project are invaluable. The ability to plan, measure, cut, and assemble materials, as well as the understanding of foundational construction principles, will serve you well in future DIY endeavors. Whether it's building furniture, tackling outdoor projects, or engaging in creative pursuits, the experience gained from constructing your wood shed will continue to enrich your capabilities as a handy individual.
As you bask in the satisfaction of a job well done, take a moment to appreciate the journey you've undertaken. The challenges you've overcome, the skills you've honed, and the tangible result of your hard work stand as a testament to your determination and creativity. Your wood shed is not just a structure; it's a symbol of your ability to bring ideas to life and create something of lasting value.
So, as you open the doors of your newly constructed wood shed and begin to fill it with tools, equipment, and cherished belongings, take pride in the fact that you've built more than just a storage space – you've built a testament to your capabilities and a cornerstone of your DIY legacy.