
Home>Create & Decorate>DIY & Crafts>How To Build An Rc Car
DIY & Crafts
How To Build An Rc Car
Published: February 22, 2024

Content Creator specializing in woodworking and interior transformations. Caegan's guides motivate readers to undertake their own projects, while his custom furniture adds a personal touch.
Learn how to build your own RC car with our DIY & Crafts guide. Get step-by-step instructions and expert tips for creating your custom remote-controlled car.
(Many of the links in this article redirect to a specific reviewed product. Your purchase of these products through affiliate links helps to generate commission for Twigandthistle.com, at no extra cost. Learn more)
Introduction
Building your own remote-controlled (RC) car can be an incredibly rewarding and enjoyable experience. Whether you're a seasoned hobbyist or a newcomer to the world of DIY and crafts, constructing an RC car allows you to unleash your creativity and technical skills while having a blast. From selecting the perfect kit or components to fine-tuning the vehicle's performance, every step of the process offers a unique opportunity for learning and fun.
In this comprehensive guide, we will walk you through the step-by-step process of building your very own RC car. You'll learn how to choose the right kit or components, assemble the chassis, install the electronics, add the body and details, and finally, test and fine-tune your creation. By the end of this journey, you'll not only have a fully functional RC car but also a deeper understanding of the mechanics and engineering behind it.
Whether you're drawn to the thrill of high-speed racing or the intricate details of customizing your vehicle, building an RC car allows you to tailor every aspect to your preferences. From the sleek design of the chassis to the responsiveness of the electronics, you have the freedom to create a one-of-a-kind machine that reflects your personality and style.
So, roll up your sleeves, gather your tools, and get ready to embark on an exciting adventure in DIY and crafts. Building an RC car is not just about the destination; it's about the exhilarating journey of bringing your vision to life. Let's dive in and discover the joy of creating something extraordinary from scratch.
Choosing the Right Kit or Components
When it comes to building an RC car, the first and most crucial step is selecting the right kit or components. This decision sets the foundation for the entire project, influencing the car's performance, appearance, and customization options. Whether you opt for a pre-made kit or prefer to handpick individual components, there are several key factors to consider.
1. Kit vs. Components
Before diving into the world of RC car construction, you'll need to decide whether to purchase a complete kit or assemble the vehicle from individual components. Kits often provide a convenient all-in-one solution, including the chassis, electronics, and other essential parts. On the other hand, sourcing individual components allows for greater customization and control over the car's specifications.
2. Chassis Design
The chassis serves as the foundation of the RC car, determining its overall structure and handling. Consider the type of terrain you plan to navigate, whether it's smooth pavement, rugged off-road tracks, or a combination of both. Different chassis designs, such as on-road, off-road, or drift, cater to specific driving styles and environments.
3. Power System
Selecting the appropriate power system is crucial for achieving the desired speed and performance. Electric motors are popular for their ease of use and maintenance, while nitro engines offer the excitement of realistic engine sounds and exhaust fumes. Each option has its unique characteristics, so it's essential to align the power system with your driving preferences and skill level.
4. Electronics and Control
The electronic components, including the transmitter, receiver, and speed controller, play a pivotal role in controlling the RC car's movements. Compatibility and reliability are key considerations when choosing these components, as they directly impact the car's responsiveness and maneuverability on the track.
5. Customization Potential
For many enthusiasts, the ability to customize and personalize their RC car is a significant draw. Assess the customization potential of the kit or components, such as the availability of upgrade parts, interchangeable body shells, and compatibility with aftermarket accessories. This aspect allows you to tailor the car to your preferences and continually enhance its performance and appearance.
By carefully evaluating these factors and conducting thorough research, you can make an informed decision when choosing the right kit or components for your RC car project. Remember, the choices you make at this stage will shape the entire building process and ultimately determine the unique character of your creation.
Assembling the Chassis
Assembling the chassis is a pivotal phase in the construction of an RC car, laying the groundwork for its structural integrity and performance. This process involves meticulously piecing together the frame, suspension, and drivetrain components to create a solid foundation for the vehicle. Let's delve into the intricate steps of assembling the chassis and explore the essential considerations along the way.
1. Frame Construction
The chassis frame serves as the skeleton of the RC car, providing the framework to support the various components and withstand the rigors of driving. Depending on the chosen kit or components, the frame may be constructed from lightweight yet durable materials such as aluminum, carbon fiber, or composite plastics. Assembling the frame involves meticulously aligning and fastening the individual pieces, ensuring precise fitment and structural integrity.
2. Suspension Setup
The suspension system plays a critical role in dictating the car's handling and stability, especially when traversing uneven terrain. Assembling the suspension involves installing the shock absorbers, springs, and control arms, meticulously adjusting them to achieve the desired ride height and damping characteristics. Fine-tuning the suspension setup allows for customizing the car's responsiveness and optimizing its performance for specific driving conditions.
3. Drivetrain Integration
The drivetrain components, including the gearbox, differential, and driveshafts, form the mechanical heart of the RC car, transferring power from the motor to the wheels. Assembling the drivetrain involves precision assembly of these components, ensuring smooth and efficient power transmission. Proper lubrication and alignment of the drivetrain elements are crucial to minimize friction and maximize the car's overall efficiency and durability.
4. Electronics Mounting
Integrating the electronic components into the chassis is a critical step in ensuring seamless functionality. Mounting the receiver, speed controller, and servo securely within the chassis not only ensures their protection but also contributes to the car's overall weight distribution and balance. Careful consideration should be given to cable management and component placement to optimize the car's center of gravity and minimize interference with moving parts.
5. Customization and Personalization
While assembling the chassis, enthusiasts have the opportunity to personalize their RC car by incorporating custom upgrades and accessories. This could include anodized aluminum parts for enhanced durability, adjustable suspension components for fine-tuning, or even custom chassis braces for added rigidity. These personalized touches not only elevate the car's aesthetics but also allow for tailored performance enhancements.
Assembling the chassis is a meticulous yet gratifying process that sets the stage for the subsequent stages of building an RC car. Attention to detail, precision assembly, and a keen eye for customization opportunities are key elements in creating a chassis that forms the backbone of a truly exceptional RC car.
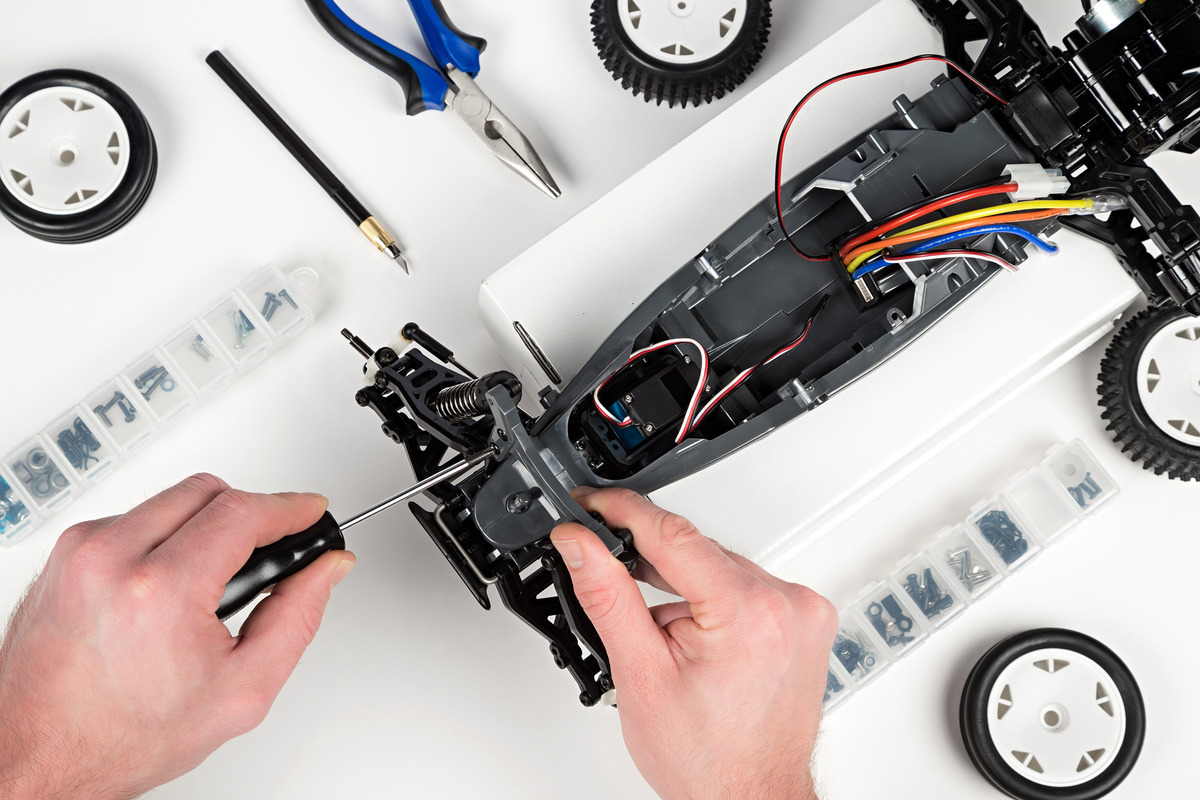
Installing the Electronics
Installing the electronics is a pivotal phase in the construction of an RC car, as it involves integrating the essential components that govern the vehicle's control and performance. From the receiver and speed controller to the servo and battery, each electronic element plays a crucial role in dictating the car's responsiveness and functionality. Let's delve into the intricate process of installing the electronics and explore the critical considerations along the way.
1. Receiver and Transmitter Pairing
The receiver, often referred to as the radio receiver, acts as the nerve center of the RC car, receiving signals from the transmitter and translating them into commands for the vehicle's movements. Pairing the receiver with the transmitter involves establishing a secure and reliable connection, typically through a process of binding. This ensures that the car responds accurately to the transmitter's inputs, allowing for precise control over its speed and steering.
2. Speed Controller Integration
The speed controller, also known as the ESC (Electronic Speed Controller), regulates the power delivery from the battery to the motor, controlling the car's acceleration and braking. Integrating the speed controller involves mounting it securely within the chassis and connecting it to the motor and battery. Additionally, configuring the ESC settings, such as throttle calibration and brake force, allows for fine-tuning the car's driving characteristics to suit the driver's preferences and the specific terrain.
3. Servo Installation and Adjustment
The servo plays a critical role in steering the RC car, translating the commands from the transmitter into precise movements of the front wheels. Installing the servo involves securing it within the chassis and connecting it to the receiver and steering linkage. Proper adjustment of the servo's neutral position and endpoint limits ensures that the car's steering response is accurate and consistent, contributing to its agility and maneuverability on the track.
4. Battery and Power Management
Selecting the right battery and managing its placement within the chassis are essential for optimizing the car's weight distribution and runtime. Installing the battery involves securing it in a designated compartment and connecting it to the speed controller. Additionally, implementing a reliable power management system, such as low-voltage cutoff or battery monitoring, safeguards the battery's health and prevents over-discharge, ensuring longevity and consistent performance.
5. Wiring and Cable Management
Neat and organized wiring not only enhances the car's aesthetics but also contributes to its reliability and performance. Properly routing and securing the cables, ensuring they are free from obstructions and potential sources of interference, minimizes the risk of electrical issues during operation. Additionally, utilizing cable ties, routing channels, and protective sheathing helps maintain a tidy and serviceable electronics layout within the chassis.
6. Testing and Calibration
Once the electronics are installed, thorough testing and calibration are essential to verify their functionality and ensure proper integration with the car's mechanical components. This involves conducting range tests for the transmitter and receiver, verifying the ESC's programming, and confirming the servo's responsiveness. Calibration of the electronic components, such as throttle and steering endpoints, allows for precise adjustments to match the car's performance to the driver's preferences.
Installing the electronics is a meticulous yet rewarding process that forms the technological heart of the RC car. Attention to detail, precision integration, and thorough testing are key elements in creating a reliable and responsive electronic system that complements the car's mechanical prowess, culminating in a truly exceptional RC vehicle.
Adding the Body and Details
Adding the body and details to your RC car is where the vehicle truly comes to life, transforming from a collection of components into a visually striking and personalized machine. This phase allows you to infuse your creativity and style into the car, making it a reflection of your preferences and personality. From selecting the body shell to customizing the finer details, every step in this process contributes to the overall aesthetics and character of the RC car.
1. Body Shell Selection
The body shell serves as the outer skin of the RC car, defining its appearance and aerodynamic profile. When selecting a body shell, consider factors such as the car's intended use, whether for on-road racing, off-road bashing, or scale realism. Additionally, explore the wide range of available designs, from sleek sports cars to rugged trucks, and choose one that resonates with your style and preferences.
2. Painting and Customization
Once you have chosen the body shell, the next step is to unleash your creativity through painting and customization. Whether you opt for vibrant colors, intricate designs, or realistic detailing, the painting process allows you to make the car uniquely yours. Consider using masking techniques, decals, and specialized paints to achieve professional-looking results that showcase your attention to detail and artistic flair.
3. Body Mounting and Accessories
Mounting the body shell onto the chassis is a crucial step that requires precision and care. Ensure that the body aligns properly with the chassis and that the mounting method provides secure attachment while allowing for easy removal for maintenance. Additionally, consider adding scale accessories such as light buckets, wing mirrors, and driver figures to enhance the realism and visual appeal of the RC car.
4. Fine Details and Decals
The finer details, such as decals, sponsor logos, and scale accessories, add depth and character to the RC car. Strategically placing decals and adding scale accessories, such as exhaust tips, roof racks, or interior components, elevates the car's realism and visual impact. Paying attention to these details demonstrates your dedication to creating a visually captivating and authentic representation of a full-scale vehicle.
5. Personalization and Customization
Beyond the standard body shell and accessories, consider personalized touches that make the RC car uniquely yours. Whether it's customizing the wheels, adding LED lighting, or incorporating aftermarket upgrades, these personalization options allow you to tailor the car to your preferences and stand out on the track.
Adding the body and details to your RC car is a highly rewarding and creative endeavor that brings the vehicle to its full potential. By infusing your style and attention to detail into every aspect of the car's exterior, you create a visually stunning and personalized machine that reflects your passion for the hobby.
Testing and Fine-Tuning
Once the assembly of your RC car is complete, it's time to transition to the crucial phase of testing and fine-tuning. This stage is where the true potential of your creation is realized, as you meticulously assess its performance, address any issues, and optimize its capabilities for an unparalleled driving experience.
Initial Systems Check
Before hitting the track, conduct a comprehensive systems check to ensure that all components are functioning as intended. Verify the responsiveness of the steering and throttle, test the range and reliability of the radio system, and confirm that the electronic speed controller (ESC) is calibrated for smooth acceleration and braking. Additionally, inspect the suspension for proper alignment and damping characteristics, ensuring that the car is poised for optimal handling.
Track Testing
Take your RC car to a suitable track or open area to conduct initial performance tests. Start with gentle acceleration and braking maneuvers to gauge the car's responsiveness and stability. Gradually increase the speed and assess how the car handles different terrains and obstacles. Pay close attention to its cornering ability, traction, and overall stability, noting any areas that require adjustment.
Fine-Tuning Adjustments
Based on the initial testing, identify areas that require fine-tuning and make incremental adjustments to optimize the car's performance. This could involve tweaking the suspension settings to achieve the desired ride height and damping, adjusting the steering trim for precise control, or refining the gear ratios to balance speed and torque. Fine-tuning allows you to tailor the car's characteristics to your driving style and the specific track conditions.
Performance Evaluation
Conduct thorough performance evaluations, such as speed runs, slalom courses, and simulated race scenarios, to assess the car's capabilities across different driving scenarios. Measure its top speed, acceleration, and agility, taking note of any areas where it excels or falls short. This comprehensive evaluation provides valuable insights into the car's strengths and areas for improvement.
Iterative Testing and Refinement
Testing and fine-tuning is an iterative process that may require multiple rounds of adjustments and evaluations. Continuously refine the car's setup based on the feedback from each testing session, making incremental changes to enhance its performance and address any shortcomings. This iterative approach allows for a methodical and thorough refinement of the car's characteristics.
Endurance and Reliability Testing
In addition to performance assessments, conduct endurance testing to evaluate the car's durability and reliability under prolonged driving conditions. This involves testing its thermal management, battery longevity, and overall robustness during extended driving sessions. Identifying and addressing any potential reliability issues ensures that the car is ready for sustained use.
Continuous Improvement
The testing and fine-tuning phase is not just about achieving an optimal setup; it's also an opportunity for continuous improvement. Embrace the process of refining and enhancing your RC car, leveraging each testing session to gain insights and make informed adjustments. By striving for continuous improvement, you elevate the car's performance and your own skills as a builder and driver.
In essence, the testing and fine-tuning phase is where your RC car truly comes to life, evolving from a collection of components into a finely tuned and high-performing machine. Embrace the process with patience and attention to detail, and you'll unlock the full potential of your creation, ready to conquer the track with confidence and precision.
Conclusion
In conclusion, the journey of building your own RC car is not just about assembling mechanical and electronic components; it's a captivating adventure that allows you to unleash your creativity, technical skills, and passion for the hobby. From the initial selection of the kit or components to the meticulous assembly of the chassis, integration of electronics, and the artistic customization of the body, every step in the process offers a unique opportunity for learning, self-expression, and enjoyment.
As you navigate through the intricacies of building an RC car, you gain a deeper understanding of engineering principles, mechanical dynamics, and electronic systems. The hands-on experience of assembling the chassis, integrating the electronics, and fine-tuning the car's performance provides invaluable insights into the inner workings of a high-performance vehicle. This knowledge not only enhances your skills as a hobbyist but also fosters a deeper appreciation for the craftsmanship and innovation behind RC car technology.
Furthermore, the process of building an RC car is a testament to your ingenuity and attention to detail. The careful selection of components, precision assembly of the chassis, and artistic customization of the body reflect your dedication to creating a machine that is not only technically proficient but also visually stunning. Each decision made during the construction process, from choosing the power system to painting the body shell, contributes to the unique character and performance of the finished RC car.
Moreover, the testing and fine-tuning phase represents the culmination of your efforts, where the true potential of your creation is realized. Through iterative testing, performance evaluations, and continuous refinement, you transform the RC car into a high-performing and reliable machine that is ready to conquer the track with confidence and precision. This phase not only showcases your commitment to achieving optimal performance but also hones your skills as a driver and builder.
In essence, building an RC car is a deeply rewarding and enriching experience that goes beyond the realm of a mere hobby. It is a journey of exploration, creativity, and technical mastery that allows you to bring your vision to life in the form of a remarkable and personalized vehicle. Whether you are drawn to the thrill of high-speed racing, the art of customization, or the joy of technical craftsmanship, building an RC car offers a fulfilling and immersive experience that leaves a lasting impression on both the builder and the machine itself.