
Home>Create & Decorate>DIY & Crafts>How To Build A Privacy Wall
DIY & Crafts
How To Build A Privacy Wall
Published: April 12, 2024

Senior Editor in Create & Decorate, Kathryn combines traditional craftsmanship with contemporary trends. Her background in textile design and commitment to sustainable crafts inspire both content and community.
Learn how to build a privacy wall with our DIY & Crafts guide. Create a stylish and functional barrier for your outdoor space. Step-by-step instructions included!
(Many of the links in this article redirect to a specific reviewed product. Your purchase of these products through affiliate links helps to generate commission for Twigandthistle.com, at no extra cost. Learn more)
Introduction
So, you're looking to add a little more privacy to your outdoor space, huh? Well, you've come to the right place! Building a privacy wall can be a great way to create a secluded oasis in your backyard or to block out an unsightly view. Whether you're aiming to create a cozy nook for relaxation or simply want to enhance the aesthetics of your outdoor area, a privacy wall can be a fantastic addition to your home. In this guide, we'll walk you through the steps to build your very own privacy wall, so you can enjoy some peace and quiet in your own little slice of paradise. Let's get started!
Choosing the Right Location
When it comes to building a privacy wall, the first step is to carefully consider the location where you want to install it. Here are some key factors to keep in mind when choosing the right spot for your privacy wall:
-
Privacy Needs: Assess the areas of your outdoor space where you feel the need for more privacy. Whether it's to block the view from neighboring properties, shield your patio from the street, or create a secluded corner in your garden, identifying the specific privacy needs will help you determine the best location for your wall.
-
Sun and Wind Exposure: Take note of the sun and wind patterns in your yard. Position the privacy wall to provide shade where needed and to block strong winds, creating a more comfortable outdoor environment.
-
Aesthetic Considerations: Consider how the privacy wall will complement the overall look and feel of your outdoor space. Think about the landscaping, existing structures, and the visual impact of the wall from different vantage points.
-
Legal Restrictions: Check local building codes and homeowner association regulations to ensure compliance with any restrictions on the height, location, and materials allowed for privacy walls in your area.
-
Utility Lines and Underground Obstacles: Before finalizing the location, make sure to check for any underground utility lines or obstacles that could interfere with the construction process. It's essential to avoid any potential hazards and ensure a smooth building process.
By carefully considering these factors, you can select the optimal location for your privacy wall, ensuring that it meets your privacy needs while enhancing the functionality and aesthetics of your outdoor space.
Selecting Materials
When it comes to building a privacy wall, selecting the right materials is crucial for ensuring durability, aesthetics, and functionality. Here are some key considerations when choosing the materials for your privacy wall:
-
Wood: Wood is a popular choice for privacy walls due to its natural beauty and versatility. Cedar and redwood are excellent options as they are naturally resistant to decay and insect damage. Pressure-treated lumber is another durable choice that offers long-term protection against rot and pests.
-
Composite Materials: If you're looking for a low-maintenance option, composite materials such as PVC, vinyl, or composite wood are worth considering. These materials are resistant to rot, warping, and insect damage, making them ideal for long-lasting privacy walls.
-
Metal: For a modern and industrial look, metal privacy screens or panels can be a stylish choice. Materials like aluminum, steel, or wrought iron offer durability and can be customized to create unique designs.
-
Masonry: Brick, concrete blocks, or natural stone can add a timeless and substantial feel to your privacy wall. These materials provide excellent durability and can be used to create a solid and imposing barrier for maximum privacy.
-
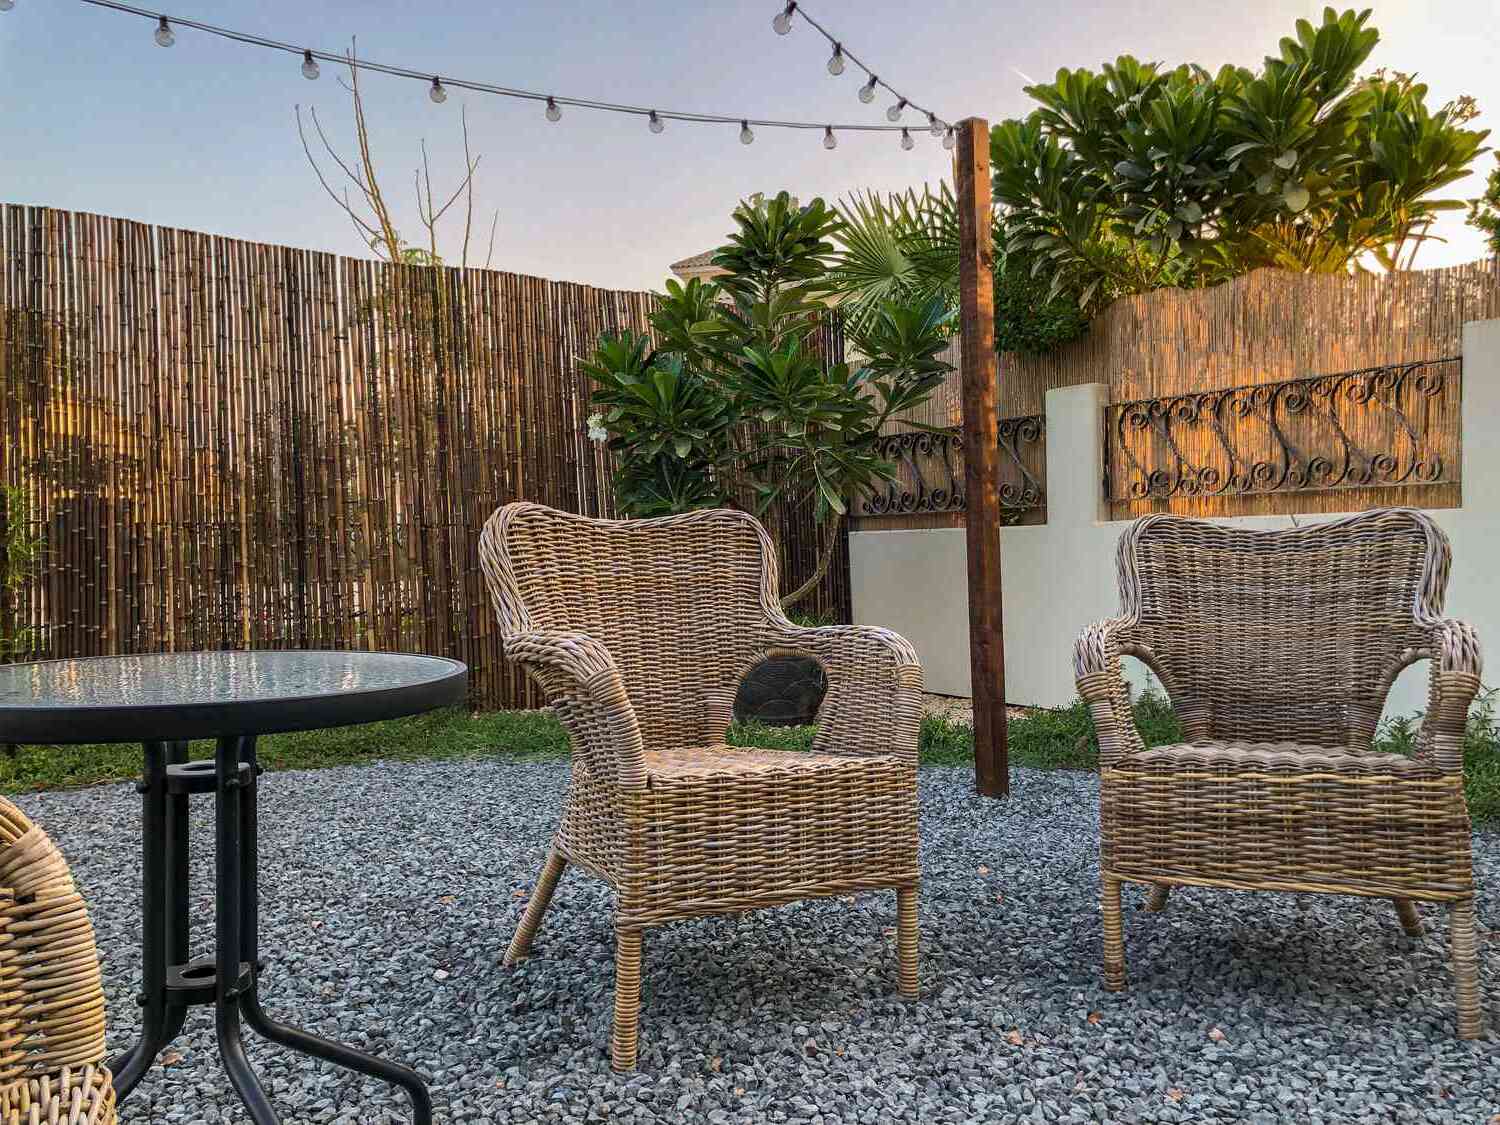
Bamboo: If you prefer a more natural and eco-friendly option, bamboo can be a great choice for creating a tropical or Zen-inspired privacy wall. Bamboo screens or panels offer a lightweight and sustainable solution for adding privacy to your outdoor space.
-
Decorative Additions: Consider incorporating decorative elements such as lattice panels, trellises, or ornamental ironwork to add visual interest and enhance the overall design of your privacy wall.
By carefully selecting the materials for your privacy wall, you can achieve the desired aesthetic appeal, durability, and functionality while ensuring that it complements the style of your outdoor space. Keep in mind factors such as maintenance requirements, cost, and the overall design vision when making your material choices.
Designing the Privacy Wall
Designing your privacy wall is where you can let your creativity shine and tailor the wall to your specific needs and style preferences. Here are some key aspects to consider when designing your privacy wall:
-
Height and Length: Determine the ideal height and length of the privacy wall based on your privacy needs and the dimensions of your outdoor space. Taller walls provide more seclusion, while the length of the wall should align with the area you want to enclose or shield from view.
-
Style and Aesthetics: Consider the architectural style of your home and the existing landscaping when choosing the design for your privacy wall. Whether you prefer a modern, minimalist look, a rustic and natural feel, or a decorative and ornate design, the style of the wall should harmonize with the overall aesthetic of your outdoor space.
-
Privacy Features: Decide on the level of privacy you want to achieve. Options such as solid panels, slatted designs, or latticework can offer varying degrees of privacy while allowing for airflow and natural light.
-
Integration with Landscape: Integrate the privacy wall seamlessly into your landscape design by incorporating elements such as climbing plants, built-in planters, or decorative lighting. This can soften the visual impact of the wall and create a more inviting and cohesive outdoor environment.
-
Structural Considerations: Work with a structural engineer or a knowledgeable contractor to ensure that the design of the privacy wall meets safety and building code requirements. Factors such as wind resistance, stability, and proper anchoring should be carefully considered during the design phase.
-
Permits and Regulations: Check with local authorities to determine if any permits are required for the construction of your privacy wall. Be aware of any zoning regulations, setback requirements, or neighborhood covenants that may impact the design and construction of the wall.
By thoughtfully considering these design aspects, you can create a privacy wall that not only serves its practical purpose but also enhances the beauty and functionality of your outdoor living space. Whether you opt for a sleek and modern design, a charming and rustic look, or a combination of materials and textures, the design process allows you to tailor the privacy wall to your unique preferences and lifestyle.
Preparing the Site
Before you start building your privacy wall, it's essential to prepare the site to ensure a smooth and successful construction process. Here's a detailed look at the steps involved in preparing the site for your privacy wall:
-
Clearing the Area: Begin by clearing the area where the privacy wall will be constructed. Remove any existing vegetation, debris, or obstacles that may interfere with the installation process. This includes rocks, tree roots, and any other obstructions that could affect the stability of the wall.
-
Marking the Layout: Use stakes and string to mark the layout of the privacy wall. This will help you visualize the dimensions and placement of the wall, ensuring that it aligns with your design plans and meets the desired specifications.
-
Excavation: If your privacy wall requires a concrete footing or foundation, excavation will be necessary. Dig the trench for the footing according to the depth and width specified in your design plans. It's important to excavate to the appropriate depth to provide a stable base for the wall.
-
Leveling the Ground: Ensure that the ground where the wall will be built is level and compacted. Use a compactor or tamper to create a firm and even surface for the foundation. Properly leveled ground will contribute to the stability and longevity of the privacy wall.
-
Installing Drainage (if needed): Depending on the location and soil conditions, you may need to incorporate drainage features to prevent water buildup behind the wall. This could involve the installation of perforated drainage pipes or gravel backfill to promote proper water drainage.
-
Verifying Property Lines: Before proceeding with the construction, it's crucial to verify the property lines to ensure that the privacy wall is built within your property boundaries. This step is essential to avoid any legal disputes or encroachment on neighboring properties.
-
Gathering Tools and Materials: As part of site preparation, gather all the necessary tools and materials required for the construction of the privacy wall. This may include concrete mix, reinforcement bars, gravel, leveling tools, and safety equipment.
By thoroughly preparing the site for your privacy wall, you can lay the groundwork for a successful and structurally sound construction process. Taking the time to clear the area, mark the layout, and address foundational considerations will set the stage for the next phase of building your privacy wall.
Building the Foundation
Building a solid foundation is crucial for the stability and longevity of your privacy wall. The foundation provides the necessary support to withstand external forces and ensure that the wall remains structurally sound over time. Here's a detailed guide on how to build the foundation for your privacy wall:
-
Preparing the Footing: If your privacy wall design calls for a concrete footing, begin by preparing the footing trench according to the specified dimensions in your design plans. The depth and width of the trench will depend on the height and length of the wall, as well as the soil conditions in your area.
-
Reinforcement and Formwork: Once the footing trench is excavated, it's time to add reinforcement bars (rebar) to provide strength and stability to the foundation. Place the rebar in the trench according to the recommended spacing and secure them in place. Additionally, construct formwork using wooden boards to contain the concrete and shape the footing.
-
Pouring the Concrete: With the reinforcement and formwork in place, it's time to pour the concrete for the footing. Use a high-quality concrete mix and ensure that it is thoroughly compacted to eliminate air pockets and achieve a uniform density. Smooth the surface of the concrete to create a level and even footing.
-
Curing and Drying: Allow the concrete to cure and dry according to the manufacturer's recommendations. This typically involves keeping the concrete moist and protected from extreme temperatures to facilitate proper curing and achieve maximum strength.
-
Anchor Bolts and Leveling: If your privacy wall will be attached to the foundation, install anchor bolts in the concrete footing before it fully sets. The anchor bolts will provide a secure connection between the wall and the foundation. Use a level to ensure that the top of the footing is perfectly level and aligned with the design specifications.
-
Inspecting and Testing: Once the concrete has cured, inspect the foundation for any imperfections or irregularities. Test the stability and integrity of the footing by applying pressure and verifying that it can support the weight of the privacy wall.
By following these steps to build a strong and well-constructed foundation, you can ensure that your privacy wall is built on a solid base, providing the necessary support and stability for years to come. A properly built foundation is essential for the overall structural integrity of the privacy wall and contributes to its long-term performance and durability.
Constructing the Wall
Once the foundation is in place, it's time to move on to the exciting phase of constructing the privacy wall. This is where you'll see your plans come to life as the wall takes shape. Here's a step-by-step guide on how to construct the wall for your privacy needs:
-
Laying the First Course: Begin by laying the first course of your chosen building material on top of the foundation. Whether you're using bricks, concrete blocks, or wooden panels, ensure that they are positioned evenly and securely. Use a level to check for uniformity and adjust as needed to maintain a straight and level base for the wall.
-
Building Upward: As you progress with the construction, continue to stack the building materials according to your design plans. Whether you're creating a solid wall or incorporating openings for airflow and aesthetics, maintain consistency in the placement of the materials to achieve a cohesive and visually appealing structure.
-
Securing the Materials: Depending on the type of material used, secure the components together using mortar, adhesive, or fasteners. Follow the manufacturer's recommendations for the specific material to ensure proper bonding and structural integrity. Pay attention to the joints and connections to create a stable and durable wall.
-
Incorporating Reinforcement: If you're building a tall or particularly heavy privacy wall, consider incorporating reinforcement elements such as steel bars or anchors to enhance the stability and resistance to external forces. This is especially important for walls that may be exposed to strong winds or other environmental factors.
-
Adding Gate or Door Features: If your privacy wall includes a gate or door, carefully install these elements according to the manufacturer's instructions. Ensure that the gate or door is aligned properly, operates smoothly, and integrates seamlessly with the overall design of the wall.
-
Finishing Touches: As the wall nears completion, take the time to inspect the structure for any imperfections or inconsistencies. Make any necessary adjustments to ensure that the wall is uniform, level, and meets your design specifications. Clean off any excess mortar, sealants, or debris to achieve a polished and professional finish.
-
Applying Surface Treatments: Depending on the material used for the wall, consider applying surface treatments such as sealants, stains, or paint to enhance the appearance and protect the wall from the elements. Follow the recommended application methods and allow sufficient time for the treatments to dry and cure.
By following these steps, you can successfully construct a privacy wall that not only provides the desired seclusion but also enhances the visual appeal and functionality of your outdoor space. Whether you opt for a solid masonry wall, a sleek metal panel design, or a natural wood barrier, the construction phase is where your vision for a private and inviting outdoor retreat becomes a reality.
Adding Finishing Touches
As the construction of your privacy wall nears completion, it's time to focus on adding the finishing touches that will elevate the overall appearance and functionality of the structure. Here are the essential steps to consider when adding the final details to your privacy wall:
-
Inspecting for Imperfections: Before proceeding with the finishing touches, carefully inspect the entire wall for any imperfections, such as uneven surfaces, protruding fasteners, or excess mortar. Address any issues to ensure that the wall meets your quality standards and design expectations.
-
Adjusting and Aligning: Make any necessary adjustments to ensure that the wall is uniform, level, and aligned with your original design plans. Pay attention to the straightness of the vertical and horizontal lines, as well as the overall symmetry of the structure.
-
Cleaning and Clearing Debris: Clean off any residual mortar, adhesive, or construction debris from the surface of the wall. Use a brush, sponge, or appropriate cleaning tools to remove any unsightly marks or blemishes, leaving the wall looking clean and polished.
-
Sealing Joints and Gaps: If your privacy wall consists of materials such as wood or masonry, consider sealing any joints, gaps, or seams to prevent moisture infiltration and enhance the structural integrity of the wall. Use an appropriate sealant or caulk that is compatible with the material to create a watertight barrier.
-
Applying Protective Coatings: Depending on the material used for the wall, consider applying protective coatings such as clear sealants, stains, or paint to safeguard the surface from weathering, UV exposure, and moisture. Follow the manufacturer's recommendations for application methods and drying times to achieve optimal protection.
-
Adding Decorative Elements: Enhance the visual appeal of the privacy wall by incorporating decorative elements such as ornamental caps, finials, or trim pieces. These details can add a touch of elegance and sophistication to the structure, creating a polished and refined look.
-
Integrating Lighting Features: If desired, integrate lighting fixtures into the privacy wall to illuminate the area and create a warm and inviting ambiance. Consider options such as low-voltage LED lights, sconces, or recessed lighting to enhance the functionality and aesthetics of the wall, especially during evening hours.
-
Incorporating Greenery: Soften the appearance of the privacy wall by incorporating greenery such as climbing vines, hanging planters, or potted plants. This not only adds a natural and organic element to the structure but also helps blend the wall seamlessly into the surrounding landscape.
-
Customizing with Personal Touches: Consider adding personalized elements such as engraved plaques, decorative artwork, or custom signage to infuse the privacy wall with your unique style and personality. These personal touches can make the wall feel like a true extension of your outdoor living space.
By carefully attending to these finishing touches, you can ensure that your privacy wall is not only structurally sound and functional but also visually appealing and tailored to your specific preferences. The attention to detail during this phase will result in a privacy wall that serves as a standout feature in your outdoor environment, providing both seclusion and aesthetic charm.
Conclusion
In conclusion, building a privacy wall can significantly enhance the privacy, aesthetics, and functionality of your outdoor space. By carefully choosing the location, selecting the right materials, and designing a wall that aligns with your preferences, you can create a secluded oasis that complements your lifestyle. Proper site preparation, foundation construction, and meticulous attention to detail during the building and finishing phases are essential for achieving a privacy wall that not only meets your practical needs but also adds a touch of elegance to your outdoor environment. Whether you opt for a natural wood design, a durable masonry structure, or a modern metal panel, the process of building a privacy wall allows you to customize your outdoor space and create a tranquil retreat where you can relax and unwind in peace.