
Home>Create & Decorate>DIY & Crafts>DIY Garbage Can Enclosure: How To Build A Stylish And Functional Outdoor Storage Solution
DIY & Crafts
DIY Garbage Can Enclosure: How To Build A Stylish And Functional Outdoor Storage Solution
Published: June 4, 2024

Senior Editor in Create & Decorate, Kathryn combines traditional craftsmanship with contemporary trends. Her background in textile design and commitment to sustainable crafts inspire both content and community.
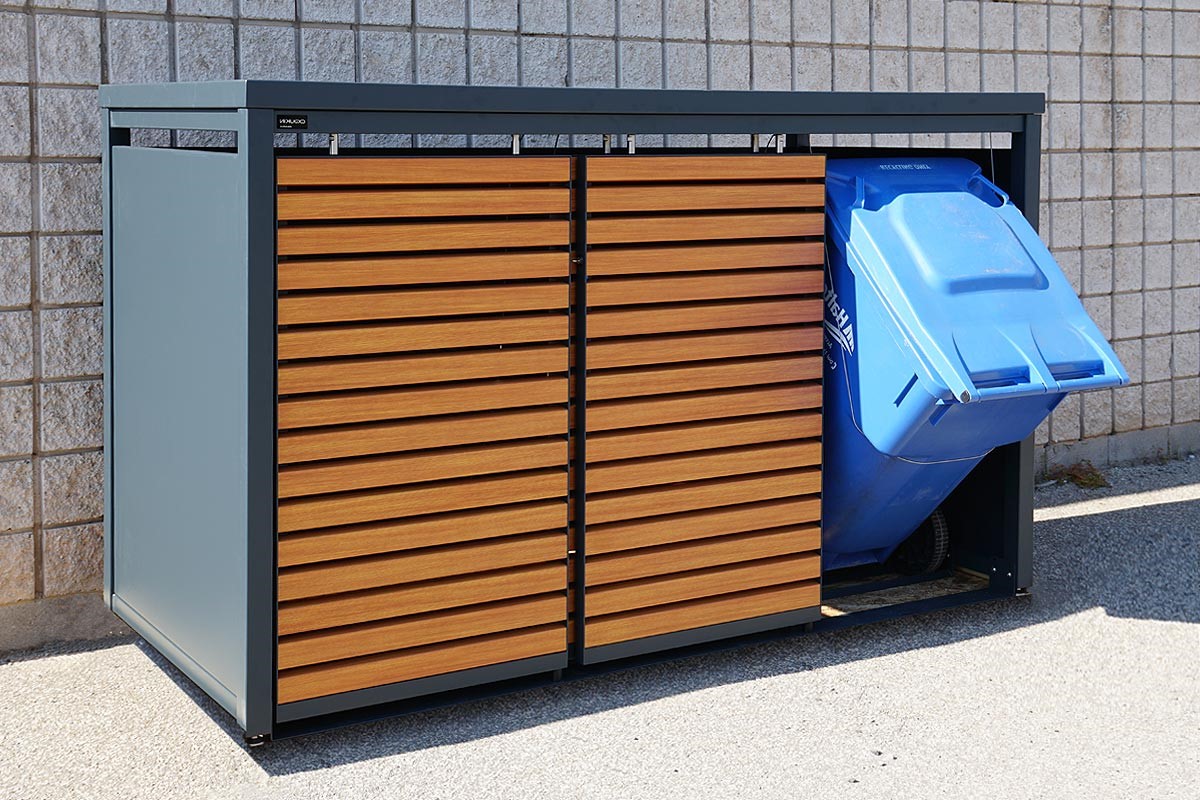
Learn how to create a stylish and functional outdoor storage solution with our DIY garbage can enclosure. Perfect for your DIY & Crafts projects.
(Many of the links in this article redirect to a specific reviewed product. Your purchase of these products through affiliate links helps to generate commission for Twigandthistle.com, at no extra cost. Learn more)
Introduction
Are you tired of looking at unsightly garbage cans cluttering up your outdoor space? A DIY garbage can enclosure might just be the solution you need. Not only will it keep your trash bins out of sight, but it can also add a touch of style to your yard. In this article, we'll guide you through the process of building a stylish and functional outdoor storage solution for your garbage cans. Whether you're a seasoned DIY enthusiast or a beginner looking for a new project, this guide will help you create a practical and attractive enclosure for your trash bins.
Planning Your Garbage Can Enclosure
Before you start building your garbage can enclosure, it's essential to plan out the details to ensure a successful project. Here are some key steps to consider during the planning phase:
-
Determine the Size: Measure the dimensions of your garbage cans to determine the size of the enclosure needed. Consider leaving some extra space for easy access to the bins and to accommodate any future changes in garbage can size.
-
Choose a Location: Select a suitable location for the enclosure in your yard. It should be easily accessible for placing and retrieving the garbage cans, yet discreet enough to keep them out of plain sight.
-
Check Local Regulations: Before building, check with your local municipality or homeowners' association for any regulations or guidelines regarding the construction of outdoor structures. This step will help you avoid any potential issues in the future.
-
Design Considerations: Think about the design and style you want for your enclosure. Consider elements such as the material, color, and overall aesthetic to ensure that it complements your outdoor space.
By carefully planning these aspects, you'll set the stage for a successful and well-executed garbage can enclosure project.
Gathering Materials and Tools
Once you have a solid plan in place, it's time to gather the necessary materials and tools for building your garbage can enclosure. Here's a comprehensive list to get you started:
Materials:
- Lumber: Purchase pressure-treated lumber for durability and resistance to outdoor elements. You'll need various sizes, including 4x4s for the posts, 2x4s for framing, and 1x6s for the siding.
- Hardware: Stock up on galvanized screws, hinges, and latches to ensure the longevity and security of your enclosure.
- Roofing Materials: Depending on your design preference, you may need shingles, metal roofing panels, or polycarbonate sheets for the roof.
- Concrete: If your enclosure will have a concrete foundation, gather the necessary concrete mix and gravel.
- Siding Options: Choose the type of siding you prefer, such as cedar boards, composite panels, or vinyl siding.
- Decorative Elements: Consider adding decorative elements such as trim pieces, finials, or paint for a personalized touch.
Tools:
- Measuring Tape: Accurate measurements are crucial for a precise and professional-looking enclosure.
- Circular Saw: A reliable saw for cutting lumber to the required dimensions.
- Drill/Driver: Essential for driving screws and assembling the enclosure components.
- Level: Ensure that your enclosure is straight and plumb during construction.
- Hammer: Useful for tasks such as nailing trim pieces or adjusting components.
- Safety Gear: Don't forget safety glasses, work gloves, and hearing protection for a safe working environment.
By gathering these materials and tools, you'll be well-prepared to tackle the construction of your garbage can enclosure with confidence and efficiency.
Building the Frame
Building the frame is a critical step in constructing your garbage can enclosure. The frame provides the structure and support for the entire enclosure, so it's essential to approach this phase with precision and attention to detail. Here's a step-by-step guide to help you build a sturdy and reliable frame for your outdoor storage solution:
-
Cutting the Lumber: Begin by cutting the pressure-treated lumber to the required dimensions for the frame components. Use a measuring tape and a circular saw to ensure accurate cuts. You'll need to cut the 4×4 posts to the desired height for the enclosure, as well as the 2x4s for the horizontal framing.
-
Assembling the Posts: Position the 4×4 posts in the designated location for your enclosure, ensuring that they are evenly spaced and aligned. Use a level to check for plumb and adjust the posts as needed. Once the posts are in position, secure them by driving galvanized screws through the base of each post into the ground or a concrete foundation.
-
Adding Horizontal Supports: With the posts in place, it's time to add the horizontal 2×4 supports to create the frame structure. Cut the 2x4s to the appropriate lengths for the top and bottom framing members, then attach them to the posts using screws. These horizontal supports will form the framework for attaching the siding and roof components.
-
Cross-Bracing for Stability: Depending on the size of your enclosure, you may need to add diagonal cross-bracing for additional stability. Cut the 2x4s at the proper angles to fit between the posts and secure them in place. This step will help prevent the frame from shifting or leaning over time.
-
Checking for Square: Throughout the assembly process, regularly check that the frame is square and level. This ensures that the enclosure will have clean lines and a professional appearance once completed. Make any necessary adjustments to maintain the squareness of the frame.
By following these steps, you'll be well on your way to creating a solid and well-constructed frame for your garbage can enclosure. Once the frame is in place, you can proceed to the next phase of adding the siding to enclose the structure and enhance its visual appeal.
Adding the Siding
Once the frame of your garbage can enclosure is securely in place, the next step is to add the siding to enclose the structure and enhance its visual appeal. The siding not only provides a finished look to the enclosure but also offers protection from the elements. Here's a detailed guide on how to add the siding to your garbage can enclosure:
-
Choosing the Siding Material: Select the siding material that best suits your preferences and complements the overall design of your outdoor space. Common options include cedar boards, composite panels, or vinyl siding. Consider factors such as durability, maintenance requirements, and aesthetic appeal when making your selection.
-
Measuring and Cutting: Take precise measurements of the sides of the frame where the siding will be installed. Use a measuring tape to determine the exact dimensions needed for each section of siding. Once measured, use a circular saw to cut the siding material to the appropriate sizes.
-
Attaching the Siding: Begin attaching the siding to the frame, starting from the bottom and working your way up. Secure the siding panels or boards to the frame using galvanized screws or nails, ensuring that they are evenly spaced and aligned. For vinyl siding, interlock the panels securely to prevent moisture infiltration.
-
Overlapping Joints: If you're using siding panels, ensure that the joints between panels are properly overlapped and sealed to prevent water penetration. This step is crucial for maintaining the integrity of the enclosure and protecting its contents from the elements.
-
Trim and Finishing Touches: Once the main sections of siding are installed, add any necessary trim pieces to provide a polished look and conceal any exposed edges. Consider adding decorative elements such as finials or paint to further enhance the appearance of the enclosure.
-
Ventilation Considerations: If your garbage can enclosure will house bins that contain organic waste, consider incorporating ventilation openings in the siding to promote airflow and prevent odors from accumulating inside the enclosure.
By following these steps, you'll be able to add the siding to your garbage can enclosure effectively, creating a visually appealing and weather-resistant structure to house your trash bins. With the siding in place, the next phase of the construction process involves installing the roof to provide protection from the elements and complete the enclosure's functional design.
Installing the Roof
Installing the roof is a crucial step in completing your garbage can enclosure, as it provides protection from the elements and ensures that your trash bins remain shielded from rain, snow, and harsh sunlight. Here's a comprehensive guide to help you successfully install the roof for your outdoor storage solution:
-
Selecting the Roofing Material: Choose a roofing material that suits your design preferences and provides adequate weather resistance. Common options include asphalt shingles, metal roofing panels, or polycarbonate sheets. Consider factors such as durability, aesthetics, and compatibility with the overall style of your outdoor space.
-
Measuring and Cutting: Measure the dimensions of the roof area on your enclosure frame to determine the amount of roofing material needed. Use a measuring tape to calculate the precise dimensions, and then use a circular saw or appropriate cutting tool to cut the roofing material to fit the roof structure.
-
Applying Underlayment: Before installing the primary roofing material, consider applying an underlayment to provide an additional layer of protection against moisture. For asphalt shingles or metal roofing, a waterproof underlayment can help prevent water infiltration and enhance the longevity of the roof.
-
Installing the Roofing Material: Begin installing the selected roofing material, starting from the bottom and working your way up. For asphalt shingles, overlap the shingles to create a water-resistant barrier, and secure them in place using roofing nails. If using metal roofing panels, ensure that they are properly aligned and securely fastened to the roof structure.
-
Sealing and Flashing: Pay attention to sealing the edges and joints of the roofing material to prevent water penetration. Use appropriate sealants or flashing materials to seal any gaps or transitions in the roof structure, ensuring a watertight seal that protects the interior of the enclosure.
-
Roof Ventilation: Consider incorporating ventilation elements into the roof design to promote airflow within the enclosure. Ventilation can help prevent heat buildup and reduce moisture accumulation, particularly if the enclosure will house organic waste that may produce odors.
-
Finishing Touches: Once the primary roofing material is installed, add any necessary finishing touches to complete the roof's appearance. Consider adding ridge caps for asphalt shingle roofs, or trim pieces to provide a polished look and ensure that the roof complements the overall aesthetic of the enclosure.
By following these steps, you'll be able to install the roof for your garbage can enclosure effectively, providing essential protection for your trash bins while completing the functional and stylish design of the outdoor storage solution. With the roof in place, the final phase of the construction process involves adding any remaining finishing touches to perfect the appearance and functionality of the enclosure.
Adding Finishing Touches
Once the primary construction of your garbage can enclosure is complete, it's time to add the finishing touches that will enhance both its appearance and functionality. These final details will elevate the overall aesthetic and ensure that your outdoor storage solution is both practical and visually appealing. Here's a detailed guide on adding the finishing touches to your garbage can enclosure:
-
Paint or Stain: Consider applying a coat of paint or stain to the exterior of the enclosure to complement your outdoor space's color scheme. Choose a high-quality outdoor paint or stain that provides durability and weather resistance. This step not only adds a personalized touch but also helps protect the wood from the elements.
-
Decorative Elements: Add decorative elements such as trim pieces, finials, or ornamental hardware to enhance the visual appeal of the enclosure. These details can create a cohesive look that integrates the enclosure with the overall design of your yard or outdoor area.
-
Door Hardware: Install durable and secure door hardware, including hinges and latches, to ensure that the enclosure's doors function smoothly and provide reliable access to the garbage cans. Choose hardware that complements the style of the enclosure while offering practical functionality.
-
Interior Organization: Consider adding hooks, shelves, or storage compartments inside the enclosure to optimize the space and keep the garbage cans organized. This interior organization can make it easier to manage the trash bins and any additional outdoor storage items.
-
Lighting: If the enclosure is located in a dimly lit area, consider adding outdoor lighting to improve visibility and accessibility, especially during evening hours. Solar-powered lights or low-voltage LED fixtures can illuminate the area around the enclosure and enhance its overall usability.
-
Landscaping Integration: Integrate the enclosure with the surrounding landscaping by adding planters, trellises, or climbing vines. This integration can soften the visual impact of the enclosure and create a more harmonious connection with the natural elements in your yard.
-
Signage or Labeling: Consider adding signage or labeling to clearly indicate the purpose of the enclosure and provide instructions for proper use. This step can be particularly useful if the enclosure serves multiple functions, such as recycling or composting in addition to trash storage.
By incorporating these finishing touches, you'll transform your garbage can enclosure into a well-integrated and attractive feature of your outdoor space. These details will not only enhance the functionality of the enclosure but also contribute to a cohesive and visually appealing landscape design.
Conclusion
In conclusion, building a DIY garbage can enclosure is a rewarding project that offers both practical benefits and aesthetic enhancements to your outdoor space. By carefully planning the size, location, and design of the enclosure, gathering the necessary materials and tools, and following the step-by-step construction process, you can create a stylish and functional outdoor storage solution for your trash bins. From building the sturdy frame to adding the protective siding and installing the roof, each phase of the construction contributes to the overall durability and visual appeal of the enclosure. The addition of finishing touches, such as paint, decorative elements, and interior organization, further elevates the enclosure's functionality and integration with your outdoor landscape. With a well-executed garbage can enclosure, you can effectively conceal unsightly trash bins, protect them from the elements, and contribute to a more organized and visually appealing outdoor environment. Whether you're a seasoned DIY enthusiast or a beginner looking to enhance your home's exterior, building a garbage can enclosure is a project that offers both practical and aesthetic rewards.