
Home>Create & Decorate>DIY & Crafts>How To Build A Privacy Wall On A Deck
DIY & Crafts
How To Build A Privacy Wall On A Deck
Published: February 27, 2024

Content Creator specializing in woodworking and interior transformations. Caegan's guides motivate readers to undertake their own projects, while his custom furniture adds a personal touch.
Learn how to create a DIY privacy wall for your deck with our step-by-step guide. Enhance your outdoor space with this easy craft project.
(Many of the links in this article redirect to a specific reviewed product. Your purchase of these products through affiliate links helps to generate commission for Twigandthistle.com, at no extra cost. Learn more)
Introduction
Creating a private and cozy outdoor space is a wonderful way to enhance the comfort and appeal of your deck. Whether you're looking to shield your deck from prying eyes, reduce wind exposure, or simply add a touch of style, building a privacy wall can be a rewarding DIY project. This guide will walk you through the step-by-step process of constructing a sturdy and attractive privacy wall on your deck, providing you with the seclusion and ambiance you desire.
A well-designed privacy wall not only offers seclusion but also adds a decorative element to your outdoor living area. By incorporating natural elements such as wood or bamboo, or even utilizing modern materials like metal or vinyl, you can customize the look to complement your deck's aesthetic. Additionally, the privacy wall can serve as a backdrop for hanging plants, outdoor artwork, or string lights, further enhancing the charm of your outdoor space.
Whether you're a seasoned DIY enthusiast or a novice looking to expand your skills, building a privacy wall on your deck is a manageable and gratifying project. Not only does it provide a sense of accomplishment, but it also allows you to tailor the design to suit your specific preferences and needs. With the right materials, tools, and guidance, you can transform your deck into a secluded retreat where you can relax, entertain, and enjoy the outdoors in peace and comfort.
Now, let's dive into the detailed steps required to build a privacy wall that will elevate the functionality and allure of your deck. From gathering the necessary materials and tools to adding the finishing touches, each step will bring you closer to creating a private oasis that reflects your personal style and enhances your outdoor living experience.
Step 1: Gather Materials and Tools
Before embarking on the construction of a privacy wall for your deck, it's essential to gather all the necessary materials and tools. This step sets the foundation for a smooth and efficient building process, ensuring that you have everything at hand to bring your vision to life.
Materials
- Lumber: Select high-quality lumber that is suitable for outdoor use, such as cedar or pressure-treated wood. The specific dimensions will depend on the design and size of your privacy wall.
- Privacy Panels: These can include lattice, bamboo screening, or pre-made wooden or vinyl panels, depending on your preferred aesthetic and level of privacy.
- Fasteners: Choose corrosion-resistant screws or nails designed for outdoor applications to secure the components of the privacy wall.
- Concrete: If your privacy wall will include support posts, you'll need concrete mix to secure them in the ground.
- Post Caps: Optional decorative elements that can be added to the tops of support posts for a polished look.
- Stain or Paint: If desired, select a suitable exterior stain or paint to protect and enhance the appearance of the wood.
Tools
- Measuring Tape: Essential for taking accurate measurements of the deck and planning the layout of the privacy wall.
- Level: Ensures that the support posts and crossbeams are installed perfectly straight and level.
- Circular Saw or Miter Saw: For cutting lumber to the required lengths and angles.
- Drill/Driver: Needed for driving screws or drilling pilot holes for nails.
- Shovel: If installing support posts in the ground, a shovel will be necessary for digging the holes.
- Wheelbarrow: Useful for mixing concrete if support posts are part of the design.
- Safety Gear: This includes gloves, safety glasses, and hearing protection to ensure a safe working environment.
By gathering these materials and tools, you'll be well-prepared to proceed with the subsequent steps of measuring, planning, and ultimately constructing your privacy wall. With everything in place, you can approach the project with confidence, knowing that you have the essential elements to bring your vision to fruition.
Step 2: Measure and Plan
Accurate measurements and meticulous planning are crucial for the successful construction of a privacy wall on your deck. This step sets the stage for a well-executed project, ensuring that the privacy wall fits seamlessly into the existing layout of your deck while fulfilling its intended purpose.
Begin by measuring the dimensions of your deck, taking into account the length and height where the privacy wall will be installed. Consider the desired level of privacy and the aesthetic appeal you wish to achieve. If you're incorporating pre-made privacy panels, take precise measurements to determine the quantity needed and ensure a proper fit.
Next, sketch a rough layout of the privacy wall, indicating the placement of support posts, crossbeams, and privacy panels. This visual representation will serve as a guide during the construction phase, helping you stay organized and focused on the intended design.
Consider any additional features you may want to incorporate, such as decorative elements or integrated seating. Planning these details in advance allows for a cohesive and harmonious integration of the privacy wall with the overall deck design.
Take into account local building codes and regulations, especially if the privacy wall will exceed a certain height or if it will be attached to an existing structure. Adhering to these guidelines is essential to ensure the safety and compliance of your project.
Once you have finalized the measurements and layout, review the plan to identify any potential challenges or adjustments that may be necessary. This proactive approach will help mitigate unforeseen issues during the construction phase, saving time and resources.
By meticulously measuring and planning the privacy wall, you set the groundwork for a smooth and efficient construction process. This thoughtful preparation ensures that the privacy wall not only meets your functional and aesthetic requirements but also integrates seamlessly with your deck, enhancing the overall appeal of your outdoor living space.
Step 3: Install Support Posts
The installation of support posts is a critical phase in building a sturdy and reliable privacy wall for your deck. These posts provide the structural foundation, ensuring that the privacy wall is securely anchored and capable of withstanding various weather conditions. Here's a detailed guide on how to install support posts effectively:
1. Determine Placement:
Begin by marking the locations where the support posts will be installed. Use the previously developed plan to ensure accurate placement, taking into account the desired spacing between posts and their alignment with the overall design of the privacy wall.
2. Digging Holes:
Using a shovel, dig holes at the marked locations to accommodate the support posts. The depth of the holes should be in accordance with local building codes and regulations, typically reaching below the frost line to prevent shifting or instability.
3. Positioning the Posts:
Place the support posts into the prepared holes, ensuring that they are level and plumb. Temporary bracing can be used to hold the posts in position while the concrete is added to secure them.
4. Adding Concrete:
Mix the concrete according to the manufacturer's instructions in a wheelbarrow or mixing container. Carefully pour the concrete into the holes around the support posts, ensuring that they are completely filled. Use a level to confirm that the posts remain plumb during this process.
5. Allowing for Setting:
Allow sufficient time for the concrete to set and cure as per the recommended duration provided by the concrete manufacturer. This is crucial for establishing a solid and stable foundation for the support posts.
6. Checking Alignment:
Once the concrete has fully set, verify that the support posts are still level and aligned with the intended layout. Make any necessary adjustments to ensure uniformity and straightness.
By following these steps, you can effectively install support posts that form the backbone of your privacy wall. This foundational element sets the stage for the subsequent phases of the construction process, bringing you closer to the realization of a private and inviting outdoor space on your deck.
Step 4: Attach Crossbeams
With the support posts securely in place, the next crucial step in building a durable and visually appealing privacy wall for your deck is to attach the crossbeams. These horizontal components not only provide structural stability but also serve as the framework for securing the privacy panels. Here's a detailed guide on how to effectively attach crossbeams to complete this essential phase of the construction process:
-
Selecting the Crossbeams: Choose high-quality lumber that is suitable for outdoor use, such as pressure-treated wood or cedar. The dimensions of the crossbeams will depend on the design and size of your privacy wall. Ensure that the lumber is straight and free from any defects that may compromise its structural integrity.
-
Measuring and Cutting: Using a measuring tape and a saw, carefully measure and cut the crossbeams to the required lengths. It's essential to achieve precise cuts to ensure a seamless fit and a professional finish. If the privacy wall spans a significant length, consider joining multiple lengths of lumber using appropriate joinery techniques for added strength.
-
Positioning the Crossbeams: With the assistance of a level, position the crossbeams horizontally across the support posts at the predetermined intervals. Ensure that the crossbeams are aligned and level, as this will contribute to the overall stability and aesthetic appeal of the privacy wall.
-
Securing the Crossbeams: Using corrosion-resistant screws or nails, attach the crossbeams to the support posts securely. Predrilling pilot holes may be necessary to prevent the wood from splitting during the fastening process. Be mindful of maintaining consistent spacing between the crossbeams to accommodate the privacy panels effectively.
-
Reinforcement and Finishing: For added reinforcement, consider adding diagonal bracing between the support posts and the crossbeams. This can enhance the structural integrity of the privacy wall, especially in areas prone to strong winds or other environmental factors. Additionally, consider adding decorative elements or post caps to the tops of the support posts for a polished and personalized touch.
By following these detailed steps, you can effectively attach the crossbeams, bringing you closer to the completion of this pivotal phase in the construction of your privacy wall. The secure and precisely positioned crossbeams provide the foundation for seamlessly integrating the privacy panels, ultimately transforming your deck into a private and inviting outdoor sanctuary.
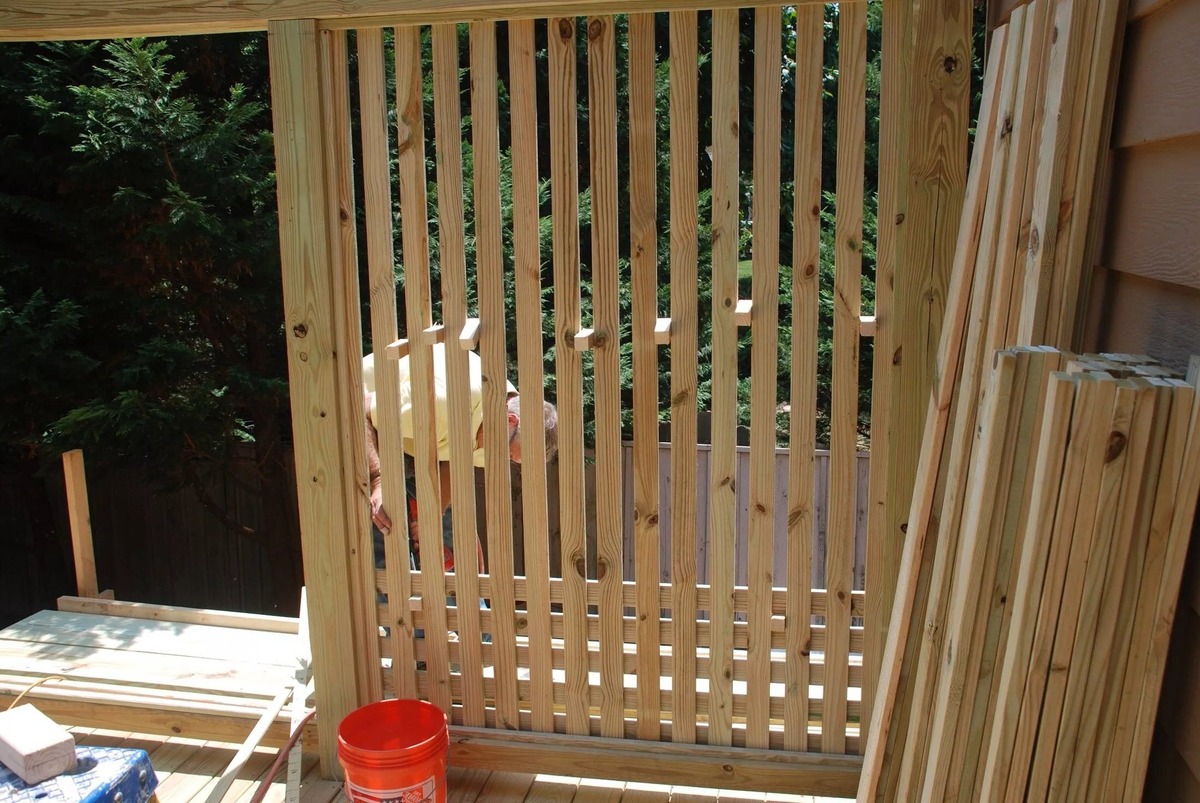
Step 5: Add Privacy Panels
The addition of privacy panels is a defining moment in the construction of your privacy wall, as it not only enhances the seclusion of your outdoor space but also contributes to its visual appeal. Whether you opt for traditional wooden lattice, bamboo screening, or modern vinyl panels, the installation process remains consistent. Here's a detailed guide on how to effectively add privacy panels to complete the transformation of your deck into a private oasis:
-
Selecting the Privacy Panels: Choose privacy panels that align with your desired level of seclusion and aesthetic preferences. Consider the material, color, and design elements that complement the overall style of your deck. Ensure that the panels are suitable for outdoor use and capable of withstanding the elements.
-
Measuring and Cutting: Take precise measurements to determine the dimensions of the privacy panels needed to cover the designated areas of the privacy wall. Using a saw, carefully cut the panels to fit the spaces between the crossbeams, ensuring a snug and uniform appearance.
-
Securing the Panels: Position the privacy panels between the crossbeams, ensuring that they are aligned and level. Depending on the selected panels, you may need to use screws or nails to secure them to the crossbeams and support posts. Predrilling pilot holes can help prevent the panels from splitting during the fastening process.
-
Customization and Integration: Consider customizing the privacy panels to reflect your personal style. This can include adding decorative elements, painting or staining the panels, or incorporating planters for a touch of greenery. Additionally, explore creative ways to integrate lighting or outdoor artwork to enhance the ambiance of the secluded space.
-
Evaluation and Adjustment: Once the privacy panels are in place, step back to assess the overall appearance and functionality of the privacy wall. Make any necessary adjustments to ensure that the panels are securely fastened and provide the desired level of privacy. Attention to detail during this phase contributes to a polished and cohesive end result.
By following these detailed steps, you can effectively add privacy panels to your privacy wall, bringing you closer to the realization of a secluded and visually captivating outdoor retreat. The integration of privacy panels not only enhances the privacy and comfort of your deck but also provides an opportunity for creative expression, allowing you to tailor the space to your unique preferences and lifestyle.
Step 6: Finishing Touches
As you approach the final phase of building your privacy wall on the deck, it's time to add the finishing touches that will elevate the overall aesthetic and functionality of the structure. These subtle yet essential details contribute to the cohesiveness and visual appeal of the privacy wall, transforming it into a seamless extension of your outdoor living space.
1. Stain or Paint:
Consider applying a protective stain or paint to the privacy wall to enhance its durability and visual allure. Choose a finish that complements the existing color scheme of your deck while providing resistance to weathering and UV exposure. This step not only adds a polished look to the privacy wall but also contributes to its long-term maintenance and longevity.
2. Decorative Elements:
Incorporate decorative elements such as ornamental caps for the support posts or intricate lattice toppers to infuse personality and charm into the privacy wall. These embellishments serve as focal points, adding character and individuality to the structure while harmonizing with the overall design of your deck.
3. Greenery and Planters:
Integrate greenery by incorporating planters or trellises within the privacy wall. Adding climbing vines, potted plants, or hanging baskets not only softens the appearance of the structure but also introduces natural elements that enhance the ambiance of your outdoor space.
4. Seating and Accessories:
If space allows, consider integrating built-in seating or attaching hooks for hanging outdoor accessories. This thoughtful addition transforms the privacy wall into a multifunctional feature, providing seating options and convenient storage for items such as gardening tools, lanterns, or decorative accents.
5. Lighting:
Explore creative lighting solutions to illuminate the privacy wall and create a captivating evening ambiance. Incorporate string lights, sconces, or solar-powered fixtures to add warmth and visual interest, extending the functionality of the deck into the evening hours.
6. Maintenance Considerations:
Lastly, consider the long-term maintenance of the privacy wall. Ensure that all components are properly sealed and secured, and establish a maintenance routine to preserve the structural integrity and visual appeal of the structure. Regular inspections and upkeep will prolong the lifespan of the privacy wall, allowing you to enjoy its benefits for years to come.
By attending to these finishing touches, you can elevate the privacy wall from a functional barrier to a captivating and integrated feature of your deck. Each detail contributes to the overall cohesiveness and charm of the outdoor space, creating a secluded retreat that reflects your personal style and enhances your enjoyment of the great outdoors.
Conclusion
In conclusion, the process of building a privacy wall on your deck is a gratifying endeavor that not only enhances the functionality of your outdoor space but also allows for creative expression and personalization. By following the step-by-step guide outlined in this article, you have embarked on a journey to transform your deck into a secluded retreat that reflects your unique style and meets your specific needs.
From the initial gathering of materials and tools to the meticulous planning, installation of support posts, attachment of crossbeams, addition of privacy panels, and the incorporation of finishing touches, each phase has contributed to the creation of a private and inviting outdoor sanctuary. The careful consideration of design elements, structural integrity, and aesthetic details has culminated in the realization of a privacy wall that seamlessly integrates with your deck, elevating its allure and functionality.
The privacy wall not only provides seclusion and protection from external elements but also serves as a canvas for personalization. Whether through the addition of decorative elements, integration of greenery, or the incorporation of lighting and seating, the privacy wall has evolved into a multifaceted feature that enhances the overall ambiance of your outdoor living space.
As you admire the completed privacy wall on your deck, take pride in the craftsmanship and attention to detail that have gone into its construction. Embrace the opportunity to enjoy moments of relaxation, entertainment, and connection with nature within this private oasis that you have meticulously brought to life.
Furthermore, the skills and knowledge gained from this project can be applied to future endeavors, empowering you to undertake additional DIY projects with confidence and proficiency. The experience of building a privacy wall serves as a testament to your creativity, resourcefulness, and dedication to enhancing your living environment.
Ultimately, the privacy wall stands as a testament to your vision and craftsmanship, enriching your outdoor lifestyle and providing a tranquil haven where you can unwind, entertain, and savor the beauty of your surroundings. It is a testament to the transformative power of DIY projects and the fulfillment that comes from creating a space that resonates with your individuality and enhances your everyday experiences.