
Home>Create & Decorate>DIY & Crafts>DIY: Build A Run-In Shed For Horses
DIY & Crafts
DIY: Build A Run-In Shed For Horses
Published: February 23, 2024

Content Creator specializing in woodworking and interior transformations. Caegan's guides motivate readers to undertake their own projects, while his custom furniture adds a personal touch.
Learn how to build a run-in shed for horses with our DIY & Crafts guide. Create a safe and comfortable shelter for your equine friends. Step-by-step instructions and tips included!
(Many of the links in this article redirect to a specific reviewed product. Your purchase of these products through affiliate links helps to generate commission for Twigandthistle.com, at no extra cost. Learn more)
Introduction
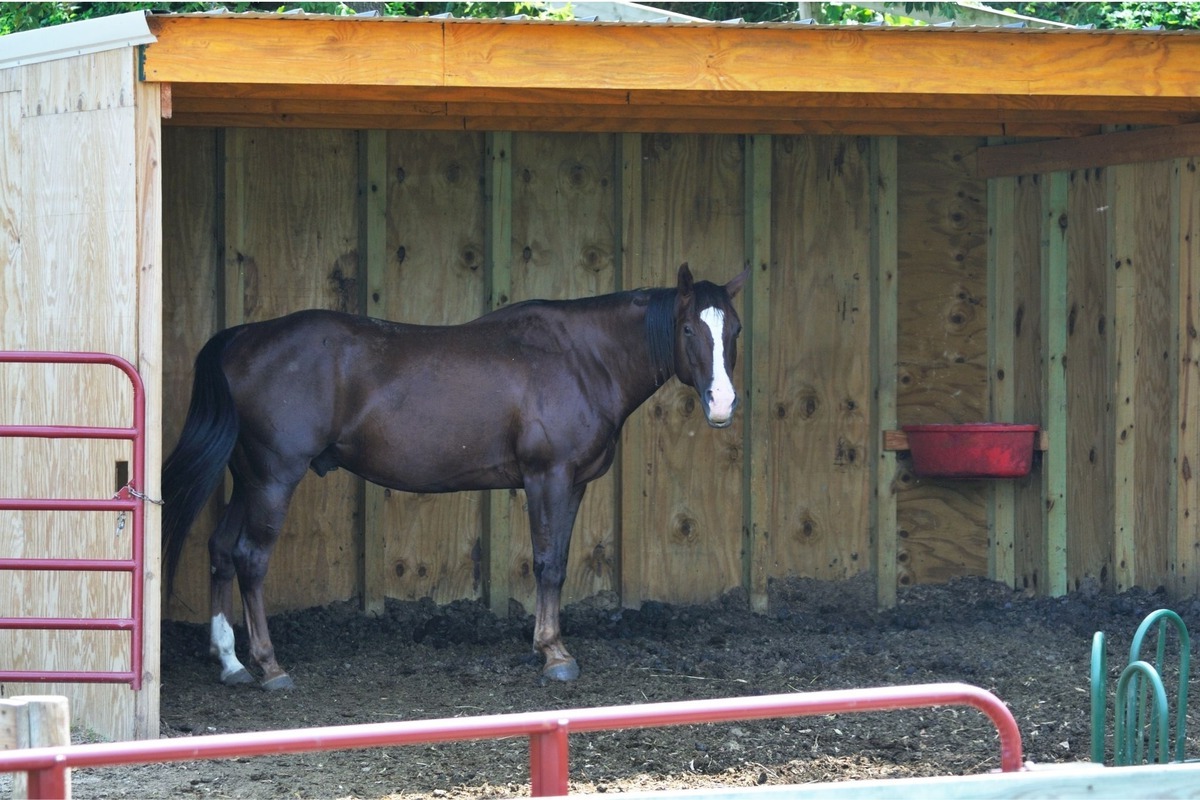
Are you a horse owner looking to provide your equine companions with a comfortable and sheltered space to roam and rest? Building a run-in shed for your horses can be a rewarding and practical DIY project. A run-in shed, also known as a loafing shed or a shelter, offers horses a place to seek refuge from the elements, whether it's the scorching sun, pouring rain, or biting winds. This structure provides a safe haven for horses to relax, eat, and find protection, making it an essential addition to any equine property.
Constructing a run-in shed for your horses not only ensures their well-being but also allows you to exercise your DIY skills and creativity. Whether you're a seasoned DIY enthusiast or a novice looking to embark on your first major project, building a run-in shed can be a fulfilling endeavor. By taking on this task, you'll have the opportunity to customize the shed to suit your horses' needs and your property's layout, creating a space that is both functional and aesthetically pleasing.
Throughout this comprehensive guide, we'll walk you through the step-by-step process of building a run-in shed for your horses. From planning and preparation to the finishing touches, you'll gain valuable insights and practical tips to help you successfully complete this project. By the end of this journey, you'll be equipped with the knowledge and confidence to embark on this rewarding DIY venture and provide your horses with a cozy and protective shelter they'll appreciate for years to come. So, roll up your sleeves, gather your tools, and let's dive into the exciting world of building a run-in shed for your beloved equine companions.
Planning and Preparation
Before diving into the construction of a run-in shed for your horses, thorough planning and preparation are essential to ensure a smooth and successful building process. This phase sets the foundation for the entire project, allowing you to anticipate potential challenges and make informed decisions. Here's a detailed breakdown of the key steps involved in the planning and preparation stage:
-
Assessing Your Horses' Needs: Begin by evaluating the specific needs of your horses. Consider the number of horses that will be using the shed, their sizes, and any special requirements they may have. This assessment will help determine the dimensions and features of the run-in shed, ensuring that it adequately accommodates your equine companions.
-
Research and Design: Take the time to research different run-in shed designs and layouts. Explore various architectural styles and features that align with your horses' needs and your property's aesthetics. Whether you opt for a traditional or modern design, ensure that the structure provides ample space, ventilation, and protection from the elements.
-
Obtaining Permits: Check with your local building authorities to determine if any permits are required for constructing a run-in shed on your property. Understanding the necessary regulations and obtaining the required permits in advance will prevent potential legal issues and ensure compliance with local building codes.
-
Setting a Budget: Establish a realistic budget for the project, factoring in the cost of materials, tools, and any professional assistance you may need. By setting a clear budget from the outset, you can make informed decisions when selecting materials and avoid unexpected financial strain as the project progresses.
-
Gathering Materials and Tools: Create a comprehensive list of materials and tools needed for the construction process. This may include lumber, roofing materials, fasteners, and essential tools such as saws, drills, and measuring equipment. Ensuring that you have all the necessary items on hand will streamline the building process and minimize delays.
-
Selecting an Ideal Location: Carefully choose the location for the run-in shed, considering factors such as natural drainage, proximity to grazing areas, and accessibility for maintenance. The chosen site should provide a level and well-drained foundation for the shed, promoting the comfort and safety of your horses.
By meticulously addressing these crucial aspects during the planning and preparation stage, you'll lay a solid groundwork for the construction of a functional and well-suited run-in shed for your horses. This thoughtful approach will set the stage for a successful and rewarding DIY endeavor, ensuring that the final structure meets both your horses' needs and your vision for an ideal equine shelter.
Choosing the Right Location
Selecting the ideal location for your run-in shed is a critical decision that significantly impacts the comfort and well-being of your horses. The chosen site should offer a balance of practicality, safety, and functionality, ensuring that the shed serves its intended purpose effectively. Here's a detailed exploration of the key considerations when choosing the right location for your equine shelter:
Natural Drainage and Ground Stability
When scouting for a location, prioritize areas with natural drainage to prevent water accumulation around the shed. Standing water can lead to muddy and unsanitary conditions, posing health risks to your horses. Additionally, opt for a site with stable ground to minimize the risk of uneven settling, which could compromise the structural integrity of the shed over time.
Proximity to Grazing Areas
Consider the proximity of the chosen location to your horses' grazing areas. Placing the run-in shed within close reach of the grazing space allows your horses to seek shelter conveniently during inclement weather or when they need a break from the sun. This accessibility promotes the shed's practical use and encourages your horses to utilize it as a comfortable resting spot.
Shelter from Natural Elements
Assess the natural elements, such as prevailing winds and sun exposure, when determining the shed's location. Positioning the shed to provide natural windbreaks and shade during different times of the day can enhance its functionality. By strategically orienting the shed, you can create a comfortable and protected environment for your horses, shielding them from harsh winds and excessive sunlight.
Accessibility for Maintenance
Ensure that the chosen location allows easy access for routine maintenance and cleaning. Accessibility is crucial for tasks such as mucking out the shed, replenishing bedding, and conducting structural inspections. A location that facilitates effortless maintenance promotes the overall cleanliness and hygiene of the shed, contributing to your horses' health and comfort.
Safety and Visibility
Prioritize safety by selecting a location that offers good visibility from your home or barn. A visible location allows you to monitor your horses while they are in the shed, enabling you to quickly respond to any emergencies or unusual behavior. Additionally, a visible shed location can act as a deterrent to potential predators, contributing to your horses' security.
By carefully considering these factors and evaluating potential locations on your property, you can identify the optimal site for your run-in shed. This thoughtful approach ensures that the shed not only meets your horses' needs for shelter and comfort but also integrates seamlessly into your equine management practices, enhancing the overall functionality and well-being of your equine companions.
Gathering Materials and Tools
Gathering the necessary materials and tools is a crucial step in preparing for the construction of a run-in shed for your horses. By ensuring that you have all the essential items on hand, you can streamline the building process and minimize potential delays. Here's a comprehensive breakdown of the materials and tools you'll need to embark on this rewarding DIY project:
Materials
-
Lumber: Select high-quality lumber for the structural components of the shed, including posts, beams, rafters, and siding. Pressure-treated wood is an excellent choice for its durability and resistance to decay, ensuring the longevity of the shed.
-
Roofing Materials: Choose durable and weather-resistant roofing materials such as metal panels or asphalt shingles. These materials provide reliable protection from the elements and contribute to the shed's overall resilience.
-
Fasteners: Stock up on a variety of fasteners, including nails, screws, and bolts, to secure the structural elements and roofing materials. Opt for corrosion-resistant fasteners to maintain the shed's structural integrity over time.
-
Foundation Materials: Depending on your chosen foundation type, gather concrete, gravel, or compacted stone to establish a stable and level base for the shed. Ensure that the foundation materials align with your local building codes and environmental conditions.
-
Siding and Trim: Consider the aesthetic appeal and weather resistance when selecting siding and trim materials. Options such as vinyl siding, board and batten, or wooden clapboard can enhance the shed's visual appeal while offering protection from moisture and pests.
-
Ventilation and Insulation: If desired, acquire ventilation components and insulation materials to regulate the shed's internal climate. Proper ventilation and insulation contribute to the comfort and well-being of your horses, especially during extreme weather conditions.
Tools
-
Power Tools: Essential power tools such as a circular saw, drill/driver, and reciprocating saw facilitate efficient cutting, drilling, and fastening during the construction process.
-
Measuring and Marking Tools: Equip yourself with measuring tapes, framing squares, and marking tools to ensure accurate and precise assembly of the shed components.
-
Leveling and Grading Tools: Depending on the foundation type, tools such as a level, shovel, and grading equipment are essential for establishing a stable and properly graded foundation for the shed.
-
Safety Gear: Prioritize safety by obtaining personal protective equipment, including gloves, safety glasses, and dust masks, to safeguard yourself during the construction process.
By proactively gathering these materials and tools, you'll set the stage for a smooth and efficient construction process, allowing you to focus on bringing your vision of a comfortable and protective run-in shed for your horses to life.
Building the Foundation
The foundation serves as the fundamental support system for the entire structure of the run-in shed, playing a pivotal role in ensuring its stability and longevity. When building the foundation for your equine shelter, it's essential to adhere to best practices and consider the specific environmental and soil conditions of your property. Here's a detailed exploration of the key steps involved in constructing a solid foundation for your run-in shed:
-
Site Preparation: Begin by clearing and leveling the chosen site for the foundation. Remove any vegetation, rocks, or debris to create a clean and even surface. This preparatory step sets the stage for establishing a stable foundation that promotes the structural integrity of the shed.
-
Foundation Type Selection: Evaluate the available foundation options, such as concrete pads, gravel pads, or post footings, based on your property's characteristics and local building codes. Each foundation type offers distinct advantages, and your choice should align with factors such as soil drainage, frost depth, and the shed's intended use.
-
Excavation and Grading: If opting for a concrete or gravel pad, proceed with excavating the designated area to the required depth and dimensions. Use grading tools to ensure that the excavated site is level and properly sloped for efficient water drainage, mitigating the risk of water pooling around the foundation.
-
Formwork and Reinforcement: For concrete foundations, construct formwork to contain the concrete and provide the desired shape and dimensions. Additionally, incorporate reinforcement materials such as rebar or wire mesh to enhance the strength and durability of the concrete foundation, especially in areas prone to soil movement or seismic activity.
-
Concrete Pouring and Curing: Once the formwork is in place, proceed with pouring the concrete into the prepared site, ensuring even distribution and proper consolidation. After pouring, implement appropriate curing measures to facilitate the concrete's gradual strength development and minimize the risk of cracking.
-
Anchoring and Post Installation: If utilizing post footings, securely anchor the treated lumber posts into the ground at designated intervals, ensuring proper alignment and stability. Consider using concrete or gravel backfill around the posts to enhance their anchoring and resistance to soil movement.
By meticulously executing these foundational steps, you'll establish a robust and reliable base for your run-in shed, laying the groundwork for the subsequent stages of construction. A well-constructed foundation not only ensures the structural stability of the shed but also contributes to its long-term resilience in the face of varying environmental conditions.
Constructing the Frame
With the foundation in place, the next pivotal phase in building a run-in shed for your horses involves constructing the frame, which forms the skeletal structure of the shelter. The frame serves as the framework upon which the shed's walls, roof, and other components will be installed, making it essential to ensure precision and structural integrity. Here's a comprehensive exploration of the key steps involved in constructing the frame for your equine shelter:
-
Lumber Selection: Begin by selecting high-quality lumber for the frame components, prioritizing durability and resistance to environmental elements. Pressure-treated wood is an excellent choice for its ability to withstand moisture, pests, and decay, ensuring the longevity of the frame.
-
Cutting and Assembly: Utilize precise measurements and cutting techniques to fabricate the posts, beams, and other structural elements according to the shed's design specifications. Employing power tools such as a circular saw and drill/driver facilitates efficient cutting and assembly, ensuring accurate alignment and joint connections.
-
Post Installation: Position the prepared posts at designated intervals along the perimeter of the foundation, ensuring proper spacing and alignment. Secure the posts in place using appropriate fasteners and bracing techniques, promoting stability and load-bearing capacity.
-
Beam and Rafter Installation: Once the posts are securely in place, proceed with installing the horizontal beams and rafters to form the framework's roof structure. Ensure that the beams are level and properly aligned, providing a solid foundation for the shed's roofing materials.
-
Bracing and Reinforcement: Implement diagonal bracing and reinforcement techniques to enhance the frame's stability and resistance to lateral forces. Proper bracing minimizes the risk of structural sway and ensures that the frame can withstand external pressures, such as strong winds or heavy snow loads.
-
Door and Window Openings: If incorporating doors or windows into the shed design, carefully frame and reinforce the designated openings within the frame. This step ensures that the frame accommodates these elements seamlessly, allowing for easy installation of access points and natural lighting features.
By meticulously executing these steps, you'll establish a robust and well-structured frame for your run-in shed, setting the stage for the subsequent phases of construction. The completed frame serves as the backbone of the shelter, providing the necessary support and framework for the shed's walls, roof, and finishing touches. With the frame in place, you're one step closer to bringing your vision of a comfortable and protective shelter for your horses to fruition.
Adding the Roof and Siding
As the frame of the run-in shed takes shape, the next crucial step involves adding the roof and siding to enclose the structure and provide essential protection from the elements. This phase marks a significant milestone in the construction process, as it contributes to the shed's functionality, durability, and overall visual appeal. Here's a detailed exploration of the key steps involved in adding the roof and siding to your equine shelter:
Roof Installation
Begin by selecting durable and weather-resistant roofing materials that align with your design preferences and environmental considerations. Options such as metal panels, asphalt shingles, or polycarbonate sheets offer reliable protection and longevity, safeguarding the shed and its occupants from rain, snow, and harsh sunlight.
Once the roofing materials are chosen, proceed with the careful installation of the roof components, ensuring proper alignment, weatherproofing, and secure fastening. Pay close attention to the roof's slope and drainage features, allowing for efficient water runoff and preventing potential leaks or water accumulation. Properly installed flashing and sealants further enhance the roof's weather resistance, contributing to the shed's overall resilience in varying climatic conditions.
Siding Application
Selecting the appropriate siding materials is essential for both functional and aesthetic considerations. Opt for siding options such as vinyl, wood, or metal that offer durability, resistance to moisture, and visual appeal. The chosen siding should complement the shed's design while providing effective protection against environmental elements and potential wear and tear.
Carefully apply the siding to the shed's framework, ensuring precise fitting, secure attachment, and proper sealing to prevent moisture infiltration. Attention to detail during the siding installation process contributes to the shed's overall structural integrity and weather resistance, creating a comfortable and protective environment for your horses.
Ventilation and Finishing Touches
Incorporate ventilation features into the roof and siding design to promote air circulation within the shed, contributing to a comfortable and healthy environment for your horses. Options such as ridge vents, gable vents, or louvered openings facilitate airflow, regulate internal temperatures, and minimize humidity buildup, enhancing the shed's overall livability.
As the roof and siding installation nears completion, attend to finishing touches such as trim work, gutter installation, and paint or stain application to enhance the shed's visual appeal and weather resistance. Thoughtful attention to these details adds a polished and cohesive look to the structure while ensuring long-term protection and durability.
By meticulously executing the roof and siding installation process, you'll bring your vision of a functional and visually appealing run-in shed for your horses to life. This phase represents a significant stride toward completing the equine shelter, setting the stage for the final touches and the eventual enjoyment and comfort it will provide to your beloved equine companions.
Finishing Touches
As the construction of the run-in shed nears completion, attention to finishing touches plays a pivotal role in enhancing the functionality, aesthetics, and overall appeal of the equine shelter. This phase encompasses a range of meticulous details and thoughtful additions that contribute to the shed's comfort, durability, and visual harmony within its surroundings.
Trim Work and Detailing
Incorporating trim work around the doors, windows, and corners of the shed adds a polished and cohesive look to the structure. Well-crafted trim not only enhances the shed's visual appeal but also provides protective edges and seals, contributing to its weather resistance and longevity. Careful attention to trim detailing reflects a commitment to craftsmanship and elevates the overall aesthetic of the equine shelter.
Gutter Installation
Installing gutters along the roofline of the shed serves as a practical and essential addition, facilitating efficient water drainage and management. Properly installed gutters and downspouts direct rainwater away from the shed's foundation, preventing potential water accumulation and soil erosion. This simple yet crucial feature contributes to the shed's structural integrity and promotes a drier and more stable environment for the horses.
Paint or Stain Application
Applying a protective coat of paint or stain to the exterior surfaces of the shed enhances its resistance to moisture, UV exposure, and environmental wear. The chosen finish not only adds a splash of color and personality to the structure but also acts as a shield, safeguarding the wood from decay, discoloration, and insect damage. Thoughtful consideration of the shed's surroundings and the desired aesthetic impact guides the selection of an appropriate paint or stain, ensuring a harmonious integration with the property's landscape.
Interior Bedding and Amenities
Preparing the interior of the shed with comfortable and clean bedding materials, such as straw or shavings, creates a welcoming and cozy environment for the horses. Additionally, incorporating amenities such as feeders, water troughs, and salt blocks within the shed ensures that the equine occupants have easy access to essential resources. These interior touches prioritize the horses' well-being and convenience, transforming the shed into a functional and inviting space for them to seek refuge and relaxation.
Signage and Personalization
Adding personalized signage or decorative elements to the exterior of the shed infuses a touch of individuality and character. Whether it's a custom nameplate, equine-themed artwork, or a welcoming message, these personal touches contribute to the shed's identity and create a warm and inviting atmosphere. Furthermore, clear and visible signage can serve practical purposes, such as indicating the shed's name, the horses it accommodates, or emergency contact information, enhancing both the shed's charm and its functional clarity.
By meticulously attending to these finishing touches, the run-in shed evolves from a functional structure to a thoughtfully crafted and inviting space for the horses. Each detail contributes to the shed's overall comfort, resilience, and integration into the equine environment, culminating in a space that not only meets the horses' needs but also reflects the care and dedication invested in its construction.
Conclusion
In conclusion, the journey of building a run-in shed for your horses is not just a construction project; it's a labor of love and a commitment to the well-being of your equine companions. From the initial planning and preparation to the meticulous finishing touches, every step in the construction process reflects a dedication to creating a safe, comfortable, and nurturing environment for your horses.
As you reflect on the completion of the run-in shed, take pride in the craftsmanship and attention to detail that have gone into every aspect of the structure. The careful selection of materials, the precision in constructing the frame, and the thoughtful additions such as ventilation, gutter installation, and personalized touches all contribute to a space that goes beyond mere shelter—it becomes a sanctuary for your horses.
The run-in shed stands as a testament to the bond between humans and horses, embodying the commitment to providing a space where these majestic animals can find respite, nourishment, and security. It becomes a central element of your equine management practices, seamlessly integrating into the daily routines and well-being of your horses.
Moreover, the completion of the run-in shed marks the beginning of a new chapter—a chapter filled with moments of tranquility as you witness your horses seeking shelter from the elements, sharing quiet moments of rest, and finding comfort within the protective walls of the shed. It becomes a backdrop for the stories and memories that will unfold, a witness to the unique bond between horse and owner.
As you stand back and admire the finished structure, remember that the run-in shed is more than just a building; it's a reflection of your commitment to the horses that bring joy, companionship, and purpose to your life. It stands as a symbol of stewardship, care, and respect for these magnificent animals, embodying the values of compassion and responsibility that define the equestrian community.
In the end, the completion of the run-in shed is not just a construction milestone; it's a celebration of the enduring connection between humans and horses, a testament to the timeless partnership that transcends the boundaries of language and culture. It's a reminder that in the act of building a shelter, we also build and nurture the bonds that enrich our lives and honor the noble spirit of the horse.