
Home>Create & Decorate>DIY & Crafts>DIY Bike Shed: Step-by-Step Guide To Building Your Own
DIY & Crafts
DIY Bike Shed: Step-by-Step Guide To Building Your Own
Published: February 24, 2024

Senior Editor in Create & Decorate, Kathryn combines traditional craftsmanship with contemporary trends. Her background in textile design and commitment to sustainable crafts inspire both content and community.
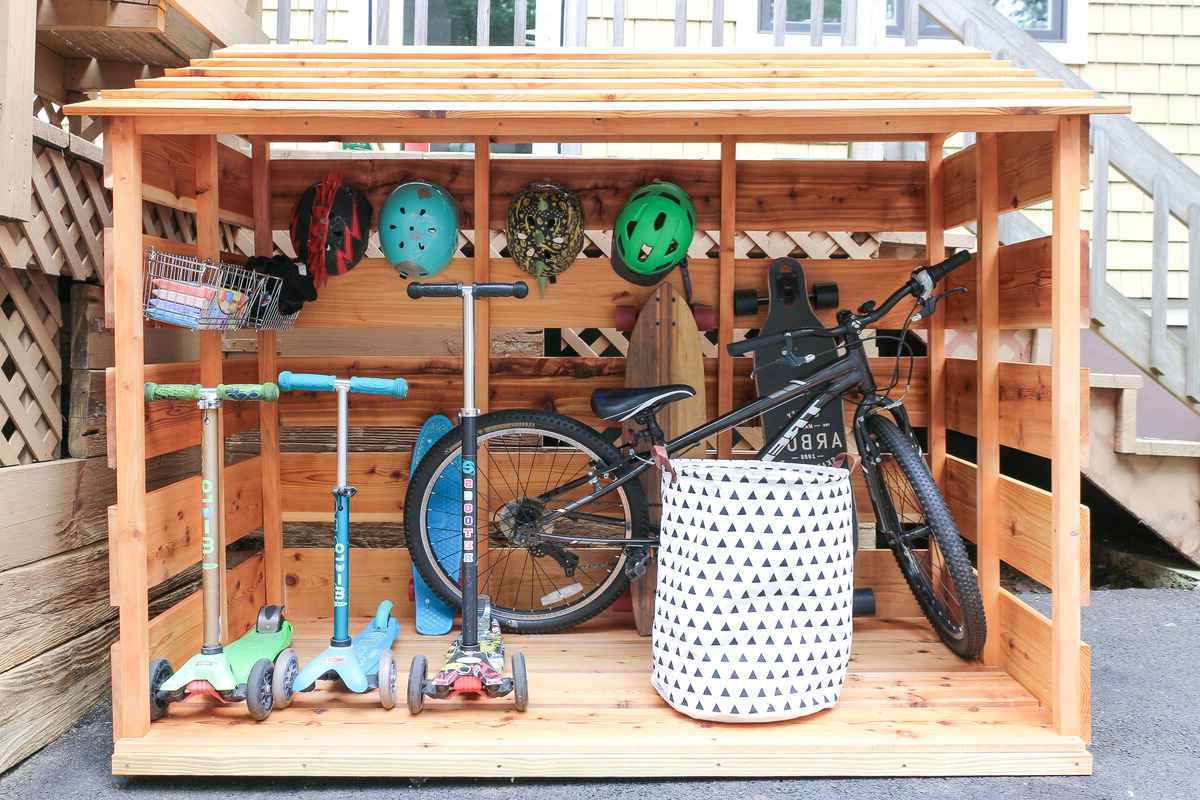
Discover how to build your own DIY bike shed with our step-by-step guide. Get creative with DIY & Crafts and create the perfect storage solution for your bikes. Start your project today!
(Many of the links in this article redirect to a specific reviewed product. Your purchase of these products through affiliate links helps to generate commission for Twigandthistle.com, at no extra cost. Learn more)
Introduction
Welcome to the world of DIY bike sheds! If you're a cycling enthusiast or simply looking for a practical and stylish way to store your bicycles, building your own bike shed can be a rewarding and cost-effective project. Not only does it provide a secure space to keep your bikes protected from the elements, but it also adds a charming touch to your outdoor space.
In this comprehensive guide, we will walk you through the step-by-step process of creating your very own bike shed. Whether you're a seasoned DIY enthusiast or a novice looking to embark on your first major construction project, this guide is designed to equip you with the knowledge and confidence to tackle the task at hand.
Building a bike shed is not just about functionality; it's an opportunity to unleash your creativity and craftsmanship. From selecting the perfect location for your shed to choosing the right materials and adding personalized touches, this project allows you to tailor the shed to your specific needs and aesthetic preferences.
As you embark on this journey, envision the satisfaction of completing a project that not only serves a practical purpose but also reflects your unique style and ingenuity. Whether you're aiming for a sleek, modern design or a rustic, countryside charm, the possibilities are endless when it comes to customizing your DIY bike shed.
So, roll up your sleeves, gather your tools, and get ready to dive into the exciting world of DIY construction. By the end of this guide, you'll be well-equipped to bring your vision to life and create a functional, eye-catching bike shed that will be the envy of your neighborhood. Let's get started on this fulfilling and rewarding endeavor!
Step 1: Planning and Preparation
Before diving into the physical construction of your DIY bike shed, it's crucial to lay a solid foundation through meticulous planning and thorough preparation. This initial step sets the stage for a smooth and successful building process, ensuring that every aspect of the project is carefully considered and thoughtfully executed.
Research and Design
Begin by conducting thorough research to gather inspiration and ideas for your bike shed. Explore various designs, materials, and styles to determine the look and functionality that best suits your needs. Consider factors such as the number of bikes you intend to store, the available space in your yard, and any specific features you desire, such as additional storage for cycling gear or a workbench for bike maintenance.
Once you have a clear vision in mind, sketch out a rough design or create a digital blueprint of your bike shed. Take precise measurements of the designated area where the shed will be located, ensuring that the dimensions align with your intended design. This stage allows you to visualize the layout and make any necessary adjustments before proceeding to the construction phase.
Check Local Regulations
Before commencing the build, it's essential to check with your local authorities or homeowner's association to determine if there are any regulations or permits required for constructing a bike shed on your property. Some areas may have specific guidelines regarding the size, height, and placement of outdoor structures, so it's crucial to ensure compliance with any applicable regulations to avoid potential issues down the line.
Budget and Materials
Next, establish a budget for your project and create a detailed list of materials and tools required for the construction. Research the cost of lumber, roofing materials, hardware, and any additional elements such as windows or doors. Consider both the quality and durability of the materials, aiming for a balance between affordability and long-term resilience. Additionally, factor in the cost of any specialized tools or equipment that may be necessary for the build.
Timeframe and Schedule
Assess the time commitment required for the construction of your bike shed and create a realistic schedule that aligns with your availability. Consider factors such as weather conditions, potential interruptions, and any assistance you may need from friends or family members. Setting a clear timeframe for each phase of the project helps you stay organized and ensures steady progress towards completing your DIY bike shed within a reasonable timeframe.
By dedicating ample time to planning and preparation, you lay a solid groundwork for the subsequent stages of construction. This thoughtful approach minimizes potential setbacks and maximizes the efficiency and success of your DIY bike shed project. With a well-defined plan in place, you're ready to move on to the next exciting phase of gathering materials and tools to bring your vision to life.
Step 2: Gathering Materials and Tools
With the planning phase complete, it's time to shift focus to gathering the essential materials and tools that will bring your DIY bike shed to fruition. This step is pivotal in ensuring that you have everything needed to progress smoothly through the construction process, minimizing delays and maximizing efficiency.
Lumber and Building Materials
Begin by sourcing high-quality lumber and building materials based on the design and dimensions outlined during the planning phase. Select pressure-treated lumber for enhanced durability and resistance to decay, especially for the foundation and structural components. Consider the type of siding and roofing materials that best complement your shed's design, whether it's traditional wooden shingles, metal roofing panels, or durable composite materials.
Hardware and Fasteners
Stock up on a comprehensive array of hardware and fasteners, including nails, screws, bolts, and brackets. Ensure that you have the appropriate sizes and types to accommodate various aspects of the construction, from framing and sheathing to securing the roof and installing doors and windows. Additionally, consider acquiring hinges, latches, and other hardware necessary for the functional elements of the shed.
Tools and Equipment
Assess your existing tool collection and acquire any additional tools required for the build. Essential tools may include a circular saw, power drill, level, measuring tape, framing square, and a hammer. Depending on the complexity of your design, specialized tools such as a nail gun, miter saw, or roofing nailer may also be beneficial. Having the right tools on hand ensures precision and efficiency throughout the construction process.
Safety Gear
Prioritize safety by obtaining the necessary protective gear, including work gloves, safety goggles, and a dust mask. If your project involves extensive cutting or working at heights, consider investing in a sturdy pair of work boots and a hard hat for added protection. Safety should always be a top priority when engaging in DIY construction projects.
Additional Components
Depending on your shed's design and intended use, you may need to acquire additional components such as windows, doors, vents, and any specialized features tailored to your specific requirements. Consider the aesthetic and functional aspects of these components, ensuring they align seamlessly with your overall design vision.
By meticulously gathering the required materials and tools, you set the stage for a seamless and productive construction phase. With everything in place, you're well-prepared to embark on the hands-on process of bringing your DIY bike shed to life.
Step 3: Building the Foundation
The foundation serves as the backbone of your bike shed, providing stability and structural integrity to support the entire structure. A well-constructed foundation is essential for ensuring the longevity and resilience of your DIY bike shed, especially in the face of varying weather conditions and ground movement. In this phase, meticulous attention to detail and precision is paramount to laying a solid groundwork for the rest of the construction process.
Site Preparation
Before commencing the foundation build, carefully prepare the designated site by clearing the area of any debris, vegetation, or uneven surfaces. Use a shovel and a level to excavate the ground, ensuring that the area is level and free from any obstructions that could impede the foundation's stability. It's crucial to create a level and compacted base to support the foundation materials and prevent shifting or settling over time.
Foundation Type
Select the appropriate foundation type based on your shed's design, the soil composition of the site, and local building codes. Common foundation options for bike sheds include concrete slab, concrete piers, or pressure-treated skids. Each type offers distinct advantages in terms of stability, durability, and resistance to moisture. Consider consulting with a local building professional to determine the most suitable foundation type for your specific location and shed design.
Building the Foundation
If you opt for a concrete slab foundation, begin by constructing a formwork to contain the concrete. Ensure that the formwork is precisely leveled and squared to the shed's dimensions. Next, pour and level the concrete within the formwork, taking care to achieve a smooth and even surface. For concrete pier foundations, strategically place and secure the piers at designated intervals to support the shed's structure effectively.
In the case of pressure-treated skids, position and anchor the skids to the prepared site, ensuring they are level and securely anchored to prevent shifting. Whichever foundation type you choose, meticulous attention to detail during the construction process is crucial to ensure a stable and reliable base for your bike shed.
Allow for Proper Curing
After constructing the foundation, allow adequate time for the concrete to cure and set fully. This typically involves a curing period of several days, during which the concrete gains strength and stability. It's essential to exercise patience and refrain from proceeding with the superstructure construction until the foundation has completed the curing process.
By dedicating careful attention to building a solid foundation, you establish a robust base for the subsequent phases of constructing your DIY bike shed. The foundation lays the groundwork for the shed's structural integrity, ensuring that it stands the test of time and provides a secure space to house your bicycles for years to come.
Step 4: Constructing the Frame
With the foundation in place, the focus shifts to constructing the frame of your DIY bike shed. The frame serves as the skeletal structure, providing support for the walls, roof, and overall stability of the shed. This phase marks a significant milestone in the construction process, as it sets the stage for the shed to take shape and become a tangible structure within your outdoor space.
Selecting Quality Lumber
Begin by selecting high-quality lumber for the frame, prioritizing strength, durability, and resistance to the elements. Pressure-treated lumber is an excellent choice for framing, offering enhanced protection against decay and moisture. Carefully inspect each piece of lumber, ensuring that it is straight, free from defects, and cut to the precise dimensions required for your shed's design.
Framing the Walls
Using the measurements and design plans established during the planning phase, begin framing the walls of the shed. Lay out the bottom plates and top plates for each wall, ensuring that they are squared and aligned according to the shed's dimensions. Secure the vertical studs between the plates, spacing them at regular intervals to provide structural support for the walls. Additionally, incorporate openings for windows and doors as per your design specifications.
Assembling the Roof Trusses
If your shed design includes a pitched roof, the next step involves assembling the roof trusses. Carefully follow the design plans to construct the trusses, ensuring that they are accurately aligned and securely fastened. The trusses play a critical role in supporting the roof structure and distributing its weight evenly, contributing to the shed's overall stability and resilience.
Erecting the Frame
Once the wall frames and roof trusses are assembled, it's time to erect the frame of the bike shed. Enlist the assistance of a few individuals to help lift and position the wall frames into place, securing them to the foundation with anchor bolts or fasteners. As the walls take shape, ensure that they are plumb and aligned, making any necessary adjustments to achieve a precise and sturdy frame.
Bracing and Reinforcement
To reinforce the frame's stability, incorporate diagonal bracing within the walls and trusses. Diagonal bracing helps distribute lateral forces and prevents the frame from swaying or shifting under external pressures, such as strong winds. Additionally, install horizontal nailing plates to connect the walls and provide further structural integrity to the frame.
Progress and Precision
Throughout the frame construction process, prioritize precision and attention to detail. Ensure that all components are accurately aligned, securely fastened, and structurally sound. Taking the time to construct a robust and precisely engineered frame sets the stage for a successful and enduring bike shed that stands the test of time.
By meticulously constructing the frame of your DIY bike shed, you lay the groundwork for the subsequent phases of adding the roof, installing doors, and adding personalized touches. The frame represents the structural backbone of the shed, embodying the craftsmanship and care invested in bringing your vision to life. With the frame in place, the project moves forward, inching closer to the realization of your custom-built bike shed.
Step 5: Adding the Roof
Adding the roof to your DIY bike shed marks a pivotal stage in the construction process, as it not only provides protection from the elements but also contributes to the shed's overall aesthetic appeal. Whether you opt for a traditional gable roof, a sleek flat roof, or a stylish gambrel roof, the careful installation of the roof ensures that your shed is weatherproof and visually striking.
Roofing Materials
Before commencing the roof installation, carefully select the roofing materials that best align with your shed's design, climate considerations, and personal preferences. Common roofing options for bike sheds include asphalt shingles, metal roofing panels, or durable polycarbonate sheets. Each material offers distinct advantages in terms of durability, weather resistance, and visual appeal. Consider factors such as longevity, maintenance requirements, and compatibility with the shed's overall design when making your selection.
Roof Framing
The first step in adding the roof involves framing the structure to support the chosen roofing materials. If your shed features a pitched roof, ensure that the trusses are securely in place and aligned according to the design plans. The trusses play a crucial role in distributing the roof's weight and providing structural integrity to the shed. Additionally, incorporate ridge boards and rafters to complete the framework for the roof, ensuring that they are precisely positioned and securely fastened to the frame.
Roof Sheathing
Once the roof framing is in place, proceed to install the roof sheathing, which serves as the base for the roofing materials. Common sheathing materials include plywood or oriented strand board (OSB), providing a solid and uniform surface for the roof covering. Carefully measure and cut the sheathing to fit the roof dimensions, ensuring that it is securely attached to the trusses and rafters. Properly installed sheathing forms a stable foundation for the final layer of roofing materials and contributes to the shed's structural stability.
Roofing Installation
With the sheathing in place, it's time to install the chosen roofing materials according to the manufacturer's guidelines. Whether you're laying asphalt shingles, securing metal roofing panels, or fitting polycarbonate sheets, precision and attention to detail are paramount. Ensure that the roofing materials are aligned, securely fastened, and properly sealed to prevent water infiltration. Pay close attention to the roof's edges, valleys, and penetrations, taking care to implement flashing and sealants to safeguard against potential leaks.
Finishing Touches
As the roofing materials are installed, take the opportunity to add finishing touches that enhance both the functionality and visual appeal of the roof. Consider incorporating roof vents to promote air circulation and prevent moisture buildup within the shed. Additionally, trim the roof edges and eaves to provide a polished and cohesive appearance. The finishing touches not only contribute to the shed's weatherproofing but also elevate its overall aesthetic, creating a striking and well-protected space for your bicycles.
By meticulously adding the roof to your DIY bike shed, you bring the structure one step closer to completion, ensuring that it stands as a durable and visually appealing addition to your outdoor space. With the roof securely in place, the project progresses to the final phase of installing doors and adding personalized touches, culminating in the fulfillment of your custom-built bike shed vision.
Step 6: Installing the Doors and Finishing Touches
With the structural elements of your DIY bike shed in place, the focus now shifts to the installation of doors and the addition of finishing touches that elevate both the functionality and visual appeal of the shed. This phase represents the culmination of your meticulous construction efforts, as the shed transforms into a fully realized space ready to house and showcase your bicycles.
Door Selection
Begin by selecting doors that align with the design and functionality of your bike shed. Whether you opt for a single hinged door, double doors for larger access, or a sliding barn-style door, consider factors such as ease of use, security, and visual harmony with the shed's overall aesthetic. Additionally, prioritize doors constructed from durable materials that offer resistance to weather and provide reliable protection for the shed's contents.
Installation Process
Carefully measure and prepare the door opening to accommodate the selected doors, ensuring that the frame is squared and level to facilitate a seamless installation. Enlist the assistance of a few individuals to position and secure the doors in place, ensuring that they operate smoothly and provide a secure seal when closed. Pay close attention to the alignment and hardware installation, including hinges, handles, and locking mechanisms, to ensure that the doors function effectively and contribute to the shed's overall security.
Finishing Touches
With the doors in place, turn your attention to the finishing touches that add character and functionality to the bike shed. Consider incorporating features such as windows to introduce natural light and ventilation, enhancing the shed's interior ambiance. Additionally, add trim and molding to the exterior to provide a polished and cohesive appearance, elevating the shed's visual appeal and complementing its surroundings.
Personalization and Customization
Embrace the opportunity to personalize your bike shed with custom touches that reflect your unique style and preferences. Whether it's adding decorative accents, painting the exterior in a color that resonates with your outdoor space, or incorporating storage solutions for cycling accessories, infuse the shed with elements that make it distinctly yours. By customizing the shed to align with your vision, you create a space that not only serves a practical purpose but also enhances the overall charm of your outdoor environment.
Final Inspection
Upon completing the installation of doors and finishing touches, conduct a thorough inspection of the shed to ensure that all elements are securely in place and functioning as intended. Check for any potential areas that may require additional sealing or adjustments to enhance the shed's weatherproofing and overall integrity. Taking the time to conduct a comprehensive inspection ensures that your DIY bike shed is fully prepared to serve its intended purpose for years to come.
By meticulously installing the doors and adding finishing touches, you bring your DIY bike shed to its completion, culminating in a functional, visually appealing, and personalized space that stands as a testament to your craftsmanship and creativity. With the doors securely in place and the shed adorned with personalized touches, you've transformed a vision into a tangible and rewarding addition to your outdoor environment.
Conclusion
Congratulations on successfully completing the construction of your DIY bike shed! This journey has been a testament to your dedication, creativity, and craftsmanship, resulting in a functional and visually captivating addition to your outdoor space. As you stand back and admire the fruits of your labor, it's essential to reflect on the significance of this achievement and the impact it has on your surroundings.
Your bike shed is more than just a storage space; it's a reflection of your personality and passion for cycling. The careful planning, precise construction, and thoughtful customization have transformed a simple structure into a personalized sanctuary for your bicycles. Every detail, from the foundation to the finishing touches, embodies the care and attention you've invested in creating a space that not only serves a practical purpose but also enhances the aesthetic appeal of your outdoor environment.
Beyond its functional role, your DIY bike shed stands as a symbol of self-reliance and ingenuity. By taking on this project, you've demonstrated the power of hands-on creativity and the satisfaction that comes from bringing a vision to life through hard work and perseverance. The shed serves as a constant reminder of your ability to tackle challenges, embrace new skills, and transform raw materials into a tangible and meaningful creation.
Moreover, your bike shed has the potential to inspire others within your community. As neighbors and friends admire the structure, they witness the possibilities of DIY construction and the transformative impact it can have on a space. Your shed stands as a testament to the rewards of embarking on a hands-on project, encouraging others to explore their own creative endeavors and make a lasting mark on their surroundings.
As you move forward, utilizing your newly constructed bike shed, remember the journey that led to its completion. The skills you've honed, the lessons you've learned, and the sense of accomplishment you've gained are invaluable. Whether it's the joy of organizing your bicycles within the shed's secure confines or the pride of showcasing your craftsmanship to visitors, your DIY bike shed will continue to enrich your life in countless ways.
In closing, your DIY bike shed represents more than just a structure; it embodies the spirit of creativity, resilience, and individuality. It stands as a testament to your ability to transform a vision into reality and serves as a source of pride and inspiration for years to come. As you embark on future projects and endeavors, may the experience of building your bike shed continue to fuel your passion for hands-on creativity and the fulfillment that comes from crafting a space that is uniquely yours.