Home>Create & Decorate>DIY & Crafts>DIY Plyo Box: Build Your Own Fitness Equipment

DIY & Crafts
DIY Plyo Box: Build Your Own Fitness Equipment
Published: June 13, 2024

Content Creator specializing in woodworking and interior transformations. Caegan's guides motivate readers to undertake their own projects, while his custom furniture adds a personal touch.
Looking to build your own fitness equipment? Learn how to make a DIY plyo box with our step-by-step guide. Get creative with our DIY & Crafts project!
(Many of the links in this article redirect to a specific reviewed product. Your purchase of these products through affiliate links helps to generate commission for Twigandthistle.com, at no extra cost. Learn more)
Introduction
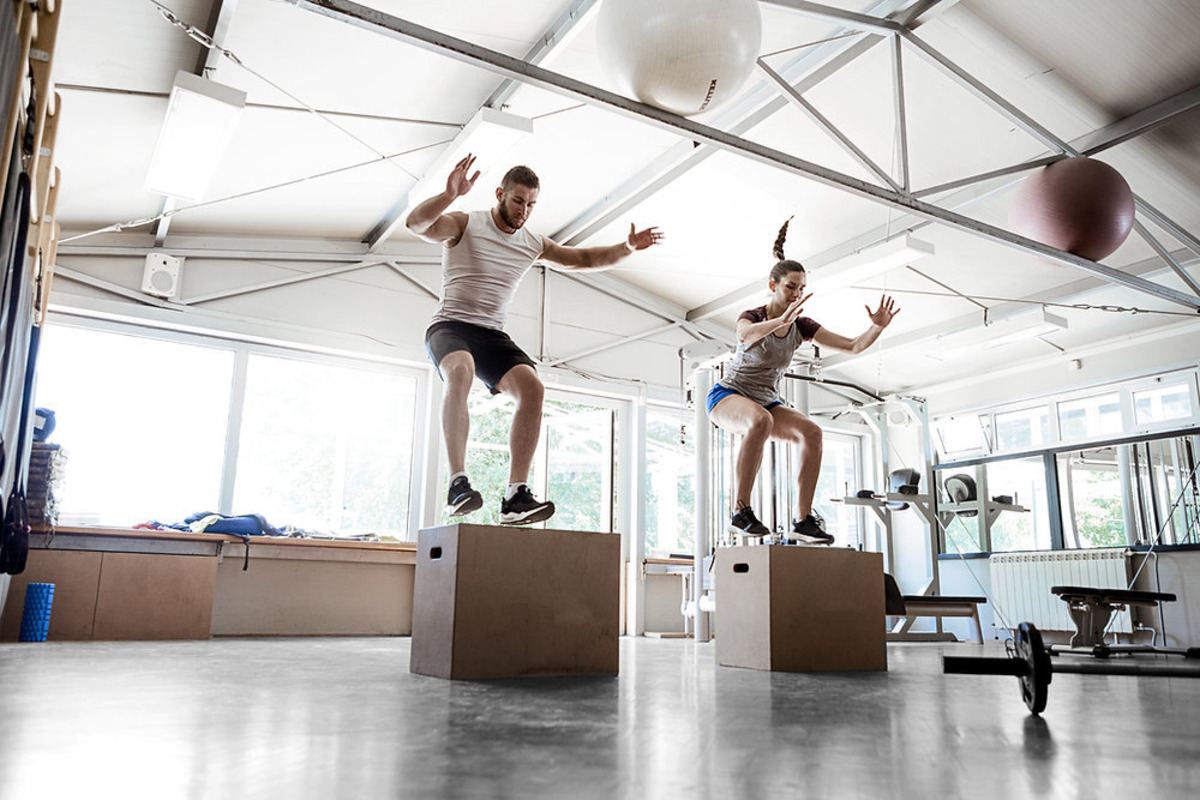
Are you looking to add a new dimension to your home workout routine? Building your own plyo box could be the perfect solution! Whether you're a fitness enthusiast or just looking to stay in shape, a plyo box is a versatile piece of equipment that can help you improve your strength, agility, and overall fitness. In this article, we'll guide you through the process of building your very own plyo box, so you can enjoy the benefits of this effective fitness tool right in the comfort of your own home. Let's dive in and get started on this exciting DIY project!
Read more: How to Build an Indoor Window Planter Box
Benefits of Using a Plyo Box
-
Versatility: A plyo box offers a wide range of exercises, including box jumps, step-ups, and elevated push-ups, making it a versatile addition to your home gym.
-
Improved Explosiveness: Plyometric exercises performed on a plyo box can help improve your explosive power, which is beneficial for various sports and everyday activities.
-
Enhanced Cardiovascular Fitness: Incorporating plyo box exercises into your workout routine can elevate your heart rate, contributing to improved cardiovascular health and endurance.
-
Strength Development: By performing exercises such as box squats and Bulgarian split squats, you can target and strengthen different muscle groups, including the quadriceps, glutes, and hamstrings.
-
Space-Saving: A single plyo box can serve multiple purposes, eliminating the need for bulky equipment and saving space in your home gym or workout area.
-
Cost-Effective: Building your own plyo box is a cost-effective alternative to purchasing one, allowing you to enjoy the benefits of this fitness tool without breaking the bank.
-
Customizable Height: When you build your own plyo box, you have the flexibility to customize its height to suit your fitness level and exercise preferences.
-
Challenging Workouts: Plyo box exercises provide a challenging workout experience, helping you push your limits and achieve new fitness goals.
Incorporating a plyo box into your fitness routine can bring about a multitude of benefits, making it a valuable addition to any home gym setup.
Materials Needed for Building a Plyo Box
To build your own plyo box, you will need the following materials:
-
Plywood: Select a sturdy plywood sheet with a thickness of 3/4 inch. The plywood will form the main structure of the plyo box, so it's essential to choose a durable and high-quality material.
-
Wood Screws: Opt for wood screws that are long enough to securely fasten the plywood pieces together. Using screws specifically designed for wood will ensure the stability and strength of the plyo box.
-
Wood Glue: Choose a reliable wood glue to reinforce the joints and enhance the overall sturdiness of the plyo box. Applying wood glue before securing the pieces with screws will provide added structural support.
-
Measuring Tape: A measuring tape is essential for accurately measuring and cutting the plywood to the required dimensions. Precise measurements are crucial to ensure the plyo box is constructed to the correct specifications.
-
Saw: A saw, such as a circular saw or a table saw, will be necessary for cutting the plywood sheets into the various pieces needed to assemble the plyo box. Ensure the saw is suitable for cutting through plywood with precision.
-
Drill: A drill will be used to create pilot holes for the wood screws, as well as for other assembly tasks. Make sure to have the appropriate drill bits on hand for the wood screws you will be using.
-
Sandpaper: Sandpaper or a sanding block will be required to smooth out any rough edges or surfaces after cutting the plywood. This will help prevent splinters and ensure a neat finish.
-
Paint or Sealant (Optional): If desired, you can choose to paint or apply a sealant to the exterior of the plyo box for added protection and a personalized touch. This step is optional but can enhance the appearance and durability of the plyo box.
Gathering these materials will set you on the path to constructing your very own plyo box, providing a cost-effective and rewarding addition to your home fitness equipment.
Step-by-Step Instructions for Building a Plyo Box
-
Gather the Necessary Materials: Begin by gathering all the materials listed in the previous section, ensuring that you have the required plywood, wood screws, wood glue, measuring tape, saw, drill, and sandpaper.
-
Determine the Dimensions: Decide on the dimensions for your plyo box based on your fitness level and available space. A common option is a box with three different heights on each side, such as 20 inches, 24 inches, and 30 inches, allowing for varied workout intensities.
-
Measure and Mark the Plywood: Use a measuring tape to mark the dimensions on the plywood, indicating where you will need to make cuts to create the individual pieces for the plyo box.
-
Cut the Plywood Pieces: Carefully use a saw to cut the plywood into the required pieces according to the measurements. It's crucial to ensure precision during this step to achieve accurately sized components.
-
Assemble the Box Structure: Begin assembling the box by applying wood glue to the edges of the plywood pieces and joining them together. Use the drill to create pilot holes, then secure the pieces with wood screws to form the box structure.
-
Reinforce the Joints: Apply additional wood glue to reinforce the joints and enhance the overall stability of the plyo box. This step will help ensure that the box can withstand the impact of plyometric exercises.
-
Smooth the Edges: Use sandpaper to smooth out any rough edges or surfaces, creating a neat and splinter-free finish for the plyo box.
-
Optional: Paint or Seal the Plyo Box: If desired, you can choose to paint the exterior of the plyo box with a durable paint or apply a sealant to protect the wood and add a personalized touch to the box.
-
Test the Stability: Once the plyo box is fully assembled and any optional finishes are applied, test its stability by gently applying pressure to different areas and ensuring that it can support your weight.
-
Enjoy Your DIY Plyo Box: With the construction complete, your DIY plyo box is ready to be incorporated into your workout routine. Experiment with various exercises and enjoy the benefits of this versatile fitness tool.
Following these step-by-step instructions will guide you through the process of building your very own plyo box, providing a rewarding and cost-effective addition to your home gym.
Tips for Using Your DIY Plyo Box
-
Start with the Right Height: When incorporating your DIY plyo box into your workout routine, begin with a height that is comfortable and manageable for your current fitness level. As you build confidence and strength, you can gradually increase the height to challenge yourself further.
-
Focus on Proper Form: Whether performing box jumps, step-ups, or other exercises, prioritize maintaining proper form to ensure safety and effectiveness. This includes landing softly, keeping your knees aligned with your toes, and engaging your core throughout the movements.
-
Warm Up Adequately: Before engaging in plyo box exercises, it's essential to warm up your muscles and prepare your body for the dynamic movements. Incorporate dynamic stretches and light cardio to increase blood flow and flexibility.
-
Use a Non-Slip Surface: To prevent the plyo box from sliding during use, place it on a non-slip surface such as a rubber mat or carpet. This will enhance stability and reduce the risk of accidents or injuries.
-
Gradually Increase Intensity: As your strength and agility improve, consider incorporating more challenging plyometric exercises and increasing the intensity of your workouts. This progression will help you continue to see improvements in your fitness level.
-
Listen to Your Body: Pay attention to how your body responds to plyo box exercises. If you experience discomfort or pain, it's important to reassess your technique and consider scaling back the intensity until you can perform the exercises comfortably.
-
Alternate Exercises: To prevent overuse injuries and maintain overall balance in your workout routine, alternate plyo box exercises with other forms of strength and cardiovascular training. This variety will contribute to a well-rounded fitness regimen.
-
Stay Hydrated: Engaging in plyometric exercises can be demanding on the body, so be sure to stay hydrated before, during, and after your workouts. Proper hydration is essential for supporting your overall performance and recovery.
-
Seek Professional Guidance: If you're new to plyometric training or have specific fitness goals, consider seeking guidance from a fitness professional to ensure that you are using your DIY plyo box effectively and safely.
-
Enjoy the Versatility: Get creative with your plyo box workouts and explore the diverse range of exercises it offers. From lateral step-overs to incline push-ups, the versatility of the plyo box allows for endless possibilities to keep your workouts engaging and challenging.
Incorporating these tips into your plyo box workouts will help you maximize the benefits of this DIY fitness equipment while minimizing the risk of injury, allowing you to enjoy a safe and effective training experience.
Read more: DIY Pull Up Bar for Your Garage
Conclusion
Building your own plyo box is a rewarding DIY project that not only adds a versatile piece of fitness equipment to your home gym but also allows you to customize it to your specific preferences. By following the step-by-step instructions and utilizing the recommended materials, you can create a durable and cost-effective plyo box that will serve as a valuable tool for enhancing your strength, agility, and overall fitness. With the multitude of benefits it offers, including improved explosiveness, cardiovascular fitness, and strength development, the DIY plyo box stands as a testament to the power of creativity and resourcefulness in the realm of home improvement and fitness. So, roll up your sleeves, gather your materials, and embark on the journey of constructing your very own DIY plyo box to elevate your workout routine and achieve your fitness goals.

