
Home>Create & Decorate>DIY & Crafts>DIY Generator Enclosure: How To Build A Protective Housing For Your Generator
DIY & Crafts
DIY Generator Enclosure: How To Build A Protective Housing For Your Generator
Published: June 10, 2024

Senior Editor in Create & Decorate, Kathryn combines traditional craftsmanship with contemporary trends. Her background in textile design and commitment to sustainable crafts inspire both content and community.
Learn how to build a DIY generator enclosure to protect your generator with our step-by-step guide. Perfect for DIY & Crafts enthusiasts.
(Many of the links in this article redirect to a specific reviewed product. Your purchase of these products through affiliate links helps to generate commission for Twigandthistle.com, at no extra cost. Learn more)
Introduction
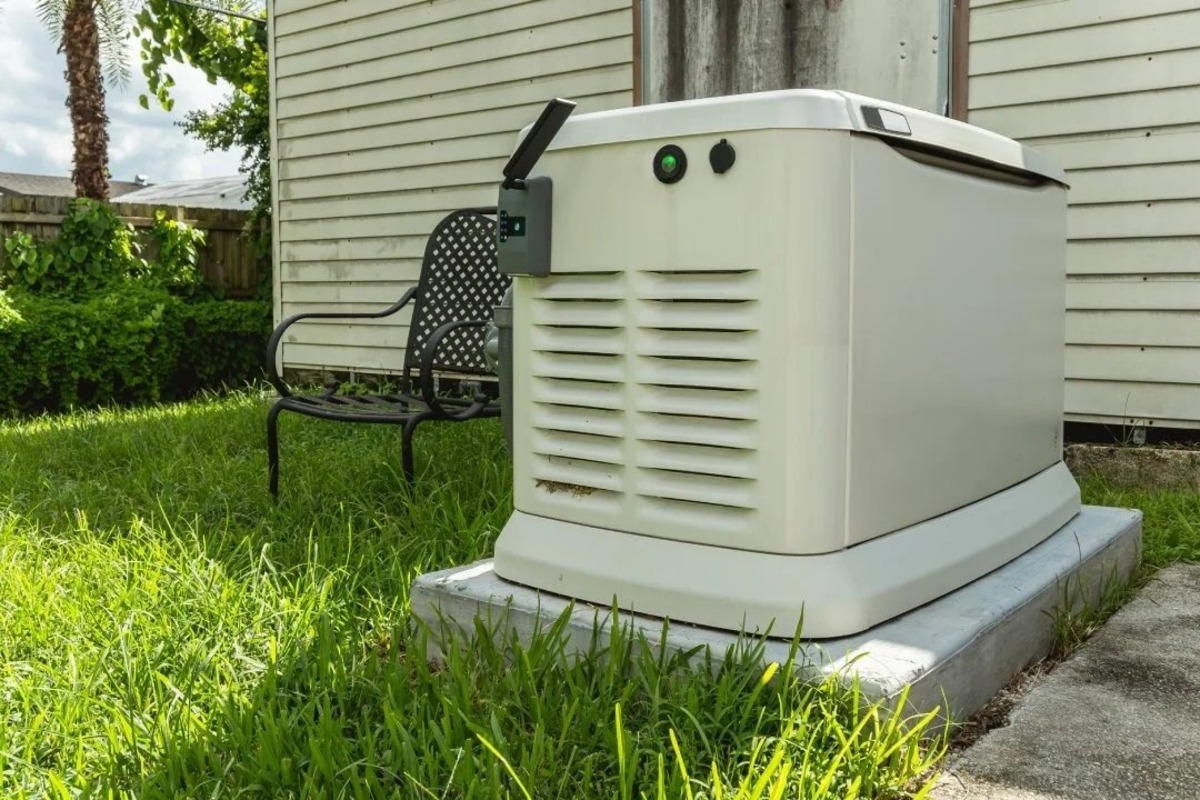
Are you tired of your generator being exposed to the elements? Do you want to protect it from rain, snow, and other outdoor hazards? Building a DIY generator enclosure is the perfect solution to keep your generator safe and sound. In this guide, we will walk you through the step-by-step process of constructing a protective housing for your generator. With the right materials and a little bit of elbow grease, you can create a sturdy and weather-resistant enclosure that will prolong the life of your generator and provide peace of mind during power outages. Let's get started!
Materials Needed
To build a DIY generator enclosure, you will need the following materials:
- Pressure-treated lumber: This will serve as the primary material for constructing the frame of the enclosure. Opting for pressure-treated lumber will ensure that your enclosure can withstand the outdoor elements without succumbing to rot or decay.
- Exterior plywood: You'll need this to create the walls and roof of the enclosure. Make sure to choose plywood that is specifically designed for exterior use to provide maximum protection against moisture and weathering.
- Roofing materials: Depending on your preference, you can use asphalt shingles, metal roofing, or corrugated fiberglass panels to cover the roof of the enclosure and shield it from rain and snow.
- Hinges and latches: These will be essential for creating a door on the enclosure, allowing easy access to the generator for maintenance and refueling.
- Ventilation components: To prevent overheating, you'll need vents or fans to ensure proper airflow within the enclosure. This will help dissipate heat generated by the running generator.
- Weatherproof sealant: Using a high-quality sealant will help to weatherproof the seams and joints of the enclosure, keeping moisture out and protecting the interior components of the generator.
- Fasteners and hardware: Nails, screws, and other fasteners will be necessary for assembling the frame, attaching the siding and roofing, and securing the door and any additional features.
Gathering these materials will set you on the right path to constructing a durable and protective enclosure for your generator.
Planning Your Enclosure
Before diving into the construction process, it's crucial to carefully plan your generator enclosure to ensure that it meets your specific needs and requirements. Here are the key steps to consider when planning your enclosure:
-
Location: Select a suitable location for the enclosure that is both easily accessible for maintenance and away from areas where exhaust fumes could pose a health risk. Ensure that there is enough space around the enclosure for proper ventilation and airflow.
-
Size: Determine the dimensions of the enclosure based on the size of your generator and any additional space needed for maintenance and refueling. Consider the future possibility of upgrading to a larger generator and plan the enclosure size accordingly.
-
Design: Sketch out a rough design for the enclosure, including the placement of the door, vents, and any other features you may want to incorporate. Consider the aesthetic appeal of the enclosure and how it will blend with its surroundings.
-
Permits and Regulations: Check local building codes and regulations to ensure compliance with any necessary permits or restrictions for constructing a generator enclosure. This step is essential to avoid any legal issues down the road.
-
Foundation: Decide whether the enclosure will be built directly on the ground or if it requires a concrete or gravel foundation. The foundation should provide stability and prevent moisture from seeping into the enclosure.
Taking the time to plan your generator enclosure thoroughly will set the stage for a successful construction process and ensure that the final product meets your expectations and functional needs.
Building the Frame
The first step in constructing your DIY generator enclosure is building the frame, which will provide the structure and support for the entire enclosure. Follow these steps to create a sturdy frame for your generator housing:
-
Measure and Cut Lumber: Begin by measuring and cutting the pressure-treated lumber to the appropriate lengths based on your enclosure design. Use a saw to make precise cuts, ensuring that the pieces fit together seamlessly.
-
Assemble the Base: Lay out the cut lumber to form the base of the frame, securing the pieces together with screws or nails. This will serve as the foundation for the rest of the frame and provide stability for the enclosure.
-
Construct the Walls: Once the base is in place, erect the vertical supports to form the walls of the enclosure. Secure the vertical pieces to the base and each other, ensuring that they are plumb and level to create a square and sturdy structure.
-
Add Support Beams: Install additional horizontal support beams within the frame to reinforce the walls and provide extra stability. These beams will help distribute the weight of the roof and siding, preventing sagging or warping over time.
-
Frame the Door Opening: If your enclosure design includes a door, frame out the opening for the door within the wall structure. Ensure that the door frame is securely anchored to the rest of the frame for added strength.
By following these steps, you can build a robust frame that forms the skeleton of your generator enclosure. Once the frame is in place, you can proceed to the next phase of the construction process.
Adding Siding and Roofing
With the frame of your DIY generator enclosure in place, the next crucial step is to add siding and roofing to provide protection from the elements. Follow these steps to effectively install the siding and roofing for your generator housing:
-
Cut and Install Siding: Measure and cut the exterior plywood to fit the dimensions of the walls of the enclosure. Secure the plywood to the frame using nails or screws, ensuring that the seams between the panels are tightly sealed. Consider using weatherproof sealant on the seams to provide an extra layer of protection against moisture.
-
Cover the Roof: Depending on your preference and the climate in your area, choose the appropriate roofing material for your enclosure. Whether it's asphalt shingles, metal roofing, or corrugated fiberglass panels, carefully install the roofing material, starting from the bottom and working your way up. Ensure that each row overlaps the previous one to prevent water from seeping through.
-
Seal Joints and Edges: Once the siding and roofing are in place, apply weatherproof sealant to the joints, edges, and any gaps to prevent water infiltration. This step is crucial for maintaining the integrity of the enclosure and safeguarding the generator from moisture-related damage.
-
Install Door and Hardware: If your design includes a door, attach it to the frame using heavy-duty hinges and secure latches. Ensure that the door fits snugly within the frame and provides a tight seal to keep out rain and debris.
By following these steps, you can effectively add siding and roofing to your generator enclosure, creating a weather-resistant barrier that will shield your generator from the elements and prolong its lifespan. Once the siding and roofing are in place, you can proceed to the next phase of the construction process.
Installing Ventilation
Proper ventilation is essential for maintaining a safe and functional environment within your generator enclosure. Without adequate airflow, the generator can overheat, leading to performance issues and potential safety hazards. Here's how to effectively install ventilation in your DIY generator enclosure:
-
Determine Ventilation Needs: Assess the size of your generator and the enclosure to determine the appropriate amount of ventilation required. Consider factors such as the generator's power output and the ambient temperature in your area.
-
Choose Ventilation Components: Select the ventilation components that best suit your needs, such as vents, louvers, or fans. Ensure that the chosen components are designed for exterior use and can withstand exposure to the elements.
-
Placement of Vents: Strategically place vents or louvers on opposite sides of the enclosure to promote cross-ventilation. This configuration allows fresh air to enter from one side and hot air to exit from the other, creating a continuous flow of air.
-
Cut Openings: Using a jigsaw or appropriate cutting tool, carefully cut openings in the walls of the enclosure to accommodate the ventilation components. Take precise measurements to ensure that the openings align with the chosen ventilation system.
-
Install Ventilation Components: Securely install the vents or louvers in the prepared openings, following the manufacturer's instructions. If using fans, ensure they are positioned to expel hot air effectively and are wired to a power source as per the electrical code.
-
Weatherproofing: Apply weatherproof sealant around the edges of the ventilation components to prevent water infiltration. This step is crucial for maintaining the integrity of the enclosure and protecting the generator from moisture-related damage.
By following these steps, you can effectively install ventilation in your generator enclosure, ensuring that your generator operates at an optimal temperature and remains protected from overheating. Proper ventilation will contribute to the longevity and performance of your generator, making it an essential aspect of the enclosure construction process.
Finishing Touches
After completing the major construction aspects of your DIY generator enclosure, it's time to add the finishing touches to enhance its functionality and aesthetics. These final steps will ensure that your enclosure is fully equipped to protect your generator and provide convenient access for maintenance and operation.
-
Seal and Caulk: Inspect the entire enclosure for any gaps, seams, or joints that may allow water or pests to enter. Use a high-quality exterior caulk to seal these areas, including around the door frame, vents, and any other openings. This step will further weatherproof the enclosure and safeguard your generator from potential damage.
-
Paint or Stain: Consider applying a coat of exterior paint or stain to the enclosure to enhance its visual appeal and provide an additional layer of protection against the elements. Choose a color that complements the surroundings and blends seamlessly with your outdoor space.
-
Interior Lighting: Install a small, weatherproof LED light inside the enclosure to illuminate the interior when accessing the generator in low-light conditions. This will facilitate safe and convenient maintenance and operation, especially during power outages or adverse weather.
-
Security Measures: If security is a concern, consider adding a locking mechanism to the door of the enclosure to prevent unauthorized access. A sturdy padlock or latch can provide peace of mind, especially in residential or commercial settings.
-
Ground Anchors: To secure the enclosure against strong winds or potential displacement, consider installing ground anchors or tie-downs. These anchors will provide additional stability and prevent the enclosure from shifting during inclement weather.
-
Signage and Safety Information: Affix a small, weather-resistant sign to the exterior of the enclosure, indicating safety information, generator specifications, and emergency contact details. This can be particularly useful for informing others about the presence and purpose of the enclosure.
By incorporating these finishing touches, you can elevate the functionality, durability, and visual appeal of your DIY generator enclosure. These details will contribute to the overall effectiveness of the enclosure in protecting your generator and ensuring its reliable performance during power outages and emergencies.
Conclusion
In conclusion, constructing a DIY generator enclosure is a rewarding and practical endeavor that offers numerous benefits. By following the step-by-step process outlined in this guide, you can create a protective housing for your generator that safeguards it from the elements, prolongs its lifespan, and ensures reliable performance during power outages. The careful selection of materials, meticulous planning, and attention to detail during the construction process are essential for achieving a durable and weather-resistant enclosure. Additionally, incorporating ventilation, finishing touches, and adhering to safety considerations will further enhance the functionality and longevity of the enclosure. With your newly constructed generator enclosure in place, you can have peace of mind knowing that your generator is well-protected and ready to provide power when you need it most.