
Home>Organize & Storage>Closet Organization>DIY Cedar Closet Ideas
Closet Organization
DIY Cedar Closet Ideas
Published: September 1, 2024
Discover creative DIY cedar closet ideas to enhance your storage space with natural cedar wood, offering both elegance and functionality while protecting your clothes.
(Many of the links in this article redirect to a specific reviewed product. Your purchase of these products through affiliate links helps to generate commission for Twigandthistle.com, at no extra cost. Learn more)
Transforming your closet into a cedar wonderland doesn't require professional skills or a huge budget. Cedar closets not only look great but also repel insects and keep garments smelling fresh. With some proper planning and basic tools, anyone can create a beautiful cedar closet. This guide will walk you through some easy-to-follow ideas and tips to get your project started. Whether you want a complete cedar overhaul or just a touch of cedar for that fresh scent, there’s something here for everyone. Get ready to enjoy the benefits and beauty of cedar in your own home.
Getting Ready for Your Project
Measure the Space: Use a tape measure to get accurate dimensions of the closet. Write down the height, width, and depth.
Gather Materials: Purchase cedar planks, nails, a hammer, a saw, and sandpaper. Cedar planks are essential for their natural aroma and moth-repellent properties.
Prepare the Workspace: Clear out the closet completely. Lay down a drop cloth to protect the floor. Ensure good ventilation by opening windows or using a fan.
Safety Gear: Wear safety goggles and a dust mask to protect your eyes and lungs from sawdust. Gloves can help prevent splinters.
Cut Cedar Planks: Use the saw to cut planks to fit the closet dimensions. Sand the edges to remove any rough spots.
Install Planks: Start from the bottom and work your way up. Nail each plank securely to the wall studs. Use a level to ensure they are straight.
Finish Up: Once all planks are installed, sweep up sawdust and debris. Check for any loose nails and secure them.
Ventilation: Allow the closet to air out for a day before placing items inside. This helps the cedar scent to permeate the space.
Essential Materials and Tools
Cedar Planks: These are the main material for lining the closet. Cedar wood helps repel insects and adds a pleasant scent.
Measuring Tape: Essential for measuring the dimensions of the closet to ensure the cedar planks fit perfectly.
Saw: Needed to cut the cedar planks to the correct size. A hand saw or circular saw works well.
Nails or Screws: Used to secure the cedar planks to the walls. Nails are quicker, but screws provide a stronger hold.
Hammer or Drill: A hammer is necessary for nails, while a drill is needed for screws. Choose based on your fastening method.
Level: Ensures the cedar planks are installed straight and even.
Stud Finder: Helps locate the studs in the wall, providing a secure place to attach the planks.
Sandpaper: Smooths any rough edges on the cedar planks after cutting.
Safety Gear: Includes gloves, safety glasses, and a dust mask to protect yourself while cutting and sanding the wood.
Adhesive (Optional): Wood adhesive can provide extra hold for the cedar planks, especially if not using screws.
Required Skills and Time Commitment
Skill Level: Intermediate
Time Required: Approximately 1-2 days
- Preparation and Planning: 2-3 hours
- Gathering Materials: 1-2 hours
- Measuring and Cutting Cedar Panels: 3-4 hours
- Installing Cedar Panels: 4-6 hours
- Finishing Touches: 1-2 hours
Detailed Step-by-Step Guide
Gather Materials
- Cedar planks or panels
- Measuring tape
- Saw
- Hammer or nail gun
- Nails
- Level
- Sandpaper
Measure the Closet
- Use a measuring tape to determine the dimensions of the closet walls.
- Write down the measurements.
Cut Cedar Planks
- Use a saw to cut the cedar planks to fit the measured dimensions.
- Sand the edges to remove any splinters.
Prepare the Walls
- Clean the closet walls to ensure they are free of dust and debris.
- Use a level to mark where the first plank will go.
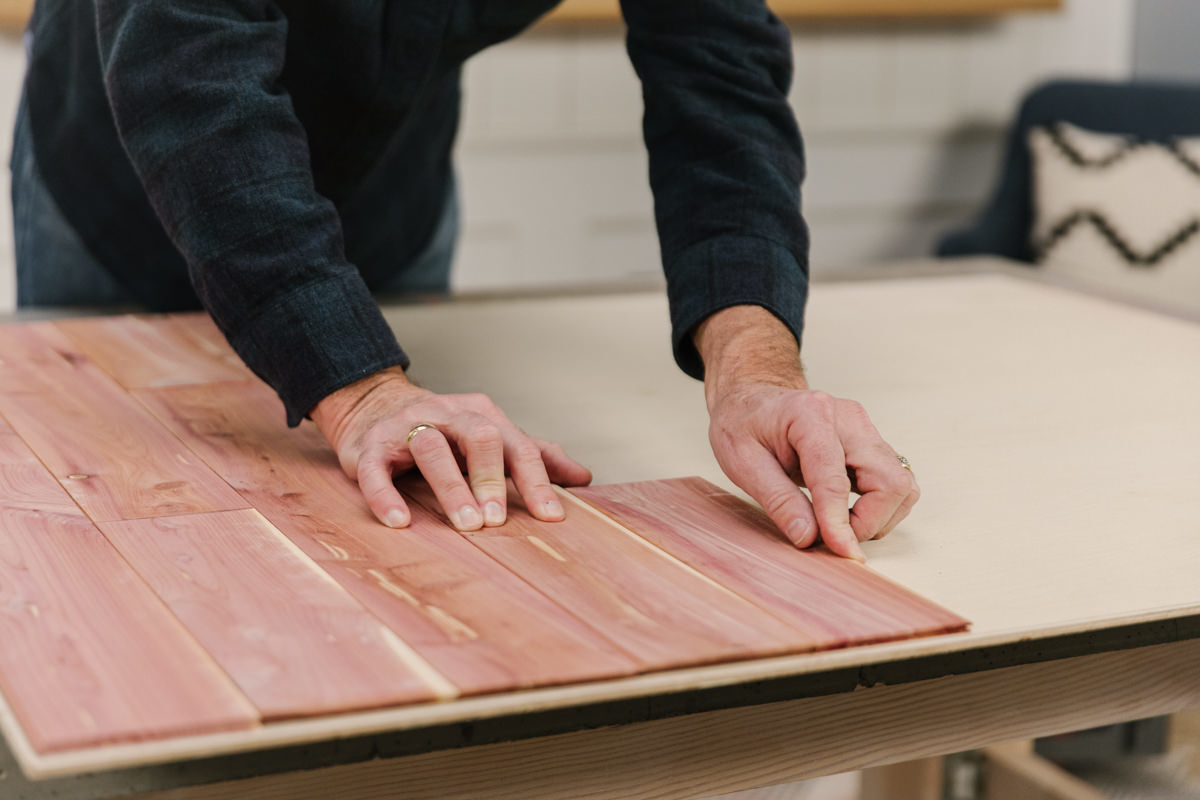
Install the Cedar Planks
- Start at the bottom of the wall.
- Use a hammer or nail gun to attach the first plank to the wall.
- Ensure it is level before securing it completely.
Continue Installing
- Place the next plank above the first one.
- Use a level to ensure it is straight.
- Nail it into place.
- Repeat until the entire wall is covered.
Finishing Touches
- Sand any rough spots.
- Wipe down the cedar to remove dust.
- Enjoy the fresh cedar scent and natural insect-repelling properties.
Helpful Tips and Tricks
Measure Twice, Cut Once: Always double-check measurements before cutting cedar panels. This saves time and materials.
Use Cedar Planks or Panels: Cedar planks or panels are easier to install than individual boards. They come in various sizes and are often tongue-and-groove, which makes fitting them together simpler.
Seal the Edges: Apply a clear sealant to the edges of the cedar panels. This prevents moisture from seeping in and causing warping.
Ventilation: Ensure proper ventilation in your closet. Cedar needs air circulation to maintain its natural properties.
Nail Gun: Use a nail gun for faster installation. It ensures the panels are securely attached to the walls.
Common Mistakes to Avoid:
- Skipping Sanding: Not sanding the cedar can result in rough surfaces that snag clothes.
- Improper Sealing: Failing to seal the edges can lead to moisture damage.
- Ignoring Ventilation: Lack of ventilation can cause the cedar to lose its effectiveness over time.
Alternatives:
- Cedar Oil: If installing cedar panels is too much work, consider using cedar oil. Apply it to existing wood surfaces for a similar effect.
- Cedar Sachets: Place cedar sachets or blocks in your closet. They are easy to replace and require no installation.
- Cedar Veneer: Use cedar veneer sheets. They are thinner and easier to apply but still provide the benefits of cedar wood.
Budgeting Your Project
Cedar planks: $100-$200 for a small closet, $200-$400 for a larger one.
Nails or screws: $5-$10.
Wood glue: $5-$10.
Measuring tape: $10-$15.
Saw: $20-$50 (hand saw) or $50-$150 (electric saw).
Hammer: $10-$20.
Level: $10-$20.
Sandpaper: $5-$10.
Protective gear: $10-$20 (gloves, goggles).
Total cost: $175-$505.
Budget-friendly alternatives:
Plywood instead of cedar planks: $50-$100.
Borrow tools from friends or neighbors.
Use existing tools if you have them.
Total cost with alternatives: $75-$200.
Creative Variations and Customizations
Alternative Materials: Instead of cedar, use pine or oak for a different look. Reclaimed wood adds a rustic touch. Plywood can be a budget-friendly option.
Colors: Stain cedar with dark walnut for a rich tone or whitewash for a coastal vibe. Paint the closet interior with pastel colors for a soft, inviting feel.
Styles: Go for a modern look by using sleek, straight lines and minimal hardware. For a vintage style, add decorative molding and antique knobs. A farmhouse style can be achieved with shiplap and barn door hardware.
Shelving: Install adjustable shelves for flexibility. Use floating shelves for a clean, open look. Add pull-out drawers for hidden storage.
Lighting: Incorporate LED strip lights for a modern touch. Use vintage Edison bulbs for a warm, nostalgic feel. Motion sensor lights add convenience.
Accessories: Add hooks for hats and bags. Install a full-length mirror on the door. Use woven baskets for organizing smaller items.
Flooring: Lay down vinyl planks for easy maintenance. Use carpet tiles for a cozy feel. Cork flooring provides a soft, eco-friendly option.
Doors: Replace standard doors with sliding barn doors for a rustic look. Use mirrored doors to make the space feel larger. Frosted glass doors add a modern touch while maintaining privacy.
Eco-Friendly Tips
Reclaimed wood is a great option for building a cedar closet. It reduces waste and gives old wood a new life. Look for salvaged cedar from old barns or buildings. This wood often has a unique character and is just as durable as new wood.
Eco-friendly finishes can protect your cedar closet without harmful chemicals. Look for natural oils like linseed or tung oil. These oils penetrate the wood, enhancing its natural beauty while providing protection.
Use bamboo for shelving or additional storage. Bamboo grows quickly, making it a sustainable choice. It's also strong and looks great with cedar.
Recycled hardware like handles, hooks, and hinges can add a vintage touch. Check out thrift stores or salvage yards for unique finds.
Energy-efficient lighting can make your closet more functional. LED lights use less energy and last longer than traditional bulbs. Consider motion-sensor lights to save even more energy.
Insulation made from recycled materials can help maintain a stable temperature in your closet. This is especially useful if you store delicate items like clothes or linens.
Natural ventilation can keep your closet fresh. Install a small vent or use a breathable fabric for closet doors. This helps prevent mold and mildew without using electric fans.
DIY organizers made from recycled cardboard or fabric scraps can keep your closet tidy. These materials are easy to find and customize to fit your needs.
By using these eco-friendly materials and methods, you can create a cedar closet that's both beautiful and sustainable.
Your Cedar Closet Awaits
Building a cedar closet isn't just about storage; it's about creating a space that smells great and keeps your clothes fresh. With some basic tools and a bit of elbow grease, you can transform any closet into a cedar-scented haven. Remember to measure your space accurately, choose high-quality cedar planks, and take your time with the installation. Don't forget to sand and seal the wood to enhance its natural properties. Whether you're a seasoned DIYer or a beginner, this project is totally doable. Plus, you'll get the satisfaction of knowing you did it yourself. So grab your tools, roll up your sleeves, and get started on your cedar closet today. Your clothes will thank you!
What are the benefits of a cedar closet?
Cedar closets help repel moths and other insects, absorb moisture, and reduce odors. Plus, they give your clothes a fresh, woodsy scent.
How do I install cedar panels in my closet?
First, measure your closet walls. Then, cut the cedar panels to fit. Use a nail gun or adhesive to attach the panels to the walls. Make sure to leave a small gap at the bottom for expansion.
Can I use cedar planks instead of panels?
Absolutely! Cedar planks work just as well. They might take a bit longer to install, but they offer a more custom look. Just follow the same steps as with panels.
How do I maintain a cedar closet?
Every few years, lightly sand the cedar to refresh its scent and effectiveness. You can also use cedar oil to boost the aroma.
Is a cedar closet safe for all types of clothing?
Yes, cedar is safe for most fabrics. However, delicate items like silk should be stored in breathable garment bags to avoid direct contact.
Can I convert an existing closet into a cedar closet?
Definitely! Just remove the current shelving and install the cedar panels or planks. You might need to adjust or replace the shelving to fit the new walls.
How much does it cost to build a cedar closet?
Costs vary based on the size of your closet and the type of cedar you choose. On average, expect to spend between $200 and $600 for materials.