
Home>Home & Furniture>Roof>How to Build a Green Roof Guide
Roof
How to Build a Green Roof Guide
Published: August 18, 2024
Learn how to build a green roof with our step-by-step guide. Discover benefits, materials, and expert tips to create an eco-friendly rooftop oasis.
(Many of the links in this article redirect to a specific reviewed product. Your purchase of these products through affiliate links helps to generate commission for Twigandthistle.com, at no extra cost. Learn more)
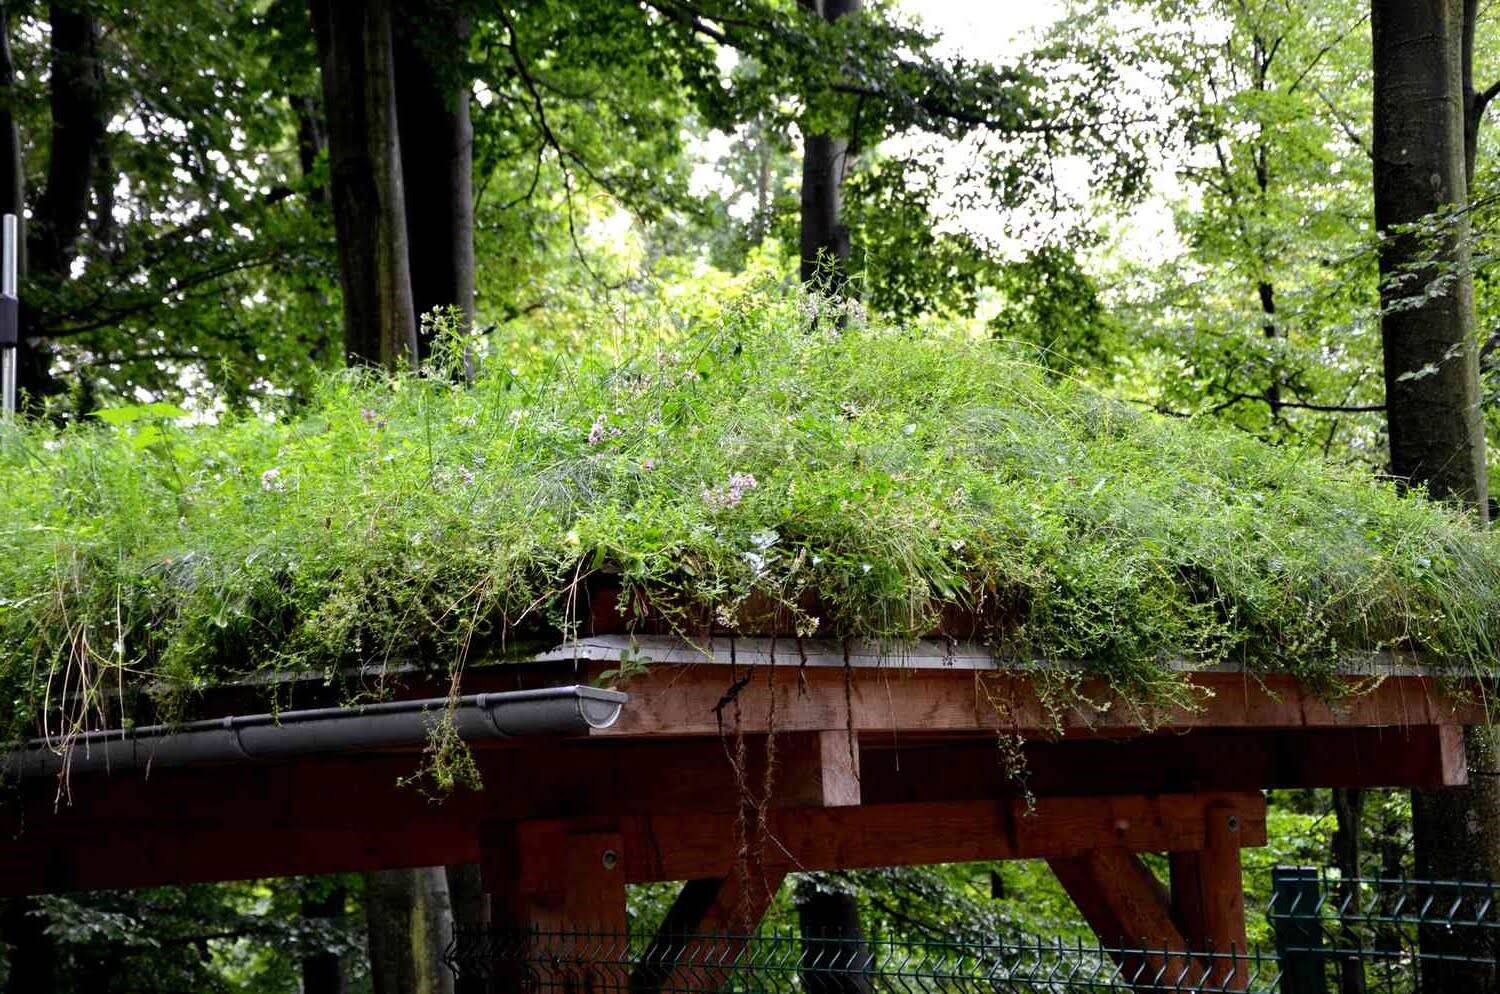
Thinking of adding some green to your roof? Building a green roof can not only make your home look cool but also help the environment. It’s a project you can tackle yourself with a bit of planning, patience, and the right materials. A green roof offers many benefits like reducing energy costs, managing stormwater, and creating a mini-habitat for birds and insects. Whether you're an experienced DIYer or new to home improvement, this guide will walk you through the basics. Ready to roll up your sleeves and get started on your green roof journey? Let’s dive in!
Getting Ready for Your Green Roof
- Check Building Codes: Ensure local regulations allow green roofs. Some areas have specific requirements.
- Inspect Roof Structure: Verify your roof can support the extra weight. Consult a structural engineer if unsure.
- Gather Materials: Get waterproof membranes, root barriers, drainage layers, soil, and plants.
- Safety Gear: Wear gloves, safety glasses, and non-slip shoes. Use a harness if working on a steep roof.
- Clear the Roof: Remove debris, old roofing materials, and any obstacles.
- Set Up Workspace: Organize tools and materials nearby. Ensure easy access to the roof.
- Weather Check: Choose a dry day to start. Rain can make the roof slippery and dangerous.
- Plan Layout: Sketch where each component will go. This helps avoid mistakes during installation.
- Prepare Plants: Choose hardy, drought-resistant plants. Keep them watered and ready for planting.
- Test Drainage: Pour water on the roof to ensure it drains properly. Fix any issues before proceeding.
Materials and Tools Checklist
Waterproof Membrane: This layer prevents water from leaking into the building. It’s essential for protecting the structure.
Root Barrier: Keeps plant roots from penetrating the waterproof membrane. Ensures the longevity of the roof.
Drainage Layer: Helps excess water flow off the roof. Prevents waterlogging and root rot.
Filter Fabric: Placed above the drainage layer. Stops soil from clogging the drainage system.
Growing Medium: A special soil mix for green roofs. Lightweight yet nutrient-rich for plant growth.
Plants: Choose hardy, drought-resistant varieties. Sedums, grasses, and wildflowers work well.
Shovel: For spreading soil and planting. A basic gardening tool.
Trowel: Smaller than a shovel. Useful for detailed planting work.
Wheelbarrow: Transports soil, plants, and other materials. Saves time and effort.
Gloves: Protects hands from dirt and sharp objects. Essential for safety.
Watering Can or Hose: For watering plants. Ensures they establish roots.
Measuring Tape: Measures dimensions accurately. Important for planning and layout.
Utility Knife: Cuts materials like the waterproof membrane and root barrier. Handy for precise work.
Safety Gear: Includes goggles, hard hat, and non-slip shoes. Keeps you safe while working on the roof.
Required Skills and Time Commitment
Skill Level: Advanced
Time Required: 2-3 weekends
- Planning and Design: 4-6 hours
- Gathering Materials: 3-5 hours
- Preparing the Roof Surface: 6-8 hours
- Installing Waterproof Membrane: 4-6 hours
- Adding Drainage Layer: 3-4 hours
- Laying Soil and Plants: 6-8 hours
Important Keywords: Advanced, 2-3 weekends, Planning, Design, Gathering Materials, Preparing Roof Surface, Installing Waterproof Membrane, Adding Drainage Layer, Laying Soil and Plants
Detailed Steps to Build a Green Roof
Check Local Regulations
- Ensure your area allows green roofs.
- Obtain necessary permits.
Assess Roof Structure
- Consult a structural engineer.
- Confirm the roof can support additional weight.
Install Waterproof Membrane
- Clean the roof surface.
- Lay down a waterproof membrane to prevent leaks.
Add Root Barrier
- Place a root barrier over the waterproof membrane.
- This prevents roots from penetrating the roof.
Install Drainage Layer
- Spread a drainage layer to manage water flow.
- Use materials like gravel or specialized drainage mats.
Add Filter Fabric
- Lay filter fabric over the drainage layer.
- This keeps soil from clogging the drainage system.
Spread Growing Medium
- Add a lightweight soil mix suitable for green roofs.
- Ensure it’s evenly distributed.
Plant Vegetation
- Choose plants suited for your climate and roof conditions.
- Plant them according to the design plan.
Water and Maintain
- Water the plants regularly until established.
- Perform routine maintenance to ensure plant health.
Helpful Tips and Tricks
Plan your green roof layout carefully. Measure the area accurately to ensure you buy the right amount of materials. Choose lightweight soil to avoid overloading your roof. Install a waterproof membrane to protect your roof from water damage. Add a root barrier to prevent plant roots from penetrating the roof. Use drainage layers to help excess water escape. Select hardy, drought-resistant plants that require minimal maintenance.
Common mistakes include not checking the roof's weight capacity, which can lead to structural damage. Skipping the waterproof membrane can cause leaks. Using regular soil instead of lightweight soil can overload the roof. Not installing a root barrier can result in plant roots damaging the roof.
Alternatives for materials or methods include using modular green roof systems, which are pre-planted trays that can be easily installed. Instead of traditional soil, consider using a mix of lightweight materials like perlite and vermiculite. For drainage, use recycled plastic drainage boards instead of gravel.
Budgeting for Your Green Roof
Materials:
- Waterproof membrane: $100-$200
- Root barrier: $50-$100
- Drainage layer: $50-$150
- Filter fabric: $30-$60
- Growing medium (soil): $100-$300
- Plants: $100-$300
Tools:
- Utility knife: $10-$20
- Shovel: $15-$30
- Trowel: $5-$15
- Wheelbarrow: $40-$80
- Gloves: $5-$15
Total cost: $505-$1,280
Budget-friendly alternatives:
- Reuse old soil: Save $50-$100
- Use native plants: Save $50-$100
- Borrow tools from neighbors: Save $75-$160
Creative Variations and Customizations
Alternative materials can change the look and feel of your green roof. Instead of traditional soil, consider using lightweight growing mediums like perlite or vermiculite. These materials reduce the overall weight of the roof. For the waterproof membrane, try using EPDM rubber instead of standard roofing felt. EPDM is more durable and flexible.
Colors can make your green roof stand out. Use colorful plants like sedums, which come in various shades of green, red, and yellow. Adding flowering plants like wildflowers can introduce bursts of color throughout the year. Paint the edges of the roof with weather-resistant paint in a color that complements your home.
Styles can vary based on your preferences. For a modern look, use sleek, geometric planters and a minimalist design. For a cottage-style roof, incorporate a mix of herbs, flowers, and grasses to create a more natural, wild appearance. If you prefer a low-maintenance option, choose drought-resistant plants that require less water and care.
Additional features can enhance your green roof. Install a drip irrigation system to ensure plants receive consistent water. Add solar panels to create an eco-friendly energy source. Incorporate birdhouses or insect hotels to attract wildlife and promote biodiversity.
Edging materials can also be customized. Use recycled plastic or metal edging for a clean, modern look. For a more rustic feel, consider using natural stone or wooden logs. These materials can help define the space and keep the growing medium in place.
Drainage solutions are crucial. Instead of standard drainage mats, use gravel layers or drainage tiles to ensure proper water flow. These options can be more cost-effective and easier to install.
Plant selection can vary based on climate and personal preference. In cooler climates, choose hardy perennials that can withstand frost. In warmer areas, opt for succulents and cacti that thrive in heat. Mixing different plant types can create a more diverse and resilient green roof.
Eco-Friendly Tips for Your Green Roof
Recycled wood can be used for the frame. This helps reduce waste and saves trees. Old bricks or tiles can be repurposed for the base layer. These materials provide good drainage and insulation.
Reclaimed soil from other gardening projects can be used. It’s a great way to recycle nutrients. Compost made from kitchen scraps can enrich the soil. This reduces the need for chemical fertilizers.
Native plants are ideal for green roofs. They require less water and are better for local wildlife. Drought-resistant plants can also be a good choice. They need less water, making the roof more sustainable.
Rainwater collection systems can be installed. This water can be used to irrigate the plants. Solar panels can be added to power the irrigation system. This makes the roof even more eco-friendly.
Natural insulation materials like sheep’s wool or cork can be used. These materials are sustainable and provide good insulation. Recycled rubber can be used for waterproofing. It’s durable and keeps waste out of landfills.
DIY tools can be borrowed or rented. This reduces the need to buy new tools, saving resources. Leftover materials from other projects can be used. This minimizes waste and makes the project more cost-effective.
Your Green Roof Awaits
Building a green roof isn't just about aesthetics; it's about sustainability and energy efficiency. You've learned the steps from planning to planting, and now it's time to get your hands dirty. Remember, proper drainage and waterproofing are crucial. Don't forget to choose plants that thrive in your climate. Regular maintenance will keep your green roof looking lush and healthy.
By following these guidelines, you'll not only enhance your home's appearance but also contribute to a greener planet. So, gather your materials, roll up your sleeves, and start building. Your green roof is just a few steps away from becoming a reality. Happy DIY-ing!
What is a green roof?
A green roof is a rooftop covered with vegetation and a growing medium. It helps insulate buildings, manage stormwater, and improve air quality.
What are the benefits of a green roof?
Green roofs provide insulation, reduce energy costs, manage rainwater, and create habitats for wildlife. They also improve air quality and reduce the urban heat island effect.
Can any building have a green roof?
Not every building can support a green roof. The structure must be able to handle the extra weight. Consult a structural engineer to check if your building is suitable.
How much maintenance does a green roof need?
Green roofs need regular maintenance like weeding, watering, and fertilizing. The amount depends on the type of plants and the climate.
What types of plants are best for green roofs?
Sedums, grasses, and wildflowers are popular choices. They are hardy, drought-tolerant, and require minimal maintenance.
How much does it cost to install a green roof?
Costs vary based on size, design, and materials. On average, it can range from $10 to $25 per square foot. Initial costs are higher, but long-term savings on energy and maintenance can offset this.
Do green roofs help with stormwater management?
Yes, green roofs absorb rainwater, reducing runoff and stress on drainage systems. They can retain up to 75% of rainwater, releasing it slowly back into the environment.