
Home>Create & Decorate>DIY & Crafts>How To Build A Window
DIY & Crafts
How To Build A Window
Published: May 12, 2024

Senior Editor in Create & Decorate, Kathryn combines traditional craftsmanship with contemporary trends. Her background in textile design and commitment to sustainable crafts inspire both content and community.
Learn how to build a window with our DIY & Crafts guide. Get step-by-step instructions and tips for creating your own custom window. Start your project today!
(Many of the links in this article redirect to a specific reviewed product. Your purchase of these products through affiliate links helps to generate commission for Twigandthistle.com, at no extra cost. Learn more)
Introduction
So, you've decided to take on the challenge of building a window yourself. Congratulations! Building your own window can be a rewarding and cost-effective project, but it does require some skill and patience. In this guide, we'll walk you through the step-by-step process of building a window from scratch. Whether you're replacing an old window or adding a new one to your home, this DIY project can add a personal touch and enhance the overall look and feel of your living space. Let's dive in and get started on this exciting journey of creating your own window!
Materials Needed
Before you begin building your window, it's essential to gather all the necessary materials and tools. Here's a list of what you'll need:
- Wood: Select high-quality wood for the frame, such as pine or cedar.
- Glass: Choose the appropriate size and type of glass for your window.
- Measuring Tape: This will be crucial for obtaining accurate measurements.
- Saw: A reliable saw for cutting the wood to the required dimensions.
- Sandpaper: To smooth the edges of the wood for a professional finish.
- Wood Glue: Essential for securely joining the frame pieces together.
- Clamps: These will help hold the frame in place during assembly.
- Screwdriver: For attaching hardware and making adjustments.
- Paint or Stain: To add a protective and decorative finish to the window frame.
- Weather Stripping: For sealing the window and preventing drafts.
- Caulk: To seal any gaps between the window frame and the wall.
Gathering these materials beforehand will ensure a smooth and efficient window-building process.
Measuring and Planning
Before diving into the construction phase, it's crucial to take accurate measurements and plan out the design of your window. Here's a detailed breakdown of the steps involved in the measuring and planning process:
-
Measure the Opening: Begin by measuring the width and height of the window opening. It's essential to take precise measurements to ensure that your custom-built window will fit perfectly.
-
Consider the Design: Decide on the style and design of your window. Will it be a traditional single-hung window, a modern casement window, or a unique custom design? Take into account the architectural style of your home and your personal preferences.
-
Create a Blueprint: Sketch out a blueprint or design plan for your window. This should include the dimensions, the type of window (e.g., fixed, operable), and any additional features such as divided lites or decorative elements.
-
Select the Wood: Choose the type of wood for your window frame. Consider the durability, appearance, and suitability for your climate. Hardwoods like oak and maple are sturdy and offer a classic look, while softwoods like pine and cedar are popular choices for their workability and natural resistance to decay.
-
Account for Hardware and Accessories: Factor in the hardware and accessories needed for your window, such as hinges, locks, and decorative trim. Ensure that these elements align with your design and functional requirements.
-
Plan for Energy Efficiency: If energy efficiency is a priority, consider incorporating features such as double-pane glass, low-emissivity coatings, and insulated frames into your window design.
By meticulously measuring and planning every aspect of your window project, you'll set the stage for a successful and satisfying DIY build.
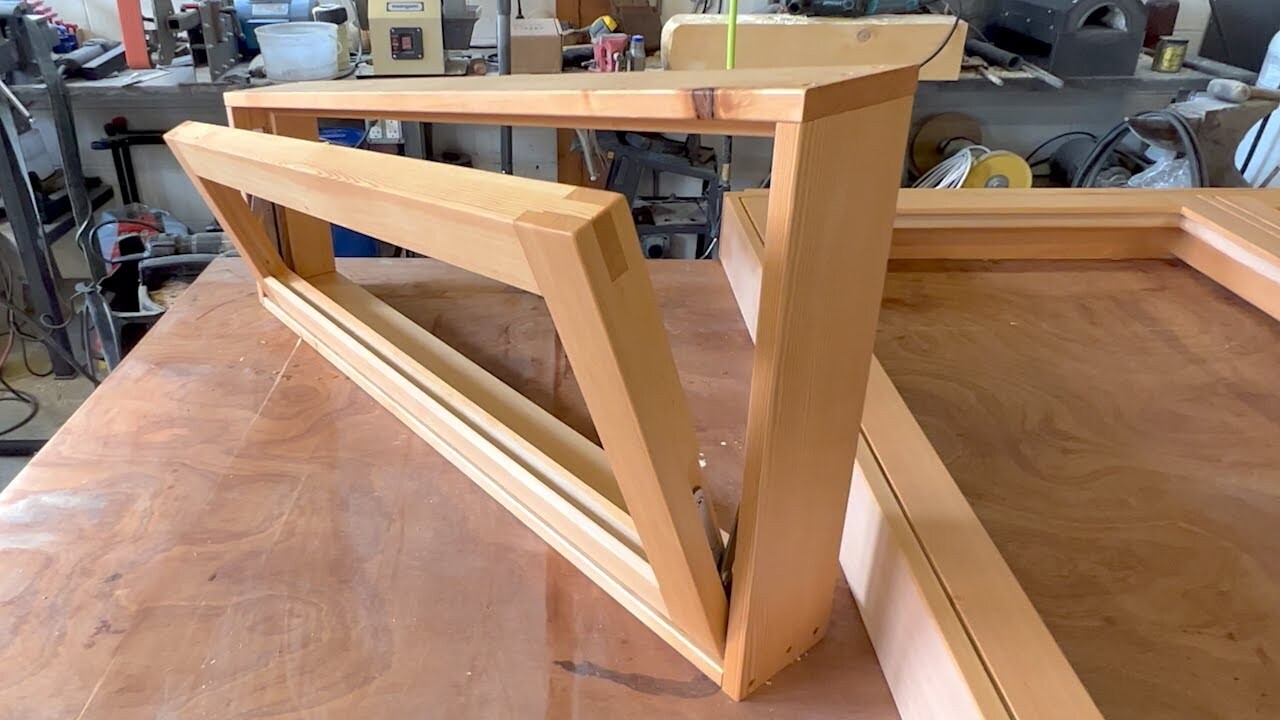
Cutting the Frame
Once you have the measurements and design plan in place, it's time to move on to the crucial step of cutting the frame for your window. This step requires precision and attention to detail to ensure that the frame pieces fit together seamlessly. Here's a detailed guide on how to cut the frame for your DIY window:
-
Prepare the Wood: Start by selecting high-quality wood for the frame, such as pine or cedar. Ensure that the wood is straight, free of knots, and has been properly seasoned to prevent warping. Use a measuring tape to mark the dimensions of each frame piece, including the top, bottom, and sides.
-
Use the Right Tools: A reliable saw is essential for cutting the wood to the required dimensions. Whether you're using a table saw, circular saw, or miter saw, make sure it is properly set up and equipped with a sharp blade suitable for cutting wood.
-
Measure Twice, Cut Once: Double-check your measurements before making any cuts. Remember the old carpenter's adage: "Measure twice, cut once." This simple rule can save you from costly mistakes and wasted materials.
-
Cutting the Angles: If your window design includes angled or mitered cuts, take extra care to accurately measure and cut these angles. A miter saw or a miter box with a handsaw can help you achieve precise angled cuts.
-
Smooth the Edges: After cutting each frame piece, use sandpaper to smooth the edges and remove any rough spots. This step is essential for achieving a professional finish and ensuring that the frame pieces fit together snugly.
-
Test the Fit: Once all the frame pieces have been cut and smoothed, perform a dry fit to ensure that they align correctly and form a square or rectangular shape. Make any necessary adjustments before proceeding to the assembly stage.
By following these steps and taking your time to cut the frame with precision, you'll be one step closer to completing your custom-built window. Remember, patience and attention to detail are key when it comes to cutting the frame for a DIY window project.
Assembling the Window
With the frame pieces cut to the correct dimensions and prepared, the next step is to assemble the window. This phase brings together the individual components to form the complete window structure. Here's a detailed guide on how to assemble your DIY window:
-
Apply Wood Glue: Before joining the frame pieces, apply a thin, even layer of wood glue to the mating surfaces. Wood glue creates a strong bond and enhances the structural integrity of the window frame.
-
Secure with Clamps: Use clamps to hold the frame pieces together while the wood glue sets. This step is crucial for ensuring that the joints are tight and secure. Position the clamps carefully to exert even pressure across the frame.
-
Check for Squareness: As you assemble the frame, periodically check for squareness using a carpenter's square. This tool helps verify that the corners form right angles, ensuring that the window will fit correctly within the opening.
-
Reinforce with Screws: In addition to wood glue, reinforcing the joints with screws adds extra strength to the window frame. Predrill pilot holes to prevent the wood from splitting, then drive the screws into place using a screwdriver or drill.
-
Install the Glass: Once the frame is assembled, carefully install the glass into the designated area. Use glazing points or window clips to secure the glass in place. Take care to position the glass evenly and ensure that it fits snugly within the frame.
-
Add Hardware and Accessories: If your window design includes operable sashes, hinges, locks, or other hardware, now is the time to install these components. Follow the manufacturer's instructions for precise placement and secure attachment.
-
Seal the Joints: Apply a bead of caulk along the inside and outside edges of the window frame to seal any gaps and prevent air or water infiltration. This step is essential for weatherproofing and ensuring the window's longevity.
By following these steps, you'll successfully assemble your DIY window, bringing together the frame, glass, and necessary hardware to create a functional and visually appealing window for your home. Paying attention to detail during the assembly process will result in a well-constructed and durable window that enhances the aesthetic and functionality of your living space.
Installing the Window
Now that you have successfully assembled your custom-built window, it's time to move on to the crucial step of installing it in its designated opening. Proper installation is essential for ensuring that the window fits securely, functions correctly, and provides efficient weatherproofing. Here's a detailed guide on how to install your DIY window:
-
Prepare the Opening: Begin by thoroughly cleaning and inspecting the window opening. Remove any debris, old caulk, or remnants from the previous window. Ensure that the opening is structurally sound and free of any obstructions that could hinder the installation process.
-
Check the Fit: Before proceeding with the installation, perform a test fit of the window within the opening. Verify that the window fits snugly and aligns correctly. Make any necessary adjustments to the opening or the window frame to achieve a proper fit.
-
Apply Weather Stripping: To enhance the window's energy efficiency and weatherproofing, apply weather stripping along the perimeter of the window opening. This will create a tight seal when the window is installed, preventing drafts and moisture infiltration.
-
Lift and Position the Window: With the help of a partner, carefully lift the window and position it within the opening. Take care to align the window squarely and evenly within the opening. Use shims to adjust the positioning as needed, ensuring that the window is level and plumb.
-
Secure the Window: Once the window is properly positioned, secure it in place by driving screws through the frame and into the surrounding wall studs. Follow the manufacturer's recommendations for the appropriate screw size and placement. This step is crucial for anchoring the window securely and preventing movement.
-
Insulate and Seal: After the window is secured, insulate the gaps between the window frame and the opening using expanding foam insulation. This will further enhance the window's energy efficiency and provide additional weatherproofing. Once the insulation is in place, trim off any excess foam.
-
Apply Exterior Trim: If your window design includes exterior trim, install it around the perimeter of the window to provide a finished look and protect the edges of the window frame. Use a combination of trim nails and exterior-grade adhesive to secure the trim in place.
-
Check for Smooth Operation: Test the window to ensure that it opens, closes, and locks smoothly. Make any necessary adjustments to the hardware or shimming to achieve proper operation. Verify that the window sashes fit securely and that there are no gaps when closed.
By following these steps, you'll successfully install your DIY window, creating a secure, weatherproof, and aesthetically pleasing addition to your home. Proper installation is essential for maximizing the functionality and longevity of your custom-built window.
Finishing Touches
After successfully installing your DIY window, it's time to add the finishing touches that will enhance its appearance and functionality. Paying attention to the details during this phase will not only elevate the visual appeal of the window but also contribute to its long-term durability and performance. Here's a detailed guide on the essential finishing touches for your custom-built window:
-
Apply a Protective Finish: To protect the wood frame from moisture, UV exposure, and general wear, apply a protective finish such as paint or stain. Choose a high-quality exterior-grade paint or stain that complements the style of your home and provides long-lasting protection. Ensure that the finish is applied evenly and thoroughly to all exposed surfaces of the window frame.
-
Install Interior Trim: Adding interior trim around the window frame can create a polished and cohesive look. Choose trim that matches the architectural style of your home and complements the design of the window. Secure the trim in place using finishing nails and wood glue, ensuring that it fits snugly against the window frame for a seamless appearance.
-
Add Window Treatments: Enhance the privacy, light control, and decorative appeal of your window by installing window treatments such as blinds, curtains, or shades. Select treatments that align with your interior decor and provide the desired level of functionality. Properly installed window treatments can add a personal touch to the window while serving practical purposes.
-
Check for Proper Sealing: Inspect the exterior and interior of the window for any gaps or areas that may require additional sealing. Apply exterior-grade caulk to seal any joints or gaps around the window frame, ensuring that it is effectively weatherproofed. Similarly, use interior caulk to seal gaps between the window frame and the wall, enhancing energy efficiency and preventing drafts.
-
Hardware Adjustment and Lubrication: If your window includes operable components such as sashes, hinges, or locks, take the time to adjust and lubricate the hardware for smooth operation. Tighten any loose screws, ensure that locks and latches function correctly, and apply a silicone-based lubricant to moving parts for effortless operation.
-
Clean and Inspect the Glass: Thoroughly clean the glass surfaces of the window, both inside and out, using a mild glass cleaner and a lint-free cloth. Inspect the glass for any imperfections or damage, and address any issues promptly to maintain the clarity and integrity of the window.
-
Add Decorative Accents: Consider adding decorative accents such as window grilles, shutters, or window boxes to enhance the visual appeal of your custom-built window. These elements can add character and charm to the window while complementing the overall aesthetic of your home's exterior.
By attending to these finishing touches, you'll complete the transformation of your DIY window into a fully integrated and visually striking feature of your home. These details not only contribute to the overall aesthetics but also play a crucial role in ensuring the functionality and longevity of your custom-built window.
Conclusion
Congratulations on successfully completing the construction and installation of your DIY window! By embarking on this rewarding journey, you've not only added a personal touch to your home but also honed your skills in woodworking and home improvement. Your custom-built window is a testament to your creativity, craftsmanship, and dedication to enhancing your living space.
As you admire the newly installed window, take pride in the fact that you've created a functional and visually appealing feature that contributes to the overall ambiance of your home. Whether it's a traditional wooden frame or a modern design with energy-efficient glass, your DIY window reflects your unique style and attention to detail.
Remember that proper maintenance and care will ensure that your custom-built window continues to enhance your home for years to come. Regular inspections, cleaning, and occasional refinishing will preserve the beauty and functionality of the window, allowing you to enjoy its benefits for the long term.
As you bask in the satisfaction of completing this DIY project, consider sharing your experience with others who may be inspired to take on similar endeavors. Your journey in building a window from scratch can serve as a source of motivation and guidance for fellow DIY enthusiasts, encouraging them to explore their creativity and skills in home improvement.
With your newfound knowledge and experience, you're well-equipped to tackle future DIY projects with confidence and enthusiasm. Whether it's building furniture, renovating a room, or crafting decorative elements, your skills in DIY and home improvement will continue to flourish, adding value and personalization to your living space.
Once again, congratulations on your successful window-building venture. Embrace the sense of accomplishment and the joy of creating something truly unique for your home. Your DIY window stands as a testament to your ingenuity and passion for crafting a living environment that reflects your individuality and style.