
Home>Home & Furniture>Kitchen>DIY Outdoor Kitchen Gazebo Build
Kitchen
DIY Outdoor Kitchen Gazebo Build
Published: July 28, 2024
Learn how to build your own outdoor kitchen gazebo with our step-by-step guide. Transform your backyard into a culinary oasis perfect for entertaining and cooking.
(Many of the links in this article redirect to a specific reviewed product. Your purchase of these products through affiliate links helps to generate commission for Twigandthistle.com, at no extra cost. Learn more)
Building your own outdoor kitchen gazebo can be a fantastic project. It allows you to create a personalized space for cooking and entertaining right in your backyard. Plus, doing it yourself saves money and can be a fun learning experience. In this guide, we'll go through the basics to get you started, from planning and gathering materials to constructing and finishing touches. No need to be a pro; even beginners can tackle this with some basic tools and patience. Let's roll up our sleeves, grab our tools, and start building that dream outdoor kitchen gazebo!
Getting Ready for Your Project
Gather Materials and Tools: Make sure you have all necessary materials like wood, screws, nails, and roofing materials. Tools needed include a saw, drill, measuring tape, level, and safety gear.
Check Local Building Codes: Ensure your project complies with local regulations. Obtain any required permits.
Choose a Location: Pick a flat, stable area in your yard. Avoid spots with poor drainage or overhead obstructions.
Measure and Mark: Use measuring tape to outline the dimensions of your gazebo. Mark corners with stakes and string.
Prepare the Ground: Clear the area of debris, rocks, and vegetation. Level the ground if necessary.
Safety Gear: Wear gloves, safety goggles, and ear protection. Keep a first aid kit nearby.
Set Up Workspace: Create a designated area for cutting and assembling materials. Keep tools organized and within reach.
Check Weather: Plan your build for a period of good weather to avoid delays and complications.
Get Help: Enlist a friend or family member to assist. Some tasks require more than one person for safety and efficiency.
Read Instructions: If using a kit, read through the entire instruction manual before starting. Familiarize yourself with each step.
Test Fit: Before final assembly, do a dry run to ensure all parts fit together correctly. This helps avoid mistakes later.
Power Source: Ensure you have access to electricity for power tools. Use outdoor-rated extension cords if necessary.
Plan for Waste: Set up a trash bin for scrap materials and packaging. Keep the workspace clean to avoid accidents.
Gathering Your Materials and Tools
Materials:
- Pressure-Treated Lumber: Used for the frame and support beams. Resists rot and insects.
- Concrete Mix: Secures the posts in the ground. Provides stability.
- Galvanized Screws and Nails: Fastens the wood pieces together. Prevents rust.
- Metal Brackets: Reinforces joints and corners. Adds strength.
- Roofing Material: Protects from weather. Options include shingles, metal sheets, or polycarbonate panels.
- Outdoor-Grade Paint or Stain: Protects wood from elements. Enhances appearance.
- Pavers or Decking: Creates a solid floor. Options include stone, wood, or composite decking.
- Outdoor Kitchen Appliances: Includes grill, sink, and countertop. Essential for cooking and prep.
- Lighting Fixtures: Provides illumination. Options include string lights, lanterns, or built-in lights.
Tools:
- Tape Measure: Measures wood and spaces accurately.
- Level: Ensures surfaces are even. Prevents tilting.
- Circular Saw: Cuts wood to size. Essential for framing.
- Drill: Makes holes and drives screws. Speeds up assembly.
- Hammer: Drives nails. Useful for framing and finishing.
- Shovel: Digs holes for posts. Also useful for mixing concrete.
- Wheelbarrow: Transports materials. Useful for concrete and dirt.
- Ladder: Reaches high places. Necessary for roof installation.
- Safety Gear: Includes gloves, goggles, and ear protection. Keeps you safe during construction.
Required Skills and Time Commitment
Skill Level: Advanced
Time Required: Approximately 3-4 weekends
- Planning and Design: 1 weekend
- Gathering Materials: 1-2 days
- Foundation Work: 1 weekend
- Building the Frame: 1 weekend
- Roof Installation: 1 weekend
- Finishing Touches: 1-2 days
Detailed Build Instructions
Plan and Design
- Measure the area where the gazebo will be built.
- Sketch a design including dimensions, materials, and features.
- Check local building codes and permits.
Gather Materials and Tools
- Materials: Lumber, screws, nails, concrete, roofing material, countertop, grill, sink.
- Tools: Tape measure, saw, drill, level, hammer, shovel, concrete mixer.
Prepare the Site
- Clear the area of debris and vegetation.
- Level the ground using a shovel and rake.
- Mark the corners of the gazebo with stakes and string.
Build the Foundation
- Dig holes for the posts, at least 2 feet deep.
- Mix and pour concrete into the holes.
- Insert posts into the concrete, ensuring they are level and plumb.
- Allow concrete to cure for 24-48 hours.
Construct the Frame
- Attach horizontal beams to the posts using screws and brackets.
- Ensure all beams are level and secure.
- Add diagonal braces for extra support.
Install the Roof
- Attach rafters to the top beams, spaced evenly.
- Secure roofing material to the rafters.
- Ensure the roof is watertight and properly ventilated.
Build the Countertop and Install Appliances
- Construct a frame for the countertop using lumber.
- Attach countertop material (e.g., granite, concrete) to the frame.
- Install the grill, sink, and other appliances.
- Connect plumbing and electrical as needed.
Finish and Decorate
- Sand and paint or stain the wood surfaces.
- Add outdoor furniture and decorations.
- Install lighting and other accessories.
Inspect and Enjoy
- Double-check all connections and stability.
- Ensure everything is functioning properly.
- Enjoy your new outdoor kitchen gazebo!
Helpful Tips for Success
Plan your layout carefully. Measure twice, cut once. Use treated lumber for the frame to withstand weather. Pre-drill holes to prevent wood from splitting. Level the ground before building to ensure stability. Anchor posts securely with concrete for a sturdy base. Install roofing with a slight slope for water runoff.
Common mistakes include not checking local building codes, which can lead to fines. Skipping the step of leveling the ground can cause an unstable structure. Using untreated wood can result in rot and decay. Forgetting to seal gaps can allow pests to enter.
Alternatives for materials include using metal posts instead of wood for longer durability. Composite decking can replace traditional wood for a low-maintenance option. Instead of shingles, consider metal roofing for better longevity.
Budgeting for Your Build
Lumber: $500 - $700
Concrete: $100 - $150
Roofing Materials: $200 - $300
Outdoor Kitchen Appliances: $1,000 - $2,000
Countertops: $200 - $400
Sink and Plumbing: $150 - $300
Electrical Supplies: $100 - $200
Paint/Stain: $50 - $100
Hardware (screws, nails, brackets): $50 - $100
Tools (saw, drill, level, etc.): $200 - $400 (if not already owned)
Total Estimate: $2,550 - $4,650
Budget-Friendly Alternatives:
- Use reclaimed wood for lumber: $200 - $400
- Opt for basic roofing materials like corrugated metal: $100 - $150
- Choose used appliances: $500 - $1,000
- Use concrete countertops instead of granite: $100 - $200
- Consider a basic outdoor sink: $50 - $100
- Borrow or rent tools: $50 - $100
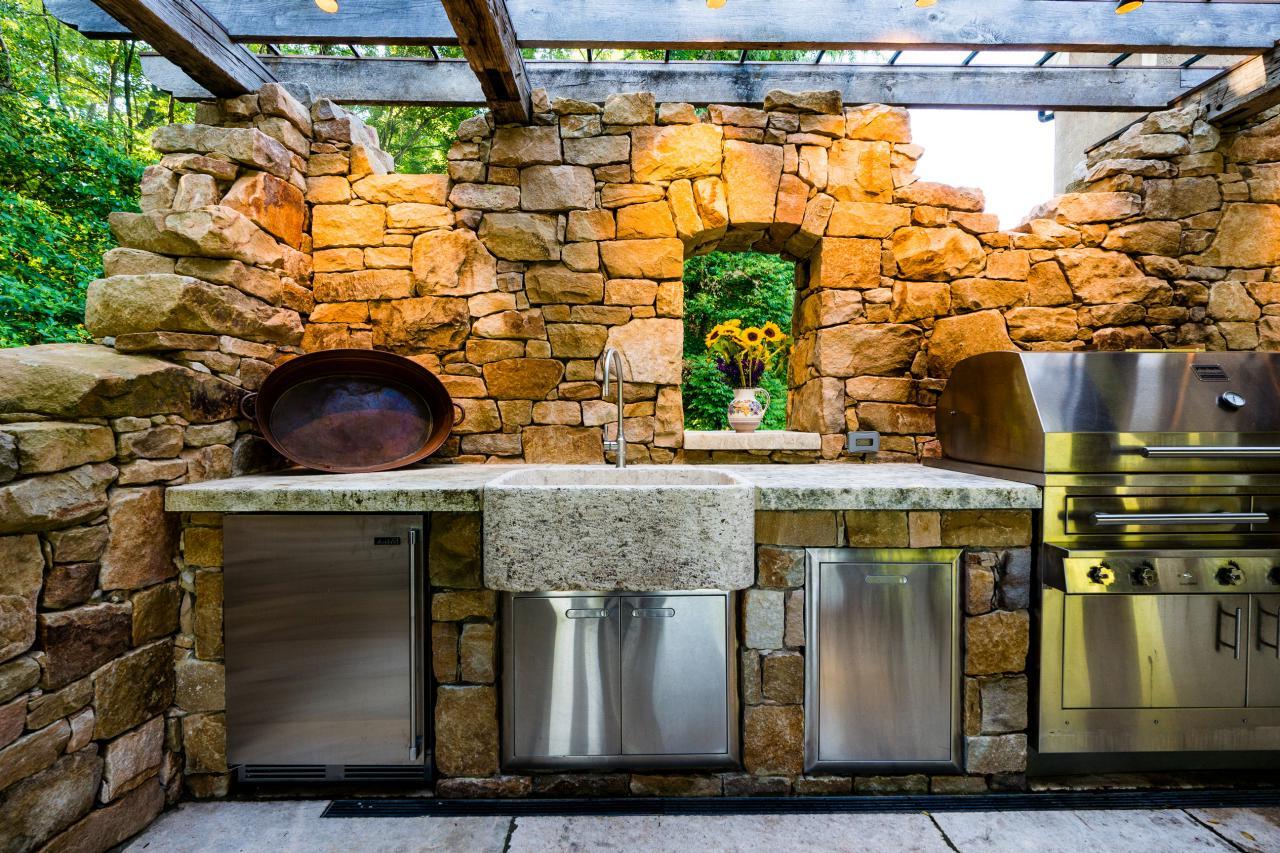
Personalizing Your Outdoor Kitchen Gazebo
Materials: Instead of wood, try using metal or composite materials for a more modern look. Metal frames can be more durable and require less maintenance. Composite materials offer the appearance of wood but resist weathering better.
Roofing: Swap out traditional shingles for metal roofing or polycarbonate panels. Metal roofing provides a sleek, industrial feel, while polycarbonate panels let in natural light and are lightweight.
Flooring: Use stamped concrete or pavers instead of plain concrete. Stamped concrete can mimic stone or brick, adding texture and interest. Pavers come in various shapes and colors, allowing for unique patterns.
Countertops: Replace standard countertops with granite, quartz, or concrete. Granite and quartz offer durability and a high-end look. Concrete can be customized with colors and embedded objects for a unique finish.
Cabinetry: Opt for stainless steel cabinets instead of wood. Stainless steel is weather-resistant and gives a professional kitchen vibe. For a rustic touch, consider reclaimed wood cabinets.
Lighting: Install solar-powered lights or LED strip lights. Solar lights are eco-friendly and reduce energy costs. LED strips can be placed under countertops or along the gazebo frame for ambient lighting.
Seating: Use built-in benches or bar stools instead of traditional patio furniture. Built-in benches can include storage underneath. Bar stools around a high counter create a casual, social atmosphere.
Colors: Paint the gazebo in bold colors like navy blue or forest green for a striking look. Alternatively, use neutral tones like beige or gray for a more classic, timeless appearance.
Decor: Add hanging plants, outdoor rugs, or string lights for a cozy feel. Hanging plants bring nature closer, outdoor rugs define the space, and string lights add a warm glow.
Appliances: Incorporate a pizza oven or smoker alongside the grill. A pizza oven offers versatility for cooking, while a smoker can enhance the flavor of your meals.
Privacy: Install outdoor curtains or bamboo screens for added privacy. Curtains can be drawn when needed, and bamboo screens provide a natural barrier.
Weatherproofing: Use weather-resistant fabrics for cushions and covers. These fabrics resist fading and mildew, keeping your outdoor kitchen looking fresh longer.
Eco-Friendly Building Tips
Reclaimed Wood: Use old barn wood or pallets. Sand and treat them to prevent rot.
Recycled Metal: Look for scrap metal for the frame. It’s sturdy and eco-friendly.
Bamboo: Fast-growing and sustainable. Great for roofing or decorative elements.
Natural Stone: Use stones from your yard or nearby areas for countertops or flooring.
Solar Lighting: Install solar-powered lights. They save energy and look great.
Eco-Friendly Paint: Choose low-VOC or zero-VOC paints. They’re better for the environment and your health.
Rainwater Collection: Set up a rain barrel. Use collected water for cleaning or plants around the gazebo.
Compostable Materials: Use compostable plates and utensils in your outdoor kitchen. They reduce waste.
Native Plants: Plant native species around the gazebo. They require less water and maintenance.
Recycled Plastic: Use recycled plastic lumber for benches or tables. It’s durable and weather-resistant.
Your Outdoor Oasis Awaits
Building your own outdoor kitchen gazebo is a rewarding project. You've learned how to plan, gather materials, and assemble everything step-by-step. Now, you can enjoy a space perfect for cooking, entertaining, or just relaxing. Remember, the key is in the details—sturdy construction, weather-resistant materials, and a layout that suits your needs. Don't rush; take your time to ensure everything is just right. Your hard work will pay off with a beautiful, functional addition to your backyard. So, grab those tools, get creative, and start building your dream outdoor kitchen gazebo. Happy building!
How much does it cost to build an outdoor kitchen gazebo?
Costs can vary widely, but expect to spend between $3,000 and $10,000. Factors like materials, size, and added features will affect the final price.
What materials are best for building an outdoor kitchen gazebo?
Pressure-treated wood, cedar, and composite materials are popular choices. They’re durable and can withstand weather changes. For the roof, consider metal or shingles.
Do I need a permit to build an outdoor kitchen gazebo?
Most places require a building permit for structures like gazebos. Check with your local building department to see what’s needed in your area.
How long does it take to build an outdoor kitchen gazebo?
Depending on your skill level and the complexity, it can take anywhere from a weekend to a few weeks. Planning and gathering materials ahead of time can speed up the process.
Can I install a grill in my outdoor kitchen gazebo?
Absolutely! Just make sure to follow safety guidelines. Keep the grill away from flammable materials and ensure proper ventilation.
What kind of flooring should I use for my outdoor kitchen gazebo?
Concrete, pavers, and stone are excellent choices. They’re durable, easy to clean, and can handle the weight of kitchen appliances.
How do I maintain my outdoor kitchen gazebo?
Regularly check for wear and tear. Clean surfaces, reseal wood, and inspect the roof for damage. Proper maintenance will keep your gazebo looking great for years.