
Home>Home & Furniture>Garage & Basement>How to Pour a DIY Basement Slab
Garage & Basement
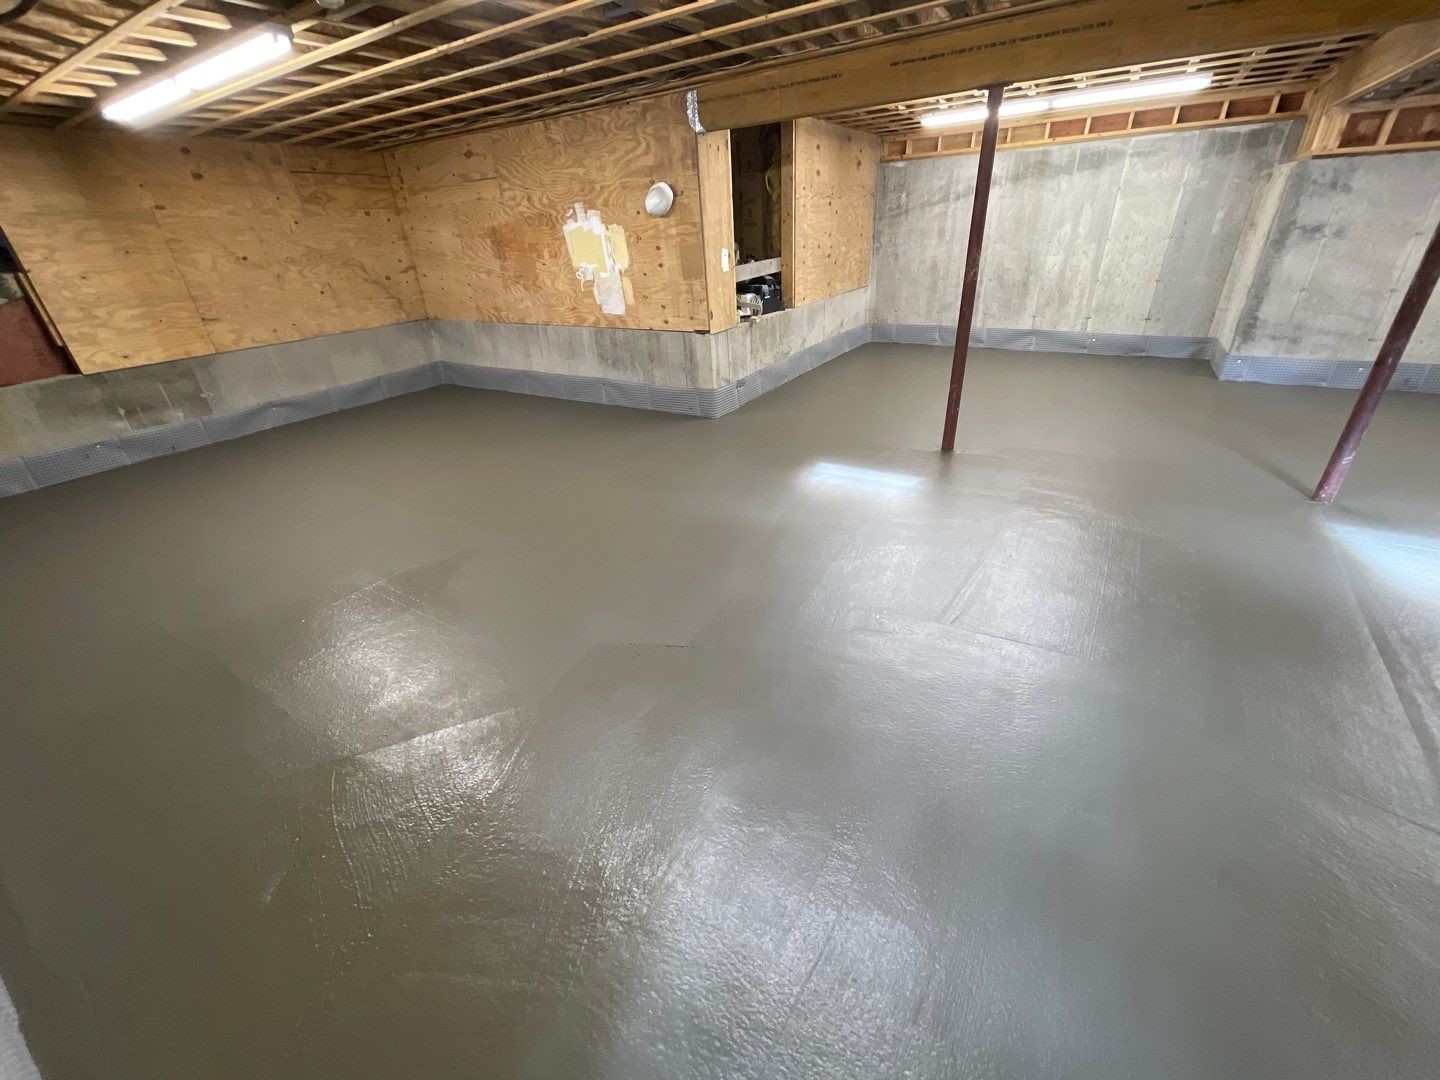
How to Pour a DIY Basement Slab
Published: August 29, 2024
Learn how to pour a DIY basement slab with our step-by-step guide. From preparation to finishing touches, ensure a durable and level foundation for your basement.
(Many of the links in this article redirect to a specific reviewed product. Your purchase of these products through affiliate links helps to generate commission for Twigandthistle.com, at no extra cost. Learn more)
Pouring a basement slab yourself might seem challenging, but with the right tools and a bit of planning, it's doable. This guide will walk you through the steps to ensure a smooth and even slab. Doing it yourself can save money, provide a sense of accomplishment, and give you control over the project. You'll need some basic tools, materials, and a willingness to get your hands dirty. Whether you're looking to create a new living space, workshop, or just want a solid floor, this project can be a rewarding experience. Ready to get started? Let's dive in.
Getting Ready for Your Project
Gather Materials: Cement, sand, gravel, water, rebar, wire mesh, plastic sheeting, wooden forms, and a concrete mixer.
Safety Gear: Wear gloves, safety goggles, dust mask, and sturdy boots.
Clear the Area: Remove any debris, rocks, or old concrete from the workspace.
Level the Ground: Use a shovel and rake to make the ground even. Compact the soil with a tamping tool.
Install Forms: Set up wooden forms around the perimeter to shape the slab. Ensure they are level and secure.
Add Gravel Base: Spread a 4-inch layer of gravel inside the forms. Compact it well.
Lay Plastic Sheeting: Place plastic sheeting over the gravel to act as a moisture barrier.
Reinforce with Rebar: Lay rebar or wire mesh over the plastic sheeting for added strength.
Mix Concrete: Follow the instructions on the cement bag. Mix cement, sand, gravel, and water in the concrete mixer.
Pour Concrete: Start at one end and work your way across. Use a shovel to spread it evenly.
Level the Surface: Use a screed board to level the concrete. Smooth it out with a trowel.
Cure the Concrete: Keep the slab moist for several days to allow it to cure properly. Cover with plastic sheeting if needed.
Remove Forms: Once the concrete has cured, carefully remove the wooden forms.
Essential Materials and Tools
- Concrete Mix: Essential for creating the slab. Choose a mix designed for basement floors.
- Gravel: Provides a stable base for the concrete. Typically, a layer of 4-6 inches is needed.
- Rebar or Wire Mesh: Reinforces the concrete, preventing cracks and adding strength.
- Plastic Sheeting: Acts as a vapor barrier, preventing moisture from seeping through the slab.
- Form Boards: Used to create the shape and boundaries of the slab. Usually made of wood.
- Concrete Mixer: Mixes the concrete to the right consistency. Can be rented if you don't own one.
- Shovels: For spreading gravel and concrete.
- Trowels: Smooths and finishes the surface of the concrete.
- Screed Board: Levels the concrete surface. A long, straight board works best.
- Bull Float: Smooths the concrete after screeding. Helps to push down aggregate and bring up the cream.
- Edger: Creates smooth, rounded edges on the slab.
- Concrete Groover: Adds control joints to prevent cracking.
- Wheelbarrow: Transports concrete mix and gravel.
- Level: Ensures the slab is even and flat.
- Measuring Tape: Measures dimensions accurately.
- Safety Gear: Includes gloves, safety glasses, and a dust mask to protect yourself during the project.
Required Skills and Time Commitment
Skill Level: Advanced
Time Required: 2-3 days
- Preparation: 4-6 hours
- Excavation and Formwork: 8-10 hours
- Pouring Concrete: 4-6 hours
- Finishing and Curing: 1-2 days
This project requires advanced skills because it involves precise measurements, heavy lifting, and working with concrete.
Detailed Step-by-Step Guide
Prepare the Area
- Clear the space of any debris or old concrete.
- Level the ground using a rake and shovel.
- Compact the soil with a tamper to ensure a solid base.
Set Up Forms
- Measure and cut wooden boards to outline the slab area.
- Stake the boards into place, ensuring they are level.
- Reinforce corners with additional stakes for stability.
Add Gravel Base
- Spread a layer of gravel about 4 inches thick.
- Level the gravel using a rake.
- Compact the gravel with a tamper.
Install Vapor Barrier
- Lay a plastic sheet over the gravel to prevent moisture.
- Overlap edges by at least 6 inches.
- Tape seams to ensure a tight seal.
Place Rebar or Mesh
- Cut rebar or wire mesh to fit the slab area.
- Position rebar in a grid pattern, elevating it slightly with rebar chairs.
- Tie intersections with wire ties for stability.
Mix and Pour Concrete
- Mix concrete according to the manufacturer's instructions.
- Pour concrete into the forms, starting at one end.
- Spread concrete evenly using a shovel and rake.
Level and Smooth Concrete
- Use a screed board to level the surface.
- Float the surface with a bull float to smooth it out.
- Edge the slab with an edging tool to create clean edges.
Cure the Concrete
- Cover the slab with plastic sheeting or wet burlap.
- Keep the surface moist for at least 7 days.
- Remove forms after the concrete has cured.
Finish the Surface
- Use a trowel for a smooth finish.
- Apply a broom finish if a textured surface is desired.
- Seal the concrete with a concrete sealer for protection.
Helpful Tips and Tricks
Prepare the Area: Clear debris and level the ground. Use a compactor to ensure a solid base.
Use a Vapor Barrier: Lay down a plastic sheet to prevent moisture from seeping through the slab.
Reinforce with Rebar: Place rebar or wire mesh to strengthen the concrete. This helps prevent cracks.
Mix Properly: Follow the instructions on the concrete mix bag. Too much water weakens the slab.
Pour in Sections: Work in manageable sections to avoid rushing. Use a screed to level the concrete.
Smooth and Finish: Use a bull float to smooth the surface. After it sets, use a trowel for a finer finish.
Cure Properly: Keep the slab moist for several days to cure. Cover with plastic or spray with water.
Common Mistakes to Avoid:
- Skipping the Vapor Barrier: Leads to moisture issues.
- Improper Mixing: Weakens the slab.
- Rushing the Pour: Causes uneven surfaces.
- Ignoring Curing: Results in cracks.
Alternatives:
- Fiber Reinforcement: Instead of rebar, use fiber additives in the mix.
- Self-Leveling Concrete: Easier to work with for a smoother finish.
- Pre-Mixed Bags: Convenient for small areas, no need to mix from scratch.
Budgeting Your Basement Slab
Concrete: For a 10x10 foot slab, you'll need about 1.85 cubic yards of concrete. This costs around $150 per cubic yard, totaling $280.
Rebar: Reinforcement bars help strengthen the slab. A 10x10 slab needs about 20 pieces of 10-foot rebar. Each piece costs around $5, totaling $100.
Gravel: A 4-inch layer of gravel is needed for drainage. You'll need about 1.25 cubic yards, costing around $50 per cubic yard, totaling $63.
Plastic Sheeting: This acts as a moisture barrier. A 10x10 foot sheet costs around $20.
Form Boards: To hold the concrete in place, you'll need 2x4 boards. For a 10x10 slab, you'll need about 40 feet of board, costing around $30.
Concrete Mixer Rental: Renting a mixer for a day costs about $50.
Trowel and Float: These tools help smooth the concrete. A trowel costs around $15, and a float costs about $20, totaling $35.
Wheelbarrow: For moving materials, a wheelbarrow costs around $60.
Level: Ensuring the slab is even, a level costs about $10.
Total Cost: Adding everything up, the total cost for materials and tools is approximately $648.
Budget-Friendly Alternatives:
- Concrete: Mix your own using cement, sand, and gravel. This can save around $50.
- Rebar: Use wire mesh instead, costing about $50.
- Concrete Mixer: Mix by hand in a wheelbarrow, saving $50.
- Tools: Borrow from friends or rent from a local hardware store, saving around $50.
Using these alternatives, you could reduce the total cost to around $498.
Creative Variations and Customizations
Alternative Materials: Instead of standard concrete, consider using self-leveling concrete for a smoother finish. Fiber-reinforced concrete can add extra strength. For a more eco-friendly option, try recycled concrete aggregate.
Colors: Add concrete dye or stain to the mix for a custom color. Acid stains can give a marbled effect. Integral color can be mixed into the concrete for a uniform look.
Styles: Create patterns with stamped concrete to mimic stone or brick. Use stencils for unique designs. Exposed aggregate can give a textured, decorative finish.
Finishes: For a polished look, use a concrete grinder to smooth the surface. Broom finishes add texture to prevent slipping. Trowel finishes can create a sleek, smooth surface.
Insulation: Consider adding insulation boards under the slab for better energy efficiency. Radiant floor heating can be installed before pouring for a warm basement floor.
Edges: Use form liners to create decorative edges. Chamfer strips can give a beveled edge for a more finished look.
Sealing: Apply a concrete sealer to protect against moisture and stains. Epoxy coatings can add durability and a glossy finish. Penetrating sealers can provide protection without changing the appearance.
Eco-Friendly Tips for Your DIY
Recycled concrete can be used as an eco-friendly alternative to new concrete. It reduces waste and saves resources. Fly ash or slag cement can replace a portion of the Portland cement in your mix, lowering the carbon footprint.
For insulation, consider recycled foam boards or hempcrete, which is made from hemp fibers and lime. These materials provide good insulation and are more sustainable.
Use reclaimed wood for formwork instead of new lumber. This reduces the demand for new wood and keeps old wood out of landfills.
When reinforcing the slab, opt for recycled steel rebar. It performs just as well as new steel but uses less energy to produce.
To reduce water usage, mix concrete with gray water or captured rainwater. This helps conserve fresh water resources.
Finally, use low-VOC sealers and finishes to minimize harmful emissions. These products are better for indoor air quality and the environment.
Your Basement Slab Awaits
You've got all the steps down for pouring a DIY basement slab. From prepping the site to smoothing out the final surface, each part is crucial. Remember, patience and attention to detail are your best friends here. Don't rush the curing process; let the concrete set properly to avoid future cracks. If you followed the guidelines and used the right tools, you should end up with a solid, level slab. This project not only saves you money but also gives you a sense of accomplishment. So, roll up your sleeves, gather your materials, and get to work. Your new basement floor is just a few steps away. Happy building!
What materials do I need to pour a basement slab?
You'll need concrete mix, rebar, gravel, plastic sheeting, wooden forms, leveling tools, and a concrete mixer.
How thick should the basement slab be?
Typically, a basement slab should be 4 inches thick. If you're planning to store heavy items, consider making it 6 inches.
Do I need a permit to pour a basement slab?
Yes, most places require a building permit. Check with your local building department to be sure.
How do I prepare the ground before pouring the slab?
First, excavate the area to the desired depth. Then, lay down gravel for drainage, followed by a layer of plastic sheeting to act as a moisture barrier.
How long does it take for the concrete to cure?
Concrete typically takes 24 to 48 hours to set enough to walk on, but it needs 28 days to fully cure.
Can I pour the slab myself, or should I hire a professional?
If you're comfortable with heavy lifting and detailed work, you can do it yourself. Otherwise, hiring a professional might be a safer bet.
How do I ensure the slab is level?
Use a leveling tool or a laser level. Make sure to check the level frequently while pouring and smoothing the concrete.