
Home>Home & Furniture>Garage & Basement>How to Build a 24×24 Garage Guide
Garage & Basement
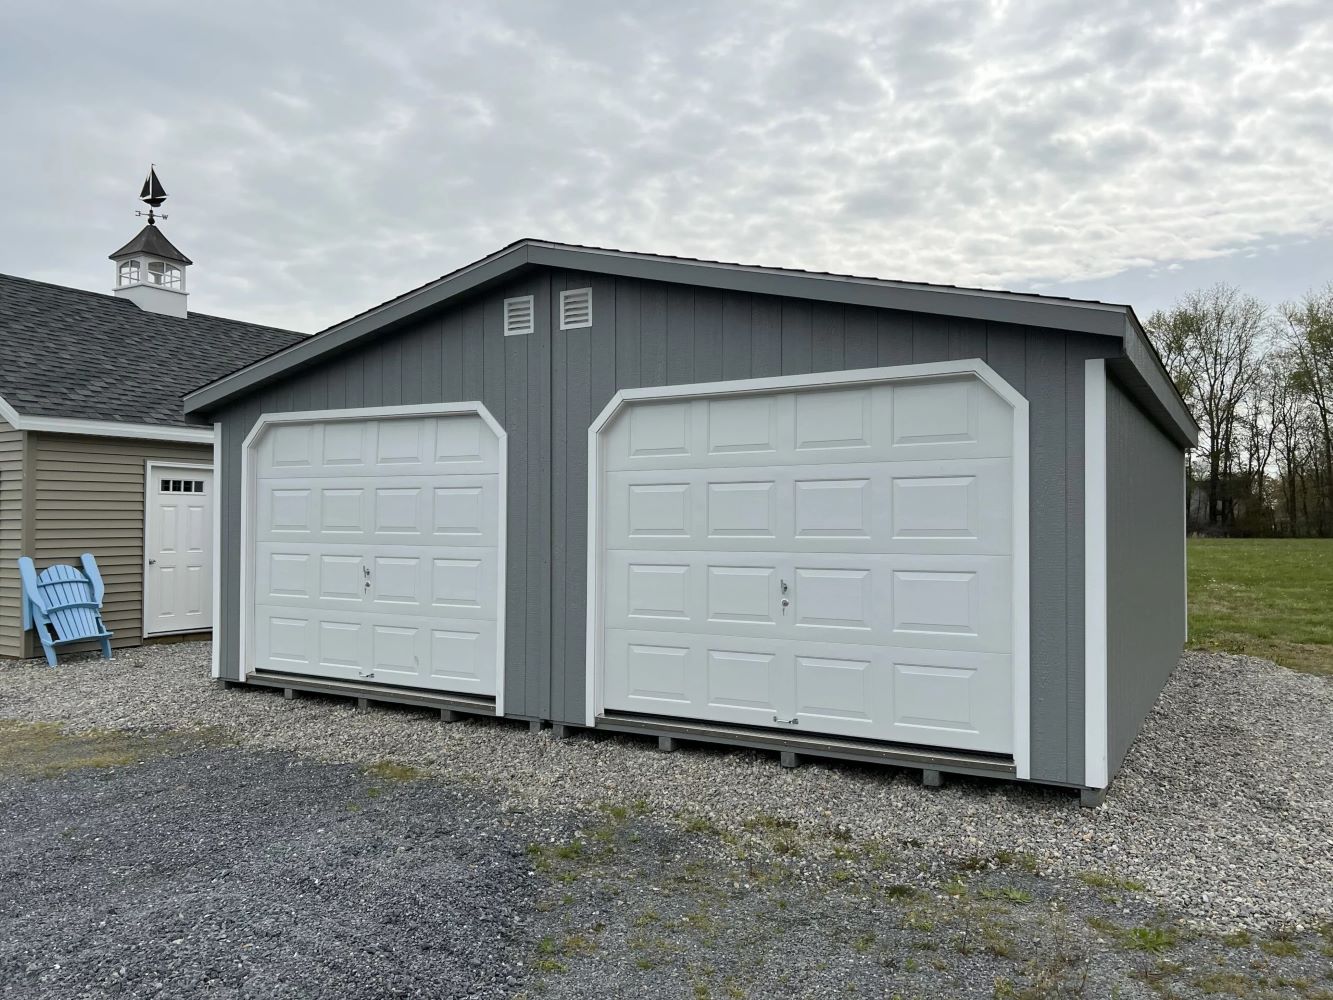
How to Build a 24×24 Garage Guide
Published: September 26, 2024
Learn how to build a 24x24 garage with our step-by-step guide. From planning and permits to construction and finishing touches, get expert tips for a successful project.
(Many of the links in this article redirect to a specific reviewed product. Your purchase of these products through affiliate links helps to generate commission for Twigandthistle.com, at no extra cost. Learn more)
Building a 24x24 garage can be an exciting DIY project that adds value and functionality to your home. Whether you need extra storage space, a place to work on your car, or a workshop, this guide will help walk you through the basics. We will cover planning, materials, and the steps needed to bring your garage project to life. By following these instructions, you can save money and gain a sense of accomplishment. Ready to get started? Let’s dive into the details and see how you can make this dream a reality.
Getting Ready for Your Garage Project
Check Local Building Codes: Ensure you understand any regulations or permits required.
Create a Detailed Plan: Draw up blueprints or use a garage kit with instructions.
Gather Materials and Tools: Make a list of everything needed, including lumber, nails, screws, concrete, and tools like hammers, drills, and saws.
Prepare the Site: Clear the area where the garage will be built. Remove any debris, rocks, or plants.
Mark the Layout: Use stakes and string to outline the garage's dimensions on the ground.
Excavate and Level the Ground: Dig out the foundation area and ensure the ground is level.
Install a Gravel Base: Spread a layer of gravel to help with drainage and provide a stable base.
Pour the Concrete Foundation: Mix and pour concrete into the excavated area. Let it cure properly.
Set Up a Safe Workspace: Keep tools organized, ensure good lighting, and wear protective gear like gloves, goggles, and a hard hat.
Check Weather Conditions: Plan to build when the weather is dry to avoid complications.
Review Safety Tips: Familiarize yourself with safety procedures for using tools and handling materials.
Essential Materials and Tools
Concrete: Used for the foundation and floor. You'll need concrete mix, water, and a mixer.
Rebar: Reinforces the concrete foundation. Comes in rods that need to be cut and placed in a grid pattern.
Lumber: For framing walls, roof, and doors. Common sizes include 2x4s and 2x6s.
Plywood/OSB: Sheathing for walls and roof. Provides structural support and a surface for siding and roofing materials.
Roofing Materials: Shingles or metal roofing, underlayment, and nails or screws to secure them.
Siding: Vinyl, wood, or metal panels for exterior walls. Protects the structure from weather.
Insulation: Fiberglass batts or foam boards for walls and roof. Helps regulate temperature.
Drywall: For interior walls. Provides a finished look and can be painted.
Doors and Windows: Pre-hung doors and windows for entry and ventilation. Includes frames and hardware.
Garage Door: A large door for vehicle entry. Includes tracks, springs, and an opener.
Nails and Screws: Various sizes for framing, sheathing, and finishing.
Concrete Anchors: Secure the framing to the concrete foundation.
Paint and Primer: For exterior and interior surfaces. Protects materials and adds color.
Electrical Wiring and Fixtures: For lighting, outlets, and garage door opener. Includes wire, boxes, switches, and lights.
Plumbing Materials: If adding water lines. Includes pipes, fittings, and fixtures.
Tools:
- Hammer: For driving nails.
- Saw: Circular saw for cutting lumber and plywood.
- Drill: For screws and making holes.
- Level: Ensures everything is straight and plumb.
- Tape Measure: For accurate measurements.
- Wrench Set: For tightening bolts and nuts.
- Trowel: For spreading concrete.
- Ladder: To reach higher areas.
- Safety Gear: Gloves, goggles, and ear protection.
These materials and tools will help you build a sturdy, functional garage.
Required Skills and Time Commitment
Skill Level: Advanced
Time Required: 2-3 Weeks
- Planning and Permits: 1-2 days
- Foundation Work: 3-5 days
- Framing: 4-6 days
- Roofing: 2-3 days
- Siding and Windows: 2-3 days
- Electrical and Insulation: 2-4 days
- Interior Finishing: 3-5 days
Detailed Building Steps
Plan and Design
- Measure the area where the garage will be built.
- Draw a detailed plan including dimensions, door, and window placements.
- Check local building codes and obtain necessary permits.
Prepare the Site
- Clear the area of debris, grass, and rocks.
- Level the ground using a shovel or a rented excavator.
- Mark the corners with stakes and string to outline the foundation.
Build the Foundation
- Dig trenches for the footings according to your plan.
- Pour concrete into the trenches and let it cure for a few days.
- Lay a vapor barrier over the cured concrete.
- Pour the concrete slab and smooth it out with a trowel.
Construct the Frame
- Assemble the wall frames on the ground using 2x4 lumber.
- Raise the wall frames and secure them to the foundation with anchor bolts.
- Install the top plates and ensure the walls are plumb and square.
Install the Roof Trusses
- Lift the trusses onto the top plates and secure them with nails or screws.
- Space the trusses evenly according to your plan.
- Attach roof sheathing to the trusses using nails or screws.
Add Exterior Sheathing
- Attach plywood or OSB sheathing to the exterior walls.
- Ensure the sheathing is flush with the edges of the wall frames.
- Cut out openings for doors and windows.
Install Doors and Windows
- Place the doors and windows into the framed openings.
- Secure them with nails or screws.
- Apply flashing tape around the edges to prevent water infiltration.
Roofing
- Lay down roofing felt over the roof sheathing.
- Install shingles or metal roofing panels starting from the bottom edge.
- Secure the roofing material with nails or screws.
Siding and Trim
- Attach siding to the exterior walls starting from the bottom.
- Overlap each row of siding to ensure water runoff.
- Install trim around doors, windows, and corners.
Electrical and Insulation
- Run electrical wiring for lights, outlets, and garage door openers.
- Install insulation between the wall studs and roof trusses.
- Cover the insulation with drywall or plywood.
Finish Interior
- Paint or finish the interior walls and ceiling.
- Install shelving, workbenches, or other storage solutions.
- Connect electrical fixtures and test them.
Final Touches
- Install gutters and downspouts to manage rainwater.
- Paint or stain the exterior siding and trim.
- Add landscaping around the garage to enhance its appearance.
Helpful Tips and Tricks
Plan Ahead: Draw a detailed blueprint. Measure twice, cut once. This saves time and materials.
Foundation: Use concrete for a strong base. Ensure it's level to avoid structural issues.
Framing: Use pressure-treated lumber for durability. Pre-cut pieces to speed up assembly.
Roofing: Consider metal roofing for longevity. It's more durable than shingles.
Insulation: Use foam board insulation. It's easy to install and effective.
Electrical: Plan outlets and lighting before drywall. This avoids costly changes later.
Doors and Windows: Install energy-efficient models. They save on heating and cooling costs.
Ventilation: Add vents to prevent moisture buildup. This extends the life of your garage.
Common Mistakes to Avoid:
- Skipping permits: Always check local regulations.
- Ignoring drainage: Proper drainage prevents water damage.
- Poor measurements: Inaccurate cuts waste materials.
- Rushing: Take your time to ensure quality work.
Material Alternatives:
- Instead of concrete, consider gravel for a temporary foundation.
- Use reclaimed wood for framing to save money.
- Polycarbonate panels can replace glass windows for a cheaper, durable option.
Estimating the Cost
Lumber: Around $2,000 for framing, walls, and roof.
Concrete: About $1,500 for the foundation.
Roofing: Shingles and underlayment cost roughly $800.
Siding: Vinyl siding costs around $1,200.
Doors: Garage door and entry door together cost about $1,000.
Windows: Two windows cost around $300.
Electrical: Wiring, outlets, and lights cost roughly $500.
Insulation: About $400 for walls and ceiling.
Drywall: Costs around $600 for walls and ceiling.
Paint: Approximately $200 for interior and exterior.
Tools: Basic tools like a hammer, saw, drill, and level cost around $300 if you don't already have them.
Total Cost: Roughly $8,800.
Budget-Friendly Alternatives:
- Use reclaimed wood for framing and walls to save on lumber costs.
- Opt for metal roofing instead of shingles, which can be cheaper.
- Consider second-hand doors and windows from salvage yards.
- Use LED lights to save on electrical costs.
- Instead of drywall, use plywood for interior walls.
Customizing Your Garage
Materials: Instead of traditional wood framing, consider using steel for a more durable structure. Concrete blocks can also be an alternative for the walls, providing better insulation and fire resistance.
Colors: Experiment with different paint colors for the exterior. Neutral tones like gray or beige offer a classic look, while bold colors like red or blue can make the garage stand out. Trim can be painted in contrasting colors to add visual interest.
Roofing Styles: Choose between a gable roof for a traditional look or a flat roof for a modern appearance. A hip roof can add architectural interest and better wind resistance.
Doors: Opt for roll-up doors for a sleek, space-saving option. Carriage-style doors can give a rustic, vintage feel. Glass-paneled doors allow natural light to enter, making the space feel larger.
Windows: Add skylights to bring in natural light. Bay windows can create a cozy nook inside. Frosted glass windows offer privacy while still allowing light to filter through.
Flooring: Use epoxy coating for a durable, easy-to-clean surface. Interlocking rubber tiles provide comfort and are easy to install. Stained concrete can give a polished, industrial look.
Storage Solutions: Install overhead storage racks to maximize space. Built-in cabinets can keep tools and supplies organized. Pegboards offer a flexible way to store and display tools.
Lighting: Use LED strip lights for energy-efficient, bright lighting. Pendant lights can add a stylish touch. Motion-sensor lights improve security and convenience.
Insulation: Consider spray foam insulation for better temperature control. Fiberglass batts are a cost-effective option. Reflective insulation can help keep the garage cooler in hot climates.
Ventilation: Install exhaust fans to remove fumes and moisture. Louvered vents can improve airflow. Ridge vents work well with gable roofs for natural ventilation.
Exterior Finishes: Use vinyl siding for a low-maintenance option. Brick veneer can add a classic, sturdy appearance. Stucco offers a smooth, modern finish.
Eco-Friendly Building Tips
Reclaimed Wood: Use wood from old barns, pallets, or other structures. It adds character and reduces the need for new lumber.
Recycled Steel: Opt for recycled steel for framing. It's strong, durable, and eco-friendly.
Insulation: Choose eco-friendly insulation like cellulose, made from recycled paper, or wool insulation.
Solar Panels: Install solar panels on the roof to generate your own electricity. This reduces reliance on non-renewable energy sources.
Rainwater Harvesting: Set up a rainwater collection system. Use the collected water for washing your car or watering plants.
LED Lighting: Use LED lights instead of traditional bulbs. They consume less energy and last longer.
Natural Ventilation: Design windows and vents to promote natural airflow, reducing the need for air conditioning.
Green Roof: Consider a green roof with plants. It helps with insulation and reduces stormwater runoff.
Low-VOC Paints: Use paints with low volatile organic compounds (VOCs). They are better for indoor air quality and the environment.
Recycled Concrete: Use recycled concrete for the foundation. It reduces waste and the need for new materials.
Energy-Efficient Doors and Windows: Install doors and windows that are energy-efficient to keep the garage temperature stable.
Permeable Pavers: Use permeable pavers for the driveway. They allow water to seep through, reducing runoff and recharging groundwater.
Your Garage Awaits
Building a 24x24 garage might seem like a big job, but breaking it down into steps makes it manageable. Start with a solid foundation, then frame the walls and roof. Don’t forget to install proper insulation and wiring for electricity. Once the structure's up, add doors, windows, and any finishing touches like paint or siding. Remember, safety first—wear protective gear and follow all local building codes. With patience and effort, you’ll have a sturdy, functional garage that meets your needs. Enjoy the satisfaction of a job well done and the extra space for your projects or storage. Happy building!
How much will it cost to build a 24x24 garage?
The cost can vary, but expect to spend between $10,000 and $30,000. Factors like materials, labor, and location can affect the price.
Do I need a permit to build a garage?
Yes, most places require a building permit. Check with your local building department to find out the specific requirements in your area.
What materials do I need?
You'll need concrete for the foundation, lumber for framing, siding, roofing materials, windows, and a garage door. Don’t forget nails, screws, and insulation.
How long will it take to build?
Building a 24x24 garage can take anywhere from a few weeks to a couple of months. It depends on your experience, help available, and weather conditions.
Can I build it myself?
Yes, if you have some DIY experience and the right tools, you can build it yourself. However, you might need help with tasks like pouring the concrete foundation or installing the roof.
What tools will I need?
Essential tools include a hammer, saw, drill, level, measuring tape, and a concrete mixer. Renting larger tools might be necessary.
How do I insulate the garage?
Use fiberglass batts or foam board insulation. Install it between the wall studs and ceiling joists to keep the garage warm in winter and cool in summer.